GME TX670 Instruction Manual
2 watt handheld uhf cb radio
Hide thumbs
Also See for TX670:
- Instruction manual (20 pages) ,
- Instruction manual (15 pages) ,
- Use and care manual (2 pages)
Table of Contents
Advertisement
Quick Links
Advertisement
Table of Contents

Related Manuals for GME TX670


Summary of Contents for GME TX670
- Page 1 2 watt handheld UHF CB radio I N S T R U C T I O N M A N U A L...
-
Page 2: Table Of Contents
FrEQuEnciEs ..........25 uHF cB oPErAtinG FrEQuEnciEs ........26 sPEciFicAtions ..............28 GmE contrAct WArrAntY AGAinst DEFEcts....29 PA G E 2 i n s t r u c t i o n m A n u A l... -
Page 3: Accessories
• Neck lanyard • Vehicle cigarette lighter trickle charger • Leather case WARNING - SAFETY INFORMATION the tX670 is a radio transmitting device. • W hen transmitting, keep the antenna more than 25 mm from any part of the head or body. • D o not transmit near electrical blasting equipment or in explosive atmospheres. - Page 4 ALWAYS switch off your radio where notices restrict the use of two-way radio or mobile telephones. ONLY use GmE approved rechargeable batteries with the supplied charger. AVOID exposing your radio to water. it is not waterproof. AVOID storing or charging your radio in direct sunlight.
-
Page 5: Important Information
IMPORTANT INFORMATION CONCERNING UHF CB RADIO the use of the citizen Band radio service is licensed in Australia by the AcmA radio communications (citizens Band radio stations) class licence and in new Zealand by the ministry of Economic Development new Zealand (mED). A General user radio licence for citizens Band radio and operation is subject to conditions contained in those licences. -
Page 6: Possible Issues
PossiBle issUes When a new narrowband radio receives a transmission from an older wideband radio the speech may sound loud and distorted – simply adjust your radio volume for best performance. When an older wideband radio receives a signal from a new narrowband radio, the speech may sound quiet - simply adjust your radio volume for best performance. -
Page 7: Telemetry Channels
AcmA regulations have allocated channels 22 and 23 for telemetry only applications and have prohibited the transmission of speech on these channels. consequently the tX670 has a transmit-inhibit applied to channels 22 and 23. in the event that additional telemetry/telecommand channels are approved by the ACMA, these channels shall be added to those currently listed where voice transmission is inhibited. Currently transmissions on channels 61, 62 and... -
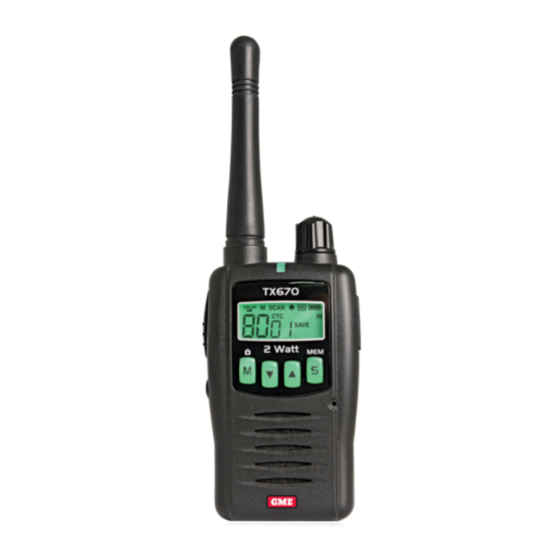
Page 8: Radio Controls
RADIO CONTROlS Antenna mode/ lock Key Volume on/off External speaker scan/ Push-to- memory talk (PTT) Belt clip channel speaker Duplex/ channel Down monitor Duplex/ monitor Battery/ compartment PA G E 8 i n s t r u c t i o n m A n u A l t X 6 7 0... -
Page 9: Lcd Display
lCD DisPlAY 1 Receiver Busy Icon: 9 High Power Icon: Appears Appears when receiving. when High transmitter power is selected. 2 Transmit Icon: Appears 10 Duplex Icon: indicates when transmitting. that Duplex communication 3 Memory Icon: Appears has been enabled. when the selected channel 11 Key-Lock Icon: Appears is stored in the scan... -
Page 10: Powering The Radio
POWERING THE RADIO Your tX670 is powered by a ni-mH rechargeable battery pack. If left unused, the batteries will discharge within a few months. if you have not used your tX670 for some time, you will need to recharge your battery pack before use. Installing the Batteries Battery installation is easier when the belt clip is removed. To do this, release the spring clip and slide the belt clip downward and away from the radio body. -
Page 11: Charging The Batteries
Charging the Batteries Your tX670 is supplied with an Ac adapter which will recharge a fully discharged battery pack to full capacity in around 15-16 hours. 1. Plug the charger into a standard 240 volt Ac outlet. 2. connect the charger to mic/charge socket on the radio. - Page 12 As soon as a signal is heard or the keys are pressed the tX670 will ‘wake up’ again. this standby mode is automatic and by itself can extend the battery life by many hours. Using CTCSS...
-
Page 13: General Operation
5 seconds. reCeiVing signAls While the TX670 is not receiving signals, it will remain in the standby mode to conserve battery power. When a signal is received, the LED indicator on the upper edge of the radio will light green and the icon will appear on the display. -
Page 14: Transmitting
(and ctcss code if applicable). Hold the tX670 approximately 5 to 8 cms from your face with the antenna vertical and speak into the built-in microphone. - Page 15 Duplex operation allows the tX670 to transmit on a different frequency to that which it receives. this allows operation through repeater stations in your area. repeaters automatically re-transmit your signal over a much wider area, providing greatly increased range. the Duplex mode only works on channels 1 – 8 and 41 – 48. With Duplex selected, your TX670 actually...
-
Page 16: Scan/Memory Key
To switch between Simplex and Duplex modes, select a duplex channel (1 – 8, 41 – 48) then briefly press the DUP button. When Duplex mode is selected, ‘DUP’ appears on the display on that channel. Mon Key To open the Squelch, press and hold the MON key. this allows you to check the current channel for activity before transmitting, particularly if you have CTCSS enabled. When the Squelch is open, the LED indicator on the upper edge of the radio will light green, the icon appears on the display and you will hear static or hiss if the channel is clear. - Page 17 To exit the Scan mode, briefly press the SCAN key again. the tX670 will return to normal operation and ‘scAn’ will disappear from the display. Scanning Features • I f a signal is received, the scan is paused, allowing you to transmit and receive on that channel. the radio will automatically resume scanning a few seconds after the last reception or transmission.
-
Page 18: Mode/Key-Lock Function
SCAN/MEM key. moDe/KeY-loCK KeY Mode Function the MODE key is used to set the various feature settings of the tX670. the following chart shows the order of these selections: Standby Mode: 1. ctcss code selection 2. transmitter Power 3. -
Page 19: Ctcss Code Selection
Selecting Channels in the ‘Standby’ mode, press the key to step up/down one channel. Press and hold the keys to quickly scroll up/down through the channels. in ‘Mode edit’ mode, press the key to step upwards or downwards through the selected mode settings. 1. CtCss CoDe seleCtion the continuous tone coded squelch system (ctcss) is a squelch quieting system that allows groups of users to share the same channel without disturbing each other. -
Page 20: Transmitter Power
‘Hi’ for high power or ‘lo’ for low power. 3. Press the MODE or PTT key momentarily to confirm and store your selection. the tX670 should now display the selected channel number along with ‘Hi’ if you have selected high power. If you have selected low power, this setting will not be indicated. -
Page 21: Vox Settings
3. Vox settings the VoX feature lets you have hands-free conversations. When you speak, the microphone automatically detects your voice (or other nearby sound) causing the radio to transmit without the need to press the PTT switch. To set radio for VOX Operation From the ‘standby’ mode: 1 Press the MODE key tHrEE (3) times to select the VoX setting mode. -
Page 22: Squelch Settings
1. Press the MODE key Four (4) times to select the Dual Watch setting mode. the ‘DW’ icon will flash on the display. 2. Press the keys to select the Dual Watch channel number. to disable the Dual Watch mode altogether select ‘oF‘. -
Page 23: Roger Beep Tone Selection
To set the ‘Squelch’ Mode 1. Press the MODE key FiVE (5) times to select the ’ icon will flash on squelch setting mode. the ‘ the display. 2. Press the keys to select the squelch level from 01 (lowest) to 03 (highest) setting. 3. -
Page 24: Call Alarm Selection
8. CAll AlArm seleCtion the tX670 provides 5 user selectable call alarm melodies to alert other users to your incoming call. When enabled, the melody can be transmitted to another user where it will be heard in the speaker of the receiving radio. -
Page 25: Ctcss Tone Frequencies
To send the Call Alarm Melody Press the PTT switch twice quickly. the lED indicator will light red for a few seconds as the melody is sent. the melody will be heard in the speaker of the receiving radio. CTCSS TONE FREQUENCIES Frequency Frequency 67.0... -
Page 26: Uhf Cb Operating Frequencies
UHF CB OPERATING FREQUENCIES Channel Frequency Channel Frequency (MHz) (MHz) 476.425~ 476.925 476.450~ 476.950 476.475~ 476.975 476.500~ 477.000 476.525~ 477.025 476.550~ 477.050 476.575~ 477.075 476.600~ 477.100 476.625 477.125 476.650 477.150 476.675 477.175~ 476.700 477.200~ 476.725 477.225~ 476.750 477.250~ 476.775 477.275~ 476.800 477.300~ 476.825... - Page 27 Channel Frequency Channel Frequency (MHz) (MHz) 476.4375~ 476.9375 61• 476.4625~ 476.9625 62• 476.4875~ 63• 476.9875 476.5125~ 477.0125 476.5375~ 477.0375 476.5625~ 477.0625 476.5875~ 477.0875 476.6125~ 477.1125 476.6375 477.1375 476.6625 477.1625 476.6875 477.1875~ 476.7125 477.2125~ 476.7375 477.2375~ 476.7625 477.2625~ 476.7875 477.2875~ 476.8125 477.3125~ 476.8375 477.3375~...
-
Page 28: Specifications
SPECIFICATIONS generAl Frequency Range: 476.425 – 477.4125 mHz Channel Spacing: 12.5 kHz No. of Channels: 8 0 (75 voice, 2 telemetry RX only, 3 for future use) CTCSS Codes: Dimensions (W x H x D): 62 x 98 x 30 mm (without antenna) Complies with: As/nZs4365:2011 Power sUPPlY Power Source: ni-mH rechargeable battery pack 3.6 V 1500 mAh Operating Time:... -
Page 29: Gme Contract Warranty Against Defects
WARRANTY AGAINST DEFECTS this warranty against defects is given by standard Communications Pty Ltd ACN 000 346 814 (We, us, our or GmE). our contact details are set out in clause 2.7. this warranty statement only applies to products purchased in Australia. Please contact your local GmE distributor for products sold outside of Australia. - Page 30 2.3 T o the extent permitted by law, our sole liability for breach of a condition, warranty or other obligation implied by law is limited (a) i n the case of goods we supply, to any one of the following as we decide - (i) the replacement of the goods or the supply of equivalent goods; (ii) the repair of the goods; (iii) the cost of repairing the goods or of acquiring equivalent goods;...
-
Page 31: Warranty Period
(f) goods where the serial number has been removed or made illegal. 4. Warranty period 4.1 We provide the following warranty on GmE and Kingray products. no repair or replacement during the warranty period will renew or extend the warranty period past the period from original date of purchase. - Page 32 Part Number: 310414 Drawing Number: 44165-7...
Need help?
Do you have a question about the TX670 and is the answer not in the manual?
Questions and answers