Viking Range VDD5300 Installation Manual
Rear downdraft ventilators
Hide thumbs
Also See for VDD5300:
- Use & installation manual (12 pages) ,
- Use & installation manual (39 pages) ,
- Use & installation manual (36 pages)
Table of Contents
Advertisement
Advertisement
Table of Contents

Related Manuals for Viking Range VDD5300


Summary of Contents for Viking Range VDD5300
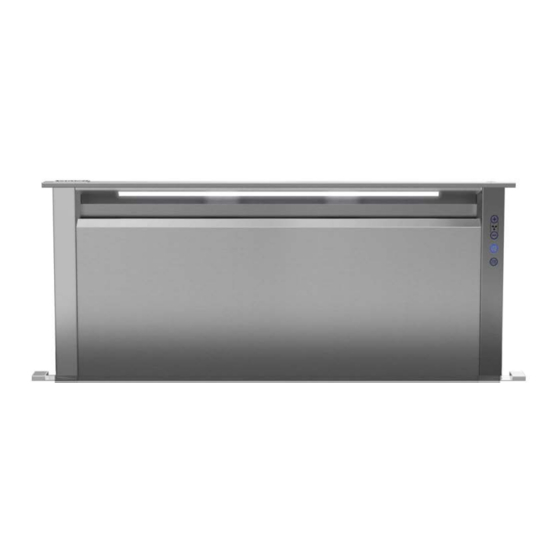
- Page 1 USE / INSTALLATION GUIDE 5 Series Rear Downdraft Ventilators...
- Page 2 MODEL WIDTH BLOWER (purchased separately) VDD5300/CVDD5300 30" W. VDVI600 Interior or VDVE900 Exterior VDD5360/CVDD5360 36" W. VDVI600 Interior or VDVE900 Exterior VDD5450/CVDD5450 45" W. VDVI600 Interior or VDVE900 Exterior, VDVE1200 Exterior VDD5480/CVDD5480 48" W. VDVI600 Interior or VDVE900 Exterior, VDVE1200 Exterior...
-
Page 3: Take Measurements
CONTENTS PLAN THE DUCTWORK These parts are included with your downdraft housing: 1 - Parts Bag containing: 2 - 2-in. Support Legs HOUSING 2 - 4-in. Support Legs2 - Screws, 1/4-20 x .50 Hex Head 2 - Screws, 1/4-20 x .50 Hex Head 2 - Screws, #8-18 x .375 Phillipst 8 - Wood Screws, #10 x .50 Phillips Round Head FLEX... - Page 4 PLAN CABINET CUTOUTS PREPARE THE DOWNDRAFT CAUTION: FRONT PANEL COVER COUNTERTOP BEFORE CUTTING HOLE IN CABINET CABINET FOR DUCTWORK, CLAMP " BACK check for interference with CHANNEL floor joists, wall studs, electrical wiring, or plumbing. SIDE VIEW (4-6) HEX NUTS INSTALLATION CENTER LINE 6 ”...
- Page 5 8" OR 10" ROUND COVER PLATE (included with REMOTE DISCHARGE SLIDE discharge plate) PLATE (Purchase Separatly) CHANNEL COVER PLATES (included with UPPER discharge plate) SUPPORT BRACKET LOWER FRONT CHANNEL PANEL Flex Blower shown installed. Installations using FLEX BLOWER (in remote location) or REMOTE BLOWER only: 4.
- Page 6 RECTANGULAR #8-32 DISCHARGE COVERS HEX NUTS (Cut aluminum tape and remove only one cover.) This Front Panel remains in place. Installations where ELECTRICAL PANEL needs to be Installations ducting through left, right or rear only: mounted in a remote location only: (Requires purchase of 1-7/8"...
- Page 7 CUT COUNTERTOP OPENING 1. Lay out and cut the cooktop cut-out far enough FORWARD so downdraft will fit behind it. 2. Set cooktop in place and slide it as far forward as possible without exposing an gaps. Center and square it with edges of countertop.
-
Page 8: Install Ductwork
INSTALL DUCTWORK Installations using REMOTE BLOWER only: CAUTION: All electrical wiring should be done by a CAUTION: BEFORE CUTTING HOLE IN CABINET qualified person(s) in accordance with all applicable FOR DUCTWORK, check for interference with floor codes and standards. joists, wall studs, electrical wiring, or plumbing. 1. - Page 9 INSTALL FINISH TRIM INSTALL COOKING APPLIANCE 1. Align the cooking appliance with downdraft and fasten SCREW appliance in place following appliance instructions. Note: Accurate alignment of cooking appliance and downdraft is necessary to ensure that there is no interference when air vent FINISH is raised and lowered.
-
Page 10: Operation
OPERATION 4-Speed Fan Speed Control 4-Speed Fan Speed Control Press + button to increase fan speed. Press - button to decrease fan speed. After maximum speed is reached, press + button once more to turn off fan. 2-Level Task Light 2-Level Task Light Press once for LOW setting. -
Page 11: Service Information
Always turn the downdraft blower on before you begin cooking to establish an air flow in the kitchen. Let the blower run for a Contact Viking Range, LLC, 1-888-(845-4641), for the nearest few minutes to clean the air after you turn the cooktop off. This service parts distributor in your area or write to: will keep the whole kitchen cleaner and brighter. -
Page 12: Warranty
Downdrafts and all of their component parts, except as detailed below*†, are warranted to be free from defective materials or workmanship in normal residential use for a period of one (1) year from the date of original retail purchase. Viking Range, LLC, warrantor, agrees to repair or replace, at its option, any part which fails or is found to be defective during the warranty period.
Need help?
Do you have a question about the VDD5300 and is the answer not in the manual?
Questions and answers