Table of Contents
Advertisement
Quick Links
Advertisement
Chapters
Table of Contents

Related Manuals for Skoda Infotainment Columbus


Summary of Contents for Skoda Infotainment Columbus
- Page 1 SIMPLY CLEVER Infotainment Columbus Operating Instructions...
- Page 2 3V0012720FA...
- Page 4 Preface This manual is intended for the Infotainment Navigation Columbus systems (hereinafter referred to only as Device). Please read these Operating Instructions carefully, because the operation in accordance with these instructions is a prerequisite for proper use of the unit.
-
Page 5: Table Of Contents
Table of Contents Telephone Vehicle systems Introductory information CAR - Vehicle settings Operating Instructions Pairing and connecting Adjustment of the heating and cooling Notes system Connection using the SIM card in the external Abbreviations module Index Introductory information Dial telephone number Telephone functions Important notes Text messages (SMS) -
Page 6: Operating Instructions
(for example, telephone, music player, etc.). Information on the compatibility of external devices can be found on ŠKODAIn- ternet pages http://infotainment.skoda-auto.com . The Images in these Operating Instructions are for illustrative purposes only. The illustrations can differ in minor details from your vehicle; they are only in- tended to provide general information. -
Page 7: Notes
Information search Notes When searching for information in the Operating Instructions, we recommend using the Index at the end of the manual. Structure of these Operating Instructions The Operating Instructions are hierarchically divided into the following areas. Main chapters (e.g. Introductory information) - the title of the main chapter is ■... -
Page 8: Abbreviations
Abbreviation Definition Abbreviations A communication protocol for a data device Abbreviation Definition ® A Bluetooth profile for the download of telephone contacts PBAP planar map display to the device memory spatial map display A program identification of the radio station, which allows a PI code group sort of radio stations ®... -
Page 9: Introductory Information Important Notes
Information on use, updating and compatibility Read and observe on page 6 first. Refer to the ŠKODAInternet pages http://infotainment.skoda-auto.com for in- formation on the compatibility of external devices as well as software updates and navigation data. Component protection ... - Page 10 Description of the device External module Fig. 2 External module The external module is located in the storage compartment on the front pas- senger side. CD/DVD ejection button CD/DVD case SD1 card slot SD2 card slot SIM card slot Fig.
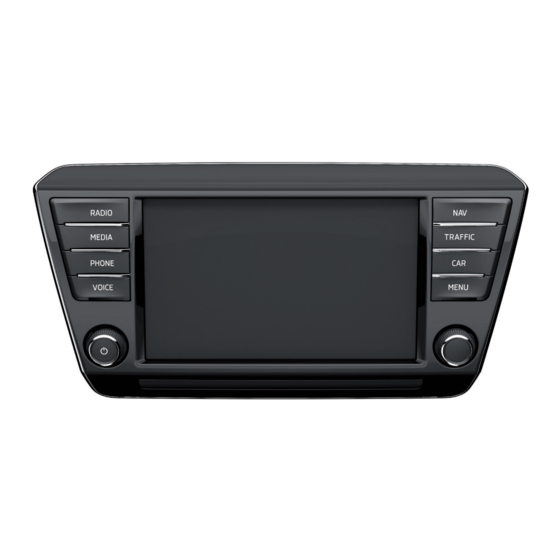
- Page 11 CAUTION Unit menus Notes on protecting and cleaning the screen To protect the screen, you can use a suitable screen protector for touch pads ■ Fig. 3 that does not affect its functionality. Unit menus Dirt can be removed from the screen by using a soft cloth and, if necessary, ■...
-
Page 12: Device Operation And Settings
The following symbol appears in the display when the sound is muted Device operation and settings . If at the time of muting a sound is made in the menu Media, then the playback Device operation is interrupted (pause) Introduction CAUTION This chapter contains information on the following subjects:... -
Page 13: Fig. 5
Menu item with “Check box” Set value › By pressing the function button with one of the following symbols , Open a sub menu of the menu item with the “pop-up window” Status line , In some menus a status bar located at the top of the screen shows the time and outdoor temperature along with other information. -
Page 14: Voice Control
Display of searched entries (the number of searched entries is displayed in Voice control the button) Erase the entered characters Introduction Switching between keyboards with specific characters of the selected lan- This chapter contains information on the following subjects: guages »... -
Page 15: Function Requirements
Function requirements › Press the symbol button Read and observe on page 11 first. on the multifunction steering wheel. Function requirements for voice control Activation of voice control is indicated by an acoustic signal and the device The unit is switched on. ... -
Page 16: Operation Principle
Operation principle not recognizing a voice command Read and observe on page 11 first. Read and observe on page 11 first. The voice commands are only then to be spoken when the symbol is dis- If a voice command is not recognised, the device answers with Pardon? and played in the device screen or in the display of the combined instrument ... -
Page 17: Voice Commands Not Included In The Help
Voice command Operation Voice commands not included in the help Switch off Album / Folder / Track re- Read and observe on page 11 first. Stop repeat peat This chapter discusses some voice commands, which are not included in the ... -
Page 18: Device Settings
› Press the key → . Voice command Operation Destination map - View a map with the destination Volume - Volume settings ■ Traffic reports - Adjustment of traffic announcements volume (TP) ■ Overview map - View a map with the route ■... - Page 19 ■ Animation when finger near screen - Switch on/off the proximity sensors In this menu, a keyboard language set can be added to allow the entering of (suppression of some function keys) characters other than those in the currently selected language (function but- Show clock in standby mode - Time and date displayed on the screen when ton ).
- Page 20 Navigation database: ... - Version of the navigation data ■ Media Codec: ... - Media codec version ■ ■ Update software - Software Update (e.g. Bluetooth) The information about available software updates can be found on the ŠKODA Internet pages www.infotainment.skoda-auto.com. Device operation and settings...
-
Page 21: Radio
Main Menu - Information and function keys » Fig. 9 on page 23 Radio The selected radio station (description or frequency) Radio Text (AM, FM) / Description of the group (DAB) Operation Preset station buttons for favourite channels Introduction Choice of radio range (FM / AM / DAB) Choice of storage group for the preferred station This chapter contains information on the following subjects:... -
Page 22: List Of Available Stations
› Alphabet - alphabetical order according to station name List of available stations › Group - Sort according to program identification of the broadcast program Search and select available stations Read and observe on page 18 first. Search stations manually ›... -
Page 23: Store Preferred Station
› This function plays all the available stations in succession for a few seconds Press the preset button for the station, which a logo is to be assigned to. each. A menu of media (SD card, USB) is displayed. Press the wheel and the search is completed, the current station remains ›... -
Page 24: Settings
Radio DAB text and image presentation Settings › In the Radio menu, press the function key . Fig. 8 Sound - Sound settings Station information ■ Scan - Auto-play all available stations in the current frequency band, each ■ station for around five seconds ■... - Page 25 Advanced set-up (DAB) › Select the DAB band in the Radio menu, and press the function key → Advanced setup. Auto-save station logos- Automatic storage of the station logos ■ ■ DAB traffic announcements - Switch on/off DAB announcements Other DAB announcements - Switch on/off other announcements (e.g., ■...
-
Page 26: Media
Depending on the audio source type: Media › Folder / Title list › Multimedia database Operation Menu settings Media Introduction Album list By touching with the finger in the area » Fig. 9 a list of albums is displayed. This chapter contains information on the following subjects: Movement within the album list can be performed by moving a finger across Main menu... -
Page 27: Playback
Audio sources Operation Action Jukebox - Internal device memory Press from CD / DVD - Inserted CD / DVD Play the next track Finger movement to the left of the SD Card 1 - inserted SD card 1 ... -
Page 28: Audio Sources
Sorting according to the track list name Display of multimedia database (available only for the display of the main folder of the source) Sorting according to the artist's name Sorting according to the album name Select the audio source ... -
Page 29: Fig
AUX - input View Jukebox › Press the key » Fig. 10 on page 23 - → → Supported audio source and file formats The device allows you to play audio files in various formats and to connect dif- ... -
Page 30: Cd / Dvd
› Press the key . WARNING The CD/DVD player is a laser product. ■ Note On the manufacturing date, this unit was classified as a class 1 laser prod- ■ It is not possible to copy the contents of copyright protected CDs or DVDs to ■... -
Page 31: Sd Card
SD card USB input Fig. 15 SD card slots Fig. 16 USB port in the centre console, front / rear Read and observe on page 26 first. Read and observe on page 26 first. The SD card slots are located in an external module in the glove box on the The USB input audio source can be connected directly or via a connecting ca- front passenger side. -
Page 32: Bluetooth Player
Charge USB audio source WIFI With the ignition on after connecting the USB audio source, the charging proc- ess is automatically started (applies for audio sources where charging via the Read and observe on page 26 first. USB connector is possible). The device allows you to play audio files connected from a WLAN device to the The charging efficiency can be different compared to the charging from the device. - Page 33 CAUTION Supported audio source and file formats The AUX input must only be used for audio devices! ■ Read and observe on page 26 first. If an external audio source is connected to the AUX input, which is equipped ■...
-
Page 34: Images
Supported audio file formats Images Codec type Maximum Max bit Multi- File suffix sampling Play lists Image viewer rate channel (File formats) rate Introduction Windows Media Audio This chapter contains information on the following subjects: 384 kbit / 96 kHz Main menu 8;... - Page 35 An image with GPS coordinates can be created and imported in the application (with starting representation) Go to previous image “MyDestination”. More information can be found on the ŠKODA Internet pages www.infotainment.skoda-auto.com. Press from Touch screen using two fingers and pull apart...
-
Page 36: Dvd Video
Supported image sources and file formats DVD video Video player Supported image sources Source Type Specification File system Introduction SD card Standard size SD, SDHC, SDXC FAT16 This chapter contains information on the following subjects: VFAT Main menu USB flash drive; USB 1.x;... - Page 37 Information for the selected video file (e.g., video title, chapter) Operation Action Open the DVD menu Press from Video settings Play / Pause / Note Press from (within 3 seconds after For safety reasons, the video display is switched off at speeds over 5 km/h Play the previous video ■...
- Page 38 Symbol Operation Supported video sources and file formats / Move the control surface to the left / right Supported video sources / Show / hide full screen display of the control sur- face File sys- Source Interface Type Specification...
-
Page 39: Tv Tuner
Supported video file formats TV tuner Codec type Max. frames per File suffix Max. resolution TV function second (File formats) Introduction MPEG-1 .mpeg MPEG-2 .mpeg2 This chapter contains information on the following subjects: MPEG-4 .mp4 Main menu VP-8/WebM .webm 720 x 480 Station list / Memory list QuickTime... - Page 40 › Main Menu - Information and function keys In the main menu TV tuner turn the control . Area with additional information on the station (e.g. - The station is It is the station list is shown » Fig. 22 - .
- Page 41 › In the main menu TV tuner press the function key Symbol Operation Switching between numeric keypad and directional ar- / . rows (teletext) › Select the desired station. / / / Movement in the EPG/teletext Confirmation EPG and teletext ...
-
Page 42: Telephone
Main telephone SIM card Telephone Extra (In the external rSAP Introductory information Telephone module) Introduction Telephone calls, Telephone calls Data connection This chapter contains information on the following subjects: Contacts, text Possible connection types messages Telephone Telephone calls, Settings Contacts, SMS, Function problems This chapter deals with the operation of a device with the telephone connec-... - Page 43 Information in the status line Telephone Signal strength of the telephone service network Signal strength of the data service network Charge status of the telephone battery Missed call Current call Incoming SMS Settings Read and observe on page 39 first.
- Page 44 ■ Select device contacts - Open the paired telephones menu (if the SIM card ■ Premium telephone - Enable / disable the use of data and telephone serv- is inserted in the external module) ices of the inserted SIM card and connect to the telephone via the rSAP pro- Delete other user profiles - Deletion of other user profiles file ■...
-
Page 45: Pairing And Connecting
ŠKODA Pairing confirmation Internet pages. Administering coupled devices http://infotainment.skoda-auto.com The pairing procedure is dependent on the number of telephones already con- Telephone search nected, whether using the inserted SIM card in the external module or via the telephone using the profile rSAP »... - Page 46 › If a SIM card is inserted in the external module of the device, then press ■ Cancel - Cancel the coupling » Fig. 24 on page 40 → Find telephone. Replace - Pairing and replacement of the main telephone →...
- Page 47 ® Select the Bluetooth device unit. The device is displayed in the telephone to be connected to as SKODA BT ..Fig. 25 Display list of blocked coupled ... is replaced with the last four symbols of the vehicle identification number devices (VIN) of your vehicle.
-
Page 48: Press The Function Key
Version 2 Icon col- › Symbol Operation Confirm the pairing request in the telephone. › Enter the 4 digit PIN code shown on the unit display into the telephone with- A device that supports the connection via the hands- in 30 seconds free profile (HFP). -
Page 49: Connection Using The Sim Card In The External Module
Delete all - Delete all device Slot in SIM card and establish connection - Delete the desired device › Confirm the deletion by pressing the function key Delete. Note ® The audio Bluetooth profile can be turned off/on by pressing the button ... -
Page 50: Dial Telephone Number
If you want to change the activated services later, then press the button → CAUTION If you let the SIM card protrude out from the slot, then it may fall out of the slot while driving due to vehicle vibrations. ... -
Page 51: Press The Function Key
Dial the mailbox number List of telephone contacts Entering a number using the voice control Dial the entered number › Enter the telephone number. › Press the function key . Prefix code If the telephone number entered has no prefix code, then the prefix code can be added before the number ... -
Page 52: Manage Preferred Contacts
The connection can be made in the contact details or one of the following Manage preferred contacts functions can be started. The function keys » Fig. 24 on page 40 allows an immediate selection of The contact name can be read out by the device's generated voice ... -
Page 53: Telephone Functions
Distinguishing the types of calls Switch the call to the telephone › Answered call Press in the menu Telephonethe function button Outgoing call → Hands-free Missed call Filter for the display of call types . By pressing the function key the following menu is displayed. -
Page 54: Text Messages (Sms)
Conference details The priority with respect to the use of the SIM card and the connected tele- › During the ongoing conference, press the function key phone can be set as follows. › In the main menu Telephone press the function key → Text message set- . -
Page 55: Enter The Telephone Number
Creating and sending the message Insert a contact in the recipient list › In the main menu of the text messages press the function key » Fig. 32 Contact search page 51. Enter the telephone number › Write a message and press the function key Return to view the message ... -
Page 56: Wlan Connectivity And Data Connection
Open the contacts list for forwarding a message WLAN connectivity and data connection Reply to the sender via a message WLAN Introduction This chapter contains information on the following subjects: Switch on / off WLAN and select the WLAN mode Connection with the device WLAN (WLAN hotspot) Device connection with the WLAN of another device (WLAN client) Settings... - Page 57 Currently connected WLAN network Connection with the device WLAN (WLAN hotspot) Delete the WLAN access password from the device memory (appears only The device offers the possibility to connect 8 external devices with the WLAN with previously connected WLAN networks) hotspot of the device.
-
Page 58: Data Connection
■ Security level: - Setting of the WLAN connection security Settings WPA2 - WPA2 security ■ › WPA - WPA security Press the key ■ → ■ No security level - Without protection (without WLAN access password) Connect - WLAN search ■... -
Page 59: Mirrorlink Mirrorlink
The list of available facilities and applications, which support the MirrorLink function, can be seed in the ŠKODA Internet pages. Fig. 36 http://infotainment.skoda-auto.com MirrorLink: Main menu CAUTION ŠKODA is not responsible for damage to the unit or to the vehicle by the use ■... -
Page 60: Fig. 37
™ Settings of the function MirrorLink Display hidden function keys › If the icon can be seen in the device screen when the function keys are mut- List of certified applications Other pages with applications (by running your finger sideways across the screen or by turning the dial, the next page can be displayed , then push the controller ) - Page 61 Function problems Read and observe on page 56 first. ™ If problems with the function MirrorLink occur, then one of the following messages appears on the device screen. Message Meaning No connection was found. Please connect a USB device. Connect the device to the USB input.
-
Page 62: Navigation
For information on how to update the navigation data ask a ŠKODA partner or Navigation data go to the following ŠKODA website. Main menu http://infotainment.skoda-auto.com Split screenSplit screen Main menu GPS satellite signal The unit uses the GPS (Global Positioning System) satellite signal for route Fig. -
Page 63: New Destination
Split screenSplit screen New destination Introduction This chapter contains information on the following subjects: Enter the destination address Enter POI Enter destination on the map Enter destination via GPS coordinates Enter destination in route This chapter covers the input options for a new destination target. Fig. - Page 64 › › Press in the Navigation main menu the function key → Manage memory If a route guidance does occur, then in the main menu Navigation press the → Delete user data → Entered cities. function key → New dest./stopover → Options → On map. ›...
-
Page 65: My Destinations
If the destination entry occurs during route guidance, the destination change List of registered destinations must be confirmed by pressing the function key start in addition to confirming in the following menu that appears. Enter destination in route › If a route guidance does occur, then in the main menu Navigation press the function key ... - Page 66 Route guidance to the stored destination Current vehicle position Store(flagged destination) › Select the desired destination in the list of stored destinations. › Press the function key Start. The current vehicle position can be stored as the so-called “Flagged destina- tion”.
-
Page 67: Poi
Other POIs Introduction Fig. 44 POI entry This chapter contains information on the following subjects: Quick selection of a POI Other POIs Search and selecting a POI POI (e.g. restaurants, petrol stations etc.) can be selected directly on the map or selected in another POI menu. -
Page 68: Import Custom Destinations
› The POI search is performed according to the category by pressing the func- http://infotainment.skoda-auto.com tion key Custom destination in vCard-format › In the device memory, a custom destination can be imported in the vCard for- the POI search is based on the destination name by pressing the function mat (*.vcf) from an SD card or a USB source. -
Page 69: Map
Custom POI category In the device memory, custom POI categories that have been created using the Introduction ŠKODA application “MyDestination” can be imported from the SD card. This chapter contains information on the following subjects: Import › Map description Insert the SD card with the POI categories into the device. -
Page 70: Options For Map Display In The Split Screen
Options for map display Options for map display in the split screen Fig. 47 Map options › In the main menu Navigation press function key Fig. 48 Map in the split screen / example of a function key menus › Press the function key in the split screen . -
Page 71: Road Sign
› Press in the Navigation main menu the function key → Map → Select cat- A change of map orientation is only possible when the map is centred on the egories for POIs. vehicle position (the function key or ›... -
Page 72: Route Guidance
Enabling automatic scaling In the map area » Fig. 46 on page 66 the following function keys are dis- › Press in the Navigation main menu the function key played depending on the map display. Aligning to the vehicle position (in the 2D map display - or 3D map dis- ... -
Page 73: Destination Management
Activation / deactivation of the Demo mode » page 77, Advanced settings. Store destination › Press the Store key. › WARNING Name destination and confirm store. The navigation announcements provided may vary from the actual situa- Edit destination tions, e.g. due to out-of-date navigation data. By pressing the function key Edit the following menu is displayed for the desti- nation processing. -
Page 74: Route Change In The Map
› Use of a toll motorway Press the function key Use of a train / ferry . Using a toll tunnel A route calculation occurs and route guidance starts. Use of a toll road Using a vignette duty highway ... -
Page 75: Nav. Announcements
› In the extra window Manoeuvre the following driving recommendations are Press in the Navigation main menu the function key → Route information. shown » Fig. Depending on the context, some of the following information is displayed. Street name and street number of the current vehicle position ›... -
Page 76: Tour
Tour Edit tour Introduction Fig. 54 Edit tour This chapter contains information on the following subjects: Tour setting Edit tour Tour memory management Tour setting Fig. 53 Open edit tour (starts a route guidance) › Entering a new tour Press in the Navigation main menu the function key ... -
Page 77: Traffic Reports
Delete the destination List of traffic reports Route guidance to this destination is continued and then to the next tour destination (previous stopovers are skipped). Fig. 55 Display the destination details List of traffic reports Tour memory ›... - Page 78 Depending on the context, the icon for the congestion is displayed on one of Note the following ways. The traffic reports are updated by the device constantly in the background. The reception of traffic reports is always switched on and cannot be turned No route guidance is carried out ›...
-
Page 79: Settings
Enter traffic obstruction ■ Dynamic route - Switch on/off dynamic route recalculation due to TMC traffic › Press in the Navigation main menu the function key → Congestion ahead. reports › Set the length value of the traffic obstruction by touching the scale, by ... - Page 80 ■ Volume - Volume control of the navigation announcements ■ Home address - Delete the stored home address No voice guidance during call - Enable / disable the playback of navigation Flagged destination - Delete the flagged destination ■ ■ prompts during a telephone conversation Advanced settings ›...
-
Page 81: Vehicle Systems Car - Vehicle Settings
Vehicle systems Main menu CAR - Vehicle settings Fig. 57 Function keys in the main menu Introduction This chapter contains information on the following subjects: Main menu Convenience consumer Driving data DriveGreen Vehicle condition Function keys in the main menu »... -
Page 82: Driving Data
Driving data Vehicle condition Fig. 58 Fig. 59 Driving data Vehicle condition › › Press the key → → Driving data. Press the key → → Vehicle status. In the screen, information regarding vehicle condition or function of the tyre Screen display »... -
Page 83: Assistance Systems
■ Winter tyres - Setting an alarm on reaching the speed limit for winter tyres ■ Traffic sign recognition - Settings for the Dynamic Road Sign Display Speed warning - Switching the function Winter tyres on and off Show in instrument cluster - Activation/deactivation of the additional traf- ■... -
Page 84: Light
› Press the key → → Background lighting. Light Description of the function keys » Fig. 60 › Press the key → → Light. Setting the interior lighting › Light assistance - Setting of outdoor lighting ■... -
Page 85: Seats
■ Central locking - Settings for opening and closing of doors ■ Reset "Since start" driving data - Reset the single-trip memory in the device Door unlocking: - Set the door unlocking feature screen and in the display of the instrument cluster ■... -
Page 86: Adjustment Of The Heating And Cooling System
■ Cancel - Return to higher-level menu Setting the operating performance of the Climatronic Reset - Restore the settings ■ Light - Lower operating performance, quiet operation Adjustment of the heating and cooling system Medium - Basic operational performance Introduction Strong - Increased operational performance This chapter contains information on the following subjects:... - Page 87 Note Auxiliary heating and ventilation In the selection of the day in the preset time, there is an option between ■ Sunday and Monday without the specified day. If this position is selected, the vehicle will be ready for use at the selected time, regardless of the current day. If a different time is set »...
- Page 88 Update Data roaming Index Visibility Data transmission Bluetooth Player Date Bluetooth profile Daytime running lights Abort route guidance Breakdown service Delete destination Broadcasting sector Demo mode Additional keyboard languages Description of the device Address 60, 61 Destination Adjust text messages Address 60, 61 Call list...
- Page 89 Device menus Dynamic route Function problems Device Settings switch on / off MirrorLink MirrorLink Telephone Sound Device operation Easy opening Device screen Eco Tips - Multi-function display Device operation from an external device coordinates Edit tour device screen Destination entry Ending the route guidance keyboard graphical driving recommendations...
- Page 90 Interior - Lighting Jukebox List Interior lighting Main menu Main menu Introductory information Multimedia database IRoute information DVD video Operation Images Playback Media Requirements and limitations Jukebox MirrorLink safe removal of the data source Navigation SD card Radio Select audio source Settings Key - memory function TV tuner...
- Page 91 My Destinations Map scale Operation My destinations Images My POI Navigation announcements Media My tour Navigation data MirrorLink Edit tour Nav. announcements Radio New tour New tour Telephone Options for map display Options for map display in the split screen Navigation Pair device Abort route guidance...
- Page 92 Proactive occupant protection Software Update Sound Safe removal of the data source System Information Satellite data Telephone Radio Time and date Screen Broadcasting sector see device screen TV tuner DAB settings Units Screen display FM - settings User profile SD card L-band Voice control List of available stations...
- Page 93 Status line Pairing - inserted SIM card, no telephone con- List of traffic reports Navigation nected Requirements Telephone Pairing - no telephone connected TMC (Traffic reports) WLAN Pairing - SIM card is inserted, a connected tele- Touch screen phone Stopover Tour Pairing - two connected telephones Map point...
- Page 94 Windscreen Automatic wiping when raining Unit menus Heating 78, 83 Units Windscreen heating Unlocking door Wiper WLAN User profile Client Enable / disable WLAN Hotspot Name vCard Password Vehicle condition Settings Vehicle identification number switch on / off Vehicle settings WLAN mode Vehicle systems WLAN Client...
- Page 95 Reprinting, duplicating, translating and any other use, either in whole or in Issued by: ŠKODA AUTO a.s. part, is not permitted without the written consent of ŠKODA AUTO a.s. © ŠKODA AUTO a.s. 2015 ŠKODA AUTO a.s. expressly reserves all rights relating to copyright laws. Subject to change.
- Page 96 Columbus: Superb anglicky 03.2015 S75.5614.02.20 3V0012720FA 3V0012720FA...
Need help?
Do you have a question about the Infotainment Columbus and is the answer not in the manual?
Questions and answers