Bosch DICENTIS Instruction Manual
Wireless conference system
Hide thumbs
Also See for DICENTIS:
- Configuration manual (134 pages) ,
- Software manual (99 pages) ,
- Hardware installation manual (80 pages)
Table of Contents
Advertisement
Quick Links
Advertisement
Table of Contents

Related Manuals for Bosch DICENTIS


Summary of Contents for Bosch DICENTIS
- Page 1 DICENTIS Wireless Conference System Installation Manual...
-
Page 3: Table Of Contents
System power on and configuration Maintenance Cleaning Inspect components Service Technical data Wireless Access Point (DCNM-WAP) Wireless Devices (DCNM-WD and DCNM-WDE) Battery Pack (DCNM-WLIION) Charger (DCNM-WCH05) High Directive Microphone (DCNM-HDMIC) Stem Microphones (DCNM-MICx) Bosch Security Systems B.V. Installation Manual 2015.03 | V1.01 |... -
Page 4: Safety
Notice! Changes or modifications made to this equipment, not expressly approved by Bosch Security Systems B.V. may void the FCC authorization to operate this equipment. 2015.03 | V1.01 | Installation Manual Bosch Security Systems B.V. - Page 5 The Wireless Discussion Devices and the Wireless Access Point should be installed and operated with minimum distance of 20 cm to your body. Bosch Security Systems B.V. Installation Manual 2015.03 | V1.01 |...
-
Page 6: About This Manual
| About this manual DICENTIS About this manual The purpose of this manual is to provide information required for installing the DICENTIS Wireless Conference System. – Please read this manual carefully before installing any of the products of the DICENTIS Wireless Conference System. -
Page 7: Document History
DICENTIS About this manual | en Document history Release date Documentation version Reason 2015.02 V1.0 1st edition. 2015.03 V1.01 Section 6 adapted. Bosch Security Systems B.V. Installation Manual 2015.03 | V1.01 |... -
Page 8: System Overview
DICENTIS System overview The DICENTIS Wireless Conference System is a “standalone” IP based system. It uses WiFi IEEE 802.11n for wireless distribution and processing of audio and data signals. A typical DICENTIS Wireless Conference System (see the following figure and numbering on... - Page 9 DICENTIS System overview | en The Wireless Access Point (DCNM-WAP) is the central device of the DICENTIS Wireless Conference System. The Wireless Access Point is used to: – Host a web interface for licensing, configuring and controlling the system. –...
-
Page 10: Extended System Requirements
Notice that a DHCP server is needed for both the Wireless Access Point and the cameras. Cameras Typical, the Bosch HD Conference Dome is used. Refer to product related information on: www.boschsecurity.com > Country of your choice > Conference Systems > DICENTIS Wireless Conference System >... -
Page 11: Installation Planning
DICENTIS Installation planning | en Installation planning Make sure you have all components for installing and connecting the DICENTIS Wireless Conference System (see System overview, page 8). – Familiarize yourself with the products capabilities of the DICENTIS Wireless Conference System (see System overview, page 8 and the paragraphs Control capacity and Coverage area in this section. -
Page 12: Unpacking
This equipment should be unpacked and handled with care. If an item appears to be damaged, notify the shipper immediately. If any items are missing, notify your Bosch representative. The original packaging is the safest container in which to transport products and can be used to return products for service if necessary. -
Page 13: Installation Wireless Access Point
AC plug‑US Mounting bracket DVD with manuals and software Safety instructions 2) Brand logo The orientation of the logo could be changed. TORX 10 Figure 5.1: Change logo orientation Bosch Security Systems B.V. Installation Manual 2015.03 | V1.01 |... - Page 14 Connect the Ethernet (PoE) (2) or AC/DC power supply adapter (3). For detailed connection description, see the “Power on / connection and indicator” paragraph at the end of this section. 2015.03 | V1.01 | Installation Manual Bosch Security Systems B.V.
- Page 15 Installation Wireless Access Point | en Wall or ceiling installation Use the mounting bracket to attach the Wireless Access Point to a wall or ceiling. TORX 10 Figure 5.3: Mounting to a wall or ceiling Bosch Security Systems B.V. Installation Manual 2015.03 | V1.01 |...
- Page 16 | Installation Wireless Access Point DICENTIS Tripod floor stand installation Use the mounting bracket to install the Wireless Access Point on a Bosch LBC1259/01 universal tripod floor stand. Figure 5.4: Mounting on a tripod floor stand 2015.03 | V1.01 | Installation Manual Bosch Security Systems B.V.
- Page 17 As soon the power supply is provided, the Wireless Access Point is powered on, and the six LEDs (1) on the front side are all on. – To configure the DCNM-WAP, refer to the software configuration manual of the DICENTIS Wireless Conference System. 4 5 6 Figure 5.5: DCNM WAP front and bottom view...
- Page 18 Tip: Live (+) Ring: Return (-) Sleeve: Shield Reset‑to‑default button: Sets the DCNM-WAP to factory default values. Press and hold for at least 8 seconds to set all settings to factory default. 2015.03 | V1.01 | Installation Manual Bosch Security Systems B.V.
-
Page 19: Installation Wireless Devices And Accessories
Follow below steps to install the required accessories to, and placing of, the Wireless Devices. These steps are a summary: Check that all equipment is available. For your reference, see the Wireless Device figure and table in this section. Bosch Security Systems B.V. Installation Manual 2015.03 | V1.01 |... - Page 20 The following table gives an overview of the Wireless Device items and functionality (Refer to the numbers in the previous figure). Connection and configuration of the Wireless Devices within the system is done via DCNM- WAP. Refer to the software configuration manual of the DICENTIS Wireless Conference System. Item Description Near Field Communication (NFC) user identification (DCNM-WDE only).
-
Page 21: Microphones
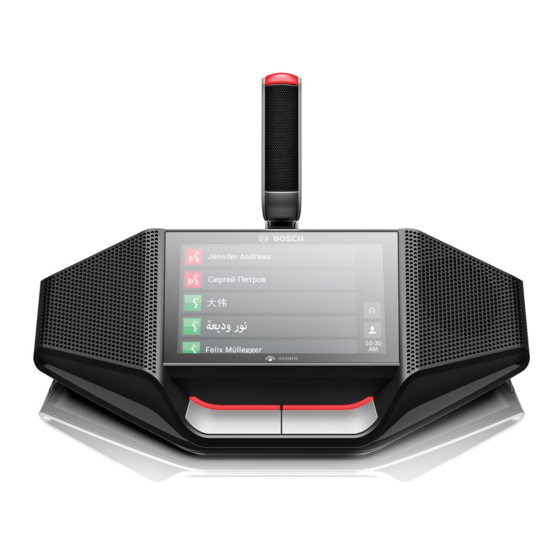
Figure 6.1: DCNM‑HDMIC or DCNM‑MICx to Wireless Device connection Both the DCNM‑HDMIC High Directive Microphone and DCNM-MICL/S Stem Microphone are typically used with the DCN multimedia device and DICENTIS wireless devices. Figure 6.2: DCNM‑HDMIC and DCNM‑MICx front and bottom view... - Page 22 (5) fits/click into place. To remove the microphone from the device: Shift lockslider (7) towards the device and hold in place lock release (8) and pull out the microphone. 2015.03 | V1.01 | Installation Manual Bosch Security Systems B.V.
-
Page 23: Battery Pack
How to install the Battery Pack Figure 6.4: Wireless Device bottom view including Battery Pack Figure 6.5: DCNM-WLIION Battery Pack top (1) and rear (3) view. Turn the Wireless Device up‑side‑down. Bosch Security Systems B.V. Installation Manual 2015.03 | V1.01 |... - Page 24 LED 1: <3 NOTE: The accuracy of the Battery Pack remaining capacity is +/- 20%. Securing nock (3x). Secures the Battery Pack in the Wireless Device. Power supply and charging connector. 2015.03 | V1.01 | Installation Manual Bosch Security Systems B.V.
-
Page 25: Charger
– LED 1: <3 NOTE: The accuracy of the Battery Pack remaining capacity is +/- 20%. NOTE: It can take up to 1 minute before the first LED is lit. Bosch Security Systems B.V. Installation Manual 2015.03 | V1.01 |... - Page 26 Caution! Do not obstruct the ventilation grilles. A blockage of the ventilation grilles can cause a risk of fire and malfunction/defect of the Charger and Battery Pack. 2015.03 | V1.01 | Installation Manual Bosch Security Systems B.V.
- Page 27 The Charger can be free‑standing or fixed installed in more permanent installations (i.e. to a wall), using the mounting bracket. TORX 10 TORX 10 Figure 6.7: Installation to a wall Bosch Security Systems B.V. Installation Manual 2015.03 | V1.01 |...
- Page 28 If the mains power supply is 100‑127 V(AC), 50/60 Hz, a maximum of 2 chargers can be looped‑through. – If the mains power supply is 220‑240 V(AC), 50/60 Hz, a maximum of 5 chargers can be looped‑through. 2015.03 | V1.01 | Installation Manual Bosch Security Systems B.V.
- Page 29 The typical charging time of one Battery Pack is 3 hours. – The LEDs (3) showing the charging level of the Battery Pack. – Remove the Battery Pack as soon it is fully charged (All LEDs (3) are on). Bosch Security Systems B.V. Installation Manual 2015.03 | V1.01 |...
-
Page 30: System Power On And Configuration
| System power on and configuration DICENTIS System power on and configuration Consult the software configuration manual of the DICENTIS Wireless Conference System for power on and configuration details of the Wireless Access Point and Wireless Devices. – For documentation, refer to the DICENTIS Wireless Conference System product related information on: www.boschsecurity.com >... -
Page 31: Maintenance
Clean the Wireless Access Point and Charger with a dry soft cloth, as required. Inspect components Check all DICENTIS Wireless Conference System components for signs of wear and tear. Replacement products can be ordered from your Bosch representative, if required. -
Page 32: Technical Data
285 x 202 x 65 mm with bracket (11.2 x 8.0 x 2.6 in) Weight: with bracket 958 g (2.11 lb) without bracket 725 g (1.60 lb) Color Light grey (RAL 000 7500) 2015.03 | V1.01 | Installation Manual Bosch Security Systems B.V. - Page 33 Approvals and certifications CE, WEEE UL, FCC CSA, ICES‑003, EPS AU/NZ RCM, MEPS RU/KZ/BY PSE, MIC China RoHS, CCC, CMIIT SASO ANATEL The system is WiFi Certified by the WiFi Alliance. Bosch Security Systems B.V. Installation Manual 2015.03 | V1.01 |...
-
Page 34: Wireless Devices (Dcnm-Wd And Dcnm-Wde)
110 dB SPL according IEC60914 Audio outputs Loudspeaker nominal output 72 dB SPL at 0.5 m Loudspeaker maximum output 80 dB SPL Headphone nominal output 0 dBV Headphone maximum output 3 dBV 2015.03 | V1.01 | Installation Manual Bosch Security Systems B.V. - Page 35 Storage temperature -20 ºC to +70 ºC (-4 ºF to +158 ºF) Relative humidity < 95 %, > 5% Approvals and certifications ICES‑003 AU/NZ RU/KZ/BY China RoHS, CMIIT SASO ANATEL Bosch Security Systems B.V. Installation Manual 2015.03 | V1.01 |...
-
Page 36: Battery Pack (Dcnm-Wliion)
(23 ºF to +95 ºF) Relative humidity <75 %, >5 % Approvals and certifications UL, FCC CSA, ICES‑003 AU/NZ RU/KZ/BY China RoHS, CCC SASO ANATEL TISI BSMI Other UN 38.3 2015.03 | V1.01 | Installation Manual Bosch Security Systems B.V. -
Page 37: Charger (Dcnm-Wch05)
-20 ºC to +70 ºC (-4 ºF to +158 ºF) Relative humidity < 95 %, > 5 % Approvals and certifications CE, WEEE UL, FCC CSA, ICES‑003 AU/NZ RU/KZ/BY China RoHS SASO Bosch Security Systems B.V. Installation Manual 2015.03 | V1.01 |... -
Page 38: High Directive Microphone (Dcnm-Hdmic)
Equivalent noise 12 dB SPL Mechanical Mounting Plug and fasten into DCN multimedia devices and DICENTIS wireless devices. Dimensions (H x W x D) 108 x 21.5 x 60 mm (4.25 X 0.85 x 2.36 in) Weight 0.035 kg (0.077 lb) -
Page 39: Stem Microphones (Dcnm-Micx)
Nominal input 85 dB SPL Maximum input 115 dB SPL Equivalent noise 15 dB SPL Mechanical Mounting Plug and fasten into DICENTIS wireless devices. Length: DCNM‑MICS (without connector) 310 mm (12.21 in) DCNM‑MICL(without connector) 480 mm (19.90 in) Connector 77.15 x 60.47 mm (3.40 x 2.38 in) - Page 42 Bosch Security Systems B.V. Torenallee 49 5617 BA Eindhoven The Netherlands www.boschsecurity.com © Bosch Security Systems B.V., 2015...