
Related Manuals for Air Live CW-720IR


Summary of Contents for Air Live CW-720IR
- Page 1 CW-720IR CU-720IR 720P Day/Night Wireless IPCAM 720P Day/Night Passive PoE IPCAM User’s Manual...
- Page 2 This product contains some codes from GPL. In compliance with GPL agreement, AirLive will publish the GPL codes on our website. Please go to www.airlive.com and go to the "Support->GPL" menu to download source code. All Trademarks are properties of their respective holders. AirLive CW-720IR / CU-720IR User’s Manual...
- Page 3 Some components of devices such as external wiring, circuit boards and liquid crystal displays have a negative impact on the environment. AirLive CW-720IR / CU-720IR User’s Manual...
-
Page 4: Table Of Contents
4.1 Using IP Camera via iOS/Android Device..........12 5. Operating the Network Camera ..............15 5.1 Live View....................15 5.2 Configuration ..................16 6. Configuration ...................17 6.1 Network....................18 6.2 Camera ....................26 6.3 System....................28 6.4 Video....................32 6.5 Audio....................36 6.6 User ....................37 AirLive CW-720IR / CU-720IR User’s Manual... - Page 5 Table of Contents 6.7 Protocol....................37 6.8 E-Mail....................38 6.9 Event Detection .................39 6.10 Storage....................40 6.11 Continuous Recording..............41 6.12 Recording List ..................42 6.13 Event Server ...................43 6.14 Event Schedule................45 AirLive CW-720IR / CU-720IR User’s Manual...
-
Page 6: Overview
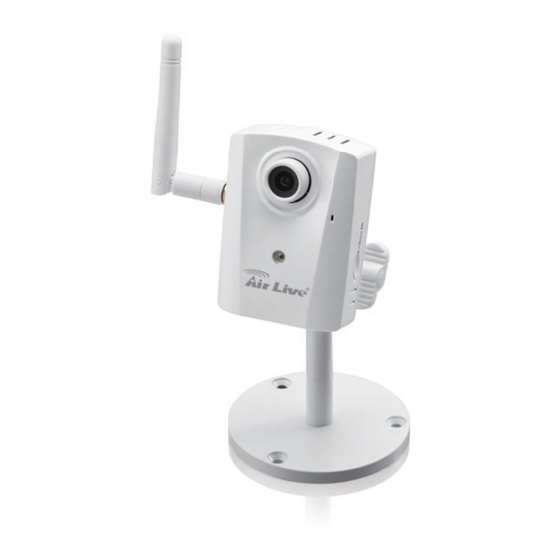
This user’s manual explains how to operate this camera. Users should read this manual completely and carefully in advance. 1.1 Introduction AirLive CW-720IR/CU-720IR is a 720P network camera which is designed for indoor and home security applications even more the SMB surveillance. The built-in IR LED provides better quality of night time monitoring. -
Page 7: Features
1. Overview 1.2 Features The main features of CW-720IR and CU-720IR. H.264 and MJPEG encoder Up to 30fps at all resolution One piece IR LED for day and night surveillance IEEE 802.11n WLAN/WPS for CW-720IR 12V Passive PoE for CU-720IR... - Page 8 Network Users 8 Simultaneous Unicast Users NAT Transversal UPnP NAT Transversal Password Protection IP Address Filtering Security HTTPS Encrypted Data Transmission User Access Log Audio Audio Encoder G.711 64kbps, G.726 32kbps Audio Streaming Two-Way AirLive CW-720IR / CU-720IR User’s Manual...
- Page 9 Continue Recording to SD / SAMBA Certificate CE, FCC-Class B Windows® XP, Vista, 7, 8 Viewing Browser IE 8.0 or later, Firefox, Safari, Chrome System Cell Phone With 3GPP player Video Player VLC, Quick Time, Real Player, Core Player AirLive CW-720IR / CU-720IR User’s Manual...
-
Page 10: System Requirement
Internet Explorer 9 or later; Apple Safari; Firefox; Google Chrome Cell Phone Microsoft Media Player 11.0 or later (to playback recorded file) Note: Please keep updating the latest Windows software and service package. (Ex: Net Framework, Windows Media Player, Enhance ActiveX Security) AirLive CW-720IR / CU-720IR User’s Manual... -
Page 11: Package Contents And Installation
2.1 Package Content User can find the following items in the package as below: 1. AirLive CW-720IR / CU-720IR is the main element of the product. 2. Bundle CD includes IP Wizard II, CamPro Express64, Quick Start Guide, User Manual, and Video clips. - Page 12 Attention: For CU-720IR, please use 12V Passive PoE injector (POE-1P). 2. DC-in: The input power is DC12V/1A. 3. Antenna (CW-720IR): Please attach the antenna before using. 4. 3.5mm Audio output: Please insert 3.5mm speaker or earphone for audio output. 5. Reset/WPS (CW-720IR) button:...
-
Page 13: Install The Camera
Connect an Ethernet cable to the LAN socket and attach it into the network. Attach the antenna before power it up. Connect the external power supply to the camera. Insert the MicroSD card if necessary. Attach the stand with screws. AirLive CW-720IR / CU-720IR User’s Manual... -
Page 14: Connect To Ip Camera
2. Package Contents and Installation 2.4 Connect to IP Camera 1. Insert the bundled CD into your PC/Laptop. Auto Run screen pops up, click “Install Software AirLive IP Wizard II” to install the configuration tool. AirLive CW-720IR / CU-720IR User’s Manual... - Page 15 2. Package Contents and Installation 3. After completing installation, run the “Air Live IP Wizard II” to start to search the IP camera. 4. The entire detected IP camera will be listed out. 5. If the Camera’s IP address is in the same IP segment as your LAN, select the founded IP Camera and double click on the item.
-
Page 16: Using Ip Camera Via Web Browser
2. Use the default account “admin” and default password “airlive”. Note: The default user name “admin” and the password “airlive” are the default values. You can change them in the Security Menu. (Please check “Configuration → Security”) AirLive CW-720IR / CU-720IR User’s Manual... -
Page 17: Operating Ip Camera Via Mobile Device
We take iOS system as the example: 2. Execute AirLive CamPro Mobile 1. Download AirLive CamPro Mobile from APP store 3. Click Setup button. 4. Setup page appears AirLive CW-720IR / CU-720IR User’s Manual... - Page 18 4. Operating IP Camera via Mobile Phone 5. Click Add and Auto Search button. Select the camera. 7. Edit the information and User Name/Password. Click “Save”. AirLive CW-720IR / CU-720IR User’s Manual...
- Page 19 8. Click “Back”. 9. Select the camera. 10. Select the channel to 11. Camera live view. enlarge the video. Note: The image is continuous snapshots, not video. Thus, live image can’t be recorded here. AirLive CW-720IR / CU-720IR User’s Manual...
-
Page 20: Operating The Network Camera
5. Operating the Network Camera Operating the Network Camera You can operate live view function on the main page, please refer to the description below: 5.1 Live View 1. Language CW-720IR / CU-720IR support multi-language. AirLive CW-720IR / CU-720IR User’s Manual... -
Page 21: Configuration
You can enable or disable the speaker/microphone function here. After enable any of these two function, you can adjust the volume by dragging the bar. 5.2 Configuration Click “Configuration” for the camera’s detail settings. For more information, please refer to Chapter 6. AirLive CW-720IR / CU-720IR User’s Manual... -
Page 22: Configuration
Click the “Configuration” to display sub-menus included: Network / Camera / System / Video / Audio / User / Protocol / E-mail / Event Detection / Storage / Continuous Recording / Recording List / Event Server / Event Schedule AirLive CW-720IR / CU-720IR User’s Manual... -
Page 23: Network
IP address, Subnet mask, and Gateway: If you didn’t select DHCP, you need to enter these parameters manually. Obtain DNS from DHCP: Enable this check box when a DHCP server is installed in the network and provide DNS service. AirLive CW-720IR / CU-720IR User’s Manual... - Page 24 Site Survey: It will list all the available access point and click “Reload” to refresh the information. Access points with a disabled SSID Broadcast will not appear unless the camera is associated with it. AirLive CW-720IR / CU-720IR User’s Manual...
- Page 25 13 characters for 128-bit WEP. HEX - In this method the string must be exactly 10 hexadecimal (0-9, A-F) characters for 64-bit WEP and 26 hexadecimal characters for 128-bit WEP. Web Key 1~4: Key value of WEP mode. AirLive CW-720IR / CU-720IR User’s Manual...
- Page 26 Choose the built-in DDNS server. DDNS Host: The domain name is applied of this device. User name: The user name is used to log into DDNS. Password: The password is used to log into DDNS. AirLive CW-720IR / CU-720IR User’s Manual...
- Page 27 UPnP enabled, the device will automatically be detected and a new icon will be added to “My Network Places.” If you do not want to use the UPnP functionality, it can be disabled. UPnP: To enable or disable the UPnP service here. AirLive CW-720IR / CU-720IR User’s Manual...
- Page 28 It shows the friendly name of this device here. 10. IP Filter You can choose several different users’ IP address which are allowed or denied by the camera. IP Filter: To enable or disable the IP filter function here. AirLive CW-720IR / CU-720IR User’s Manual...
- Page 29 URL: Type the server name or the IP address of the HTTP server. HTTP Login name: Type the user name for the HTTP server. HTTP Login Password: Type the password for the HTTP server. AirLive CW-720IR / CU-720IR User’s Manual...
- Page 30 Live Video DSCP (0~63) Live Audio DSCP (0~63) Event/Alarm DSCP (0~63) Management DSCP (0~63) * The higher DSCP value means the higher priority. AirLive CW-720IR / CU-720IR User’s Manual...
-
Page 31: Camera
Decrease the influence to the video quality when fog or moisture on the cover. Anti-False Color: To correct the color cast. ICR: You can select Day/Night mode according to the environment or select Auto to do the auto switch. AirLive CW-720IR / CU-720IR User’s Manual... - Page 32 Default Settings: Restore to factory image settings. 2. Exposure Control: Power Frequency: Frequency of power line: 50 or 60Hz. Exposure Control: Auto: Will adjust the internal gain automatically. Hold: Will hold the internal gain. AirLive CW-720IR / CU-720IR User’s Manual...
-
Page 33: System
Define the gray level of mask block. 6.3 System Use this menu to perform the principal settings of the device. 1. System DIPS (Dynamic IP Service): To enable or disable the DIPS® (Dynamic IP Service) function. AirLive CW-720IR / CU-720IR User’s Manual... - Page 34 Select to turn on or off Power LED (wireless LED if WLAN model). Log: User can check the system log information of the device, including the Main Info, Appended Info, Operator IP, and so on … AirLive CW-720IR / CU-720IR User’s Manual...
- Page 35 3. Maintenance Hard Factory Default (Include the network setting): Recall the device hard factory default settings. Note that click this button will reset all device’s parameters to the factory settings (including the IP address). AirLive CW-720IR / CU-720IR User’s Manual...
- Page 36 6. The upgrade progress information will be displayed. Once the uploading process completed, the device will reboot the system automatically. 7. Please wait for timer countdown, and then you can use IP Wizard II to search the device again. AirLive CW-720IR / CU-720IR User’s Manual...
-
Page 37: Video
1280x720 maximum. And 1.3Mega mode can streams up to 1280x1024. Text Overlay Setting: There are some important information can be embedded into image, including date, time, and/or text. User also can change the font color, background color, transparency and position. AirLive CW-720IR / CU-720IR User’s Manual... - Page 38 Rate (CBR), Variable Bit Rate (VBR) and Enhanced Variable Bit Rate (EVBR). For CBR, the video bit rate is between low to high bandwidth based on different resolutions. User can set the desired bit rate to match the limitation of bandwidth. AirLive CW-720IR / CU-720IR User’s Manual...
- Page 39 Always Enable Multicast: Multicast streaming is always enabled or by request. Warning!!! To enable the multicast streaming, you shall make sure your Intranet does support multicast function. Otherwise, your Intranet may occur network storm seriously. AirLive CW-720IR / CU-720IR User’s Manual...
- Page 40 Multicast Video: Fill in the IP address and port for multicast video streaming of the selected profile. Multicast Audio: Fill in the IP address and port for multicast audio streaming of the selected profile. AirLive CW-720IR / CU-720IR User’s Manual...
-
Page 41: Audio
Naming the AOI area and select proper level from -10(Worst) to 10(Best). Save: Save the AOI settings. 6.5 Audio 1. Setting Audio: To enable or disable audio function Audio Type: To select audio codec AirLive CW-720IR / CU-720IR User’s Manual... -
Page 42: User
Add, Modify, and Delete: Manage the user’s account information of users. 6.7 Protocol 1. ONVIF ONVIF: To enable or disable the ONVIF interface here. And select the ONVIF version to match client’s version. AirLive CW-720IR / CU-720IR User’s Manual... -
Page 43: E-Mail
Type the password for the SMTP server if Authentication is enabled. E-mail To: Type the receiver’s e-mail address. E-mail From: Type the sender’s E-mail address. This address is used for reply e-mails. E-mail Subject: Type the subject/title of the e-mail. AirLive CW-720IR / CU-720IR User’s Manual... -
Page 44: Event Detection
Camera Tampering: Select to enable or disable the camera tampering function. Minimum Duration: Select the duration time between two events. Sensitivity: Select the sensitivity of tampering, the higher value means easier to be triggered. AirLive CW-720IR / CU-720IR User’s Manual... -
Page 45: Storage
Delete old recorded files while the conditions are reached as below. Remove recordings order than: Delete old files by days. Remove oldest recordings when disk is: Delete old files by left capacity. Lock Disk: Lock the SD card to secure from format it. AirLive CW-720IR / CU-720IR User’s Manual... -
Page 46: Continuous Recording
The camera can continuously record video stream into files and save them into SD card or SAMBA server. 1. Continuous Recording Continuous Recording: Enable or disable this function. Record File Type: Choose a video profile to record. AirLive CW-720IR / CU-720IR User’s Manual... -
Page 47: Recording List
Select list from SD card or SAMBA server. Start/End time: It can list out the recorded file during a specific time. Reload/Recover: Reload or recover the file on the list. Download/Remove/Play Video: Download, remove or play the file on the list. AirLive CW-720IR / CU-720IR User’s Manual... -
Page 48: Event Server
In addition to send video file to FTP server, the device also can send event message to specified TCP server. Name: User can specify multiple TCP servers as wish. Therefore, user needs to specify a name for each TCP server setting. AirLive CW-720IR / CU-720IR User’s Manual... - Page 49 Type the user name for the HTTP Proxy. Proxy Login Password: Type the password for the HTTP Proxy. Proxy Port: Set port number of Proxy. 4. SAMBA Server The device also can send video stream to specified SAMBA server. AirLive CW-720IR / CU-720IR User’s Manual...
-
Page 50: Event Schedule
Where the Schedule Trigger will be activated by user-define interval without event happened. 1. Setting Name: Give a name to the Event or Schedule. Enable: Enable or disable this Event or Schedule. Type: Event trigger or Schedule trigger. AirLive CW-720IR / CU-720IR User’s Manual... - Page 51 Record File Prefix: Define the prefix of recorded filename. Pre-Trigger Duration: Define the maximum duration of pre-alarm. Post-Trigger Duration: Define the maximum duration of post-alarm. Max File Size: Define the maximum buffer size of record file. AirLive CW-720IR / CU-720IR User’s Manual...
Need help?
Do you have a question about the CW-720IR and is the answer not in the manual?
Questions and answers