Table of Contents
Advertisement
Quick Links
Advertisement
Table of Contents

Related Manuals for miniDSP 10X10 HD


Summary of Contents for miniDSP 10X10 HD
-
Page 1: User Manual
10 H ULTICHANNEL UDIO ROCESSOR ULTICHANNEL UDIO ROCESSOR OARD User Manual miniDSP Ltd, Hong Kong / www.minidsp.com / Features and specifications subject to change without prior notice... - Page 2 Updated section on volume control 03-08-2012 V2.0 New version combining boxed version with kit 30 May 2015 version V2.1 New product photographs 28 Sept 2015 miniDSP Ltd, Hong Kong / www.minidsp.com / Features and specifications subject to change without prior notice...
-
Page 3: Table Of Contents
A Note on this Manual ............................. 6 Product Overview ............................7 Typical usage ............................7 The miniDSP concept ..........................8 Choosing the right miniDSP ........................8 Choosing a plugin ..........................9 The miniDSP Workflow ..........................10 Installation and setup ..........................12 Software installation .......................... - Page 4 Phoenix terminal blocks ......................46 8.2.2 XLR adapters ..........................46 8.2.3 RCA adapters ..........................46 Troubleshooting ..........................47 MCU Firmware update ........................49 Obtaining Support ..........................49 miniDSP Ltd, Hong Kong / www.minidsp.com / Features and specifications subject to change without prior notice...
-
Page 5: Important Information
YSTEM EQUIREMENTS To configure your miniDSP audio processor, you will require a Windows PC or Apple Mac OS X computer with the following minimum specification: Windows PC with 1GHz or higher processor clock speed. Intel® Pentium®/Celeron® family, or AMD K6®/AMD Athlon®/AMD Duron®... -
Page 6: Warranty Terms
Finally, note that the miniDSP audio processor is a very flexible device, and many of the questions we receive at the tech support department are already answered in this user manual and in the online application notes the miniDSP.com website. So please take the time to carefully read this user manual and the online technical support. -
Page 7: Product Overview
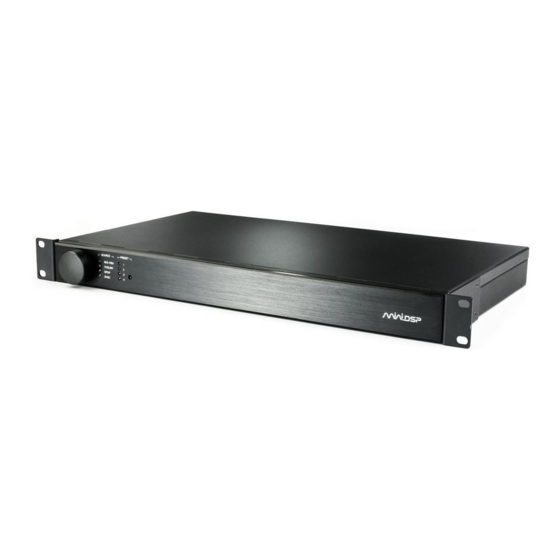
RODUCT VERVIEW Thank you for choosing the miniDSP 10x10 Hd audio processor or 8x8 Kit board. The miniDSP 10x10 Hd and 8x8 Kit board are a powerful and flexible multichannel digital audio processor that is ideal for applications such as home theater and surround-sound monitoring. -
Page 8: The Minidsp Concept
HOOSING THE RIGHT MINI The miniDSP 10x10 Hd is a self-contained “miniDSP in a box”. It has eight analog input channels and eight analog output channels, as well as two digital input and output channels with AES/EBU, S/PDIF, and TOSLINK connectors. -
Page 9: Choosing A Plugin
HOOSING A PLUGIN The plugin that is usually used with the 10x10 Hd and the 8x8 Kit is the 8x8 plugin, which runs at 48 kHz sample rate. It is also possible to run the 2x8 plugin, which runs at 96 kHz. The table below summarizes the key... -
Page 10: The Minidsp Workflow
With the initial configuration done and now that you are familiar with the various controls, it’s time to connect the miniDSP 10x10 Hd or 8x8 Kit into your system. Ensure that all power is turned off when making audio connections. See Hardware connectivity on page 14. - Page 11 10. Continue to operate offline With your miniDSP processor configured, you can continue to operate in offline mode—that is, without the computer connected. To do so, simply disconnect the USB cable. The processor “remembers” the configuration last set, and will continue to operate without the computer.
-
Page 12: Installation And Setup
User Downloads section of the miniDSP website. You will need to be logged into the website with the account you created when purchasing. The User Downloads link is visible from the dropdown menu at the top right of the website page: Navigate to the miniDSP Plug-ins section of User Downloads, then download the zip file under the heading miniDSP 10x10. -
Page 13: Mac Os X
To install the miniDSP software, open the Mac folder of the download, and double-click on the MiniDSP_8x8.dmg file to open it in a new window. Then double-click on the installer program, Install MiniDSP- 8x8.app. Once installation is complete, the 8x8 plugin will automatically start. -
Page 14: Hardware Connectivity
3.2 H ARDWARE CONNECTIVITY All connections to the 10x10 Hd are made on the rear panel. For the 8x8 Kit board, also see documentation. 3.2.1 Analog input and output There are eight analog input channels and eight analog output channels, available in both unbalanced and balanced connections. -
Page 15: Digital Input And Output
Fit the supplied IEC cable to the 12 VDC power supply. Plug the DC connector into the +12VDC socket on the rear panel of the 10x10 Hd, then plug the AC mains plug into the power outlet. Apply power to the processor only after all analog input and output connections have been made. The processor can usually be left powered on. -
Page 16: Usb
3.3 G AIN STRUCTURE The miniDSP audio processor provides a great deal of flexibility in matching with other equipment. In addition to providing balanced and unbalanced inputs and outputs, input sensitivity and output gain can be selected to adapt to different equipment. The maximum input and output signal levels are shown in Table 1. -
Page 17: To Change Input Sensitivity
A set of eight DIP switches located on the main circuit board select the output gain of each channel. Remove the top panel of the 10x10 Hd to access these jumpers. The switches can be set independently for each channel, and affect output gain for both the balanced and unbalanced output connections to that channel. -
Page 18: Synchronizing With The Processor
Cancel This option cancels the attempt to connect to the processor. The plugin will remain in offline mode. miniDSP Ltd, Hong Kong / www.minidsp.com / Features and specifications subject to change without prior notice... -
Page 19: Configuring The Processor
Note: during initial configuration of the processor, it is strongly recommended that any connected amplification be muted or powered off. The Mute button disables all audio output: miniDSP Ltd, Hong Kong / www.minidsp.com / Features and specifications subject to change without prior notice... -
Page 20: Master Volume Setting
Master volume control potentiometer. IR Mode Master volume is controlled by an infrared remote. If using the 10x10 Hd, this option should always be selected. If using the 8x8 Kit board, it can be selected if the optional VOL-FP board is installed. -
Page 21: Routing Tab
The matrix mixer provides a very powerful tool for setting up various configurations. In addition, different routing setups can be set up in different presets, and then selected with a remote control. miniDSP Ltd, Hong Kong / www.minidsp.com / Features and specifications subject to change without prior notice... -
Page 22: Output Tab
The Output tab displays a row of output channel control strips. All channels are identical, except that the two digital output channels have a reduced maximum time delay (8ms instead of 15 ms). miniDSP Ltd, Hong Kong / www.minidsp.com / Features and specifications subject to change without prior notice... -
Page 23: Channel Strip Layout
The meters can also be used during normal operation to monitor for or to help locate level or gain structure problems. miniDSP Ltd, Hong Kong / www.minidsp.com... -
Page 24: Crossover
Hovering the mouse over the curve brings up an overlay showing the frequency and the attenuation at that frequency. miniDSP Ltd, Hong Kong / www.minidsp.com / Features and specifications subject to change without prior notice... - Page 25 To link a channel, select the other channel from the drop-down menu at the top left of the Xover screen, and click the Link checkbox. miniDSP Ltd, Hong Kong / www.minidsp.com / Features and specifications subject to change without prior notice...
-
Page 26: Parametric Eq
To link a channel, select the other channel from the drop-down menu at the top left of the PEQ screen, and click the Link checkbox. miniDSP Ltd, Hong Kong / www.minidsp.com / Features and specifications subject to change without prior notice... - Page 27 A filter will also have no effect if its gain is set to 0.0. miniDSP Ltd, Hong Kong / www.minidsp.com / Features and specifications subject to change without prior notice...
-
Page 28: Compressor
The optimum settings may need to be tuned by ear. For more information, see the Wikipedia article Dynamic range compression. miniDSP Ltd, Hong Kong / www.minidsp.com / Features and specifications subject to change without prior notice... -
Page 29: Invert And Mute
The time delay corresponds to a distance. This distance is shown in meters below the entry box. The maximum time delay of 15 ms corresponds to a distance of approximately 5.2 meters (17 feet). miniDSP Ltd, Hong Kong / www.minidsp.com... -
Page 30: Custom Biquad Programming
In advanced mode, the biquad coefficients can be pasted directly into the user interface. These coefficients must be calculated using a design program – see Biquad design software below for suggestions. miniDSP Ltd, Hong Kong / www.minidsp.com / Features and specifications subject to change without prior notice... - Page 31 (Be careful: if the last line ends with a comma, that counts as an extra biquad.) miniDSP Ltd, Hong Kong / www.minidsp.com / Features and specifications subject to change without prior notice...
-
Page 32: Biquad Design Software
It includes the ability to automatically generate a bank of parametric EQ biquads based on a measurement. These coefficients can be saved to a file from REW and loaded directly into a PEQ bank in a miniDSP plugin. Room EQ Wizard can be downloaded here: ... -
Page 33: Working With Configurations
(as long as the Synchronize Config button is selected). The configuration contained in the miniDSP hardware unit cannot be uploaded back to the computer. Therefore, you must save your configuration to a file if you wish to recover from any changes you make while in offline mode. -
Page 34: Saving And Loading Configurations
To copy a configuration from one preset to another, save the configuration to a file, then select a different configuration preset and load the file. miniDSP Ltd, Hong Kong / www.minidsp.com / Features and specifications subject to change without prior notice... -
Page 35: Restoring To Defaults
PEQ filter frequency, gain, and Q Space The Space bar toggles buttons that have two states, such as Bypass, Invert, and Mute, if they have the focus. miniDSP Ltd, Hong Kong / www.minidsp.com / Features and specifications subject to change without prior notice... -
Page 36: Using The Processor
(ensure that IR Mode is selected in the Master Volume block). Pressing the knob moves into preset and source selection mode, as shown in the following flowchart. miniDSP Ltd, Hong Kong / www.minidsp.com / Features and specifications subject to change without prior notice... -
Page 37: Infrared Remote Control
Many standard and programmable remote control units can be used with the 10x10 Hd. Instead of adding another remote to your collection, the 10x10 Hd can “learn” the control codes of your current remote if it supports one of the following remote control codes: ... -
Page 38: Acoustic Measurement
COUSTIC MEASUREMENT To obtain best results from your miniDSP audio processor, acoustic measurement will be required. This section provides a brief introduction. 6.1 W HAT IS ACOUSTIC MEASUREMENT An audio system has a frequency response, which includes the response of the electronics, the loudspeaker, and the listening room. -
Page 39: Performing Acoustic Measurements
6.3 P ERFORMING ACOUSTIC MEASUREMENTS We suggest a miniDSP UMIK-1 calibrated USB measurement microphone. The UMIK-1 provides an extremely cost-effective acoustic measurement solution. Simply connect the UMIK-1 to a USB port on your computer. You can also use another measurement microphone connected via a USB soundcard (for example). Make sure that the microphone you use is specified for acoustic measurement purposes. -
Page 40: Adjusting Equalizer Settings
For more detailed information on these topics, please see our extensive collection of application notes on acoustic measurement digital crossovers. And always feel free to ask a question on our forum! miniDSP Ltd, Hong Kong / www.minidsp.com / Features and specifications subject to change without prior notice... -
Page 41: Kit Documentation
IT DOCUMENTATION The miniDSP 8x8 Kit is a bare circuit board that can be incorporated into your own chassis and combined with other electronics components. 7.1 B OARD LAYOUT AND FEATURES 5 pin USB port for +12V DC in, ADC volume control... -
Page 42: Dc Power Connectivity
7.2 DC POWER CONNECTIVITY The miniDSP 8x8 requires a 12V DC regulated power supply of at least 1.5A (18W). Power is supplied via a Phoenix terminal block connector. Be careful to apply the correct polarity to the terminal block connector as below. -
Page 43: Master Volume Control Potentiometer
A single potentiometer can be connected to multiple 8x8 Kit boards. This allows master volume control of eight or more output channels. -
Page 44: Front Panel Usb Port
They provide volume and infrared remote control and digital input/output respectively. For information on how to connect them to the 8x8 board, please see this application note: http://www.minidsp.com/images/documents/DIGI-FP + VOL-FP connectivity.pdf miniDSP Ltd, Hong Kong / www.minidsp.com / Features and specifications subject to change without prior notice... -
Page 45: Additional Information
Power supply Universal 12 VDC single supply, 2.1 mm center-positive (supplied) Dimensions (H x W x D) 41.5 x 429 x 252 mm; 1RU height miniDSP Ltd, Hong Kong / www.minidsp.com / Features and specifications subject to change without prior notice... -
Page 46: Balanced Wiring Tips
(RCA) connection. The connection scheme is shown below. Note that the cable shield must be connected to the ‘−’ terminal on the input side, whereas on the output side, the ‘−’ terminal is not connected. miniDSP Ltd, Hong Kong / www.minidsp.com... -
Page 47: Troubleshooting
Check the output meter and ensure that you are not overloading the outputs. If necessary, reduce the output gain miniDSP Ltd, Hong Kong / www.minidsp.com / Features and specifications subject to change without prior notice... - Page 48 Confirm the file format of your file (.xml). Cannot reload a configuration Confirm the version of the file. miniDSP Ltd, Hong Kong / www.minidsp.com / Features and specifications subject to change without prior notice...
-
Page 49: Mcu Firmware Update
IS IN PROGRESS. DOING SO MAY “BRICK” YOUR PROCESSOR. 8.5 O BTAINING SUPPORT 1. Check the forums on miniDSP.com to see if this issue has already been raised and a solution provided. 2. Contact miniDSP via the support portal at minidsp.desk.com with: a.
Need help?
Do you have a question about the 10X10 HD and is the answer not in the manual?
Questions and answers