Table of Contents
Advertisement
Advertisement
Table of Contents

Related Manuals for Carson zOrb


Summary of Contents for Carson zOrb
- Page 1 53x Digital Microscope User Guide MM-480...
-
Page 2: Table Of Contents
Table of Contents Important information..........Product description............ Computer requirements..........Windows based PC..........Mac OS based PC..........Package contents............Product overview ............Product specification ..........Operation................Connecting the device............Starting the Digital Viewer software........Windows based PC........... Mac OS based PC.......... - Page 3 Focusing.............. Using the Digital Viewer software........System settings menu ........... Device setup ............ Timed shot setup ..........Movie setup ............. Save setting ............. Language setting ..........
-
Page 4: Important Information
Important information Please read this instruction manual carefully before using this product, and retain this instruction for future reference. Improvements and changes to this text necessitated by typographical errors, or improvements to the software and/or equipments may be made at any time without notice. Product description This product is a USB powered device which magnifies specimens to 53x on a 21"... -
Page 5: Computer Requirements
Computer requirements Windows based PC Compatible operating Windows XP SP2, SP3 systems Windows Vista (32 bit or 64 bit) Windows 7 (32 bit or 64 bit) Windows 8 (32 bit or 64 bit) Windows 8.1 CPU Speed P4-1.8GHz or above 512 MB or above Hard disk 800 MB or above... -
Page 6: Package Contents
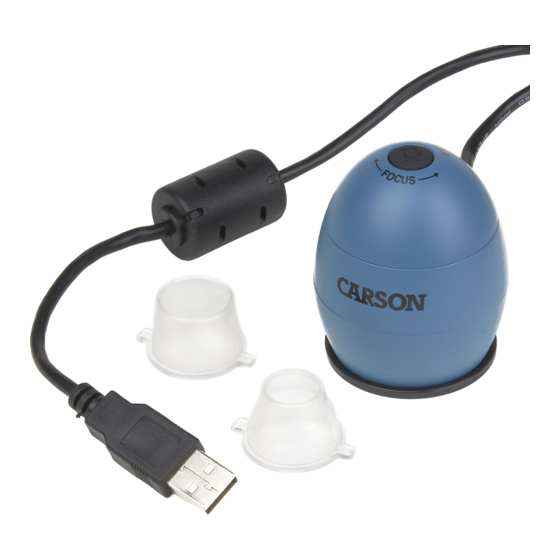
Package contents 1. Digital Microscope 2. Adapter for face/scalp 3. Adapter for nose/ears... -
Page 7: Product Overview
Product overview 1. Shutter Button 2. Focusing Ring 3. Lens 4. LED Illumination 5. Adapter slot 6. USB Cable... -
Page 8: Product Specification
Product specifications Optical Specifications Power Ratings Physical Property... -
Page 9: Operation
Operation To view the images clearly, please use one of the adaptors provided. Choose an adaptor, place it into the adaptor slot located under the main body. Lock by turning in clockwise direction. -
Page 10: Connecting The Device
Connecting the device Connect the device to the computer using the USB cable provided. The LED light will turn on indicating that the device is powered on. When the device is connected to the computer for the first time, a driver will automatically be installed by Windows or Mac OS. -
Page 11: Focusing
Focusing Rotate the focusing ring clockwise or counterclockwise until the viewing image shown on the monitor is clear and sharp. To capture an image, press the shutter button on top of the zOrb. -
Page 12: Using The Digital Viewer Software
Using the Digital Viewer software The following buttons are available: Clicking this will open the system settings menu (see next section). Clicking this will capture the on screen image of the device. Clicking this will activate or deactivate the timed shot feature. When activated, images will be captured at a regular interval. -
Page 13: System Settings Menu
System settings menu The first time the Digital Viewer software is started, the default settings will be loaded, you may change these settings manually in the system settings menu. -
Page 14: Device Setup
Device setup If the image captured by the Digital Microscope was not displayed by default, you can change this by selecting it from the "Device" drop-down menu. The resolution of images you capture can be changed from the "Resolution" drop-down menu. Timed shot setup The frequency and duration of automatic images capture can be adjusted under this option. -
Page 15: Advanced Settings
Advanced settings By clicking the "More..." button on the right of the system settings menu, you will be able to manually adjust all of the image settings. Note that the settings available may be different, depending on your operating system. Saved files With the Digital Viewer application software opened, you can locate the saved files folder by clicking the "More..."... -
Page 16: Full Screen
Full screen To activate the full screen mode, click the full screen button located on the bottom right hand corner of the Digital Viewer application software window. To exit full screen mode, either double click on the screen, or press the “Esc” button on the keyboard. Care and maintenance Keep the device dry and protect it from water or vapour. -
Page 17: Warning
Do not attempt to open or dismantle the Digital Microscope. CARSON ONE YEAR LIMITED WARRANTY This Carson product is warranted to be free from defects in material and workmanship for a period of one year from date of purchase. During this period Carson will, at... -
Page 18: Warranty Procedure
Print the RA number prominently on the top of the package. Prepay shipping. Insure the package. Send it to Carson Warranty Service, 2070 5th Ave., Ronkonkoma NY 11779. Merchandise must be shipped prepaid. Carson will not accept merchandise C.O.D.
Need help?
Do you have a question about the zOrb and is the answer not in the manual?
Questions and answers