Cisco ASA 5510 Quick Start Manual
Adaptive security appliance asa 5500 series
Hide thumbs
Also See for Cisco ASA 5510:
- Cli configuration manual (2164 pages) ,
- Configuration manual (1822 pages) ,
- Getting started manual (208 pages)
Table of Contents
Advertisement
Quick Links
Cisco ASA 5500 Series Adaptive Security Appliance
Quick Start Guide
1
Verifying the Package Contents
2
Installing the Cisco ASA 5500 Series Adaptive Security Appliance
3
Configuring the Cisco ASA 5500 Series Adaptive Security Appliance
4
Common Configuration Scenarios
5
Optional SSM Setup and Configuration Procedures
6
Optional Maintenance and Upgrade Procedures
Quick Start Guide
Quick Start Guide
Advertisement
Table of Contents

Related Manuals for Cisco Cisco ASA 5510


Summary of Contents for Cisco Cisco ASA 5510
- Page 1 Cisco ASA 5500 Series Adaptive Security Appliance Quick Start Guide Verifying the Package Contents Installing the Cisco ASA 5500 Series Adaptive Security Appliance Configuring the Cisco ASA 5500 Series Adaptive Security Appliance Common Configuration Scenarios Optional SSM Setup and Configuration Procedures...
-
Page 2: About This Document
About This Document This document describes how to install and configure the Cisco ASA 5510, 5520, and 5540 adaptive security appliance to be used in VPN, DMZ, remote-access, and intrusion protection deployments. When you have completed the procedures outlined in this document, the adaptive security appliance will be running a robust VPN, DMZ, or remote-access configuration appropriate for most deployments. -
Page 3: Verifying The Package Contents
Verifying the Package Contents Verify the contents of the packing box to ensure that you have received all items necessary to install your Cisco ASA 5500 series adaptive security appliance. Cisco ASA 5500 adaptive security appliance FL AS H LIN K... - Page 4 Statement 1071 Be sure to read the safety warnings in the Regulatory Compliance and Safety Information Caution for the Cisco ASA 5500 Series and follow proper safety procedures when performing these steps. Warning To prevent bodily injury when mounting or servicing this unit in a rack, you must take special precautions to ensure that the system remains stable.
-
Page 5: Rack Mounting The Chassis
Use the following guidelines when installing the adaptive security appliance in a rack: Allow clearance around the rack for maintenance. • When mounting a device in an enclosed rack, ensure adequate ventilation. An enclosed rack • should never be overcrowded. Each unit generates heat. When mounting a device in an open rack, make sure that the rack frame does not block the intake •... -
Page 6: Connecting The Interface Cables
Figure 2 Rack Mounting the Chassis CI SC O AS A 55 PO WE R Ad ap tiv ST AT US SE RIE e Se cur AC TI VE ity Ap pli VP N an ce FL AS H Connecting the Interface Cables To connect the interface cables, perform the following steps: Connect a computer or terminal to the adaptive security appliance for management access. - Page 7 Connect the RJ-45 connector of the blue console cable to the Console port on the rear panel Step 3 of the adaptive security appliance. (See Figure 3.) Connect the DB-9 connector of the blue cable to the serial port on your computer or terminal. Step 4 Figure 3 Connecting the Chassis Console Cable...
-
Page 8: About The Factory Default Configuration
Obtaining DES and 3DES/AES Encryption Licenses, page 52. About the Factory Default Configuration Cisco adaptive security appliances are shipped with a factory-default configuration that enables quick startup. This configuration meets the needs of most small and medium business networking environments. -
Page 9: About The Adaptive Security Device Manager
About Configuration from the Command-Line Interface In addition to the ASDM web configuration tool, you can configure the adaptive security appliance by using the command-line interface. For more information, see the Cisco Security Appliance Command Line Configuration Guide and the Cisco Security Appliance Command Reference. - Page 10 To use the Startup Wizard to set up a basic configuration for the adaptive security appliance, perform the following steps: If you have not already done so, complete one of the following steps: Step 1 If you have an ASA 5520 or 5540, connect the inside GigabitEthernet0/1 interface to a •...
-
Page 11: Common Configuration Scenarios
After ASDM starts, choose the Startup Wizard from the Wizards menu at the top of the Step 7 window. Follow the instructions in the Startup Wizard to set up your adaptive security appliance. Step 8 For information about any field in the Startup Wizard, click Help at the bottom of the window. - Page 12 Figure 4 Network Layout for DMZ Configuration Scenario ASA security appliance HTTP client Inside Outside HTTP client Internet 10.10.10.0 209.165.200.225 10.10.10.10 10.30.30.0 HTTP client Web server 10.30.30.30 Because the DMZ web server is located on a private DMZ network, it is necessary to translate its private IP address to a public (routable) IP address.
- Page 13 Step 1: Configure IP Pools for Network Translations. For an inside HTTP client (10.10.10.10) to access the web server on the DMZ network (10.30.30.30), it is necessary to define a pool of IP addresses (10.30.30.50–10.30.30.60) for the DMZ interface. Similarly, an IP pool for the outside interface (209.165.200.225) is required for the inside HTTP client to communicate with any device on the public network.
- Page 14 Click Manage Pools at the bottom of the ASDM window. The Manage Global Address Pools dialog box appears, allowing you to add or edit global address pools. For most configurations, global pools are added to the less secure, or public, interfaces. Note In the Manage Global Address Pools dialog box: Choose the dmz interface (configured using the Startup Wizard before beginning this...
- Page 15 Click Add. The Add Global Pool Item dialog box appears. In the Add Global Pool Item dialog box: Choose dmz from the Interface drop-down menu. Click Range to enter the IP address range. Enter the range of IP addresses for the DMZ interface. In this scenario, the range is 209.165.200.230 to 209.165.200.240.
- Page 16 When the Add Global Pool Item dialog box appears: Choose outside from the Interface drop-down menu. Click Port Address Translation (PAT) using the IP address of the interface. Assign the same Pool ID for this pool as you did in Step 6d. (For this scenario, the Pool ID is 200.) Click OK.
- Page 17 Step 2: Configure Address Translations on Private Networks. Network Address Translation (NAT) replaces the source IP addresses of network traffic exchanged between two interfaces on the adaptive security appliance. This translation permits routing through the public networks while preventing internal IP addresses from being exposed on the public networks. Port Address Translation (PAT) is an extension of the NAT function that allows several hosts on a private network to map into a single IP address on the public network.
- Page 18 Choose 255.255.255.224 from the Mask drop-down menu. Select the DMZ interface from the Translate Address on Interface drop-down menu. Click Dynamic in the Translate Address To section. Choose 200 from the Address Pools drop-down menu for the Pool ID. Click OK A dialog box appears asking if you want to proceed.
- Page 19 Step 3: Configure External Identity for the DMZ Web Server. The DMZ web server needs to be easily accessible by all hosts on the Internet. This configuration requires translating the web server’s IP address so that it appears to be located on the Internet, enabling outside HTTP clients to access it unaware of the adaptive security appliance.
- Page 20 Step 4: Provide HTTP Access to the DMZ Web Server. By default, the adaptive security appliance denies all traffic coming in from the public network. You must create access control rules on the adaptive security appliance to allow specific traffic types from the public network through the adaptive security appliance to resources in the DMZ.
- Page 21 Specify the type of traffic that you want to permit. HTTP traffic is always directed from any TCP source port number toward a fixed Note destination TCP port number 80. Click TCP under Protocol and Service. Under Source Port, choose “=” (equal to) from the Service drop-down menu. Click the button labeled with ellipses (...), scroll through the options, and then choose Any.
- Page 22 Click OK For additional features, such as logging system messages by ACL, click More Options Note at the top at the top of the screen. You can provide a name for the access rule in the dialog box at the bottom. Verify that the information you entered is accurate, and then click OK Although the destination address specified is the private address of the DMZ web Note...
- Page 23 Scenario 2: Remote Access VPN A remote-access Virtual Private Network (VPN) enables you to provide secure access to off-site users. ASDM enables you to configure the adaptive security appliance to create secure connections, or tunnels, across the Internet. Figure 5 shows an adaptive security appliance configured to accept requests from and establish secure connections with VPN clients over the Internet.
- Page 24 In Step 1 of the VPN Wizard, complete the following steps: Select the Remote Access VPN option. From the drop-down menu, choose outside as the enabled interface for the incoming VPN tunnels. Click Next to continue.
- Page 25 Step 2: Select VPN clients. In Step 2 of the VPN Wizard, click the radio button to allow remote access users to connect to the adaptive security appliance using either a Cisco VPN client or any other Easy VPN Remote products.
- Page 26 Specify the type of authentication that you want to use by performing one of the following steps: To use static pre-shared keys for authentication, click Pre-Shared Key, and enter a key (such – as "CisCo"). To use digital certificates for authentication, click Certificate, choose the Certificate Signing –...
- Page 27 Step 4: Specify a user authentication method. Users can be authenticated either by a local authentication database or by using external authentication, authorization, and accounting (AAA) servers (RADIUS, TACACS+, SDI, NT, and Kerberos). In Step 4 of the VPN Wizard, complete the following steps: Click the appropriate radio button to specify the type of user authentication that you want to use: A local authentication database –...
- Page 28 Step 5: Configure user accounts, if necessary. If you chose to authenticate users with a local user database, create individual user accounts in Step 5 of the VPN Wizard. To add a new user, enter a username and password, then click Add. When you have finished adding new users, click Next to continue.
- Page 29 Step 6: Configure address pools. For remote clients to gain access to your network, it is necessary to configure a pool of IP addresses that can be assigned to remote VPN clients as they are successfully connected. In this scenario, the pool is configured to use the range of IP addresses 209.165.201.1 to 209.166.201.20.
- Page 30 Step 7: Configure client attributes. To access your network, each remote access client needs basic network configuration information, such as which DNS and WINS servers to use and the default domain name. Rather than configuring each remote client individually, you can provide the client information to ASDM. The adaptive security appliance pushes this information to the remote client when a connection is established.
-
Page 31: Step 8: Configure The Ike Policy
Step 8: Configure the IKE Policy. IKE is a negotiation protocol that includes an encryption method to protect data and ensure privacy; it is also an authentication method to ensure the identity of the peers. In most cases, the ASDM default values are sufficient to establish secure VPN tunnels. - Page 32 Step 9: Configure IPSec Encryption and Authentication parameters. Choose the Encryption algorithm (DES/3DES/AES) and authentication algorithm (MD5/SHA). Click Next to continue. Step 10: Address translation exception and split tunneling. The adaptive security appliance uses Network Address Translation (NAT) to prevent internal IP addresses from being exposed externally.
- Page 33 In Step 10 of the VPN Wizard, add or remove hosts, groups, and networks dynamically from the Selected panel. Click Add or Delete, as appropriate. Enable split tunneling by checking the radio button at the bottom of the screen. Split Note tunneling allows traffic outside the configured networks to be sent out directly to the Internet instead of over the encrypted VPN tunnel.
- Page 34 Step 11: Verify the remote access VPN configuration. Review the configuration attributes for the VPN tunnel you just created. The displayed configuration should be similar to the following: If you are satisfied with the configuration, click Finish to complete the Wizard and apply the configuration changes to the adaptive security appliance.
- Page 35 Scenario 3: Site-to-Site VPN Configuration Site-to-site VPN (Virtual Private Networking) features provided by the adaptive security appliance enable businesses to extend their networks across low-cost public Internet connections to business partners and remote offices worldwide while maintaining their network security. A VPN connection enables you to send data from one location to another over a secure connection, or “tunnel,”...
- Page 36 Step 1: Configure the adaptive security appliance at the first site. Configure the adaptive security appliance at the first site, which in this scenario is ASA security appliance 1, from this point forward referred to as ASA 1. Launch ASDM by entering the factory default IP address in the address field of a web browser: https://192.168.1.1/admin/.
- Page 37 From the drop-down menu, choose outside as the enabled interface for the current VPN tunnel. Click Next to continue. Step 2: Provide information about the VPN peer. The VPN peer is the system on the other end of the connection that you are configuring, usually at a remote site.
- Page 38 Specify the type of authentication that you want to use by performing one of the following steps: To use a pre-shared key for authentication (for example, “CisCo”), click the Pre-Shared Key – radio button, and enter a pre-shared key, which is shared for IPSec negotiations between both adaptive security appliances.
- Page 39 Step 3: Configure the IKE Policy. IKE is a negotiation protocol that includes an encryption method to protect data and ensure privacy; it is also an authentication method to ensure the identity of the peers. In most cases, the ASDM default values are sufficient to establish secure VPN tunnels between two peers.
- Page 40 Step 4: Configure IPSec Encryption and Authentication parameters. Choose the Encryption algorithm (DES/3DES/AES) and authentication algorithm (MD5/SHA). Click Next to continue. Step 5: Specify Local Hosts and Networks. Identify hosts and networks at the local site to be allowed to use this IPSec tunnel to communicate with the remote-site peers.
- Page 41 On page 5 of the VPN Wizard, specify a local host or network to be allowed access to the IPSec tunnel. Perform the following steps: Click IP Address. Specify whether the interface is inside or outside by choosing an interface from the drop-down menu.
- Page 42 Step 6: Specify Remote Hosts and Networks. Identify hosts and networks at the remote site to be allowed to use this IPSec tunnel to communicate with the local hosts and networks you identified in Step 5. Add or remove hosts and networks dynamically by clicking Add or Delete respectively.
-
Page 43: What To Do Next
Step 7: View VPN Attributes and Complete Wizard. Review the configuration list for the VPN tunnel you just created. If you are satisfied with the configuration, click Finish to apply the configuration changes to the adaptive security appliance. This concludes the configuration process for ASA 1. What to Do Next You have just configured the local adaptive security appliance. -
Page 44: Optional Ssm Setup And Configuration Procedures
Optional SSM Setup and Configuration Procedures The adaptive security appliance supports optional security service modules (SSMs) that plug into the chassis and provide additional functionality. This section describes setup and configuration procedures for the 4GE SSM and the AIP SSM. 4GE SSM Procedures The 4GE Security Services Module (SSM) has eight Ethernet ports: four 10/100/1000 Mbps, copper, RJ-45 ports and four 1000 Mbps, small form-factor pluggable (SFP) fiber ports. - Page 45 Figure 7 Connecting the Ethernet port L N K S P D C is c o C is c o S S M -4 S S M -4 RJ-45 (Ethernet) port Connect the other end of the cable to your network device. (Optional) If you want to use an SFP (fiber optic) port, install and cable the SFP modules as Step 2 shown in Figure 8:...
- Page 46 Figure 8 Connecting the LC Connector L N K S P D C is c o S S M -4 LC connector SFP module Connect the other end of the LC connector to your network device. After you have attached any SFP ports to your network devices, you must also change the media type setting for each SFP interface.
- Page 47 Because the IPS software that runs on the AIP SSM provides many features and is beyond the scope of this document, detailed configuration information is available in the following separate documentation: Configuring the Cisco Intrusion Prevention System Sensor Using the Command Line Interface • Cisco Intrusion Prevention System Command Reference...
- Page 48 To specify the traffic to be diverted to the AIP SSM, add a class map using the class-map Step 1 command. For more information, see Using Modular Policy Framework in the Cisco Security Appliance Command Line Configuration Guide.
- Page 49 To add or edit a policy map that sets the actions to take with the class map traffic, enter the Step 2 following command: hostname(config)# policy-map name To identify the class map from Step 1 to which you want to assign an action, enter the Step 3 following command: hostname(config-pmap)# class class_map_name...
-
Page 50: Step 3: Sessioning To The Aip Ssm And Running Setup
Opening command session with slot 1. Connected to slot 1. Escape character sequence is 'CTRL-^X'. Enter the username and password. The default username and password are both cisco. Step 2 The first time you log in to the AIP SSM you are prompted to change the default Note password. - Page 51 You are now ready to configure the AIP SSM for intrusion prevention. See the following guides for AIP SSM configuration information: Configuring the Cisco Intrusion Prevention System Sensor Using the Command Line Interface • Cisco Intrusion Prevention System Command Reference...
-
Page 52: Optional Maintenance And Upgrade Procedures
If you are a registered user of Cisco.com and would like to obtain license, go to the following website: http://www.cisco.com/cgi-bin/Software/FormManager/formgenerator.pl If you are not a registered user of Cisco.com, go to the following website: http://www.cisco.com/pcgi-bin/Software/FormManager/formgenerator.pl Provide your name, e-mail address, and the serial number for the adaptive security appliance as it appears in the show version command output. -
Page 53: Restoring The Default Configuration
See the Cisco Security Appliance Command Line Configuration Guide for detailed command information and configuration examples: The Cisco TAC website is available to all customers who need technical assistance. To access the TAC website, go to this URL: http://www.cisco.com/tac... -
Page 54: Checking The Leds
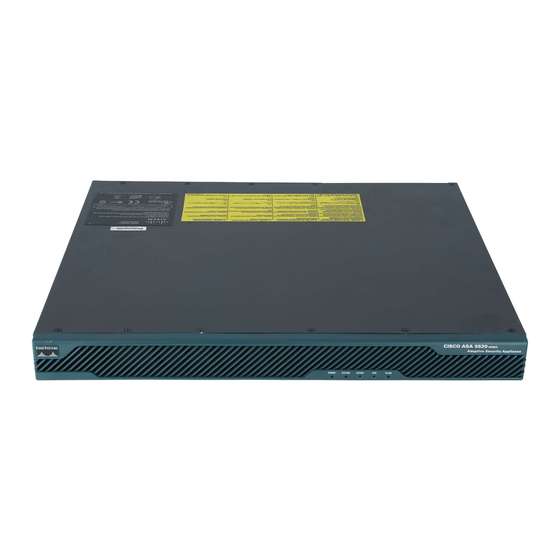
This section describes the front, rear, and the panel LEDs for the adaptive security appliance. Figure 10 shows the front view of the adaptive security appliance. Figure 10 Cisco ASA 5540 Adaptive Security Appliance Front Panel Features CISCO ASA 5540 SERIES Adaptive Security Appliance... - Page 55 Figure 11 shows the rear panel features for the adaptive security appliance. Figure 11 Cisco ASA 5540 Adaptive Security Appliance Rear Panel Features FLASH LINK SPD LINK SPD LINK SPD LINK SPD 10 12 1 MGMT Power indicator 2 External CompactFlash device...
-
Page 56: Obtaining Documentation
100 Mbps Amber 1000 Mbps Obtaining Documentation Cisco documentation and additional literature are available on Cisco.com. Cisco also provides several ways to obtain technical assistance and other technical resources. These sections explain how to obtain technical information from Cisco Systems. Cisco.com You can access the most current Cisco documentation at this URL: http://www.cisco.com/univercd/home/home.htm... -
Page 57: Ordering Documentation
Ordering Documentation You can find instructions for ordering documentation at this URL: http://www.cisco.com/univercd/cc/td/doc/es_inpck/pdi.htm You can order Cisco documentation in these ways: Registered Cisco.com users (Cisco direct customers) can order Cisco product documentation from • the Ordering tool: http://www.cisco.com/en/US/partner/ordering/ Nonregistered Cisco.com users can order documentation through a local account representative •... -
Page 58: Reporting Security Problems In Cisco Products
Register to receive security information from Cisco. • A current list of security advisories and notices for Cisco products is available at this URL: http://www.cisco.com/go/psirt If you prefer to see advisories and notices as they are updated in real time, you can access a Product Security Incident Response Team Really Simple Syndication (PSIRT RSS) feed from this URL: http://www.cisco.com/en/US/products/products_psirt_rss_feed.html... -
Page 59: Cisco Technical Support Website
URL: http://www.cisco.com/techsupport/servicerequest For S1 or S2 service requests or if you do not have Internet access, contact the Cisco TAC by telephone. (S1 or S2 service requests are those in which your production network is down or severely degraded.) Cisco TAC engineers are assigned immediately to S1 and S2 service requests to help keep your business operations running smoothly. -
Page 60: Definitions Of Service Request Severity
Definitions of Service Request Severity To ensure that all service requests are reported in a standard format, Cisco has established severity definitions. Severity 1 (S1)—Your network is “down,” or there is a critical impact to your business operations. You and Cisco will commit all necessary resources around the clock to resolve the situation. - Page 61 Magazine is the quarterly publication from Cisco Systems designed to help growing companies • learn how they can use technology to increase revenue, streamline their business, and expand services. The publication identifies the challenges facing these companies and the technologies to help solve them, using real-world case studies and business strategies to help readers make sound technology investment decisions.
- Page 62 Slovakia • Slovenia • South Africa • Spain • Sweden • Switzerland • Taiwan • Thailand • Turkey • Ukraine • United Kingdom • United States • Venezuela • Vietnam • Zimbabwe CCSP, CCVP, the Cisco Square Bridge logo, Follow Me Browsing, and StackWise are trademarks of Cisco Systems, Inc.; Changing the Way We Work, Live, Play, and Learn, and iQuick Study are service marks of Cisco Systems, Inc.;...
Need help?
Do you have a question about the Cisco ASA 5510 and is the answer not in the manual?
Questions and answers