Table of Contents
Advertisement
Advertisement
Table of Contents

Related Manuals for InFocus IN112x


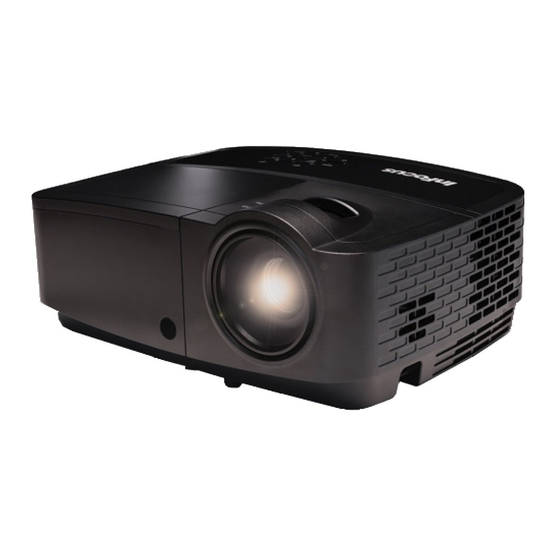
Summary of Contents for InFocus IN112x
- Page 2 This document applies to regulatory models IN112x, IN114x, IN116x, IN118HDx, environmental authority or ask the shop where you purchased the product for IN118HDxc, IN119HDx, IN119HDxc. collection or recycling options. Input ratings: 100-240Vac, 2.6A, 50-60Hz InFocus reserves the right to alter product offerings and specifications at any time without notice.
-
Page 3: Table Of Contents
Table of Contents Introduction Positioning the projector Connecting a computer source VGA connection Connecting power Optional computer connections Displaying an image Adjusting the image Connecting a video device Video device connections HDMI connection Composite video connection VGA connection Component video connection S-video connection Audio Shutting down the projector... - Page 4 • Refer to this guide for proper startup and shutdown procedures. • Only genuine InFocus lamps are tested for use in this projector. Use of non • Follow all warnings and cautions in this manual and on the projector. InFocus lamps may cause electrical shock and fire, and may void the projector •...
-
Page 5: Introduction
It is a versatile projector that is flexible enough for business presentations zoom and home video viewing too. The IN112x has native SVGA 800 x 600 resolution, the IN114x has native XGA 1024 x 768 resolution, the IN116x has native WXGA 1280 x 800 resolution, and the IN118HDx/IN118HDxc/IN119HDx/IN119HDxc have native 1080p 1920 x 1080 resolution. - Page 6 Connector panel IN112x/IN114x/IN116x/IN118HDx/IN119HDx The projector provides both computer and video connection options. S-video RS232 IN112x/IN114x/IN116x/IN118HDx/IN119HDx: computer HDMI audio in/out • VGA computer (2) • Composite video • HDMI • S-video • USB connector for firmware upgrades, mouse control and Screen Save mode.
-
Page 7: Positioning The Projector
InFocus approved ceiling mounts for proper fitting, ventilation and installation. 80”/2.0m 64”/1.6m 122”/3.1m 134”/3.4m Refer to the installation guide that comes with the InFocus Ceiling Mount Kit (p/n 100”/2.5m 80”/2.0m 152”/3.9m 167”/4.3m PRJ-MNT-UNIV) for more information. The warranty does not cover any damage 150”/3.8m... - Page 8 Table 4: IN118HDxc/IN119HDxc (1080p) Screen size Throw Ratio = 1.4 to 1.7 Size of the Distance to screen Diagonal Screen Projected Image Size (inches/m) Width Minimum distance Maximum distance (inches/m) (inches/m) (inches/m) 40”/1.0m 43”/1.1m 60”/1.5m 73”/1.9m 60”/1.5m 64”/1.6m 90"/2.3m 109”/2.8m 80”/2.0m 85”/2.2m 120”/3.0m...
-
Page 9: Connecting A Computer Source
Connecting a computer source connect VGA cable VGA connection Connect one end of the provided computer cable to th Computer 1/Computer 2 connector on the projector and the other to the VGA connector on your computer. If you are using a desktop computer, you will need to disconnect the monitor cable from the computer’s video port first. -
Page 10: Displaying An Image
Displaying an image press Power button Press the Power button. The Power LED blinks green, and the fans start to run. When the lamp comes on, the start up screen displays and the Power LED turns solid green. It can take up to a minute for the image to achieve full brightness. -
Page 11: Adjusting The Image
Adjusting the image adjust height If necessary, adjust the height of the projector by rotating the elevator foot to extend the foot. elevator foot If necessary, rotate the leveling foot located at the rear of the projector. Avoid placing your hands near the hot exhaust vent at the front of the projector. adjust distance Position the projector the desired distance from the screen at a 90 degree angle to the screen. -
Page 12: Connecting A Video Device
Plug the other connector into the S-Video connector on the projector. NOTE: Not available on the IN118HDxc or IN119HDxc. Video device connections No video cables are provided with the projector. You can order cables from InFocus Audio or provide your own. -
Page 13: Shutting Down The Projector
Shutting down the projector Table 5: Status Indicator Lights Auto Off Time The projector also has an Auto Off Time feature that automatically turns the Operational Mode Status Indicator Lights projector off after no active sources are detected and no user interaction with the projector is performed for 30 minutes. - Page 14 Problem Solution Result No start up screen Correct image Plug power cord into the projector press the Power button Press the SOURCE button Computer image projected Only start up screen appears activate laptop’s external port Restart laptop...
- Page 15 Problem Solution Result Press the Auto Image button on remote Computer image projected No computer image, just the words “Signal out of Adjust computer refresh rate (Windows 7: Control range” Panel > Display > Screen Resolution > Advanced Settings > Adapter tab). Varies per operating system. You may also need to set a different resolution on your computer, as shown in the following problem, “image fuzzy or cropped”...
- Page 16 Problem Solution Result Change the computer's "Resolution" setting to match Image fuzzy or cropped Image clear and not cropped the projector's resolution (Windows 7: Control Panel > Display > Screen Resolution). Varies per operating system. Move projector, adjust height Correct image Image not centered on screen Adjust horizontal or vertical position in...
- Page 17 Problem Solution Result Image not square Adjust Keystone on keypad Square image Adjust Sharpness in the Basic Menu Image not sharp Correct image Correct image Change aspect ratio to 4:3 or 16:9 in Basic Menu > Image does not fit 4:3 or 16:9 screen Aspect Ratio menu...
- Page 18 Problem Solution Result Turn off Ceiling Mount in Basic menu Correct image Image upside down Turn off Rear Project in Advanced Menu > Setup > Correct image Image reversed left to right Image Setup... menu Adjust the items in the Advanced Menu > Image > Projected colors don’t match source Correct image Color...
- Page 19 Problem Solution Result Turn off the internal LCD display on your laptop The video embedded in my PowerPoint Embedded video plays correctly presentation does not play on the screen Make sure vents aren’t blocked, turn off the projector Lamp turns on Lamp won’t turn on, the projector is overheating and allow it to cool for one minute Overheating...
- Page 20 Still need assistance? If you need assistance, visit our website at www.infocus.com/support or call us. See the Quick Start Guide for support contact information. This product is backed by a limited warranty. An extended warranty plan may be purchased from your dealer.
-
Page 21: Using The Remote Control
Using the remote control • Auto Image button to resynch the projector to the source. • Resize button to switch among aspect ratios (see page 26). The remote uses two (2) AAA batteries (not provided). They are easily installed by •... -
Page 22: Using The Audio
Using the audio connect audio cable Using the projector’s speakers Connect the audio source to the Audio 1/Audio 2 connectors to hear audio through the projector speakers. Amplified speakers may also be connected to the projector using the Audio Out connector. -
Page 23: Using The Keypad Buttons
Using the keypad buttons Most buttons are described in detail in other sections, but here is an overview of their functions: Power–turns the projector on and off (page 9). Right arrow - When the menu is displayed, the right arrow button navigates through the menu. -
Page 24: Optimizing Computer Images
Optimizing computer images Presentation features Several features are provided to make giving presentations easier. Here is an After the projector is running and the image is on the screen, you can optimize the overview, details are found in the menu section. image using the onscreen menus. -
Page 25: Optimizing Video Images
Optimizing video images Customizing the projector You can customize the projector for your specific setup and needs. See page 28 for After your video device is connected properly and the image is on the screen, you details on these features. can optimize the image using the onscreen menus. -
Page 26: Using The Menus
Using the menus To open the menus, press the Menu button on the keypad or remote. (The menus automatically close after 60 seconds if no buttons are pressed.) Use the keypad navigation buttons arrow buttons to move up and down to review the menu options. To enter a submenu, highlight the desired submenu and press >... -
Page 27: Basic Menu
Basic Menu Basic Menu To adjust the following settings, highlight the setting, use the right and left arrows to adjust the values. Aspect Ratio: Aspect ratio is the ratio of the image width to image height. TV screens are usually 4:3. HDTV and most DVDs are 16:9. Select Auto to have the projector choose the ratio. -
Page 28: Advanced Menu
Advanced Menu Red/Green/green Offset: adjusts the offset of the red, green or green channel of the image. Advanced Menu Color Space: applies to computer and component video sources. It allows you to select a color space that has been specifically tuned for the input signal. When Auto is selected, the projector automatically determines the standard. - Page 29 Setup: Custom Key: allows you to assign a different function to the Custom button, allowing you to quickly and easily use the effect. Highlight an effect and press Audio Setup... ^ or v on the keypad or Select on remote to choose a different one. Internal Speaker: turns the internal speaker on or off.
- Page 30 Source enter an incorrect PIN 3 times in succession, the projector will automatically menu. shut down. If you lose or forget your custom PIN, contact InFocus Technical Support. Power-up Source: determines which source the projector checks first for active video during power-up.
- Page 31 Timer Auto Off Time: automatically turns the projector off after no signals are detected for a preset number of minutes. If an active signal is received before the projector powers down, the image will be displayed. High Altitude Setting High Altitude: We recommend you turn on the High Altitude Mode when your environment is between 5000' (1500m) and 10,000' (3000m) above sea level.
-
Page 32: Maintenance
Maintenance Cleaning the lens Apply a non-abrasive camera lens cleaner to a soft, dry cloth. • Projector must be off and the lens must be at room temperature. • Avoid using an excessive amount of cleaner, and don’t apply the cleaner directly to the lens. -
Page 33: Replacing The Projection Lamp
• You can order new lamps from www.infocus.com (in select areas), your retailer or your dealer. Only genuine InFocus lamps are tested for use in this projector. Use of non InFocus lamps may cause electrical shock and fire, and may void the projector warranty. InFocus is not liable for the performance, safety or certification of any other lamps. - Page 34 Turn off the projector and unplug the power cord. turn off and unplug wait 60 minutes Wait 60 minutes to allow the projector to cool thoroughly. projector Remove the lamp door, located on top of the projector, by removing the screw on the side of the lamp door, sliding the door right, and lifting the lamp door off.
- Page 35 Computer 1 28 Computer 1/Computer 2 8 Keypad 28 Computer 2 28 Keypad buttons 22 Connecting Keystone 26 Video device 11 Contacting InFocus 19 Lamp Low Power 29 Contrast 26 Customer service contact information 19 Magnify Level 28 Menu Transparency 29...
- Page 36 menu usage 25 Search Screen 29 Mute 28 Service 30 Sharpness 26 Overscan 27, 28 Show Messages 29 Source 28 Phase 27 Source Info 28, 30 PIN Protect 29 Sync Threshold 27 Power connector 8 Power cord 8 Tint 27 Power Saving Mode 29 Tracking 27 Prevent PC Screen Saver 27...
Need help?
Do you have a question about the IN112x and is the answer not in the manual?
Questions and answers
Los botones de mi proyector están bloqueadas y no he podido desbloquearlas.
To unlock the buttons on your InFocus IN112x projector, you need to disable the keypad lock. You can do this through the projector’s menu under Keypad settings. If the keypad is locked, use the remote control to navigate the menu and disable the lock.
This answer is automatically generated