Table of Contents
Advertisement
WIRELESS 433 MHz WEATHER STATION
INTRODUCTION:
Congratulations on purchasing this Weather Station with wireless 433MHz transmission of outdoor temperature
and humidity and display of indoor temperature and humidity. It is further featuring a DCF-77 radio controlled clock
with date display and two alarms. With eight easy to use function keys, this innovative product is ideal for use in the
home or office.
FEATURES:
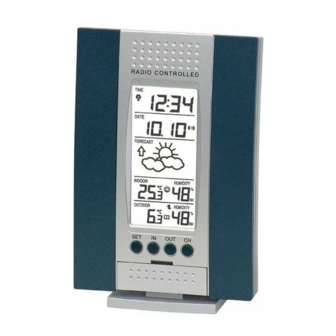
The Weather Station
LCD Display
Function Keys
•
DCF-77 Radio controlled time with manual setting options
•
Time reception ON/OFF
•
12/24 hour display
Instruction Manual
29
Hanging Hole
Battery cover
Detachable stand
Advertisement
Table of Contents

Related Manuals for Technoline WS 7018


Summary of Contents for Technoline WS 7018
- Page 1 WIRELESS 433 MHz WEATHER STATION Instruction Manual INTRODUCTION: Congratulations on purchasing this Weather Station with wireless 433MHz transmission of outdoor temperature and humidity and display of indoor temperature and humidity. It is further featuring a DCF-77 radio controlled clock with date display and two alarms. With eight easy to use function keys, this innovative product is ideal for use in the home or office.
- Page 2 • Hour and minute display, seconds indicated by flashing dot • Time zone option ±12hours • Features 2 alarms with snooze function • Snooze setting • Date and month / weekday and date calendar display selectable • Weather forecasting with 3 weather icons and weather tendency indicator •...
- Page 3 SETTING UP: First, insert the batteries into the Weather station (see “How to install and replace batteries in the Weather station” below). Once the batteries are in place, all segments of the LCD will light up briefly and a short signal tone will sound. Following some test data display, the indoor temperature and humidity, the time as 0:00 the date as 1.1.
- Page 4 no more than 25 meters from where the Weather station will be finally positioned (see notes on “Positioning” and “433 MHz Reception”). If after 10 minutes, the DCF time has not been received, use the SET key to manually enter a time initially The clock will automatically attempt to receive the DCF time at each full hour.
-
Page 5: Battery Change
Note: In the event of changing batteries in any of the units, all units need to be reset by following the setting up procedures. This is because a random security code is assigned by the transmitter at start-up and this code must be received and stored by the Weather station in the first 3 minutes of power being supplied to it. - Page 6 SET key (Setting): • To enter the set mode for the following functions: LCD contrast, Time zone, Time Reception ON/OFF, 12/24 hour display, Manual time, Year, Date, snooze time duration, °C/°F, and Weather forecasting icon sensitivity settings. Note: The year can be displayed in the set mode (not displayed in normal mode) •...
- Page 7 Note: in 24hr time display mode, the month is set by using the OUT key. In 12hr time display mode, the day is set by using the OUT key • To change alarm minute in alarm setting mode • To stop the alarm CH key (Channel) •...
-
Page 8: Lcd Screen
LCD SCREEN: DCF Tower Icon (for time reception) Time Low battery indicator Alarm 1 symbol Calendar Weather Weather Forecast icon Tendency Icon Comfort Indicator Icon Indoor Temperature in °C Indoor Relative Humidity % Outdoor reception signal Outdoor Outdoor Relative Humidity % Temperature in °C Number showing Transmitter unit For better distinctness the LCD screen is split into 5 sections displaying the informations for time, date, weather... - Page 9 LCD1 RADIO CONTROLLED TIME • In normal mode display of radio controlled time. • A reception tower symbol in the upper left hand corner of LCD 1 of the display indicates that the DCF-77 time signal is scanned for (flashing) or received (steady). •...
- Page 10 • By pressing the “OUT” key, display of the stored MIN/MAX outdoor temperature and humidity with simultaneous display of a MIN or MAX symbol in the upper center. • By pressing the “CH” key, display of outdoor sensors (up to three outdoor transmitters) 1, 2 or 3 in the center will indicate from which sensor the current reading originates.
-
Page 11: Manual Settings
MANUAL SETTINGS: The following manual settings can be changed when pressing the SET key for: • LCD contrast setting • Time zone setting • Time reception ON/OFF setting • 12/24-Hour setting • Manual time setting • Calendar setting • Snooze setting •... -
Page 12: Time Reception On/Off Setting
The time zone default of the Weather Station is 0. To change to another time zone: Press the SET key after completing the LCD contrast setting in order to enter the time zone setting (flashing). Using the IN key, set the time zone. The range runs from 0 to +12 and then runs from -12 back to 0 in consecutive 1hour intervals. -
Page 13: 12/24 Hour Time Display Setting
Note: If the Time Reception function is turned OFF manually, the clock will not attempt any reception of the DCF time as long as the Time Reception OFF function is activated. The Time Reception and DCF icons will not be displayed on the LCD. 12/24 HOUR TIME DISPLAY SETTING “24”... -
Page 14: Calendar Setting
To set the clock: The hour and minute digits start flashing in the time display section. Use the IN key to adjust the hours and the OUT key to adjust the minutes. If you hold the key while you adjust, the hours move 1 hour and the minutes move 5 minutes. Confirm with the SET key and enter the “Calendar Setting”... -
Page 15: Snooze Setting
SNOOZE SETTING: Snooze time The snooze time can be set OFF to a maximum time of 30 minutes (default is 10 minutes): Use the IN key to set the snooze time. Each pressing of the key will increase the snooze time by 5 minutes. The snooze can also be set OFF when the “OFF”... -
Page 16: Alarm Setting
WEATHER FORECASTING ICON SENSITIVITY SETTING For locations with rapid changes of weather conditions, the threshold can be set to a different level for faster display of weather conditions. Digit flashing Using the IN key to set the weather sensitivity level. There are 3 levels of setting: 1, 2 and 3; level 1 is the most sensitive setting, level 3 is the least sensitive setting (default setting is "2"). -
Page 17: Weather Forecast And Tendency
The steps for setting, activating and de-activating Alarm 2 are the same, but using the AL2 button instead of AL1. SNOOZE SETTING AND STOPPING THE ALARM: When the alarm is sounding, press the SNZ to activate the snooze function. The alarm will stop and re- activate after the snooze interval of 5 minutes (for example). -
Page 18: The Weather Tendency Indicator
Note: After setting up, readings for weather forecasts should be disregarded for the next 12-24 hours. This will allow sufficient time for the Weather Station to collect air pressure data at a constant altitude and therefore result in a more accurate forecast. Common to weather forecasting, absolute accuracy cannot be guaranteed. - Page 19 Note: Once the weather tendency indicator has registered a change in air pressure, it will remain permanently visualized on the LCD. INDOOR TEMPERATURE AND HUMIDITY READING WITH COMFORT LEVEL INDICATOR: Minimum Display Indoor Indoor Relative Temperature Humidity % in °C The indoor temperature and humidity are measured automatically and displayed on the fourth section of the LCD.
-
Page 20: Outdoor Temperature And Humidity
To reset the minimum and maximum temperature and humidity data and the times at which they were recorded, press the IN key continuously for about 3 seconds. This will reset all minimum and maximum data recorded to the current time, date, temperature and humidity. The min/max temperatures and humidity recorded are of current time and they remain unaffected by the time zone setting. -
Page 21: 433Mhz Reception Check
Twice to show transmitter 3 Three times to return to transmitter 1 Note: The transmitter number will only be displayed if there is more than one transmitter detected. To reset the minimum and maximum temperature and humidity data, and the times at which they were recorded, press the OUT key continuously for about 3 seconds. -
Page 22: Positioning The Weather Station
Note: When the 433MHz signal is received correctly, do not re-open the battery cover of either the transmitter or Weather Station, as the batteries may spring free from the contacts and force a false reset. Should this happen accidentally then reset all units (see Setting up above) otherwise transmission problems may occur. The transmission range is about 25 m from the transmitter to the Weather Station (in open space). -
Page 23: Care And Maintenance
There is also double sided tape included with the wall mount. On smooth surfaces this can be used instead of drilling holes. The mounting surface can, however, affect the transmission range. If for example the unit is attached to a piece of metal, it may then either reduce or increase the transmitting range. For this reason, we recommend not placing the unit on any metal surfaces or in any position where a large metal or highly polished surface is in the immediate proximity (garage doors, double glazing, etc.). -
Page 24: Liability Disclaimer
(“OF.L” displayed if outside this range) Outdoor -29.9ºC to +69.9ºC with 0.1ºC resolution -21.8°F to +157.8°F with 0.2°F resolution (“OF.L” displayed if outside this range) Relative humidity measuring range: Indoor and outdoor 1% to 99% with 1% resolution (“- -” displayed if outside this range) Indoor temperature checking interval every 15 seconds Indoor humidity checking interval... - Page 25 • The specifications of this product may change without prior notice. • This product is not a toy. Keep out of the reach of children. • No part of this manual may be reproduced without written consent of the manufacturer. R&TTE Directive 1999/5/EC Summary of the Declaration of Conformity : We hereby declare that this wireless transmission device does comply with the essential requirements of R&TTE Directive 1999/5/EC.
Need help?
Do you have a question about the WS 7018 and is the answer not in the manual?
Questions and answers