
Related Manuals for GRASS VALLEY Trinix NXT


Summary of Contents for GRASS VALLEY Trinix NXT
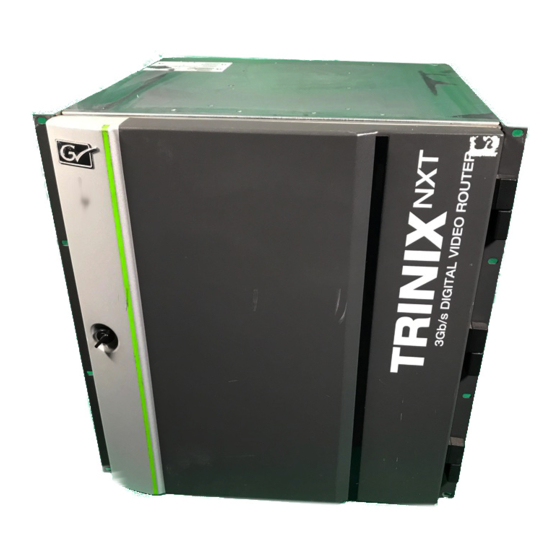
- Page 1 Trinix NXT DIGITAL VIDEO ROUTER Installation and Service Manual Software Version 3.3.0 071827612 SEPTEMBER 2011...
- Page 2 CERTIFICATE Certificate Number: 510040.001 The Quality System of: Grass Valley USA, LLC and its Grass Valley Affiliates Headquarters: 400 Providence Mine Road 15655 SW Greystone Ct. Brunnenweg 9 Nevada City, CA 95945 Beaverton, OR 97006 D-64331 Weiterstadt United States United States...
- Page 3 Trinix NXT DIGITAL VIDEO ROUTER Installation and Service Manual Software Version 3.3.0 071827612 SEPTEMBER 2011...
- Page 4 Benelux/Belgium: +32 (0) 2 334 90 30 Benelux/Netherlands: +31 (0) 35 62 38 42 1 N. Europe: +45 45 96 88 70 Germany, Austria, Eastern Europe: +49 6150 104 444 UK, Ireland, Israel: +44 118 923 0499 Copyright © Grass Valley USA, LLC. All rights reserved. This product may be covered by one or more U.S. and foreign patents.
-
Page 5: Table Of Contents
Jupiter Facility Control System ........Trinix NXT — Installation and Service Manual... - Page 6 512X1024 Default Power Supply Configuration ......512X1024 Redundant Power Supply Configurations, Option A ... Trinix NXT — Installation and Service Manual...
- Page 7 Sync Reference ........... . . Trinix NXT — Installation and Service Manual...
- Page 8 ..............Trinix NXT — Installation and Service Manual...
-
Page 9: About This Manual
TRX-NXTXXX frames are similar except for minor differ- ences, which are identified in this manual. The Trinix Digital Video Router can be controlled by the Grass Valley Jupiter or Encore Control System. Configuration information for the control system itself is contained in the control system’s documentation set: Jupiter Control System Release Notes. - Page 10 Preface Trinix NXT — Installation and Service Manual...
-
Page 11: Safety Terms And Symbols
DANGER the marking. — A personal injury hazard exists but is not immediately acces- WARNING sible as you read the marking. — A hazard to property, product, and other equipment is present. CAUTION Trinix NXT — Installation and Service Manual... -
Page 12: Symbols On The Product
— Prior to servicing, remove jewelry such as rings, watches, Remove jewelry and other metallic objects. — Do not touch exposed connections, components or Avoid exposed circuitry circuitry when power is present. Trinix NXT — Installation and Service Manual... -
Page 13: Cautions
Use anti-static procedures, equipment and surfaces during servicing. — If you suspect product damage Do not operate with suspected equipment failure or equipment failure, have the equipment inspected by qualified service personnel. Trinix NXT — Installation and Service Manual... - Page 14 (ASICS). As a result, circuit board repair at the component level is very difficult in the field, if not impossible. For war- ranty compliance, do not troubleshoot systems beyond the board level. Trinix NXT — Installation and Service Manual...
- Page 15 — Wenn Sie diesen Begriff lesen, besteht ein unmittelbares Verlet- GEFAHR zungsrisiko. — Wenn Sie diesen Begriff lesen, besteht ein mittelbares Verlet- WARNUNG zungsrisiko. — Es besteht ein Risiko für Objekte in der Umgebung, den Mixer VORSICHT selbst oder andere Ausrüstungskomponenten. Trinix NXT — Installation and Service Manual...
- Page 16 — Führen Sie interne Servicearbeiten nur aus, wenn eine weitere Person anwesend ist, die erste Hilfe leisten und Wiederbelebungsmaßnahmen einleiten kann. — Legen Sie vor Servicearbeiten Schmuck wie Ringe, Schmuck abnehmen Uhren und andere metallische Objekte ab. Trinix NXT — Installation and Service Manual...
- Page 17 — Betreiben Sie das Gerät nicht an einer Spannungsquelle, die eine höhere Spannung liefert als in den Spezifika- tionen für dieses Produkt angegeben. — Um eine Überhitzung des Geräts zu vermeiden, Gerät ausreichend belüften müssen die Ausrüstungskomponenten entsprechend den Installationsan- Trinix NXT — Installation and Service Manual...
- Page 18 Hersteller empfohlenen Typs aus. Entsorgen Sie gebrauchte Batterien entsprechend den Anweisungen des Batterieherstellers. Das Gerät enthält keine Teile, die vom Benutzer gewartet werden können. Wenden Sie sich bei Problemen bitte an den nächsten Händler. Trinix NXT — Installation and Service Manual...
- Page 19 La signalétique suivante peut être apposée sur le produit: — risque de danger imminent pour l’utilisateur. DANGER — Risque de danger non imminent pour l’utilisateur. AVERTISSEMENT — Risque d’endommagement du produit, des installations MISE EN GARDE ou des autres équipements. Trinix NXT — Installation and Service Manual...
- Page 20 — Ne réalisez pas une interven- Ne procédez pas seul à une intervention d’entretien tion d’entretien interne sur ce produit si une personne n’est pas présente pour fournir les premiers soins en cas d’accident. Trinix NXT — Installation and Service Manual...
- Page 21 — Ne branchez pas ce produit à une Utilisez la source d’alimentation adéquate source d’alimentation qui utilise une tension supérieure à la tension nomi- nale spécifiée pour ce produit. Trinix NXT — Installation and Service Manual...
- Page 22 Cette unité ne contient aucune partie qui peut faire l’objet d’un entretien par l’utilisateur. Si un problème survient, veuillez contacter votre distribu- teur local. Trinix NXT — Installation and Service Manual...
-
Page 23: Certifications And Compliances
Changes or modifications not expressly approved by Grass Valley Group can affect emission compliance and could void the user’s authority to operate this equipment. -
Page 24: Canadian Certified Power Cords
For the CDRH: The radiant power is detected trough a 7 mm aperture at a distance of 200 mm from the source focused through a lens with a focal length of 100 mm. Trinix NXT — Installation and Service Manual... -
Page 25: Certification
ANSI X3T11 Fiber Channel Standard. Certification Category Standard Designed/tested for compliance with: Safety ANSI/UL 1950-1997 3rd Ed. Professional Video and Audio Equipment CAN/CSA-C22.2 No. 950-95 EN 60950 Trinix NXT — Installation and Service Manual... - Page 26 Regulatory Notices Trinix NXT — Installation and Service Manual...
-
Page 27: Recommended Esd Guidelines
Implementing the information in this section will help you protect the investment that you have made in purchasing Grass Valley equipment. This section contains Grass Valley’s recommended ESD guidelines that should be followed when handling electrostatic discharge sensitive (ESDS) items. -
Page 28: Sources Of Esd And Risks
Any equipment commonly found in an ESD work area, such as solder guns, heat guns, blowers, etc., should be grounded. Materials Plastic work holders, foam, plastic tote boxes, pens, packaging containers and other items commonly found at workstations can generate static elec- tricity. Trinix NXT — Installation and Service Manual... -
Page 29: Grounding Requirements For Personnel
* For situations where an ESD garment is used as part of the wrist strap grounding path, the total system resistance, including the person, garment, and grounding cord, must be less than 3.5 x 10 ohm. Trinix NXT — Installation and Service Manual... - Page 30 ESD Protection Trinix NXT — Installation and Service Manual...
-
Page 31: Section 8 - Introduction
• Proven dependability • Exceptional signal performance • Standard Definition (SD), High Definition (HD), and 3Gb/s in the same frame • 3Gb/s Clean Flow signals • Easy to service and upgrade Trinix NXT — Installation and Service Manual... -
Page 32: Sd, Hd, And 3Gb/S In The Same Frame
SD, HD, and 3GB/s in the Same Frame Trinix NXT supports SD, HD, and 3Gb/s video in all configurations. The matrix boards and high-speed backplane are designed for SD, HD, and 3Gb/s signals. The only difference between SD, HD, and 3Gb/s implemen- tations is the 3G Matrix, Input and Output boards. -
Page 33: Easy To Create Very Large Routers
Jupiter control panels or an automation computer. Trinix can also be con- trolled using a direct Ethernet (“CPL”) integration with the Grass Valley Encore or SMS 7000 control system. -
Page 34: The Asymmetric Frame
The Trinix frame offers plenty of power to spare the: • Trinix DV-33128 runs on a 600W Power Supply Unit (PSU). • Trinix NXT-128x128 runs on a 1000W PSU. • Trinix DV-33256 and the DV-33512 both run on a 1250W PSU. -
Page 35: Serviceability And Reliability
Each board has a micro-controller that is part of an overall communications bus, which is part of the hardware for the Broadlinx technology. This hard- ware is what gathers all of the particular board information (voltages, Trinix NXT — Installation and Service Manual... -
Page 36: Broadlinx
The Broadlinx option, which consists of Broadlinx software running on the NR-33000 Sync/NIC/OPM board, allows SMS 7000 or Encore control using Grass Valley CPL (Control Point Language) through an Ethernet con- nection. Broadlinx will also support SNMP/NetCentral monitoring with the correct license. - Page 37 This license can be purchased as part of the orig- inal system or can be purchased later by contacting Grass Valley Technical Support. The MAC address is shown in the SNMP section of the Configu- ration Broadlinx web access display.
- Page 38 NetCentral User Guide. Non-NetCentral Managers For information concerning registration of Monitoring Stations (SNMP Managers) for use with non-NetCentral SMNP management applications, please refer to Configuring an SNMP Manager’s IP Address on page 303. Trinix NXT — Installation and Service Manual...
-
Page 39: Section 9 - Planning Guide
This step will ensure EMC compliance. Spare BNC panels that are not connected to boards do not need to be terminated. Grass Valley recommends that the cable lengths be no less than 10 Meters (32.8 Feet) when re-entering the Trinix routing switcher through 3Gb/s Input boards. - Page 40 Figure 16 on page Figure 1. TRX-NXT-128x128 Front View (Door Removed). Power supplies FAN ALARM Fan modules SR-33000 Sync Reference / NR-33000 FAN ALARM Broadlinx Board slots Input/output boards Matrix board (configuration varies) Trinix NXT — Installation and Service Manual...
- Page 41 AGAINST RISK OF FIRE, REPLACE ONLY WITH SAME TYPE AND RATING OF FUSE 115: 6.0A 250V SLOW BLOW 230: T2.5A 240V AUTO SELECT 100-130V/200-240V 6.0A/2.5A 47-63HZ DC IN + DC IN - PS B PS A Trinix NXT — Installation and Service Manual...
- Page 42 Section 9 — Planning Guide Figure 3. TRX-NXT-256x256 Rear Panel. Trinix NXT — Installation and Service Manual...
- Page 43 INPUTS INPUTS INPUTS INPUTS INPUTS OUTPUTS OUTPUTS OUTPUTS OUTPUTS OUTPUTS OUTPUTS OUTPUTS OUTPUTS INPUTS INPUTS INPUTS INPUTS 1-32 33-64 65-96 97-128 1-32 33-64 65-96 97-128 129-160 161-192 193-224 225-256 129-160 161-192 193-224 225-256 Trinix NXT — Installation and Service Manual...
- Page 44 Section 9 — Planning Guide Figure 5. The DIP, Level, and Monitoring Switch for the DV-33256 and TRX-NXT 256x256 LEVEL SUPER INPUT EXPAND 96 112 OUTPUT EXPAND SYNC REDUNDANT INT XPT CNTL 60Hz ENABLE ULTRA MONITOR FRAME Trinix NXT — Installation and Service Manual...
- Page 45 Trinix Frames Figure 6. TRX-NXT 256x256 Rear panel Trinix NXT — Installation and Service Manual...
- Page 46 449 - 480 417 - 448 385 - 416 225 - 256 193 - 224 161 - 192 129 - 160 Rear view. See Figure 8 Figure 10 for detail Input/output boards (configuration varies) Trinix NXT — Installation and Service Manual...
- Page 47 100-120V: 12.5A, 250V, SLO BLO 200-240V: T6.3A, 250V 200-240V: T6.3A, 250V CONTROL PS C PS A PS D PS B WARNING: FOR CONTINUED PROTECTION AGAINST RISK OF FIRE, REPLACE ONLY WITH SAME TYPE AND RATING OF FUSE Trinix NXT — Installation and Service Manual...
- Page 48 Section 9 — Planning Guide Figure 9. TRX-NXT-512x512 Rear Panel Trinix NXT — Installation and Service Manual...
- Page 49 SUPER ULTRA INPUT EXPAND MONITOR FRAME OUTPUT EXPAND 1024 SYNC REDUNDANT 1536 INT XPT CNTL 2048 60Hz ENABLE Figure 11. TRX-NXT-128x256 Asymmetric Frame-Front Fan modules Matrix boards Broadlinx Boards Input Boards Output Boards Trinix NXT — Installation and Service Manual...
- Page 50 Output boards The inner eight slots are Input boards Figure 13 for detail DC Power inputs Board Matrix boards SR module Figure 13. The Level, Monitor, and Frame Switch For the 128x256 Routing Switcher Trinix NXT — Installation and Service Manual...
- Page 51 The inner eight slots are Input boards DC Power inputs Matrix boards SR module Broadlinx boards Figure 15 for detail Output boards Figure 15. The Level, Monitor, and Frame Switch For the 256x512 Routing Switcher Trinix NXT — Installation and Service Manual...
- Page 52 Fan modules Output Boards DC Power inputs Matrix and Primary Broadlinx boards Figure 17 on page 53 for detail Input Boards Matrix and Sec- ondary Broadlinx boards DC Power inputs Output Boards Fan modules Trinix NXT — Installation and Service Manual...
- Page 53 Trinix Frames Figure 17. The Level, Monitor, and Frame Switch For the 512x1024 Routing Switcher Trinix NXT — Installation and Service Manual...
- Page 54 Section 9 — Planning Guide Figure 18. Protected Paths, Signal Flow, and Power Supply System for TRX-NXT-512x512 Router. Trinix NXT — Installation and Service Manual...
- Page 55 Note Grass Valley strongly recommends, whenever possible, using the AC high line to reduce line currents and heat within the power supplies. In AC power applications, the 512x512 frames are equipped with two power supplies mounted in a separate frame.
- Page 56 (20A AC low line and 10A AC high line) power circuit. Note Grass Valley strongly recommends, whenever possible, using the AC high line to reduce line currents and heat within the power supplies. The Trinix 512x1024 frames have a minimum of two PS trays with four power modules in each tray.
- Page 57 The air is drawn to the top rear of the frame, across all of the Input and Output boards as well as the Matrix boards, and then expelled out the back of the router. Figure 20. Airflow Openings for TRX-NXT-256x256 Frame. Rear Right side Left side Trinix NXT — Installation and Service Manual...
- Page 58 Grass Valley recommends that you replace the fan and return the system to normal redundant opera- tion as soon as possible.
- Page 59 Figure 23. Airflow Openings for the TRX-NXT-256x512 Main Frame. Rear Side A two (2) RU space should be kept free on the bottom of the frame and fan to ensure enough airflow to prevent the routing switcher from overheating. Trinix NXT — Installation and Service Manual...
- Page 60 A two (2) RU vent option is also available to draw intake air in from the front of the frame. Figure 24. TRX-NXT-512x1024 1 RU Fans located at the top and bottom of the frame 2 RU Air Vent located at the bottom of the frame Trinix NXT — Installation and Service Manual...
-
Page 61: Sync Reference Options
The TRX-NXT-128x128 and the TRX-NXT-256x256 frames, uses two pairs of output monitor ports, which are provided by the NR-33000 board (one side of each pair is inverted). Two additional dual ports are optionally Trinix NXT — Installation and Service Manual... - Page 62 The signal flow through a 128 x 128 routing system is shown in Figure 25 on page 63 as an example. Inputs are received and outputs are delivered to the rear of the frame directly with a connection to the rear panels (no cabling). Trinix NXT — Installation and Service Manual...
- Page 63 Figure 25. Input and Output Routing Through Matrix Board For 128 x 128 Routing Switcher. 32 Output 32 Input Card Card 32 Input 32 Output Card Card Matrix Card (128 x 128) 32 Input 32 Output Card Card 32 Input 32 Output Card Card Trinix NXT — Installation and Service Manual...
- Page 64 Section 9 — Planning Guide Figure 26. Signal Flow for the 512x1024 Routing Switcher - Top Physical (0x37) (0x35) (0x34) (0x36) (0x33) (0x32) (0x31) (0x30) (Logical) Physical (0x27) (0x25) (0x24) (0x26) (0x23) (0x22) (0x21) (0x20) (Logical) Trinix NXT — Installation and Service Manual...
- Page 65 Trinix Frames Figure 27. Signal Flow for the 512x1024 Routing Switcher - Bottom Physical (0x27) (0x25) (0x24) (0x26) (0x23) (0x22) (0x21) (0x20) (Logical) Physical (0x37) (0x36) (0x35) (0x34) (0x33) (0x32) (0x31) (0x30) (Logical) Trinix NXT — Installation and Service Manual...
- Page 66 Section 9 — Planning Guide For a description of the various Input, Output, and Matrix boards available for Trinix, contact your Grass Valley account representative. Analog Processing Control The VI-33100 universal input module accepts analog as well as digital sig- nals.
- Page 67 SC boards. (See Configuration DIP Switches on page 231) Figure 28. Rear Panel Master Alarm Circuit (left) and Example Of Customer-supplied Indicator Circuit (right) EXTERNAL CIRCUIT (EXAMPLE) REAR PANEL BNC NOT TO EXCEED 24 VDC @ 20 mA Trinix NXT — Installation and Service Manual...
- Page 68 All of the alarm and status information is gathered by the Broadlinx tech- nology to make it available to the user via Web pages. For more informa- tion, see Section 13-Broadlinx Software on page 285. Trinix NXT — Installation and Service Manual...
-
Page 69: Duplication And Expansion
Port expander for HD operations and the PE2x2-3G Port expander for 3Gp/s operations. Unused connectors should be terminated for optimum performance. Figure 29. 0 -255 0 -255 0 - 255 Trinix PE 33016 used as 256x256 Dual outputs splitters Trinix NXT — Installation and Service Manual... - Page 70 Figure 31. 240 Single Outputs and 16 Dual Outputs Example 1 - 16 1 - 16 PE 33016 used as Frame 0 Dual outputs splitter 1 - 256 Trinix 17 - 256 256 x 256 Single outputs Trinix NXT — Installation and Service Manual...
- Page 71 Figure 33 on page 73 shows a 256 input router with 256 dual outputs; this arrangement requires 16 PE-33016 Port expanders. All unused connectors must be terminated. 16 terminators are supplied with each PE-33016. Trinix NXT — Installation and Service Manual...
- Page 72 Section 9 — Planning Guide Figure 32. Use of Single PE-33016 to Provide Dual Outputs for 16 Switcher Outputs PE-33016-1 PE-33016-1 Exterior Interior Dual outputs 390-1796-00 390-1797-00 These 16 cables connect to rear of PE Trinix NXT — Installation and Service Manual...
- Page 73 Duplication and Expansion Figure 33. PE-33016 Port Expanders Provides 256 Dual outputs for 256 Input Switcher. A B C EXTERIOR 16 PE-30016 Expander Modules in MK-33000 Mounting Kit INTERIOR 3.25 in. (82 mm) Trinix NXT — Installation and Service Manual...
-
Page 74: Output Duplication - Quad
33000; this provides 112 single outputs and 16 quad outputs. A 256 input router with 128 single outputs and 128 quad outputs would appear similar All unused connectors must be terminated with 75-ohm terminators; for PE-33008 applications terminators must be supplied by end-user. Trinix NXT — Installation and Service Manual... - Page 75 Figure 34. Use of 2 PE 33008s to Provide Quad Outputs for 16 Switcher Outputs Connections to 2nd PE-33008 are similar PE-33008-1 PE-33008-1 Exterior Interior 390-1795-00 390-1794-00 Quad outputs These cables connect to rear of PE Trinix NXT — Installation and Service Manual...
-
Page 76: Expanded Systems
Any unused connectors should be terminated for optimum performance. The port expanders are mounted in an MK-33000 Mounting Kit as described previously (Figure 33 on page 73). Figure 35. PE-33016 Used as a Combiner. Interior side Exterior side Trinix NXT — Installation and Service Manual... - Page 77 (for output expansion). All outputs are non-inverting. In the figures below the PE33016 Port expander is used as an example. Use the PE33016 Port expander for HD operations and the PE2x2-3G Port expander for 3Gp/s operations. Trinix NXT — Installation and Service Manual...
- Page 78 The term “restricted” refers to a wiring scheme where some signal paths are not available. For example, the second system shown in the above figure will not allow outputs 1-16 to receive inputs 513-1024. Trinix NXT — Installation and Service Manual...
- Page 79 1 - 512 512 x 512 513 - 1024 PE-33016 513 - 1024 used as PE-33016 combiners Dual outputs 513 - 1024 used as splitters Frame 3 513 - 1024 Trinix 512 x 512 Trinix NXT — Installation and Service Manual...
- Page 80 513 - 1024 1 x 4 splitters Frame 9 513 - 1024 Trinix 512 x 512 Frame 11 1537 - 2048 PE-33016 513 - 1024 used as Dual outputs combiners Trinix 512 x 512 Trinix NXT — Installation and Service Manual...
- Page 81 Dual outputs 4 x 1 combiners Frame 5 1537 - 2048 Trinix 512 x 512 Inputs PE-33016 used as 1537 - 2048 splitters Frame 7 1537 - 2048 Trinix 512 x 512 Trinix NXT — Installation and Service Manual...
- Page 82 1 x 4 splitters Frame 13 1537 - 2048 Trinix 512 x 512 PE-33008 1537 - 2048 used as Frame 15 Dual outputs 4 x 1 1537 - 2048 combiners Trinix 512 x 512 Trinix NXT — Installation and Service Manual...
- Page 83 The 1024x1024 Frame This configuration can process SD,HD and 3Gb/s signals. Figure 41. Example of the 1024x1024 Frame Frame 0 1-512 Trinix 512 x1024 TRX-PE-2x2-3G 1-1024 used as Combiners Frame 2 513-1024 Trinix 512 x1024 Trinix NXT — Installation and Service Manual...
- Page 84 The 512x2048 Frame This configuration can process SD,HD and 3Gb/s signals. Figure 42. Example of the 512x2048 Frame Frame 0 1-1024 Trinix 512 x1024 TRX-PE-2x2-3G 1-512 used as Splitters Frame 8 1025-2048 Trinix 512 x1024 Trinix NXT — Installation and Service Manual...
- Page 85 512 x1024 Combiners TRX-PE-2x2-3G 1-512 used as Splitters Frame 8 TRX-PE-2x2-3G 1025-2048 Trinix used as 512 x1024 Combiners Frame 1 Trinix 512 x1024 TRX-PE-2x2-3G 513-1024 used as Splitters Frame 9 Trinix 512 x1024 Trinix NXT — Installation and Service Manual...
- Page 86 Trinix 512 x1024 Frame 4 Trinix 512 x1024 TRX-PE-2x2-3G 1025-1536 used as Splitters Frame 12 Trinix 512 x1024 Frame 5 Trinix 512 x1024 TRX-PE-2x2-3G 1537-2048 used as Splitters Frame 13 Trinix 512 x1024 Trinix NXT — Installation and Service Manual...
- Page 87 Grass Valley recommends that you terminate all unused outputs that may be driven with an active signal. Properly shielded 75-ohm terminators or spare infrastructure coax cables should be used. This step will ensure EMC compliance.
- Page 88 33000 installed. • When the system is upgraded to 1024 x 512, the LD-33000 boards will be removed and replaced by output boards. The cabling to the port expanders is already in place. Trinix NXT — Installation and Service Manual...
- Page 89 Termination provided by LD-33100 in Frame 1. Input and Output Expansion The rules just described for use of LD-33100 Loader boards will also apply to systems designed for expansion of both inputs and outputs. An example Trinix NXT — Installation and Service Manual...
- Page 90 An example of an output-expanded system in shown in Figure 50 on page 91; an input-expanded system is shown in (Figure 119 on page 209). Note Output monitoring is not available for input-expanded systems controlled by an SR-33000 Sync/OPM board. Trinix NXT — Installation and Service Manual...
- Page 91 256 x 256 PE-33016 used as QC station Output monitor video combiner Asymmetrical Frames Output monitor signals are cascaded from the expansion frame to the main frame (frame 0) via the TRX-SR Sync/OPM board. Trinix NXT — Installation and Service Manual...
- Page 92 Note: The order of the frames for the monitor cascade does not matter. MON outs (4) Trinix 128x256 Inputs 129-257 Outputs 1-256 Switcher Frame 1 No Connect CAS ins (4) Or Test Signal Trinix NXT — Installation and Service Manual...
- Page 93 Note: The order of the frames for the monitor cascade does not matter. MON outs (4) Trinix 512x1024 Inputs 513-1024 Outputs 1-1024 Switcher Frame 1 No Connect CAS ins (4) X 2 Or Test Signal Trinix NXT — Installation and Service Manual...
- Page 94 Note: The order of the frames for the monitor cascade does not matter. MON outs (4) Trinix 256x512 Inputs 513-768 Outputs 1-512 Switcher Frame 1 No Connect CAS ins (4) Or Test Signal Trinix NXT — Installation and Service Manual...
-
Page 95: Protected Paths
Figure 54 on page 96 shows an example of a TRX-NXT-512x512 router with a pair of Protected paths (Depending on system requirements, the upstream splitter may or may not be needed). The signal detector monitors Trinix NXT — Installation and Service Manual... - Page 96 Powered by PS C and PS D PS A and PS B Output 1 Input 1 Input/Output boards DM-33501/2 Splitter Splitter Combiner Combiner Matrix boards Input/Output boards Input 257 Output 257 Secondary path Trinix NXT — Installation and Service Manual...
- Page 97 Protected Paths Figure 55. Example of Protected Paths for TRX-NXT-512x1024 Router Primary Path 1-256 Primary Path Primary 1-256 Path Splitter Combiler Secondary Path Secondary Path 513-769 257-512 Secondary Path Trinix NXT — Installation and Service Manual...
-
Page 98: Planning
The maximum number of Protected paths for a TRX-NXT-512x512 router is 256. A more detailed example is shown in Table 5. This table shows a sequential wiring scheme for a system yet to be installed or a system where cables will Trinix NXT — Installation and Service Manual... - Page 99 NetPP MainPP NetSP MainSP Notice that in all cases the primary path I/O numbers are always in the 1- 256 range while the secondary path I/O numbers are always in the 257-512 range. Trinix NXT — Installation and Service Manual...
- Page 100 Sat1SP StuASP Sat2PP StuBPP Sat2SP StuBSP NetPP MainPP NetSP MainSP The numbers shown here correspond to the connector numbers used during router configuration (but not, in most cases, to the actual silk screen Trinix NXT — Installation and Service Manual...
- Page 101 Signal OK, driver ON Output assigned to Output assigned to protected path, driver OFF protected path, driver OFF Input 128 Output 128 Output 1 Input 1 Primary path Combiner Combiner Splitter Splitter Secondary path Trinix NXT — Installation and Service Manual...
- Page 102 CAUTION With a TRX-NXT-128x128, it is not possible to arrange completely indepen- dent paths, that is, paths that use different matrix boards and power supplies. Protected path configuration for TRX-NXT-128x128 routers provides redun- dancy for input and output boards only. Trinix NXT — Installation and Service Manual...
- Page 103 AirPP MCPP AirSP MCSP Sat1PP StuAPP Sat1SP StuASP Sat2PP StuBPP Sat2SP StuBSP Notice that I/O numbers conform to the ranges that are shown in Table 10 Recommended Protected Path Ranges on page 102. Trinix NXT — Installation and Service Manual...
- Page 104 Primary Path Secondary Path 1-128 1-128 129-256 129-256 TRX-NXT-512x1024 Recommended Protected path ranges for TRX-NXT-512x1024 routers are as follows: Table 15. Recommended Protected Path Ranges Primary Path Secondary Path 1-256 1-256 513-769 257-512 Trinix NXT — Installation and Service Manual...
-
Page 105: Worksheet For Protected Path Implementation
Based on the preceding examples, specific primary and secondary paths should be identified and noted. The following worksheet is provided for this purpose. Table 16. Protected Paths Worksheet Primary Path Secondary Path Output Input Output Input Name Name Name Name Trinix NXT — Installation and Service Manual... -
Page 106: Control Systems
Crosspoint bus cable, which can be supplied in 3, 10, 25, or 50 foot lengths. The Crosspoint bus connector is looped out in order to connect the bus to the next item under Crosspoint control. Trinix NXT — Installation and Service Manual... - Page 107 Crosspoint Bus Terminator. The CC-2010 is a 10-conductor (plus ground) cable. Ready-made cables, with installed 15-pin D male connectors, are available from Grass Valley. All rear-panel Crosspoint bus connectors are 15-pin D, female.
-
Page 108: Sms 7000 / Encore Control
The system is operated in the Internal Crosspoint Bus Control mode, during which the Broadlinx board sends commands to the Crosspoint bus. Refer to the SMS 7000 or Encore documentation for control system plan- ning information. Trinix NXT — Installation and Service Manual... -
Page 109: Lan And Com Bus Connections
Do not use Broadlinx with either the Dynex DX-ESW8, 10/100M Fast Ethernet Switch or the Zonet Model ZFS3124. Compliance with EEC, EMC, EN series, UL- 1950, and CSA C22.2 No. 950-M89 standards requires use of a shielded cable. Trinix NXT — Installation and Service Manual... - Page 110 If the Trinix LAN is connected to the Internet, the connection should be made through a firewall. Note Do not use Broadlinx with either the Dynex DX-ESW8, 10/100M Fast Ethernet Switch or the Zonet Model ZFS3124. Trinix NXT — Installation and Service Manual...
- Page 111 Broadlinx boards. For an illus- tration, see Figure 67 on page 140. Compliance with EEC, EMC, EN series, UL- 1950, and CSA C22.2 No. 950-M89 standards requires use of a shielded cable. Trinix NXT — Installation and Service Manual...
-
Page 112: System Monitoring Applications
For a detailed description of Broadlinx web page monitoring using Internet Explorer, see Broadlinx / Internet Explorer Monitoring on page 311. For a brief description of system monitoring using SNMP/NetCentral, see SNMP/NetCentral Monitoring on page Trinix NXT — Installation and Service Manual... -
Page 113: Specifications
Tri-level sync also accepted Video Standard: NTSC/PAL/HDTV, auto-detected Return Loss: >/= 40dB from 100 KHz to 5 MHz >/= 35dB from 5 MHz to 10 MHz >/= 25dB from 10 MHz to 30 MHz Trinix NXT — Installation and Service Manual... - Page 114 160 meters of Belden 1694A or an equivalent coax cable. For 3Gp/s operation, equalization is automatic up to 140 meters of Belden 1694A, when installed in a Trinix frames. See Glossary Trinix NXT — Installation and Service Manual...
- Page 115 IEC Connector, AC separate mains input for each power sup- ply module. Note Each power supply must be connected to a separate AC mains branch circuit with an over-current protector rated at no more than 20A. Trinix NXT — Installation and Service Manual...
- Page 116 20 A @ 120 VAC and 10 A @ 240 VAC TRX-NXT-512x1024 20 A @ 120 VAC and 10 A @ 240 VAC 128 x 128 frame: 49.05 A Inrush Current 256 x 256 frame: 55.0 A 512 x 512 frame: 45 A Trinix NXT — Installation and Service Manual...
- Page 117 12 A @ 48 VDC DV-33256 and NXT-256 23 A @ 48 VDC DV-33512 and NXT-512 46 A @ 48 VDC TRX-NXT-128x256 21 A @ 48 VDC TRX-NXT-256x512 42 A @ 48 VDC TRX-NXT-512x1024 Trinix NXT — Installation and Service Manual...
-
Page 118: Environmental
0 to +35 degrees C (+32 to +95 F) 10 to 90%, Non-condensing Air Flow The Door should remain closed during operation for all Trinix models. Requirements for the Trinix 512x1024’s airflow and clearance: Trinix NXT — Installation and Service Manual... -
Page 119: Physical
Fans units (one on top, one on bottom): 2 x 1 RU: 1.75 in. high x 19 in. wide x 17.5 in. deep (44.45 x 483 x 444 mm) MK-33000 Mounting Kit (for port expansion) 14 inches (8 RU) high x 19 in. 4 in. deep (356 x 483 x 100 mm) Trinix NXT — Installation and Service Manual... - Page 120 Section 9 — Planning Guide Trinix NXT — Installation and Service Manual...
-
Page 121: Configuration
Table 17. 128x128 Matrix Specifications Matrix Size # of Frame # Input Boards # Output Boards # of Matrix Boards Weight in pounds (kilograms) (34) (37) (40) (43) Power Consumption* (W) ~350 ~400 ~440 ~480 Approximate Trinix NXT — Installation and Service Manual... - Page 122 With two power supplies Power Consumption* (W) ~480 Table 20. 256x512 Matrix Size Specifications Matrix Size # of Frame # Input Boards # Output Boards ~300 ~350 # of Matrix Boards (~140) (~160) Trinix NXT — Installation and Service Manual...
- Page 123 # Input Boards # Output Boards # of Matrix Boards ~750 ~1400 ~800 ~1600 ~6400 Weight* in pounds (kilograms) (~340) (~640) (~360) (~730) (~2900) # of RUs Power Consumption* (W) ~4000 ~6000 ~4000 ~8000 ~32000 Trinix NXT — Installation and Service Manual...
- Page 124 2048 # of Frames # Input Boards # Output Boards # of Matrix Boards ~800 ~1600 ~6400 Weight* in pounds (kilograms) (~360) (~730) (~2900) # of RUs Power Consumption* (W) ~4000 ~8000 ~32000 Trinix NXT — Installation and Service Manual...
-
Page 125: Section 10 - Hardware Installation
• Retain all shipping cartons and padding material for inspection by the carrier. • Do NOT return damaged merchandise to Grass Valley until an appropriate claim has been filed with the carrier and a material return authorization number has been received from Grass Valley. -
Page 126: Customer-Supplied Rack Requirements
Note Grass Valley recommends each power supply have its own dedicated 20A circuit breaker. The possibility of having a failed supply shut down a breaker is a possibility if circuit breakers are shared. This failure will remove a func- tioning Power supply from operation. - Page 127 For more information about Power Supply connections with Asymmetric frames, see Trinix Asymmetrical Power Supply Configurations page 227. Grass Valley strongly recommends, whenever possible, using the AC high line to reduce line currents and heat within the power sup- plies.
-
Page 128: Connecting And Configuring The Reference Settings
The SR-33000 Sync Reference / OPM board, the NR-33000 NIC/Sync/ OPM board, or (in TRX-NXT-512x512 units) the SR-33500 Sync Refer- ence board can be used to lock the system to a Reference sync. Trinix NXT — Installation and Service Manual... - Page 129 Sync line 1 corresponds to the Primary Ref IN 1 connector on the rear panel. If additional references are used, the DIP switches can be set to assign each board to one of four possible sync lines. See Output Board Configuration on page 185. Trinix NXT — Installation and Service Manual...
-
Page 130: Configuring Each Output Monitor On The Trx-Opm Boards
LSB of reference source used for Monitor Output 3 S1-6 MSB of reference source used for Monitor Output 3 S1-7 LSB of reference source used for Monitor Output 4 S1-8 MSB of reference source used for Monitor Output 4 Trinix NXT — Installation and Service Manual... -
Page 131: Connecting The Cables
There are numerous ways to control and monitor the Trinix router. You will need to connect your preferred Control and Monitoring method. 1. Connect the Routing switcher to the Grass Valley control system of your choice: • For Jupiter control system connections and settings, see Jupiter... -
Page 132: Optional Connections
Figure 94 on page 179. TRX-NXT-256x512 configuration. For the TRX-NXT-128x256, the configuration is through a jumper on the NR/SR-33000 board, which is shown in Figure 88 on page 174 Figure 89 on page 175. Trinix NXT — Installation and Service Manual... -
Page 133: Powering Up The Routing Switcher
The front door should be closed during normal operation. Although the Trinix Routing switcher will function properly with the door open, leaving the frame open on a continuous basis will result in shortened product life. Trinix NXT — Installation and Service Manual... - Page 134 SECURED WITH 2 RACK SCREWS (SUPPLIED). RACK SPACERS FOR DV-33128 CHASSIS (KIT NO. 44-052989-001) RACK SPACERS FOR DV-33512 CHASSIS/ POWER SUPPLY NOT SHOWN. (KIT NO. RACK SPACERS FOR 650-4352-00) DV-33256 CHASSIS (KIT NO. 44-052990-001) Trinix NXT — Installation and Service Manual...
- Page 135 SR-33000 Sync Reference / NR-33000 FAN ALARM Fan modules Broadlinx Board slots FAN ALARM SR-33000 Sync Reference / NR-33000 Broadlinx Board slots Input/output boards Matrix board (configuration varies) Input/output boards Matrix board (configuration varies) Trinix NXT — Installation and Service Manual...
- Page 136 AGAINST RISK OF FIRE, REPLACE ONLY WITH SAME TYPE AND RATING OF FUSE 115: 6.0A 250V SLOW BLOW 230: T2.5A 240V AUTO SELECT 100-130V/200-240V 6.0A/2.5A 47-63HZ DC IN + DC IN - PS B PS A Trinix NXT — Installation and Service Manual...
- Page 137 Summary of Installation Procedure Figure 64. TRX-NXT-256 X 256 Front View (door removed). SR-33000 Sync Reference / NR-33000 Broadlinx Board Fan modules Power supplies slots VADJ OK VADJ Matrix boards Input/output boards (configuration varies) Trinix NXT — Installation and Service Manual...
- Page 138 INPUTS INPUTS INPUTS INPUTS INPUTS OUTPUTS OUTPUTS OUTPUTS OUTPUTS OUTPUTS OUTPUTS OUTPUTS OUTPUTS INPUTS INPUTS INPUTS INPUTS 1-32 33-64 65-96 97-128 1-32 33-64 65-96 97-128 129-160 161-192 193-224 225-256 129-160 161-192 193-224 225-256 Trinix NXT — Installation and Service Manual...
- Page 139 Summary of Installation Procedure Figure 66. TRX-NXT-256x256 Rear Panel. Trinix NXT — Installation and Service Manual...
- Page 140 (configuration varies) SR-33000 Sync Reference / NR-33000 Broadlinx Board Power supply unit may be slots mounted above or below main chassis PS A PS C PRIMARY SECONDARY PS B PS D Trinix NXT — Installation and Service Manual...
- Page 141 PS D PS C PS B PS A WARNING: FOR CONTINUED PROTECTION AGAINST RISK OF FIRE, REPLACE ONLY WITH SAME TYPE AND RATING OF FUSE This XPT cable required only for SMS/Encore control Trinix NXT — Installation and Service Manual...
- Page 142 Section 10 — Hardware Installation Figure 69. TRX-NXT-512x512 Rear Panel Trinix NXT — Installation and Service Manual...
- Page 143 Summary of Installation Procedure Figure 70. TRX-NXT-128x256 Asymmetric Frame, Front modules Matrix boards Broadlinx Boards Input Boards Output Boards Trinix NXT — Installation and Service Manual...
- Page 144 Fan modules and Exhaust vents Input and Output boards The outer four slots are Board Output boards The inner eight slots are Input boards Figure 2 for detail DC Power inputs Matrix boards SR module Trinix NXT — Installation and Service Manual...
- Page 145 The inner eight slots are Input boards DC Power inputs Matrix boards SR module Broadlinx boards Figure 73 for detail Output boards Figure 73. The Level, Monitor, and Frame Switch For the 256x512 Routing Switcher Trinix NXT — Installation and Service Manual...
- Page 146 Fan modules Output Boards DC Power inputs Matrix and Primary Broadlinx boards Figure 75 on page 147 for detail Input Boards Matrix and Sec- ondary Broadlinx boards DC Power inputs Output Boards Fan modules Trinix NXT — Installation and Service Manual...
- Page 147 Summary of Installation Procedure Figure 75. The Level, Monitor, and Frame Switch For the 512x1024 Routing Switcher Trinix NXT — Installation and Service Manual...
-
Page 148: Setting The Rear Panel Dip Switch
(for example, an NR-33000 Sync/NIC/OPM board). This setting is used when the NR is in turn being controlled through a LAN connection to a control system such as a Grass Valley Series 7000 Signal Management System or Encore. For more information, see SMS 7000 / Encore Control... - Page 149 Multi-viewer cards that are in other frames without Broadlinx cards may receive this LTC data through the Com Bus. Console A & B connectors These connectors are for serial connection and type various Broadlinx com- mands. Trinix NXT — Installation and Service Manual...
- Page 150 Section 10 — Hardware Installation Control Connector This connector is reserved for future use. Trinix NXT — Installation and Service Manual...
-
Page 151: Power Supply Notes
Note Grass Valley strongly recommends that you use redundant power supplies. The back panel of the frame provides a separate AC connector for each supply. Each power supply must be connected to a separate AC mains branch circuit with an over-current protector that is rated at no more than 20A AC low line and 10 A AC high line. - Page 152 TRX-OPM, and primary NR-3300. CAUTION Unlike the Fan Fuses, fuses F101, F105, F201 & F205 do not have the Blown- Fuse LED indicators! Trinix NXT — Installation and Service Manual...
- Page 153 10A AC high line. Note Grass Valley strongly recommends, whenever possible, using the AC high line to reduce line currents and heat within the power supplies. Power supply modules for the 512 x 512 Routing switchers are mounted in...
- Page 154 It is possible to connect both AC and DC power sources as part of a system redundancy scheme. In this case, refer to the AC and DC notes above. RP- 33500 jumper JN1 should be set to AC. Table 25. TRX-NXT-512x512 DC Power Cord Pinouts. Trinix NXT — Installation and Service Manual...
- Page 155 20A AC low line or 10A AC high line power circuit. Note Grass Valley strongly recommends, whenever possible, using the AC high line to reduce line currents and heat within the power supplies. Each power supply frame must be connected to the Trinix Asymmetrical frame for power distribution and power supply status monitoring.
- Page 156 Note For DC applications, fusing must be provided externally in accordance with local electrical regulations. DC input specifications and characteristics for DC Power Input the Trinix are shown in the section. Trinix NXT — Installation and Service Manual...
-
Page 157: Sync Reference Connections
Encore and Jupiter control system and to a single connection on the Trinix router. For example, TRX-NXT-128x128, TRX-NXT-256x256, and TRX-NXT-512x1024. The sync redundant switch is located between the OP Expand and INT XPT switches on the rear of the Router chassis. Trinix NXT — Installation and Service Manual... - Page 158 Encore and Jupiter control system and to two connections on the Trinix router. For example, TRX-NXT-128x128, TRX-NXT-256x256, TRX- NXT-128x256, TRX-NXT-256x512, and TRX-NXT-512x1024. The sync redundant switch is located between the OP Expand and INT XPT switches on the rear of the Router chassis. Trinix NXT — Installation and Service Manual...
- Page 159 • If different phases of the same reference are used, the phase that is most delayed is recommended for connection to the control system. • If NTSC and PAL are used, select the reference for those outputs where determinism is most important. Trinix NXT — Installation and Service Manual...
- Page 160 Sync Redundant switch = Off Sync 2 Sync 3 Sync 4 Primary NR-33000 Secondary NR-33000 Output board(s) on SL1 Output board(s) on SL2 Output board(s) on SL3 Output board(s) on SL4 Sync Lines Trinix NXT — Installation and Service Manual...
- Page 161 Sync Reference Connections For a discussion concerning which sync reference should be connected to the control system, see Sync Connection to Control System on page 159. Trinix NXT — Installation and Service Manual...
- Page 162 Sync Bus 1 is always combined with Sync Bus 3 and Bus 2 combined with Bus 4. When configuring the output boards, only Bus 1 and Bus 2 are valid selections. Trinix NXT — Installation and Service Manual...
- Page 163 Sync Reference Connections For a discussion concerning which of the two sync references should be connected to the control system, see Sync Connection to Control System page 159. Trinix NXT — Installation and Service Manual...
- Page 164 For a discussion concerning which of the four sync references should be connected to the control system, see Sync Connection to Control System. The “C” switch mentioned here and on the following drawings in on the Trinix rear panel. Trinix NXT — Installation and Service Manual...
- Page 165 Sync Line 1. If the board is removed, Sync Line 1 will automatically switch to the SR-33500. Note A secondary NR-33000 can be installed to provide Broadlinx redundancy. In this case, the NR REF IN 3 and 4 connectors would not be used. Trinix NXT — Installation and Service Manual...
- Page 166 NR REF IN 3 and 4 connectors would not be used. For a discussion concerning which of the two sync references should be connected to the control system, see Sync Connection to Control System. Trinix NXT — Installation and Service Manual...
- Page 167 Notice that Sync Line 1 is always combined with Sync Line 3 and Line 2 combined with Line 4. When configuring the output boards, only Bus 1 and Bus 2 are valid selections. Trinix NXT — Installation and Service Manual...
- Page 168 SL3 Output board(s) on SL4 Sync Lines In this arrangement, all four possible sync references are used. Two NR boards are installed, but not operated in sync redundant mode. The NR Trinix NXT — Installation and Service Manual...
- Page 169 • If the Secondary NR is removed, the SR will feed Sync Lines 3 and 4. See Sync Connection to Control System on page 159 for information con- cerning which of the four sync references should be connected to the control system. Trinix NXT — Installation and Service Manual...
-
Page 170: Nr/Sr-33000 / Sr-33500/ Trx-Sr V-Phasing
Switch point relative to NR: S3-4 NR: S3-5 NR: S3-6 Ref. B SR-33000: S2-4 SR-33000: S2-5 SR-33000: S2-6 (“Ref 2” on SR-33500) SR-33500: S101-4 SR-33500: S101-5 SR-33500: S101-6 -1.0 line -0.5 line Coincident (default) +0.5 line Trinix NXT — Installation and Service Manual... - Page 171 Table 29. Switch Point Shift For Signals Referenced to Ref 4 Switch point relative to SR-33500: S102-4 SR-33500: S102-5 SR-33500: S102-6 Ref. 4 -1.0 line -0.5 line Coincident (default) +0.5 line +1.0 line +1.5 line +2.0 line +2.5 line Trinix NXT — Installation and Service Manual...
- Page 172 Off, On, Off +2.0 line On, Off, Off On, Off, Off +2.5 line Off, Off, Off Off, Off, Off Table 32 shows the switches providing Status for the Source Select DIP Switch S1. Trinix NXT — Installation and Service Manual...
- Page 173 DipSwitch S4. Table 33. VIT Field Select DIP Switchs S4 DIP Switch S4 Status S4:1-2 Field 1, Field 2 S4:3-4 Field 1, Field 2 S4:5-6 Field 1, Field 2 S4:7-8 Field 1, Field 2 Trinix NXT — Installation and Service Manual...
- Page 174 SMPTE Alarm Jumper JN1 Secondary alarms are no Report SALARM longer sup- Supress ported. SALARM Always set this jumper to the "Suppress SALARM" position. Location of Lithium-Ion battery Switch S3. S2 default settings Trinix NXT — Installation and Service Manual...
- Page 175 Figure 89. SR-33000 Sync/OPM reference card Monitor expansion jumpers JN3 and JN4. DC and single power supply systems: set JN2 to “DC.” AC and Dual power supply sys- tems: set JN2 to “AC.” Switch S2. Trinix NXT — Installation and Service Manual...
- Page 176 Section 10 — Hardware Installation Figure 90. SR-33500 Sync/OPM reference card Switches S101 and S102. DIP switches S103, S104, and S610 are reserved for future use. The default setting for these switches is “Open.” Trinix NXT — Installation and Service Manual...
- Page 177 The +3.3V supply is OK. Green The +5V supply is OK. LOGIC VCC Green The ComBus Logic VCC is getting power from the backplane. XC DONE Green The FPGA is configured Figure 92. TRX-SC Trinix NXT — Installation and Service Manual...
- Page 178 LSB of reference source used for Monitor Output 3 S1-6 MSB of reference source used for Monitor Output 3 S1-7 LSB of reference source used for Monitor Output 4 S1-8 MSB of reference source used for Monitor Output 4 Trinix NXT — Installation and Service Manual...
- Page 179 NR/SR-33000 / SR-33500/ TRX-SR V-Phasing Figure 94. RP-33500 512 x 512 Rear Panel board DC and single power supply systems: set JN1 to “DC.” AC and Dual power supply sys- tems: set to “AC.” Trinix NXT — Installation and Service Manual...
- Page 180 Section 10 — Hardware Installation Figure 95. 3G Input Base and Mezzanine Boards TRX-HI-3G Input Mezzanine, which is also used in the HI- 1024 TRX-HI-3G Trinix NXT — Installation and Service Manual...
- Page 181 NR/SR-33000 / SR-33500/ TRX-SR V-Phasing Figure 96. HI-1024 LEDs Trinix NXT — Installation and Service Manual...
- Page 182 Section 10 — Hardware Installation Figure 97. 3G Output Base and Mezzanine Boards TRX-HO-3G Output Mezzanine TRX-HO-3G Trinix NXT — Installation and Service Manual...
- Page 183 NR/SR-33000 / SR-33500/ TRX-SR V-Phasing Figure 98. 3G Matrix 128 and 128R Boards 128R Board 128 Board Trinix NXT — Installation and Service Manual...
- Page 184 Section 10 — Hardware Installation Figure 99. 3G Matrix 256 Base and Mezzanine Boards 256 Mezzanine 256 Base Trinix NXT — Installation and Service Manual...
-
Page 185: Output Board Configuration
Figure 100. Sync Reference CLOSED OPEN SYNC SEL A SYNC SEL B AUTO RCLK Table 36. Sync Reference Sync line Sync Sel A switch Sync Sel B switch Closed Closed Open Closed Closed Open Open Open Trinix NXT — Installation and Service Manual... -
Page 186: Duplication And Expansion
. Use the PE33016 Port expander for HD operations and the PE2x2-3G Port expander for 3G operations. Figure 101. 0 -255 0 -255 0 - 255 Trinix PE 33016 used as 256x256 Dual outputs splitters Trinix NXT — Installation and Service Manual... - Page 187 Frame 0 Dual outputs splitter 1 - 256 Trinix 17 - 256 256 x 256 Single outputs Note Use the PE33016 Port expander for HD operations and the PE2x2-3G Port expander for 3G operations. Trinix NXT — Installation and Service Manual...
- Page 188 1 - 512 Trinix 512 x 512 Inputs expanded to 1024 1 - 512 PE 33016 used as Dual outputs combiners Frame 1 513 - 1024 1 - 512 Trinix 512 x 512 Trinix NXT — Installation and Service Manual...
- Page 189 Dual outputs used as combiners Frame 1 513 - 1024 1 - 512 Trinix 512 x 512 Note Use the PE33016 Port expander for HD operations and the PE2x2-3G Port expander for 3G operations. Trinix NXT — Installation and Service Manual...
- Page 190 106. The gain for outputs 1-16 must be held at unity by opening the on-board DIP switch for that set of outputs; this will override the rear-panel DIP switch setting for those outputs. Trinix NXT — Installation and Service Manual...
- Page 191 Figure 105. Location of gain jumpers on SO-33110/33011, HO-3G, and HO-33110/33011 output boards. SO-33011 MEZZANINE (UPPER NUMBERS) Note labelling error: Pin 1 "BOOST*" = Expand Enable "BOOST_REF" = Force Normal SO-33110 BASE (LOWER NUMBERS) HO-33011 MEZZANINE (UPPER NUMBERS) HO-33110 BASE (LOWER NUMBERS) Trinix NXT — Installation and Service Manual...
-
Page 192: Output Expansion
16 outputs Force Normal: Hold gain at unity (do not boost) these 16 outputs. This Open Open setting overrides the rear panel switch. Output Expansion Output expansion requires input splitters and input gain adjustment. Trinix NXT — Installation and Service Manual... - Page 193 Figure 105 on page 191). Restricted Output Expansion Using Restricted Output expansion one or more input blocks are not passed through a splitter and are therefore not boosted. For example, in the system Trinix NXT — Installation and Service Manual...
- Page 194 1-16 must be held at unity by setting the on- board jumper for that set of inputs to the Force Normal position; this overrides the rear-panel DIP switch setting for those inputs. Trinix NXT — Installation and Service Manual...
- Page 195 Duplication and Expansion Figure 109. Location of gain jumpers on SI-33110, and HI-33110. Note labelling error: Some "Base" jumpers have reversed silkscreening. In all cases, "Expand Enable" requires a jumper between pins 1 and 2. Trinix NXT — Installation and Service Manual...
- Page 196 On (Closed) On (Closed) boost switch setting for these 16 inputs Force Normal: Hold gain at unity (do not boost) these 16 inputs. This Off (Open) Off (Open) setting overrides the rear panel switch. Trinix NXT — Installation and Service Manual...
-
Page 197: Output Reclocker Bypass Settings
“Reclock if possible” means the signal will be checked to see if it is properly formed and running at a standard data rate supported by this board model. If so, the signal will be reclocked. “Bypass” means the signal will not be reclocked. Trinix NXT — Installation and Service Manual... - Page 198 A list of supported data rates for the HO-33110 and HO-33120 Output Boards is shown in the Data Reclocking specifications on page 115. Sync Selection Switch S5 See the table on page 185. Trinix NXT — Installation and Service Manual...
-
Page 199: Input Equalization Settings
On; if the stickers are not present, these switches should be set to Off. The remaining six switches on S401 are always set to Off. Figure 112. DM-33501 Digital Matrix board. DM--33502 and DM256-3G is similar S401 Trinix NXT — Installation and Service Manual... -
Page 200: Output Monitoring
The Monitor Inputs are the bottom four connections. The TRX-SR is used on the 256x512 frame and the TRX-OPM is used on the 128x256 and 512x1024 frames. Examples of basic monitoring connections are shown below. Trinix NXT — Installation and Service Manual... - Page 201 Figure 114. Example of the Output Monitor Connection for the 256 x 256 all-NTSC switcher. QC STATION SECONDARY PRIMARY NIC B NIC A COM BUS COM BUS SWITCHER CONTROL PANEL CONSOLE CONSOLE CONTROL GPIO/TC CROSSPOINT BUS JUPITER CONTROL SYSTEM Trinix NXT — Installation and Service Manual...
- Page 202 FAN IFC XPT BUS SWITCHER CONTROL PANEL COM BUS COM BUS ALARM LEVEL SUPER ULTRA INPUT EXPAND MONITOR FRAME OUTPUT EXPAND 1024 SYNC REDUNDANT 1536 INT XPT CNTL 2048 60Hz ENABLE JUPITER CONTROL SYSTEM Trinix NXT — Installation and Service Manual...
- Page 203 The second BNC connector of each pair provides an inverted output signal. Note For Jupiter-controlled (0-based) systems, subtract one (1) from these numbers in the following tables. *For Jupiter-controlled (0-based) systems, subtract one (1) from these numbers. Trinix NXT — Installation and Service Manual...
- Page 204 1027* 1028* Table 42. TRX-NXT-512x512Monitor Switch Information TRX-NXT-512x512 Monitor Output Number Switch and Address 513* 514* 515* 516* 1024 1025* 1026* 1027* 1028* 1536 1537* 1538* 1539* 1540* 2048 2049* 2050* 2051* 2052* Trinix NXT — Installation and Service Manual...
- Page 205 2048 2049* 2050* 2051* 2052* Table 45. TRX-NXT-512x1024 Monitor Switch Information TRX-NXT-512x1024 Monitor Output Number Switch and Address 1024 1025* 1026* 1027* 1028* 1536 1537* 1538* 1539* 1540* 2048 2049* 2050* 2051* 2052* Trinix NXT — Installation and Service Manual...
- Page 206 Monitor 4 S101-7 S101-8 S102-7 S102-8 Auto detect ON Force bypass (do not reclock) There is no Output Monitor "Reclock Bypass" option on frames that use the TRX-OPM card. For example, the 512x1024 frame. Trinix NXT — Installation and Service Manual...
-
Page 207: Monitoring With Expanded Systems
Switch S2- 8 is the Mezz Boost Override switch, which is only used for Grass Valley testing. This switch should be set to OFF at all times. All other switches are defined in the tables under TRX-SR V Phase and... - Page 208 1 - 256 Trinix 256 x 256 PE-33016s 1 - 256 used as combiners Dual outputs Frame 1 257-512 257 - 512 Trinix 256 x 256 PE-33016 used as QC station Output monitor video combiner Trinix NXT — Installation and Service Manual...
- Page 209 Figure 63 (128 x 128); Figure 65 (256 x 256); or Figure 67 (512 x 512). The “Monitor” switch must also be set to identify the total number of outputs (see page 203). Trinix NXT — Installation and Service Manual...
- Page 210 Note: The order of the frames for the monitor cascade does not matter. MON outs (4) Trinix 128x256 Inputs 129-257 Outputs 1-256 Switcher Frame 1 No Connect CAS ins (4) Or Test Signal Trinix NXT — Installation and Service Manual...
- Page 211 Note: The order of the frames for the monitor cascade does not matter. MON outs (4) Trinix 512x1024 Inputs 513-1024 Outputs 1-1024 Switcher Frame 1 No Connect CAS ins (4) X 2 Or Test Signal Trinix NXT — Installation and Service Manual...
-
Page 212: Frame Number Settings
256* 512* 768* *The 128X256 router is a subset of the 256X256 router and it operates as a partially stuffed 256X256 system. *For Jupiter-controlled (0-based) systems, subtract one (1) from these input/output numbers. Trinix NXT — Installation and Service Manual... - Page 213 The 256X512 router is a subset of the 512X512router and it operates as a par- tially stuffed 512X512 system. Table 49. Frame Numbering (cont.) TRX-NXT-512x1024 FRAME NUMBER INPUTS 1537-2048* 1025-1536* 513-1024* 1-512* OUTPUTS 1-1024 1025--2048 *For Jupiter-controlled (0-based) systems, subtract one (1) from these input/output numbers. Trinix NXT — Installation and Service Manual...
-
Page 214: Jupiter Control
Interconnection from a Jupiter VM-3000 or CM-4000 control board is via Crosspoint bus cable, which can be supplied in 3, 10, 25, or 50-foot lengths. The Crosspoint bus (“XPT BUS”) connector (15-pin D-con- Trinix NXT — Installation and Service Manual... - Page 215 For those who wish to prepare their own cables, pin-outs are shown below in Figure 125. The cable itself should be Belden 9505 or equiva- lent. Details concerning ferrite cores are given in Figure 126. Trinix NXT — Installation and Service Manual...
- Page 216 Section 10 — Hardware Installation Figure 125. CC-2010 wiring. Reference: Assembly, CC-2010 Matrix Cable,” Grass Valley drawing no. 01-032707-TAB Twisted pairs Shield Reset Black Black Yellow Yellow Data Black Black Green Green Clock Black Black Blue Blue Take Black Black...
- Page 217 Broadlinx monitoring of TRX-NXT-512x512 and multi-frame units. 5. Refer to the Jupiter VM-3000 System Controller Installation and Operation Manual or the Jupiter CM-4000 System Controller Installation and Operation Manual for installation details about the control system. Trinix NXT — Installation and Service Manual...
- Page 218 When controlling such units, references to Physical Input/Output connectors in Jupiter tables refer to that connector number plus 1. For example, Physical Input 10 in the Jupiter Switcher Input table would correspond to connector number 11 on the Trinix rear panel. Trinix NXT — Installation and Service Manual...
-
Page 219: Sms 7000 / Encore Control
“0” and the adjacent rotary switch must point at “1.” Note On all the Trinix rotary switches, use the triangular arrowhead for pointing (not the screwdriver slot). Figure 130. LEVEL SUPER 96 112 14 15 ULTRA Trinix NXT — Installation and Service Manual... - Page 220 The Crosspoint bus cable is described on Figure 124. 4. Install LAN components as described beginning on page 221. 5. Refer to the SMS 7000 or Encore documentation for control system configuration details. Trinix NXT — Installation and Service Manual...
-
Page 221: Lan And Com Bus Connections
The connection should be made through a firewall if the Trinix LAN is connected to the Internet. Compliance with EEC, EMC, EN series, UL- 1950, and CSA C22.2 No. 950-M89 standards requires use of a shielded cable. Trinix NXT — Installation and Service Manual... - Page 222 If you plan to use a secondary NR-33000 board connect another Ethernet cable from the NIC B jack to the network switch. If the Trinix LAN is connected to the Internet, the connection should be made through a firewall. Trinix NXT — Installation and Service Manual...
- Page 223 Trinix, see Encore Control on page 371. Figure 133. Encore connections to Trinix Ethernet switch Primary Encore controller Secondary Encore controller Ethernet switch Ethernet switch NIC A NIC B connector connector Trinix Encore control panels Trinix NXT — Installation and Service Manual...
- Page 224 • To configure the board using Broadlinx web pages, refer to the Broadlinx Software section on page 285. • To configure the board using the Grass Valley NetConfig applica- tion, refer to the NetConfig Instruction Manual. Compliance with EEC, EMC, EN series, UL- 1950, and CSA C22.2 No. 950-M89 standards requires use of a shielded cable.
- Page 225 LAN and Com Bus Connections If SNMP/NetCentral monitoring is to be used, the Trinix SNMP agent residing on the NR-33000 board must be enabled (that is, licensed). For more information, see SNMP/NetCentral Monitoring on page 300. Trinix NXT — Installation and Service Manual...
-
Page 226: Replacing Trinix Boards
10.3us. All of the legacy matrix/output cards VIT timing will be delayed by a similar amount. Grass Valley recommends that you operate with matched versions of boards to meet RP-168 switch points. However, the system will operate but with a minor timing offset. -
Page 227: Section 11 - Trinix Asymmetrical Power Supply Configurations
Figure 135. Lineage Power Supply Frame The Lineage power supply frame supports up to four power supply mod- ules. The power supply frame sets the output voltage of each power supply module to 48 VDC. Trinix NXT — Installation and Service Manual... -
Page 228: The Power Supply Module
Watts. • For AC high line, 200-240 VAC, the output power is limited to 1800 Watts. Each power supply module provides an I C interface for status and moni- toring as mentioned earlier. Trinix NXT — Installation and Service Manual... - Page 229 There are four LEDs on the front panel of the power supply module that display the status for the AC input, DC input, Temperature, and non-spe- cific faults. For more information, see Asymmetrical Frames in the Trouble- shooting section on page 390. Trinix NXT — Installation and Service Manual...
-
Page 230: Basic Configuration For The Lineage Power Supply Frame
Trinix Asymmetrical routing switcher. Each TRX-SC board provides two I C interface connectors that will monitor and provide the status of the external power supply modules. Each TRX-SC board must Trinix NXT — Installation and Service Manual... - Page 231 SW 2 = BUS A EXPANSION ENABLE (Future use) SW 3 = BUS B ENABLE SW 4 = BUS B EXPANSION ENABLE (Future use) SW 5 = N/A SW 6 = N/A SW 7 = N/A SW 8 = N/A Trinix NXT — Installation and Service Manual...
- Page 232 A DIP switch is enabled by moving the switch to the ON position. See Figure 140 below, in this example the BUS A is enabled. Note The gray color indicates the position of the switch. Figure 140. TRX-SC Configuration Example Trinix NXT — Installation and Service Manual...
-
Page 233: The 128X256 Trinix Asymmetrical Frame
The power cable is connected to the DC INPUT A connector of the router frame. The power supply’s interface cable is connected to the PMBUS A connector of the router frame. Trinix NXT — Installation and Service Manual... - Page 234 The default configuration uses two power supplies. The corresponding TRX-SC DIP switch setting for the 128X256 default con- figuration is shown in Figure 143. Figure 143. TRX-SC DIP Switch Settings for 128X256 Default Configuration Trinix NXT — Installation and Service Manual...
- Page 235 Figure 144. Trinix 128X256 Redundant PSU Configurations, Options A POS 4 POS 3 POS 2 POS 1 The option A configuration uses one power supply and three power supply modules. Trinix NXT — Installation and Service Manual...
- Page 236 A and B, is shown in Figure 146. Note The configuration switch settings are the same as the default configuration. Figure 146. TRX-SC DIP Switch settings for 128X256 Options A and B Trinix NXT — Installation and Service Manual...
- Page 237 The other Trinix power supply rack is connected to the DC INPUT B con- nector on the router frame. The power supply’s interface cable is connected to the PMBUS B connector on the router frame. Trinix NXT — Installation and Service Manual...
- Page 238 POS 2 POS 1 The corresponding TRX-SC DIP switch setting for the 128X256 redundant power supply configuration, option C, is shown in Figure 148. Figure 148. TRX-SC DIP Switch settings for 128X256 Option C Trinix NXT — Installation and Service Manual...
- Page 239 The second Trinix power supply rack is connected to the DC INPUT B con- nector of the router frame. The power supply’s interface cable from this Trinix power supply rack is connected to the PMBUS B connector of the router frame. Trinix NXT — Installation and Service Manual...
- Page 240 Figure 149. Trinix 128X256 Redundant PSU Configurations, Option D POS 4 POS 3 POS 2 POS 1 POS 4 POS 3 POS 2 POS 1 Option D provides two power supplies, each with three power supply modules. Trinix NXT — Installation and Service Manual...
- Page 241 Option E provides two power supplies, four modules per supply. The corresponding TRX-SC DIP switch setting for the 128X256 redundant power supply configurations, options D and E, is shown in Figure 151 on page 242. Trinix NXT — Installation and Service Manual...
- Page 242 Section 11 — Trinix Asymmetrical Power Supply Configurations Figure 151. TRX-SC DIP Switch settings for 128X256 Option D and E Trinix NXT — Installation and Service Manual...
-
Page 243: The 256X512 Trinix Asymmetrical Frame
243 below. This connectivity supports up to two external power supply frames and eight power supply modules. Figure 152. Trinix 256X512 Frame Rear View The TRX-SC Board connections The Isolated Power inputs Trinix NXT — Installation and Service Manual... - Page 244 The power is connected to the DC INPUT A connector of the router frame. The power supply’s interface cable is connected to the PMBUS A connector on the router frame. Figure 153. 256X512 Default Power Supply Configuration POS 4 POS 3 POS 2 POS 1 Trinix NXT — Installation and Service Manual...
- Page 245 Figure 156 on page 247). The power is connected to the DC INPUT A connector of the router frame. The power supply’s interface cable is connected to the PMBUS A connector of the router frame. Trinix NXT — Installation and Service Manual...
- Page 246 Section 11 — Trinix Asymmetrical Power Supply Configurations Figure 155. Trinix 256X512 Redundant PSU Configurations, Options A POS 4 POS 3 POS 2 POS 1 Option A uses three power supply modules. Trinix NXT — Installation and Service Manual...
- Page 247 157. the 256X512 Note The configuration switch settings for Options A and B are the 256X512 same as the default configuration. Figure 157. TRX-SC DIP Switch Settings for 256X512 Options A and B Trinix NXT — Installation and Service Manual...
- Page 248 Trinix power supply rack is connected to the PMBUS B connector of the router frame. Figure 158. Trinix 256X512 Redundant PSU Configurations, Options C POS 4 POS 3 POS 2 POS 1 POS 4 POS 3 POS 2 POS 1 Trinix NXT — Installation and Service Manual...
- Page 249 The other Trinix power supply rack is connected to the DC INPUT B con- nector of the router frame. The power supply’s interface cable from this Trinix power supply rack is connected to the PMBUS B connector of the router frame. Trinix NXT — Installation and Service Manual...
- Page 250 Figure 160. Trinix 256X512 Redundant PSU Configurations, Option D POS 4 POS 3 POS 2 POS 1 POS 4 POS 3 POS 2 POS 1 Option D uses two power supplies with three power supply modules each. Trinix NXT — Installation and Service Manual...
- Page 251 The corresponding TRX-SC DIP switch setting for both options D and E, for the 256X512 redundant power supply configurations, is shown in Figure 162. Figure 162. TRX-SC DIP Switch Settings for 256X512 Option D and E Trinix NXT — Installation and Service Manual...
-
Page 252: The 512X1024 Trinix Asymmetrical Frame
(Figure 163). Grass Valley recommends that the power supplies are installed to the side of the 512X1024 Asymmetrical frame.There must be a 2RU space above and below the fans for the routing switcher. If your needs require installing the power supply above and /or below the frame, make sure there is a 2RU space between the frame and the Power supply. - Page 253 The 512X1024 Trinix Asymmetrical Frame Figure 163. Trinix 512X1024 Frame Rear View The Isolated Power inputs The TRX-SC Board connections The TRX-SC Board connections The Isolated Power inputs Trinix NXT — Installation and Service Manual...
-
Page 254: 512X1024 Default Power Supply Configuration
The following images are used as examples of how to connect the cables. Do NOT place anything on top or on the bottom of the 512x1024 routing switcher; doing so will block the airflow and may cause the routing switcher to overheat. Trinix NXT — Installation and Service Manual... - Page 255 The 512X1024 Trinix Asymmetrical Frame Figure 164. Trinix 512X1024 Default PSU Configuration 3 RU space: 2RU RU Empty Space 1 RU Fan Trinix NXT — Installation and Service Manual...
- Page 256 For the 512X1024 default power supply configuration the two TRX-SC boards in the frame are configured with the corresponding DIP switch setting as shown in Figure 165. Figure 165. TRX-SC DIP Switch Settings for 512X1024 Default Configuration Trinix NXT — Installation and Service Manual...
-
Page 257: 512X1024 Redundant Power Supply Configurations, Option A
The additional power supply’s interface cables are connected to the PMBUS B connectors of the router frame (Figure 166). Figure 166. Trinix 512X1024 Redundant PSU Configuration, Options A 3 RU space 2RU RU Empty Space 1 RU Fan Trinix NXT — Installation and Service Manual... - Page 258 For the 512X1024 redundant power supply configuration, option A, the two TRX-SC boards in the frame are configured with the corresponding DIP switch setting as shown in Figure 167. Figure 167. TRX-SC DIP Switch Settings for 512X1024 Option A Trinix NXT — Installation and Service Manual...
-
Page 259: Section 12 - Broadlinx Installation
• Any Encore system that is newer than the 1.7.3 version. • Any Jupiter system. • The 2.0.13 version of NetConfig or newer. Note Do not use Broadlinx with either the Dynex DX-ESW8, 10/100M Fast Ethernet Switch or the Zonet Model ZFS3124. Trinix NXT — Installation and Service Manual... -
Page 260: Software Installation
Broadlinx boards is that you must update the Active Broadlinx board and then telnet into the Inactive bard to start the update process. With the single board, you will only need to telnet into one board. Trinix NXT — Installation and Service Manual... -
Page 261: Updating Compact Flash Cards
• Certain steps of the following procedure will momentarily interrupt switcher operations. These steps are preceded by a statement. Caution For more information, contact Grass Valley’s Technical support; see page Updating Compact Flash Cards Compact Flash (CF) Memory cards are used to update Broadlinx. These cards are read from the NR-33000 (Broadlinx) board. -
Page 262: Updating New Broadlinx Boards
If not, see the Installation instructions that came with the CF card reader. Note Grass Valley recommends that you format your CF card to the FAT16 format. For more information, see Formatting the Compact Flash Card with the FAT16 Format on page 279. -
Page 263: Updating Systems With A Single Broadlinx Board
This option will insure that switches occur at the correct timing position. • Update the Trinix router to Broadlinx 3.0.1 or newer. CAUTION Grass Valley strongly recommends that customers keep all software updated to the latest released version. New boards are NOT guaranteed to be compat- ible with older versions of software. - Page 264 Do not press the Browser's Refresh button (or press F5 on your keyboard) during the installation. A redrawing issue may occur with the 512x1024 routing switcher's Web page. If you do press the Refresh button, you must reset the bottom half of the 512x1024 frame. Trinix NXT — Installation and Service Manual...
- Page 265 Activating Software 1. Click the button at the bottom of the page (Figure 170). The Activate Message from webpage dialog will then appear: Figure 171. The Estimated Time Dialog Trinix NXT — Installation and Service Manual...
- Page 266 When the progress bars reach 100%, a “finished firmware update” message will appear. 3. Click the button (Figure 173 on page 267). Click here to close this window Trinix NXT — Installation and Service Manual...
- Page 267 Figure 174. The Restart Button on the Firmware Management Screen The cards must be restarted to use the new firmware. 5. Click the button, which is shown above in Figure 174. Restart The following Caution pop-up window will then appear: Trinix NXT — Installation and Service Manual...
- Page 268 The Post Complete window will then reappear. 7. Navigate to the Firmware Management page. All Status indicators should be green but the NR -33000 board. Figure 176. The Firmware Management Screen All boards are up to date Trinix NXT — Installation and Service Manual...
-
Page 269: Updating Systems With Two Broadlinx Boards
2. Insert the Compact Flash card into the slot on the Broadlinx board and then insert the Broadlinx boards into the frame. Broadlinx will then inventory the boards that are in the frame. Trinix NXT — Installation and Service Manual... - Page 270 An example of this table is shown in the figure below (Figure 179 on page 271). When accessing this web page there may be a slight delay as the page is gathering the latest information. Trinix NXT — Installation and Service Manual...
- Page 271 (Figure 179). The Activate Message from webpage dialog will then appear: Figure 180. The Estimated Time Dialog 2. Click the button. The Broadlinx: Updating firmware status window will then appear: Trinix NXT — Installation and Service Manual...
- Page 272 When the progress bars reach 100%, a “finished firmware update” message will appear. 3. Click the button (Figure 173 on page 267). Click here to close this window Trinix NXT — Installation and Service Manual...
- Page 273 Figure 183. The Restart Button on the Firmware Management Screen The cards must be restarted to use the new firmware. 5. Click the button, which is shown above in Figure 183. Restart The following Caution pop-up window will then appear: Trinix NXT — Installation and Service Manual...
- Page 274 • Press the Activation button on the Inactive board.The Activate button is the button closest to the CF card 2. Navigate to the Firmware management page. All Status indicators should be green but the now inactive broadlinx board. Trinix NXT — Installation and Service Manual...
- Page 275 Figure 186. The Restart Button on the Firmware Management Screen The cards must be restarted to use the new firmware. 5. Click the button, which is shown above in Figure 186. Restart The following Caution pop-up window will then appear: Trinix NXT — Installation and Service Manual...
- Page 276 The Post Complete window will then reappear. 7. Navigate to the Firmware Management page. All Status indicators should be green. Figure 188. The Firmware Management Screen All boards are up to date Trinix NXT — Installation and Service Manual...
-
Page 277: Licensing Snmp On Both Broadlinx Boards
3. Enter the redundantConfigShow command at the command prompt to verify that the communications is active and that the SNMP license key had been transferred. 4. Once the key is transferred the board should be rebooted. Trinix NXT — Installation and Service Manual... - Page 278 Web page. If zero is shown, no SNMP key has been set. Trinix NXT — Installation and Service Manual...
-
Page 279: Formatting The Compact Flash Card With The Fat16 Format
Figure 190. The Manage Option of the My Computer Menu 3. Select the Disk Management option under the Storage menu. 4. Right click the CF, when it appears, and then select the Format option (Figure 191 on page 280). Trinix NXT — Installation and Service Manual... - Page 280 6. Select FAT from the File system drop-down list. 7. Select Default from the Allocation unit size drop-down list. 8. Click the button. A popup will appear (Figure 193). Figure 193. Format Warning Click the button. Trinix NXT — Installation and Service Manual...
-
Page 281: Alternate Methods For Updating A Compact Flash Cards
• This feature cannot be used to downgrade from 3.2.0x to 3.1.0x (or older releases). • The Compact Flash should be at least 128MB in size. An error will appear if a smaller sized flash is used Trinix NXT — Installation and Service Manual... - Page 282 Broadlinx. This will display the software versions available for loading in the right panel (Figure 194). Figure 194. NetConfig’s Load Software Window The available versions of The destina- software tions for the software Trinix NXT — Installation and Service Manual...
-
Page 283: Installation Faq
• If the LED is green, Restart Web browser. • If the LED is red, Open the door and see which board has a red LED. Then start a Telnet session to check the alarm conditions on the board. Trinix NXT — Installation and Service Manual... - Page 284 Section 12 — Broadlinx Installation Trinix NXT — Installation and Service Manual...
-
Page 285: Section 13 - Broadlinx Software
The Broadlinx option, which consists of Broadlinx software running on the NR-33000 Sync/NIC/OPM board, allows SMS 7000 or Encore control using Grass Valley CPL (Control Point Language) through an Ethernet con- nection. Broadlinx also provides Web pages for the following operations: •... - Page 286 Figure 195. The Local Connection Properties Dialog 3. Scroll down and then select the Internet Protocol (TCP/IP) setting. 4. Click the button. The Internet Protocol (TCP/IP) Properties Properties dialog will then appear (Figure 196). Trinix NXT — Installation and Service Manual...
- Page 287 The Broadlinx board should be powered up (or rebooted) only after all network connections have been made. Otherwise the board may fail to boot properly. Starting BroadLinx 1. Start Microsoft Internet Explorer on the PC. Trinix NXT — Installation and Service Manual...
-
Page 288: Complex Network
Configure Configuration page (Figure 198). You should see the current Network Interface parameters. Your parameters will differ from those in the example shown in Figure 198. Trinix NXT — Installation and Service Manual... - Page 289 Network Configuration page. The Configure Network Interface page (Figure 199) will then be displayed. Figure 199. The Configure Network Interface Screen 3. Enter the information that is needed to connect to your network in the respective fields. Trinix NXT — Installation and Service Manual...
- Page 290 Protected Paths When Protected Paths are started in the system, run the board insertion procedure for Protected Paths. That is, setting up the network parameters and synchronizing the paths.dat file and so forth. Trinix NXT — Installation and Service Manual...
- Page 291 In the event the board does become active, before these steps have been executed, immediately reset the newly inserted Broadlinx board (NR 33000). Trinix NXT — Installation and Service Manual...
-
Page 292: Configuration
The Time settings are used only to timestamp the “Events” log entries. Clicking the arrow button at the bottom of the Current Time Management Time section (Figure 201 on page 293) will open the Time management screen, which is shown in Figure 202. Trinix NXT — Installation and Service Manual... - Page 293 If the SNTP server is on another network you may need to enter the IP address of the gateway to that network. Setting the Time Manually The clock will run in stand-alone mode if no external reference is available. per SMPTE RP 164-1996. Trinix NXT — Installation and Service Manual...
- Page 294 Figure 205. System Description 2. Enter a new description in the text field. 3. Click the button. Clicking the button will close the page Save Cancel without saving the changes. Trinix NXT — Installation and Service Manual...
- Page 295 IP Address: This field assigns an IP address to the primary NR-33000. This address must end with an even number. If an odd number is entered, it will automatically be changed to the next higher number. Trinix NXT — Installation and Service Manual...
- Page 296 Enter License Key arrow button. The Enter SNMP License window will then appear. Figure 210. The Enter License Key 3. Enter the SNMP license key that was issued to you by sales and support. Trinix NXT — Installation and Service Manual...
- Page 297 Figure 211. The License Key is Valid Note If the number is not valid, check the number entered. If the number is still not valid contact Tech support (see Contacting Grass Valley on page 5. Click the button. The SNMP License window will then close and return you to the Configuration page.
- Page 298 Table 51. Board Description for “squared” or Symmetric Frames Board Description Abbreviation High Definition Input board Standard Definition Input board High Definition Output board Standard Definition Output board Three Gb/s boards Data Matrix board Trinix NXT — Installation and Service Manual...
- Page 299 For example, if there are four SO- 33110 output boards, three with firmware version “2” and one with firm- ware version “1,” the table will show “1...” Trinix NXT — Installation and Service Manual...
-
Page 300: Snmp/Netcentral Monitoring
CAUTION Grass Valley strongly recommends that users keep all software updated to the latest released version. New boards are NOT guaranteed to be compatible with older versions of software. - Page 301 The current status of the reference signal. For example, Present, Faulty, or Missing. Table 58. Input/Output Signal Information Item Description Signal Alias The Alias name of the signal. Signal Type The type of signal. For example, HD or SD Video. Trinix NXT — Installation and Service Manual...
- Page 302 Fan Error A trap message is sent to the manager if any error occurs in the fan. This error trap is cleared once the fan is restored to the correct state. Trinix NXT — Installation and Service Manual...
- Page 303 Manager IP Address is set automatically by the NetCentral application. Follow these steps to configure an SNMP manager’s IP Address: 1. Click the Configure SNMP Manager IP Address hyperlink on the Configuration Web page (Figure 214). Trinix NXT — Installation and Service Manual...
- Page 304 Address page. The submitted changes will not be affected. Configuring Input Signal Loss Notifications Input Signal-Loss SNMP notifications are configured using the Broadlinx Web pages. The Signal-Loss settings are ONLY available if you have a valid Trinix NXT — Installation and Service Manual...
- Page 305 Page. Both of these pages are explained in detail below. From the Individual Input Board Web Page You can use Grass Valley’s NetConfig application to access each Input board. Follow these steps to configure the Input Signal Loss notification feature using the Individual Input board’s Web Page:...
- Page 306 The Signal-Loss settings are only available if SNMP is licensed on that matrix. The Signal-Loss settings can be accessed from two places. • From the individual Output Board Web page. • From the Frame Level Signal Web page. Trinix NXT — Installation and Service Manual...
- Page 307 Follow these steps to configure Output Signal Loss notifications using the Frame level signal’s Web Page: 1. Click the button to open the Frame Info tab (Figure 223). Signal 2. Select the Signal alarms for each connector. Trinix NXT — Installation and Service Manual...
- Page 308 Section 13 — Broadlinx Software Figure 223. The Signal Alarm Configuration Page 3. Save the configuration by clicking the button Save Signal Alarm Config (Figure 224). Figure 224. The Signal Alarm Configuration Page Trinix NXT — Installation and Service Manual...
-
Page 309: Licensing Snmp On Both Broadlinx Boards
3. Enter the redundantConfigShow command at the command prompt to verify that the communications is active and that the SNMP license key had been transferred. 4. Once the key is transferred the board should be rebooted. Trinix NXT — Installation and Service Manual... - Page 310 Web page. If zero is shown, no SNMP key has been set. Trinix NXT — Installation and Service Manual...
-
Page 311: Broadlinx / Internet Explorer Monitoring
(or press the F5 key on your Refresh keyboard) to return to this page at any time. Pressing the button (Located above the left hand Web page.) will Reload cause both pages to refresh. Trinix NXT — Installation and Service Manual... - Page 312 2. Click on the graphic of the Routing switcher front panel. A line drawing of the Trinix frame will then appear (similar to the example shown in Figure 228). Figure 227. The Trinix 256x512 Asymmetric Frame Trinix NXT — Installation and Service Manual...
- Page 313 (Figure 229 on page 314). The selected board and its information will then appear (Figure 230 on page 315). Trinix NXT — Installation and Service Manual...
- Page 314 Section 13 — Broadlinx Software Figure 229. Frame and Device Tree or click one of Click one of these these • In this example, the HI-33300-3G board has been selected. Trinix NXT — Installation and Service Manual...
- Page 315 Note To find the name of a board or module, you can mouse over the graphic and a tool-tip text alert with the name and status will appear (Figure 231). Figure 231. Tool-tip Trinix NXT — Installation and Service Manual...
- Page 316 • “S” = The monitor output board is not reclocking this signal (because the signal is either SD or Force Bypass mode is selected). For more information about output monitor reclocking see Output Monitor Reclock / Force Bypass Settings on page 206. Trinix NXT — Installation and Service Manual...
- Page 317 For more information about reclocking see Output Monitor Reclock / Force Bypass Settings on page 206. Trinix NXT — Installation and Service Manual...
-
Page 318: Firmware Update
Figure 234. Outputs Tab Firmware Update For firmware update instructions, refer to the Release Notes document that is supplied with the firmware; also see Updating Systems with a Single Broad- linx Board on page 263. Trinix NXT — Installation and Service Manual... -
Page 319: Trinix Matrix Identification From The Netconfig Software
235). Figure 235. The Identify Device Option 4. The LED labeled on the Broadlinx card shall blink for the default setting of 20 seconds and then returns to its previous state (Figure 236). Trinix NXT — Installation and Service Manual... - Page 320 Follow these steps to configure various options in Broadlinx: 1. Select the NetConfig option in the Configure menu (Configure> NetConfig option). Figure 237. The NetConfig Options Menu The NetConfig option dialog will then appear. Trinix NXT — Installation and Service Manual...
- Page 321 The Blink interval can be changed by entering the time in milliseconds in the Interval box. b. The Blink duration can be changed by entering the time in seconds in the Duration box. 3. Click the button to apply and save the changes. Trinix NXT — Installation and Service Manual...
-
Page 322: Updating The Fpgas Firmware On Multiple Boards At The Same Time
Follow these steps to update the FPGAs firmware for a group of boards: 1. Connect to the Trinix NR-33000 (Broadlinx) board via a console session on a PC using either a serial connection or an Ethernet/ Telnet connection. 2. Open a console window. Trinix NXT — Installation and Service Manual... - Page 323 2. Select the board type that you want to update. The 3G Input board (HI- 33300-3G HD/SD Input - 3G) is type 26. This is the board type that will be used in the rest of the examples. Trinix NXT — Installation and Service Manual...
- Page 324 See the text below. 20000528.001749: FPGA update succeeded for frame 0 slot 32, new version is 2. Card must be re-powered to use new version. (deviceMa) Trinix NXT — Installation and Service Manual...
- Page 325 0 slot 35, new version is 2. Card must be re-powered to use new version. (deviceMa) 20000528.001749: Updated: 4 FPGA(s) for group 8582 (passed 4, failed 0). (deviceMaster.cc:1079) 100% done The lights on the selected boards will remain red. Trinix NXT — Installation and Service Manual...
- Page 326 Restarting the Updated Boards The updated boards must be restarted for the firmware to be activated. Follow these steps to restart the recently updated boards: 1. Type restartFpga -1 At the command prompt. Trinix NXT — Installation and Service Manual...
- Page 327 Board Type Was Not Specified When a board type is not specified and only the updateFpgaGroup command is entered at the command prompt, a list of options will appear as well as the available board types. Trinix NXT — Installation and Service Manual...
- Page 328 FPGA version. For example: updateFpgaGroup 26 ,1 The process will be similar to what is described in Updating the FPGAs Firm- ware for a Group of Boards on page 322. Trinix NXT — Installation and Service Manual...
-
Page 329: Section 14 - Broadlinx Console Commands
(int verbose) Show the function for CodeManager class. codeManagerShowProgress (int verbose) Show the progress of activate archive. comBusShow Samples the com bus and reports what devices have to say. Trinix NXT — Installation and Service Manual... - Page 330 Table 63. E Command Arguments Detailed Description esShow No Help Text (esTributary.cc) esTribShowProgress (int show) Show progress of firmware uploads on the console. If show is 0 turn it on, otherwise turn it off. Trinix NXT — Installation and Service Manual...
- Page 331 Turn off bits in the logging filter. f should be hex. logFilterOn (unsigned int f) Turn on bits in the logging filter. f should be hex. logManagerShow (int verbose) No Help Text (logManager.cc) Trinix NXT — Installation and Service Manual...
- Page 332 (void) Diagnostic use only. Calls PathInit() directly. PathInit restores the protected path data from the paths.dat file. See the protectedPathsReset function. protectedPathShow (int startingOutput, int end- Show protected path output status. ingOutput) Trinix NXT — Installation and Service Manual...
- Page 333 Restart FPGA code for the given frame and slot If nFrame is -1 then restart all the FPGAs that need restarted. Example: restartFpga -1 If nFrame is -2 then force restart all the FPGAs. Trinix NXT — Installation and Service Manual...
- Page 334 Update FPGA code for the given frame and slot If nFrame is -1 then update all the firmware. Example: updateFirmware 0.6 updateTime (void) Forces the system to find and lock to the highest prior- ity time server. Trinix NXT — Installation and Service Manual...
- Page 335 Table 76. V Command Arguments Detailed Description versionShow (void) No Help Text (ver.c) Trinix NXT — Installation and Service Manual...
- Page 336 Section 14 — Broadlinx Console Commands Trinix NXT — Installation and Service Manual...
-
Page 337: Section 15 - Broadlinx Version And Supported Trinix Boards
The legend below shows the meaning of the different colors that are used in each table. Legend Table 77. Update Legend Requires Send Loader Requires CPLD Update CPLD All other update requirements will be listed in the Release Notes for each release. Trinix NXT — Installation and Service Manual... -
Page 338: Matrix Controller
10/23/ 30Jul1 15Mar1 Broadlinx Ver- 2.0.0 2.1.1 2.2.0 2.2.1 2.2.2 2.3.0 2.4.0 2.4.1 2.4.2 3.0.1 3.0.2 3.1.0 3.2.0 3.3.0 sion 908 Loaders Firmware version 908 App Firm- ware version FPGA Firmware version CPLD Trinix NXT — Installation and Service Manual... -
Page 339: Reference
10/23/ 30Jul1 15Mar1 Broadlinx Ver- 2.0.0 2.1.1 2.2.0 2.2.1 2.2.2 2.3.0 2.4.0 2.4.1 2.4.2 3.0.1 3.0.2 3.1.0 3.2.0 3.3.0 sion 908 Loaders Firmware version 908 App Firm- ware version FPGA Firmware version CPLD Trinix NXT — Installation and Service Manual... - Page 340 908 App Firmware version FPGA Firmware ver- sion CPLD Table 85. TrxOPM Date Released 15Mar11 Broadlinx Version 3.2.0 3.3.0 908 Loaders Firm- ware version 908 App Firmware version FPGA Firmware ver- sion CPLD Trinix NXT — Installation and Service Manual...
-
Page 341: Rear Panel
Table 89. VI33100 Date Released 8/25/ 3/4/ 7/30/ 2/11/ 9/19/ 2/17/ 8/15/ 1/18/ 10/23/ 8/19/ 10/23/ 30Jul1 15Mar1 Broadlinx Version 2.0.0 2.1.1 2.2.0 2.2.1 2.2.2 2.3.0 2.4.0 2.4.1 2.4.2 3.0.1 3.0.2 3.1.0 3.2.0 3.3.0 Trinix NXT — Installation and Service Manual... -
Page 342: Output
8/25/ 3/4/ 7/30/ 2/11/ 9/19/ 2/17/ 8/15/ 1/18/ 10/23/ 8/19/ 10/23/ 30Jul1 15Mar1 Broadlinx Version 2.0.0 2.1.1 2.2.0 2.2.1 2.2.2 2.3.0 2.4.0 2.4.1 2.4.2 3.0.1 3.0.2 3.1.0 3.2.0 3.3.0 908 Loaders Firmware version Trinix NXT — Installation and Service Manual... - Page 343 10/23/ 8/19/ 10/23/ 30Jul1 15Mar1 Broadlinx Version 2.0.0 2.1.1 2.2.0 2.2.1 2.2.2 2.3.0 2.4.0 2.4.1 2.4.2 3.0.1 3.0.2 3.1.0 3.2.0 3.3.0 908 Loaders Firmware version 908 App Firmware version FPGA Firmware version CPLD Trinix NXT — Installation and Service Manual...
- Page 344 Section 15 — Broadlinx Version and Supported Trinix Boards Trinix NXT — Installation and Service Manual...
-
Page 345: Section 16 - Protected Paths
Section Protected Paths Protected Paths Overview The Protected Path function is designed to monitor router outputs that are feeding critical downstream equipment. In the event of signal loss, the Protected Path function will automatically select the output that is carrying the same signal and trigger the system alarm. The first indica- tion of signal loss is that the LED on the front door should switch to red. - Page 346 The Broadlinx web pages display static information from the installed hardware and are valid within four minutes of any changes. Due to the length of the update time, Grass Valley recommends that you use your control system for monitoring. Adding Stand-By Boards in a Jupiter Controlled Trinix Router...
- Page 347 To restart refresh on a Jupiter Express system suspend the refresh task: SB > tr rfxp value = 0 = 0x0 SB > For more information, contact Grass Valley’s Technical support (See Con- tacting Grass Valley on page Trinix NXT — Installation and Service Manual...
-
Page 348: Verifying The Parameters On The Broadlinx Boards
6. Open the Broadlinx Web page of the active board and navigate to the Protected Paths web page. 7. Click the button at the bottom of the page to save the displayed Enter path data to the Broadlinx board (Figure 240). Trinix NXT — Installation and Service Manual... - Page 349 Figure 242. Events Link at the Top of the Broadlinx Web Page Return to the terminal session. Trinix NXT — Installation and Service Manual...
- Page 350 Figure 243. The Device Master Information List If the values are the same, the Broadlinx board is ready to be initialized and activated. If the values are not the same, contact Grass Valley’s Technical support (Contacting Grass Valley on page...
-
Page 351: Broadlinx Software With Protected Paths Installation
3. Connect to the Primary Broadlinx controller from the Broadlinx Web page • Navigate to the “Frame Signals: Protected Paths” page and then click the button to save the Protected Path data file to the new Enter card. Trinix NXT — Installation and Service Manual... - Page 352 5. Activate the Primary processor (Press the button near the compact flash on the side with two buttons or evoke the redundancyBoardActivate command from a console shell.) and connect the Web browser to the Primary processor to update the system firmware. Trinix NXT — Installation and Service Manual...
- Page 353 Broadlinx Software with Protected Paths Installation Note The above steps describe how to update both processors independently. Of course you can simply remove both processors and update them at the same time and re-enter the protected path configuration. You can also keep the paths web page up while the boards run and save the path data with the Enter button once the HTTP server has started on the board the page is connected Verifying the Firmware...
-
Page 354: Accessing The Protected Path Page
Figure 248. The Paths Item in the Navigation Panel 3. Click the button. Signals Figure 249. The Paths Item in the Navigation Panel 4. The Signals: Protected Paths page will then appear. Trinix NXT — Installation and Service Manual... - Page 355 Figure 250. The Signal Button on the Paths Page 3. Click the (Figure 251). Paths Figure 251. The Paths Item in the Navigation Panel 4. The Signals: Protected Paths page will then appear. Trinix NXT — Installation and Service Manual...
-
Page 356: Broadlinx Protective Paths Web Page
Primary the Enter button will switch to the Primary path. Secondary radio button: Selecting the radio button and then Secondary clicking the button will switch to the Secondary path. Enter Trinix NXT — Installation and Service Manual... - Page 357 Selecting the Fail Back option from the drop-down list will set how the router will respond when a path fails. If a primary output for a protected path is no longer valid, then the secondary valid path will be enabled. Trinix NXT — Installation and Service Manual...
- Page 358 Primary and Secondary path. This loss of both signals is shown as a visual alarm in the Status column because neither output in the path is active. Figure 254. The Primary and Secondary Paths Have Failed Signal has been lost Trinix NXT — Installation and Service Manual...
- Page 359 An orange status flag indicates that the Primary path is locked. A beige status flag indicates that the Secondary path has been Beige locked. A gray status flag indicates that the output has already been Gray assigned as part of a protected path. Trinix NXT — Installation and Service Manual...
- Page 360 Frame page. Back Enter button will apply the entered information. Whenever a config- Enter uration change is made, click this button to push the change to both Broadlinx cards. Trinix NXT — Installation and Service Manual...
-
Page 361: Assigning A Secondary Path
Refresh button will update and display the information on the active Refresh page. Pressing the button (Located below the Grass Valley logo on the Reload Web page Figure 257.) will cause both pages to refresh. Figure 257. The Reload Button... -
Page 362: System Alarm Overview
Alarm BNC connector. • For the Asymmetric frame, a red LED would be seen on the front door and on the rear panel Alarm BNC connector. Trinix NXT — Installation and Service Manual... -
Page 363: Encore Configuration
1. Open the Global Level Configuration page if it is not already open. 2. Create two levels (one for each of the primary and secondary paths): Figure 258. The Global Level Configuration Screen 3. Create a Physical matrix for Trinix with a single, blocked segment: Trinix NXT — Installation and Service Manual... - Page 364 4. Enable the Share option in the Segment configuration (this allows the segment to be shared across multiple logical matrices). 5. Create two logical matrices (one for each of the primary and secondary paths): Trinix NXT — Installation and Service Manual...
- Page 365 “Element 1” to be the Segment created in Step 8. Using the Source Configure screen, select the desired source and enter the logical matrix names connector numbers for the primary and secondary levels on the selected source: Trinix NXT — Installation and Service Manual...
- Page 366 9. Using the Destination Configure screen, select the desired destination and enter the logical matrix names and connector numbers for the primary and secondary levels on the selected destination: Figure 262. The Destination Configure Screen Trinix NXT — Installation and Service Manual...
-
Page 367: Jupiter Configuration
The remaining 32 x 32 block would be defined as the “Secondary” logical level and also assigned to physical level “1.” The “Follow” field for the Secondary level would list the name of the primary logical level. This will prohibit breakaway switching. Trinix NXT — Installation and Service Manual... - Page 368 Finally, CP Input and CP Output Set tables would be used to tie Category/ Number selections to the logical names of the desired inputs and outputs on both levels. For more information about logical level mapping, refer to the Jupiter Installation and Operating manual. Trinix NXT — Installation and Service Manual...
-
Page 369: Operation Notes
Once a board is replaced in the system it must be polled by the Com Bus and be found to be part of a protected path before the output will be disabled or enabled appropriately. Trinix NXT — Installation and Service Manual... - Page 370 Section 16 — Protected Paths Trinix NXT — Installation and Service Manual...
-
Page 371: Section 17 - Encore Control
The Broadlinx option, which consists of Broadlinx software running on the NR-33000 Sync/NIC/OPM board, allows Trinix to be controlled by SMS 7000 or Encore. This control uses Grass Valley CPL (Control Point Lan- guage) through an Ethernet connection. Refer to the SMS 7000 or Encore documentation for specific information about either control system. - Page 372 OPM board). This setting is used when the Broadlinx board (NR-33000) is in turn being controlled through a LAN connection to a control system such as a Grass Valley Series 7000 Signal Management System or Encore. For more information, see SMS 7000 / Encore Control on page 108.
-
Page 373: Sync Reference
(the system knows that the RCE MAP is current and can be pushed down to the matrix controller. This should work the same with a dirty map. Trinix NXT — Installation and Service Manual... - Page 374 MAP should be read back from the matrix and used to refresh the RCE status. This is also true when Encore rebooted and starts up with a Trinix routing switcher already running with single NR card installed. Trinix NXT — Installation and Service Manual...
-
Page 375: Section 18 - Analog Input Processing
Section Analog Input Processing TRX-VI-33100 Module The TRX-VI-33100 video input module consists of a 16-input “uni- versal” base board (VI-33100) and a 16-input digital-only mezzanine board (HI-33201). The VI-33100 universal base board auto-senses and accepts 16 com- posite analog SD, digital SD, or digital HD signals in any combination and passes them in digital SD or digital HD form (as appropriate) to the Trinix matrix board. -
Page 376: Customizing Analog Video Processing Settings
3. Set the terminal protocol to: 115200 baud, 8 data bits, 1 stop bit, no parity bit, and no flow control. A terminal window and a blinking cursor should appear. 4. Press ENTER. You should see the main menu: Trinix NXT — Installation and Service Manual... - Page 377 For example, with HyperTerminal go to View > Font > and select a 6- point font. Then go to File > Properties > Settings > Emulation > ANSI > Terminal Setup and select 50 rows x 132 columns. Trinix NXT — Installation and Service Manual...
- Page 378 • For entries where ON or OFF is selected, 0 = OFF and 1 = Table 98. Channel Number Equivalents. Correspondin Input number g input as on router number as rear panel shown on table Trinix NXT — Installation and Service Manual...
-
Page 379: Main Menu Options
Trap filter 0.72 Trap filter 0.50 -------------------------------------------------------------------------------- +------------------------------------- Channel Line Rate -------+ +--------------------------------- Monochrome Input (On/Off) +----------------------------- Remove Setup from Video (On/Off) +------------------------- Chroma Kill (On/Off) +--------------------- Video Decode Mode +----------------- Enable AGC (On/Off) Trinix NXT — Installation and Service Manual... - Page 380 These adjustments are made in the video path and apply to all lines (active picture and VBI) Video processing selections are summarized in Table 100. The actual menus are shown in Figure 269 on page 381. Trinix NXT — Installation and Service Manual...
- Page 381 - Input 0: Line Rate: 525 Line Type: NTSC (M, J) -------------------------------------------------------------------------------- Disable (Off) 0 Enable (On) Contrast/Y Gain: Brightness/Y Offset: 50.0% to 200.0% (0.5% steps) -100.1 to +100.1Deg (0.7mV steps) Saturation/Chroma Gain: Hue/Chroma Phase: Trinix NXT — Installation and Service Manual...
- Page 382 With Notch Decode set to “1” and Chroma Kill set to “0,” chroma is passed. With Notch Decode set to “2” and Chroma Kill set to “1,” chroma is Chroma Kill blanked and luminance is passed. Trinix NXT — Installation and Service Manual...
- Page 383 TRX-VI-33100 Module Processing Range/Choices Function Default Resolution Type 0 = Pass this line pair as is 1 = Blank this line pair Blank Setup 2 = (NTSC only) Add Setup to this line pair 3 = (NTSC) Add Setup and blank this line pair NTSC-Reserve additional lines for data: 0 = No additional lines reserved 1 = Reserve lines 21 and 284...
- Page 384 +-------------------- Horizontal (pixels) +-------+--------------------------------------------------------------------+-- 000.0 000.0 000.0 000.0 000.0 000.0 000.0 000.0 000.0 000.0 000.0 000.0 000.0 000.0 000.0 000.0 Press: '0 ~ 9' or 'A ~ F' to select channel to edit. Trinix NXT — Installation and Service Manual...
- Page 385 Picture Enhancer - -------------------------------------------------------------------------------- Reference - Input 0: Line Rate: 525 Line Type: NTSC (M, J) ================================================================================ Detail Enhancer Level: Disabled Medium High -------------------------------------------------------------------------------- +---------------------------- Channel Line Rate ----------+ +-------------------- Detail Enhancer +-------+--------------------------------------------------------------------+-- Trinix NXT — Installation and Service Manual...
- Page 386 When a group of inputs (channels) is selected, the display will show the values for those channels: Figure 278. Channel Status display for four channels. Channels: ---------------------------------------------------------------------------- Video Composite In: Monochrome Input (On/Off) : Trinix NXT — Installation and Service Manual...
- Page 387 To Save a File On PC This procedure assumes that video adjustments have been made (as described above) and need to be saved for future use. a. Select “Save or Recall a configuration file.” Trinix NXT — Installation and Service Manual...
- Page 388 Prepare your terminal emulator to send (download) data now... c. For HyperTerminal, select “Transfer > Send File.” d. Browse to the desired configuration file on the PC. e. Select “Xmodem” for the protocol. Then select “Send.” Trinix NXT — Installation and Service Manual...
-
Page 389: Section 19 - Troubleshooting
Section Troubleshooting Note It may take up to 30 seconds for the 3G modules alarms to clear when starting up the boards. The boards are operational; however the voltage sensing alarms can take up to 30 seconds to clear. This length of time to clear the alarms is due to the fact that the 3G modules are using new voltage averaging algorithms in the 908 Micro controllers to compare and verify all voltages. - Page 390 The supply is overloaded. This is an Over-temperature warning. Blinking Service is required. There is a fault. OPM Board Display Meaning In use Green In use ALARM Primary alarm Green no alarms IN USE Alarm Green Trinix NXT — Installation and Service Manual...
- Page 391 DS601 Master alarm for this board. A DC supply has failed to turn on Board OK -5VAOK DS31 Green -5 VA supply OK Check -5 VA supply IN_USE DS602 Reserved for future use Trinix NXT — Installation and Service Manual...
- Page 392 Check the COM bus Digital logic. +3V3 Green The local 3.3 logic is OK. Check the local 3.3 logic. The Main Conversion is OK. DS963 Green Feeds 7v conversion. Check the Main Conversion. Trinix NXT — Installation and Service Manual...
- Page 393 +5 V supply voltage present Check +5 V supply INUSE Yellow 1 or more outputs now in use on this board* No CrossPoints in use on this board ALARM DS901 Master alarm for this board Board OK Trinix NXT — Installation and Service Manual...
- Page 394 Yellow XPT B is the active cross point (X PT) XPT B is not the active cross point (X PT) PS FAIL DS937 XPT B’s power has failed XPT B’s power is OK Trinix NXT — Installation and Service Manual...
- Page 395 Primary alarm for this board. A DC supply has failed on the board or ALARM DS401 the microcontroller Board OK XC DONE DS402 Green The FPGA is properly configured FPGA failed to configure XPT-A Trinix NXT — Installation and Service Manual...
- Page 396 Yellow XPT B is the active cross point (X PT) XPT B is not the active cross point (X PT) PS FAIL DS937 XPT B’s power has failed XPT B’s power is OK Trinix NXT — Installation and Service Manual...
- Page 397 1 or more CrossPoints now in use on this board No CrossPoints in use on this board -3V3 DS31 Green -3V3 is OK Check -3V3 DONE DS950 Green The Xilinx FPGAs are properly configured FPGAs failed to configure Trinix NXT — Installation and Service Manual...
- Page 398 Logic supply has failed PS1 OK Green Main DC-DC Converter 1 is OK Main DC-DC Converter 1 has failed PS2 OK Green Main DC-DC Converter 2 is OK Main DC-DC Converter 2 has failed Trinix NXT — Installation and Service Manual...
- Page 399 Broadlinx web page browsing functionality may occur. However, the router will continue to switch, even when the Broadlinx board is being used to control the system (as in Encore applications). Trinix NXT — Installation and Service Manual...
- Page 400 DIP side IN_USE Yellow Output Monitor is active Green Xilinx load done 3V3+OK Green 3V3 supply OK 5V+OK Green 5V+ supply OK 10VOK Green 10 V supply OK REF_ALRM B Yellow Reference B alarm Trinix NXT — Installation and Service Manual...
- Page 401 REF_ALRM A Yellow Reference A alarm PALRM Primary alarm Primary alarm SALRM - single fan failure Trinix NXT — Installation and Service Manual...
- Page 402 This card has control of Com Bus and/or CrossPoint Bus. CrossPoint bus ACTIVE Solid yellow active. Internal XPT control. This card has control of Com Bus. Com bus activity. External XPT control ACTIVE Dim or blinking yellow (for example, the Jupiter VM-3000). Trinix NXT — Installation and Service Manual...
- Page 403 10 V (A and B) supplies OK 10 V (A and/or B) supply alarm. Failure of both A and B will also trigger PALARM. A REF Yellow Reference A alarm B REF Yellow Reference B alarm PALR Primary alarm Trinix NXT — Installation and Service Manual...
- Page 404 Broadlinx code is loading (faster flashing indicates increase in interrupt ment LEDs Flashing decimal points rate) Dual 7-seg- CPU running with Broadlinx code loaded (faster spinning indicates ment LEDs Spinning pattern increase in interrupt rate) Trinix NXT — Installation and Service Manual...
- Page 405 If unable to do a configuration read on the secondary PCI bridge. Dev 7 E.2. If unable to do a configuration read on the secondary PCI bridge. Dev 0 While initializing the Ethernet chip. Trinix NXT — Installation and Service Manual...
-
Page 406: Signal Flow
Figure 279. Signal Flow for a 256 x 256 Router Signal flow for a 512 x 512 router, which requires four DM-33500 modules is shown in Figure 280 on page 407. Trinix NXT — Installation and Service Manual... - Page 407 385-416 384-353 352-321 320-289 288-257 97-128 65-96 33-64 1-32 CONTROL INPUTS OUTPUTS OUTPUTS INPUTS CONTROL (base) (mez) 383-352 351-320 319-288 287-256 353-384 321-352 289-320 257-288 512-481 480-449 448-417 416-385 225-256 193-224 161-192 129-160 Trinix NXT — Installation and Service Manual...
- Page 408 281. Figure 281. Signal Flow for a 256 x 256 Router Signal flow for a 256 x 256 router, which requires four matrix cards, is shown below in Figure 282 on page 409. Trinix NXT — Installation and Service Manual...
- Page 409 Figure 282. Signal Flow for a 256 x 512 Router Trinix NXT — Installation and Service Manual...
-
Page 410: Incompatible Switches
Section 19 — Troubleshooting Incompatible Switches Grass Valley recommends that you do not use un-managed switches with Broadlinx. The following, is a list of switches that do not work with Broadlinx. This list is not all encompassing and will be added to as new conflicting switches are found. -
Page 411: Section 20 - Trinix Fiber Option
Section Trinix Fiber Option Trinix Fiber Boards Overview Each Trinix Fiber board provide 32 channels for both Input and Output board sets and may be used to send or receive SD, HD and 1080p/3G video signals through fiber optic cables. These boards use optical Input and Output SFP modules for fiber optic connectivity. -
Page 412: Fiber Optic Cleaning Requirement
Industry standard fiber optic cleaning kits can be purchased on the web and in electronics stores. Best Practices This section provides Grass Valley’s best practices recommendations for the precautions, cleaning instructions, service instructions, and trouble- shooting steps. Fiber-Optic Cable Precautions Fiber-optic cables and connectors are easily damaged. - Page 413 Module Repair: If the module is still not operating correctly, replace it with a known good spare and return the faulty module to a designated Grass Valley repair depot. Call your Grass Valley representative for depot loca- tion. Trinix NXT — Installation and Service Manual...
- Page 414 Section 20 — Trinix Fiber Option Refer to Contacting Grass Valley on page 4 at the front of this document for information on contacting Grass Valley Customer Service. Trinix NXT — Installation and Service Manual...
-
Page 415: Specifications
HI/HO-33300 coax input and output boards. For the SFP specifications, see the current version of the 8943RDA/-D/- DFR (SD/HD/3G-SDI Fiber Ready Reclocking DA), Installation manual on Grass Valleys web site (see Contacting Grass Valley on page 4 for more information). http://www.grassvalley.com/assets/media/3540/ Fiber_Optic_SFP_Devices.pdf... - Page 416 Board Edge LED 8 green "Power" LEDs 1 red "Alarm" LED 1 yellow "Active" LED 1 green "FPGA Ready" LED Rear Panel LED 1 LED per channel Trinix NXT — Installation and Service Manual...
-
Page 417: Led Displays
Indicates the reclocker is locked and the input signal may be valid. Indicates an unrecognized or invalid SFP is installed. No SFP alarms will be reported if the LED is blinking red. Input Board LEDs Figure 283. LEDs Input Board Trinix NXT — Installation and Service Manual... - Page 418 Indicates the reclocker is not locked and the output is disabled. Indicates an unrecognized or invalid SFP is installed. No SFP alarms will be reported if the LED is blinking red. Note The reclocker will not lock when in the force-bypass mode. Trinix NXT — Installation and Service Manual...
- Page 419 Specifications Output Board LEDs Figure 284. LEDs Output Board Number Color Indication Green FPGA is loaded Yellow Active board Alarm Condition Trinix NXT — Installation and Service Manual...
-
Page 420: Trinix Fiber Boards Installation
See ESD Protection on page 27 for more information. Grass Valley recommends that you install the boards in the lowest slot number first. For example, if you had three the Fiber boards, they should be installed in slots 1-3. -
Page 421: Installing The Trinix Fiber Option
Output boards, if they are present. Follow these steps to install the Trinix fiber option: 1. Remove the coaxial Input or Output boards from the front of the routing switcher. Move to the rear of the router. Trinix NXT — Installation and Service Manual... - Page 422 Verify that the SFPs will unplug from the panel, before installing the rear panel. It is easier to remove a stuck SFP if the panel is not installed in the frame. Trinix NXT — Installation and Service Manual...
- Page 423 Fold the levers toward each other until the front ejector levers snap into place, which will lock the board into the frame. Trinix NXT — Installation and Service Manual...
- Page 424 Section 20 — Trinix Fiber Option 10. Close the Trinix routing switcher’s door. Keep the routing switcher’s door closed during operation to maintain optimum cooling conditions. Trinix NXT — Installation and Service Manual...
-
Page 425: Section 21 - Front-Air Vent
The Front-Air Vent (FAV) is an optional accessory that is installed on the bottom of a Trinix NXT frame. The FAV will draw cool air through the front of the frame to cool the Trinix router. The FAV provides another option for the “bottom to top”... - Page 426 This section describes the installation process of the FAV. This option is designed to work with the Trinix 256x256, 512x512, 128x256, and 256x512 frames. Note The FAV will not work with the 128x128 frame. Trinix NXT — Installation and Service Manual...
-
Page 427: Installation Procedure
3. Install the screws into the Rack-Mounting holes on the side of the FAV (see Figure 289 on page 427). Figure 289. Front View of the FAV Trinix router Rack-Mounting holes 4. Install the screws in the rear Rack-Mounting holes on the side of the FAV. Trinix NXT — Installation and Service Manual... - Page 428 2. Place the Mounting brackets over the holes and then replace the existing screws (see Figure 290 below). Figure 290. Rear View of the FAV Rack-Mounting holes Trinix router Mounting brackets Note The Mounting brackets can be adjusted as necessary. Trinix NXT — Installation and Service Manual...
-
Page 429: Section 22 - Trinix Frame Slot Maps
The current slot information for an installed board can be found by entering deviceListShow at the command prompt during a telnet session. However, only slots that have installed boards are shown, empty slots will not be identified. Trinix NXT — Installation and Service Manual... -
Page 430: Trinix 512X512 Frame Slot Numbers
129-160 Slot # Slot # Slot # Slot # Slot # Slot # Slot # Slot # Slot # Slot # Slot # Slot # Slot # Slot # Slot # Slot # Trinix NXT — Installation and Service Manual... -
Page 431: Trinix 256X256 Frame Slot Numbers
1-32 Slot # Slot # Slot # Slot # Slot # Slot # Slot # Slot # Slot # Slot # Slot # Slot # Slot # Slot # Slot # Slot # Trinix NXT — Installation and Service Manual... -
Page 432: Trinix 128X128 Frame Slot Numbers
Output 33-64 Slot # 25 Output 1-32 Slot # 24 Input 97-128 Slot # 11 Input 65-96 Slot # 10 Slot # 16 Input 33-64 Slot # 09 Input 1-32 Slot # 08 Trinix NXT — Installation and Service Manual... -
Page 433: Trinix 256X512 Frame Slot Numbers
Trinix 256x512 Frame Slot Numbers Trinix NXT — Installation and Service Manual... -
Page 434: Trinix 128X256 Frame Slot Numbers
Appendix 22 — Trinix Frame Slot Maps Trinix 128x256 Frame Slot Numbers Trinix NXT — Installation and Service Manual... -
Page 435: Trinix 512X1024 Frame Slot Numbers
Trinix 512x1024 Frame Slot Numbers Trinix NXT — Installation and Service Manual... - Page 436 Appendix 22 — Trinix Frame Slot Maps Trinix NXT — Installation and Service Manual...
-
Page 437: Section 23 - Expanded System Sizes
Frame ID=2 Frame ID=8 Frame ID=10 Outputs Table 110. 128x256 Frame Expanded System Inputs Frame ID=0 Frame ID=2 Frame ID=8 Frame ID=10 128 - 256 384 - 512 640 - 768 896 -1024 Outputs Trinix NXT — Installation and Service Manual... - Page 438 Frame ID=8 Frame ID=10 256 - 512 768 - 1024 1280 - 1536 1792 - 2048 Outputs *For input expansion beyond 256 inputs please contact Grass Valley. Table 113. 512x512 Frame Expanded System Inputs 2048 Frame ID=5 Frame ID=7 Frame ID=13...
- Page 439 Frame ID=13 1792 1536 Frame ID=4 Frame ID=12 1280 1024 Frame ID=1 Frame ID=9 Frame ID=0 Frame ID=8 256 - 512 - 768 - 1024 1280 - 1536 - 792 - 2048 Outputs Trinix NXT — Installation and Service Manual...
- Page 440 Appendix 23 — Expanded System Sizes Trinix NXT — Installation and Service Manual...
-
Page 441: Glossary
Fabric Board - DM-33100 matrix board crosspoint (matrix) cards and the con- used in Trinix router. trol device. FPGA - Field Programmable Gate Array. The control device could be any one of Trinix NXT — Installation and Service Manual... - Page 442 A separate, internal switching system is used to switch the Monitor Output to any output of the switcher. physical level - see LEVEL Trinix NXT — Installation and Service Manual...
-
Page 443: Index
NR-33000 board LED Bypass 0-31 -5VAOK Input board LED 60 Hz enable C switch Canadian EMC Cat 5 cable 111, A REF Cat 5E cable 109, NR-33000 board LED CB-3000 A switch 107, Trinix NXT Installation and Service Manual... - Page 444 Ethernet Expanded systems Explorer Data rate Extended crosspoint bus Data Reclocking Defined Data reclocking Daylight savings time DC OK LED Fabric board DHCP FAN ALARM LED defined 390, FAN IFC connectors Dip switch settings Trinix NXT Installation and Service Manual...
- Page 445 Jupiter 33, 106, HI-3G Input Card connector numbering HO-33110 manual data rate Jupiter control LEDs 399, reclock settings HO-33120 data rates gain switches NR-33000 board LED LEDs 393, Laser Compliance reclock settings LD-33100 Trinix NXT Installation and Service Manual...
- Page 446 Planning guide Notch Decode Mode Power consumption 121, 122, NR-33000 Power supply CPU codes redundant 153, LEDs removing PALARM POWER/ALARM LED switches & jumpers Preemphasis Added (DM-33512 Digital Matrix NTSC or PAL blackburst Board) Numbering Trinix NXT Installation and Service Manual...
- Page 447 SMPTE 292M-1998 SR-33000 board LED defined Reference signals SMS 7000 108, Refresh SNMP Defined SNTP IP Regulatory Notices SO-33110 Returning merchandise LEDs 393, 399, RFI modifications software download from web Router (network) Specifications RP-33500 Trinix NXT Installation and Service Manual...
- Page 448 FAQ database Input Matrix web site Grass Valley Matrix Controller web site software download Output Weight 121, 122, Rear Panel Reference Troubleshooting 345, 375, 389, TRX-NXT-128x128 X3T11 TRX-NXT-256x256 XC DONE TRX-NXT-256x512 512 Matrix board LED Trinix NXT Installation and Service Manual...
- Page 449 SR-33000 board LED NR-33000 board LED XPT BUS connector Trinix NXT — Installation and Service Manual...
Need help?
Do you have a question about the Trinix NXT and is the answer not in the manual?
Questions and answers