Hatz Diesel 1B20 Original Instruction Book
Hide thumbs
Also See for 1B20:
- Operator's manual (89 pages) ,
- Instruction book (37 pages) ,
- Instruction book (34 pages)
Table of Contents
Advertisement
I I N N C C L L U U D D E E S S S S U U P P P P L L E E M M E E N N T T A A L L I I N N F F O O R R M M A A T T I I O O N N T T O O
T T H H E E O O W W N N E E R R ' ' S S M M A A N N U U A A L L F F O O R R M M O O D D E E L L Y Y E E A A R R 2 2 0 0 1 1 5 5
E E P P A A C C E E R R T T I I F F I I E E D D N N O O N N R R O O A A D D C C O O M M P P R R E E S S S S I I O O N N - -
I I G G N N I I T T I I O O N N E E N N G G I I N N E E S S . .
I I N N C C L L U U D D E E S S S S U U P P P P L L E E M M E E N N T T A A L L I I N N F F O O R R M M A A T T I I O O N N T T O O
T T H H E E O O W W N N E E R R ' ' S S M M A A N N U U A A L L F F O O R R M M O O D D E E L L Y Y E E A A R R 2 2 0 0 1 1 5 5
C C A A L L I I F F O O R R N N I I A A R R E E G G U U L L A A T T I I O O N N S S F F O O R R H H E E A A V V Y Y - - D D U U T T Y Y
O O F F F F - - R R O O A A D D E E N N G G I I N N E E S S
CREATING POWER SOLUTIONS.
1B20 | 1B27 | 1B30 | 1B40 | 1B50
Translation of the
ORIGINAL
INSTRUCTION BOOK
Hatz Diesel
www.HATZ-DIESEL.com
Advertisement
Table of Contents

Related Manuals for Hatz Diesel 1B20


Summary of Contents for Hatz Diesel 1B20
- Page 1 I I N N C C L L U U D D E E S S S S U U P P P P L L E E M M E E N N T T A A L L I I N N F F O O R R M M A A T T I I O O N N T T O O 1B20 | 1B27 | 1B30 | 1B40 | 1B50 T T H H E E O O W W N N E E R R ’...
- Page 2 A new HATZ Diesel engine - working for you This engine is intended only for the purpose determined and tested by the manufacturer of the equipment in which it is installed. Using it in any other manner contravenes the intended purpose.
-
Page 3: Table Of Contents
Contents Page Page Important safety notes when operating the engine 5.3. Maintenance every 250 operating hours Description of the engine 5.3.1. Oilbath air cleaner maintenance General notes 5.3.2. Changing engine oil 3.1. Technical data 5.3.3. Checking and adjusting 3.2. Transport valve clearances Notes on installation 5.3.4. -
Page 4: Important Safety Notes When Operating The Engine
Important safety notes when operating the engine HATZ diesel engines are efficient, strong and durable. For this reason they are frequently installed on equipment used for commercial purposes. The manufacturers of such equipment must observe any relevant equipment safety regulations when the engine forms part of an overall system. - Page 5 Important safety notes when operating the engine – The engine must be stopped before performing any maintenance, cleaning- or repair work. – Stop the engine before refilling the fuel tank. Never refuel near a naked flame or sparks which could start a fire. Don’t smoke. Don’t spill fuel. –...
-
Page 6: Description Of The Engine
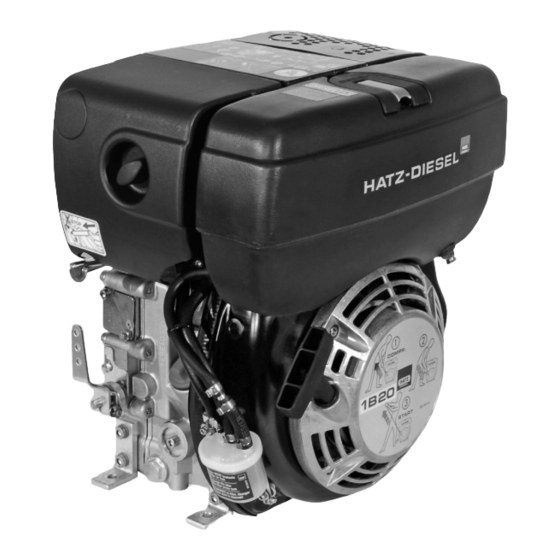
Description of the engine 1 Type plate 13 Ignition key 2 Cylinder head cover 14 LED display 3 Exhaust silencer 15 Intake opening for cooling and 4 Exhaust mesh insert combustion air 5 Oil pressure switch 16 Oil filler pipe and dipstick 6 Starter motor 17 Recoil starter 7 Voltage regulator... -
Page 7: General Notes
General notes 3.1. Technical data Type 1B20 1B27 1B30 1B40 1B50 Design Air-cooled four-stroke diesel engine Combustion system Direct injection Number of cylinders Bore / stroke 69 / 62 74 / 62 80 / 69 88 / 76 93 / 76... -
Page 8: Transport
3.2. Transport A suspension lug „20“ is provided as standard equipment, so that the engine F < 15 N STOP can be lifted safely, chap. 2. It is not suitable or approved for lifting the complete equipment to which the engine is attached. <... -
Page 9: Epa / Carb - Type Plate
3.5. EPA/CARB-type plate and Every engine is equipped with an additional loose engine type plate. If the original type fuel label plate on the engine is not readily visible after The layout of the EPA / CARB - type plate depends the engine is installed in the equipment then on the engine application and is placed on the the second loose type plate must be attached... -
Page 10: Emission-Related Installation Instructions
3.6. EMISSION-RELATED INSTALLATION INSTRUCTIONS See supplemental information for EPA certified engines, Page 41; resp. supplemental informa- tion for California regulations for off road engines, Page 51. 3.7. Closed crankcase ventilation system Please note that the engine has a closed crankcase ventilation system. Exceeding the maximum admissible tilt angle (see chapter 3.1. -
Page 11: Operation
When adding oil or checking the oil level, the Operation engine must be horizontal. 4.1. Before starting up for the first time Engines are normally supplied dry, i.e. not con- taining fuel or oil. 4.1.1. Engine oil Oil quality Qualified are all trademark oils which fulfil at least one of the following specifications: ACEA –... -
Page 12: Version With Oilbath Air Cleaner
4.1.2. Version with oilbath air cleaner 4.1.3. Fuel Stop the engine before refilling the fuel tank. Never refuel near a naked flame or sparks which could start a fire. Don’t smoke. Use only pure fuel and clean filling equipment. Take care not to spill fuel. All diesel fuels which satisfy the following speci- fications are suitable: EN 590 or... -
Page 13: Starting
At temperatures below 0 °C, winter-grade fuel should be used or paraffin added to the fuel well in advance. Paraffin content for: Lowest ambient temperature when Summer Winter starting, in °C fuel fuel 0 up to –10 20 % – –10 up to –15 30 % –... - Page 14 Speed adjuster, standard version Now, the engine is ready for starting. 050 145 00 – First, set the engine speed adjustment lever „1“ to STOP position. Next, set it either to ½ START or max. START, as practical or Never use starting sprays ! required.
-
Page 15: Recoil Starter
4.2.2. Recoil starter (down to – 6 °C) – For starting preparations, see Chapter 4.2.1. Starting procedure – Grip the handle with both hands. – Pull the starting cable out by the handle until you feel a slight resistance. – Let the cable run back; in this way the entire length of the starting cable can be used to start the engine. -
Page 16: Electric Starter
4.2.3. Electric starter – Turn the key to position II. – Release the key as soon as the engine runs. – For starting preparations, see Chapter 4.2.1. The starting key must spring back to position I and remain there during engine operation. –... - Page 17 Fuel shut-off valve, stop solenoid (additional equipment) – For emergency starting, turn the lever at fuel shut-off solenoid „1“ anti-clockwise by at least 90° using suitable pliers. The lead seal wire As soon as the starting key is at Position I, will break off.
-
Page 18: Engine Use
Automatic electrical shutdown system 4.4. Stopping the engine (additional equipment) Speed adjuster, standard version Model with error memory This is characterized by a brief flashing of all pilot lamps once the starter key has been turned to position I (Fig. 20 and 21). Important ! If the engine cuts out immediately after starting or switches off by itself during operation, a... - Page 19 Other ways of switching off the engine 2. Stop pin (optional extra) 1. Fuel shut-off valve, stop solenoid (optional extra) 05221301 – Press the stop pin until the engine cuts out, also see Fig. 24, position 2. – Once the engine has cut out, release the pin „2“...
-
Page 20: Maintenance
Maintenance Only carry out maintenance work with the engine switched off. Observe all relevant laws and regulations governing the handling and disposal of used oil, filters and cleaning agents. Protect the starting key against unauthorised use. On engines with an electric starter, disconnect the battery’s negative terminal. When maintenance work has been completed, check that all tools have been removed from the engine and all protective guards fitted again. - Page 21 1B20: 0,20mm 1B27: 0,10mm 1B30: 0,10mm 1B40: 0,10mm 1B50: 0,10mm 0000 051 104 06 250h = 1h 500h Model without automatic valve clearance adjustment. AUTOM. 0000 052 502 02 250h = 1h 500h Model with automatic valve clearance adjustment. Depending whether the engine is equipped with...
-
Page 22: Maintenance Every
5.2. Maintenance every 8 – 15 operating hours 5.2.1. Checking engine oil level To check the oil level, the engine must be standing level and be switched off. – Remove any dirt from the oil dipstick area. – Remove dipstick and clean it. –... -
Page 23: Check Air Cleaner Maintenance Indicator
5.2.4. Checking the water trap The intervals at which you should check the water trap depend entirely on the amount of water in the fuel and the care taken when re- fuelling. The normal interval is once a week. 2440 / 13 –... -
Page 24: Maintenance Every
If an external water trap is attached, check its 5.3. Maintenance every 250 water content every day, when the engine oil operating hours level is checked. The water which has collected 5.3.1. Oilbath air cleaner maintenance is separated at a clearly visible line from the diesel fuel above it. -
Page 25: Changing Engine Oil
Version with cyclone-type dust trap 2445 / 3 2440 / 13 – Take off dust collector „1“, empty it and wipe clean (dust collector must remain dry). – Clean intake aperture „2“ (also keeping it dry). Important: Do not add any oil to the dust collector. –... -
Page 26: Checking And Adjusting Valve Clearances
– On version with oilbath air cleaner, remove screw „2“ and take off cover plate with noise- insulating hood. Model for rammer operation (1B20 R) – Remove cover of air cleaner, Fig. 40. 2443 / 12 – Remove cover to air filter. - Page 27 – Remove any contamination adhering to the – Turn the crankshaft through 360° in the cover for the cylinder head. normal direction of rotation and align exactly to the OT-marking. – Remove screws „1“ and take off the cylinder head cover with gasket „2“. –...
-
Page 28: Cleaning Cooling Air Area
5.3.4. Cleaning cooling air area 5.3.6. Cleaning the exhaust mesh inlet The engine must be switched off and Exhaust system components will natu- cooled down before cleaning ! rally be hot and must not be touched while the engine is running or until it has –... - Page 29 – Subsequently, check the strainer insert for cracks or breaks; if necessary, replace. – Remount the strainer insert and the clip. Model for rammer operation (1B20 R) In addition to the maintenance work described above, the model for rammer operation requires that the inlet of the crankcase ventilation into the exhaust manifold is checked for free passage.
-
Page 30: Maintenance Every
5.4. Maintenance every 500 operating hours 5.4.1. Renewing fuel filter The maintenance intervals for the fuel filter are dependent upon the purity of the diesel oil being used and, if necessary, may have to be reduced to 250 hours. When working on the fuel system, do not expose it to naked flames;... - Page 31 Model with fuel filter in fuel tank Model with external fuel filter (no fuel filter in the tank) – Empty the fuel tank by taking out screw „1“, Fig. 34 or Fig. 35 and allow the fuel to drain into a clean vessel. This fuel can be re-used later.
-
Page 32: Air Cleaner Maintenance
– Always renew the fuel filter. Note the arrows indicating the correct direction of flow. – Secure the filter to its mount. – Fill the fuel tank with diesel fuel; Chapter 4.1.3. Air is vented from the fuel system automati- cally. -
Page 33: Maintenance Every 1000 Operating Hours
Cleaning the filter cartridge 5.5. Maintenance every 1000 operating hours Dry contamination 5.5.1. Cleaning the oil filter The oil filter should be cleaned at the same time as the engine oil is changed, since oil escapes when the filter is removed. The engine must be standing horizontally and switched off. - Page 34 – Remove oil filter from housing. – Check joint washer „1“ whether it is damaged; replacement if necessary. – Coat packing rings „1“ and „2“ slightly with oil before assembly. 2445 / 10 – Use an air line to blow out oil filter dirt from the inside outwards.
-
Page 35: Malfunctions - Causes - Remedies
Malfunctions – causes and remedies Malfunctions Possible causes Remedy Chap. 6.1. Speed control lever in stop or Engine does not idle position. Move lever to START position. 4.2.1. start, or not imme- diately, but can be Engine shutdown pin in STOP Move to operating position by turned over easily position. - Page 36 Malfunctions Possible causes Remedy Chap. Starting speed below 400 min At low - Viscosity of oil too high. temperatures: Change lubricating oil and add 5.3.2. oil of the correct viscosity class. 4.1.1. - Battery charge too low. Check the battery, if necessary contact a service station.
- Page 37 Malfunctions Possible causes Remedy Chap. 6.4. Fuel supply interrupted Engine cuts out of - Tank has run empty. Add fuel. 4.1.3. its own accord - Fuel filter blocked. Change fuel filter. 5.4.1. during operation. - Tank venting inadequate. Ensure adequte tank venting. - Air in the fuel system.
- Page 38 Malfunctions Possible causes Remedy Chap. 6.7. Too much lubricating oil Drain off lubricating oil as far as Engine becomes in engine. upper mark on dipstick. 5.3.2. very hot. Indicator lamp for cylinder Inadequate cooling: temperature - Contamination of entire (optional extra) cooling air zone.
-
Page 39: Work On The Electrical System
– Before starting emergency operation without Work on the electrical battery, proceed as follows before starting: system - disconnect plug-connection to voltage regulator for engine models with mounted Batteries generate explosive gases. instrument box (picture 26).Turn key to off- Keep them away from naked flame and position (0) and remove. -
Page 42: Supplemental Information To The Owner's Manual For Model Year 2015 Epa Certified Nonroad Compression Ignition Engines
SUPPLEMENTAL INFORMATION TO THE OWNER'S MANUAL FOR MODEL YEAR 2015 EPA CERTIFIED NONROAD COMPRESSION IGNITION ENGINES. EPA EMISSION CONTROL SUPPLEMENTAL WARRANTY STATEMENT AND EMISSION-RELATED INSTALLATION INSTRUCTIONS. - Page 43 MAINTENANCE AND WARRANTY. SUPPLEMENTAL INFORMATION TO THE OWNERS MANUAL FOR MODEL YEAR 2015 EPA CERTIFIED NONROAD COMPRESSION IGNITION ENGINES. The following supplemental information is furnished for EPA Nonroad Compression Ignition Engines which are certified according to 40 CFR Part 89 and Part 1039. This information contains the following specific items: •...
- Page 44 • Oil filler cap • Intake and exhaust gaskets at head interfaces • Emission Control Information Labels Only parts manufactured by Hatz and which have passed the Hatz Quality Assurance Program are assured of meeting EPA exhaust emission regulations. UNUSUAL OPERATING CONDITIONS. The engine must not be operated at a load factor less than 25 % for an extended period as such operation will cause the fuel injector to foul.
- Page 45 Therefore, the maintenance work has to be carried out by a qualified workshop. Hatz authorised workshops, for example, are qualified workshops. Hatz Diesel of America will give you respective addresses, if required. EMISSION CONTROL SYSTEM AND ADJUSTMENTS. The emission control system for this engine is DI (Direct Injection) and EM (Engine Modification).
- Page 46 EPA EMISSION CONTROL WARRANTY STATEMENT YOUR WARRANTY RIGHTS AND OBLIGATIONS. Motorenfabrik Hatz GmbH & Co. KG warrants the emission control system on your engine for the periods of time listed below provided there has been no abuse, neglect or improper maintenance of your engine. Your emission control system includes: •...
- Page 47 HATZ DIESEL SUPPLEMENTAL WARRANTY FOR MODEL YEAR 2015 EPA CERTIFIED ENGINES. PARTS WITH SUPPLEMENTAL LIMITED WARRANTY. The following limited warranty is supplemental to the standard HATZ DIESEL LIMITED ENGINE WARRANTY and covers Model Year 2015 EPA certified engines and applies to the following exhaust emission-related components: •...
- Page 48 SUPPLEMENTAL LIMITED WARRANTY. Hatz Diesel of America, Inc. hereinafter referred to as “HATZ” warrants each of the above-listed parts when installed in a new engine sold by Hatz to be free from defects in material and workmanship under normal use and service, only under the named warranty...
- Page 49 EMISSION-RELATED INSTALLATION INSTRUCTIONS “Failing to follow these instructions when installing a certified engine in a piece of nonroad equipment violates federal law (40CFR1068.105(b)), subject to fines or other penalties as described in the Clean Air Act.” “If you install the engine in a way that makes the engine's emission control information labels hard to read during normal engine maintenance, you must place duplicate labels on the equipment.”...
- Page 50 Following are the instructions to properly install the exhaust system and related components consistent with the EPA emission regulation requirements. 1B20 · 1B27 · 1B30 · 1B40 · 1B50 Exhaust-silencers and protection guard The exhaust silencer is fitted in connection with flat washers.
- Page 51 Dismantling: • Remove in numerical sequence 1...4. Assembly: • Assemble in reverse sequence. • Ensure gasket-kit is fitted in correct sequence i.e. the creased gaskets 4 face towards exhaust silencer and cylinder head. SAMPLING OF EXHAUST EMISSIONS After the engine is installed in the equipment and placed in service, the sampling of exhaust emissions can be performed in a way that prevents diluting the exhaust sample with ambient air as follows: •...
-
Page 52: To The Owner's Manual For
SUPPLEMENTAL INFORMATION TO THE OWNER´S MANUAL FOR MODEL YEAR 2015 CALIFORNIA REGULATIONS FOR HEAVY-DUTY OFF-ROAD ENGINES CALIFORNIA EMISSION CONTROL WARRANTY STATEMENT AND EMISSION-RELATED INSTALLATION INSTRUCTIONS. - Page 53 MAINTENANCE AND WARRANTY. SUPPLEMENTAL INFORMATION TO THE OWNER´S MANUAL FOR MODEL YEAR 2015 CALIFORNIA REGULATIONS FOR HEAVY-DUTY OFF-ROAD EN- GINES. The following supplemental information is furnished for California Heavy-Duty Off-Road Engines. This information contains the following specific items: • CARB-related engine parts and engine operating conditions •...
- Page 54 • Intake and exhaust gaskets at head interfaces • Emission Control Information Labels Only parts manufactured by Hatz and which have passed the Hatz Quality Assurance Program are assured of meeting CARB exhaust emission regulations. UNUSUAL OPERATING CONDITIONS. The engine must not be operated at a load factor less than 25 % for an extended period as such operation will cause the fuel injector to foul.
- Page 55 Therefore, the maintenance work has to be carried out by a qualified workshop. Hatz authorised workshops, for example, are qualified workshops. Hatz Diesel of America will give you respective addresses, if required. EMISSION CONTROL SYSTEM AND ADJUSTMENTS. The emission control system for this engine is DI (Direct Injection) and EM (Engine Modification).
- Page 56 Motorenfabrik Hatz authorised dealer as soon as a problem exists. The warranty repairs should be completed by the dealer as expeditiously as possible. If you have any questions regarding your warranty rights and responsibilities, you should contact Hatz Diesel of America, Inc. at (262)-544-0254.
- Page 57 CALIFORNIA CERTIFIED HEAVY-DUTY OFF-ROAD ENGINES. PARTS WITH SUPPLEMENTAL LIMITED WARRANTY. The following limited warranty is supplemental to the standard HATZ DIESEL LIMITED ENGINE WARRANTY and covers Model Year 2015 California certified Heavy-Duty off- road engines and applies to the following exhaust emission-related components: •...
- Page 58 SUPPLEMENTAL LIMITED WARRANTY. Hatz Diesel of America, Inc. hereinafter referred to as "HATZ" warrants each of the above-listed parts when installed in a new engine sold by Hatz to be free from defects in material and workmanship under normal use and service, for a period of twenty-four (24)
- Page 59 EMISSION-RELATED INSTALLATION INSTRUCTIONS “Failing to follow these instructions when installing a certified engine in a piece of nonroad equipment violates federal law (40CFR1068.105(b)), subject to fines or other penalties as described in the Clean Air Act.” “If you install the engine in a way that makes the engine's emission control information labels hard to read during normal engine maintenance, you must place duplicate labels on the equipment.”...
- Page 60 Following are the instructions to properly install the exhaust system and related components consistent with the EPA emission regulation requirements. 1B20 · 1B27 · 1B30 · 1B40 · 1B50 Exhaust-silencers and protection guard The exhaust silencer is fitted in connection with flat washers.
- Page 61 Dismantling: • Remove in numerical sequence 1...4. Assembly: • Assemble in reverse sequence. • Ensure gasket-kit is fitted in correct sequence i.e. the creased gaskets 4 face towards exhaust silencer and cylinder head. SAMPLING OF EXHAUST EMISSIONS After the engine is installed in the equipment and placed in service, the sampling of exhaust emissions can be performed in a way that prevents diluting the exhaust sample with ambient air as follows: •...
- Page 62 CALIFORNIA Proposition 65 Warning Diesel engine exhaust and some of its constituents are known to the State of California to cause cancer, birth defects, and other reproductive harm.
- Page 63 Motorenfabrik Hatz GmbH & Co. KG Ernst-Hatz-Str. 16 94099 Ruhstorf a.d. Rott Deutschland Tel. +49 8531 319-0 Fax +49 8531 319-418 marketing@hatz-diesel.de www.hatz-diesel.com 0 0 0 0 0 0 0 0 4 4 3 3 3 3 8 8 1 1 6 6 1 1 3 3 - - 1 1 0 0 . . 2 2 0 0 1 1 4 4 - - 0 0 . . 1 1 Printed in Germany USA-EPA IV-CARB CREATING POWER SOLUTIONS.
Need help?
Do you have a question about the 1B20 and is the answer not in the manual?
Questions and answers