Advertisement
Available languages
Available languages
Quick Links
Do not subject the device to severe impact or drop it from heights.
Do not use the device in extreme hot or cold, dusty or damp conditions. Do not
expose it to direct sunlight.
Avoid using the device near strong magnetic fields.
Normal functioning of the product may be disturbed by ESD. If so, simply reset
and restart the device following the instruction manual. During file transmission,
please handle with care and operate in a static-free environment.
Keep the device away from water and other liquids. In the event that water or
other liquids enter the device, power off the product immediately and clean the
device.
Do not use chemicals to clean the device in order to avoid corrosion. Clean it
with a dry cloth.
Do not install this equipment in a confined space such as a book case or similar
unit. The ventilation should not be impeded by covering the ventilation openings
with items such as newspaper, table-cloths, curtains etc.
No naked flame sources, such as lighted candles, should be placed on the
apparatus.
Attention should be drawn to environmental aspects of battery disposal.
Use the apparatus in moderate climates.
We are not responsible for damage or lost data caused by malfunction, misuse,
modification of the device or battery replacement.
Do not attempt to disassemble, repair or modify the product. This will invalidate
the warranty.
If the device will not be used for an extended period of time, please charge the
battery at least once per month to maintain battery life.
Charge the battery if:
a) The battery level icon displays
b) The device powers off automatically when restarted.
c) There is no response when pressing keys with keys unlocked and battery full.
Do not interrupt the connection when the device is being formatted or
transferring files. Otherwise, data may be corrupted or lost.
When the device is used as a portable HD, please use only per the instructions.
Otherwise, permanent data loss could occur.
Please use and install data using the attachments/accessories provided and only
according to the manufacturer's instruction.
Please refer to the information on the bottom of the device for electrical and
safety information before installing data or operating the device.
To reduce the risk of fire or electric shock, do not expose this device to rain or
moisture. The device should not be exposed to dripping or splashing. Never
place objects filled with liquids, such as vases, on the device.
There is danger of explosion if the battery is replaced incorrectly. Replace only
with the same or equivalent type.
Safety Precautions
1
(An empty battery)
Advertisement
Chapters

Related Manuals for Nextbook Ares 7 NXA7QC132


Summary of Contents for Nextbook Ares 7 NXA7QC132
- Page 1 Safety Precautions Do not subject the device to severe impact or drop it from heights. Do not use the device in extreme hot or cold, dusty or damp conditions. Do not expose it to direct sunlight. Avoid using the device near strong magnetic fields. ...
- Page 2 The battery (battery or batteries or battery pack) should not be exposed to excessive heat such as sunlight, fire or the like. Please follow responsible procedures for battery disposal. If the power adaptor disconnected from the device, the device will remain operable as long as the battery has sufficient charge.
- Page 3 Listening Cautions This product respects the current regulations for limiting the output volume of consumer audio devices to a safe level. By listening to your device with headphones or earbuds at high volumes, you run the risk of permanent damage to your ears.
-
Page 4: Table Of Contents
Table of Content Features summary ....................5 Accessories ......................5 Buttons & Ports ……………………………………..……………………………………..5 Basic Connections………………..………………………...…………………..……………6 Basic Operations ……………………………………..………………..…………...……….7 Major Applications……………………………………….………………...……...………..11 Trouble Shooting ……………………………………………………………..…………….16 Specifications ……………………………………………………………………..………..16 FCC Statements …………………………………………..…….…………………………17... -
Page 5: Features Summary
Feature Summary ● Wi-Fi network ● Built-in G-sensor ● Media Entertainment ● 7” Touch Screen ● 3rd-party Apps ● Front Webcam Accessories ● USB cable ● AC Adaptor Main Unit ● Warranty Card User Manual Buttons & Ports Earphone socket –... -
Page 6: Basic Connections
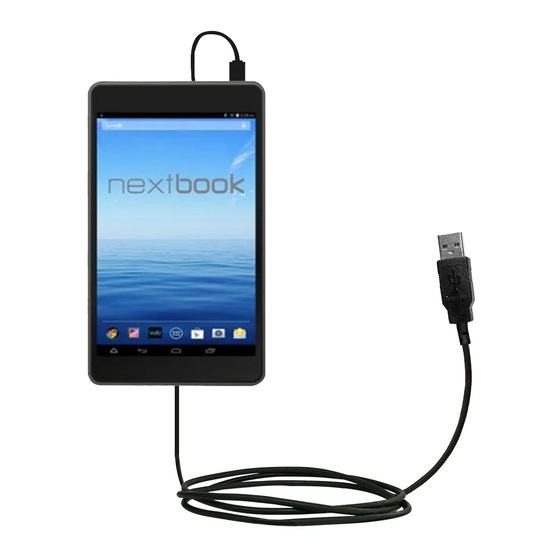
Basic Connections Charging the Battery The device has a built-in rechargeable battery. Charge the device when the battery level is low. To charge the battery, connect the device to a power adaptor via the USB port. It takes about 3 hours to fully charge the battery. The charge indicator lights in red during charging and in orange when charge is full. -
Page 7: Basic Operations
(4) Open the drive and copy files from the PC to it; (5) Disconnect the USB cable once the file transference is completed. Note: a. As you connect the tablet to the PC, you need to install the Windows Media Player (the latest version) and the USB drive first. - Page 8 Unlock the Screen The screen will be locked after the device is idle for a few seconds. You need to unlock the screen by dragging the lock icon rightwards. Customizing Home Screen Items To add a Home Screen item (shortcut, widget etc.), you can tap the application icon to display all applications and widgets, then Hold down...
- Page 9 In some apps, you can slide your finger on the screen up and down to scroll the file list; and sometimes you may hold your finger on an item to display options (if available). When viewing a photo or webpage, you put your fingers (at least two) on the screen, and you can pinch your fingers to zoom out it, or open your fingers to zoom in it for better visual effect.
- Page 10 Managing 3rd Party Applications Your device provides support to many useful third-party applications. You can purchase or download the applications to add more functions to your device. They are available online at the Internet or directly on your product. Install Applications You can install applications manually by the following methods: (1) Download the target apps directly from the built-in application library on your PC.
-
Page 11: Major Applications
Major Applications Launch Web Browser To launch the web browser, press the browser icon on the Applications screen. To display the menus, press Playing Music Tap the Music icon in the application page to launch the music player. Music Library You should enter the music library once you start the music player. - Page 12 Playback menu During playback of a music file, tap on the MENU icon bring up a context menu: Playing Videos Tap the icon of video player in the Apps page to launch it. You should see the folders or files after you enter the application. ...
- Page 13 To display the previous/next picture, slide your finger on the screen horizontally. To zoom in or out the picture, pinch your finger on the picture. Display Menu When you are viewing the picture, you can tap on the screen or the Menu icon show a menu.
- Page 14 Managing Files and Folders You can explore files and folders with the FileManager application. In the Home Screen, tap the Applications shortcut to display all applications and then tap the FileManager icon to enter the file exploration mode. When you select some folders or files by holding your tap on the target for a few seconds, a context menu will emerge for you.
- Page 15 incoming emails. To know what type of your email server is, you can consult the service provider, network administrator or search for information in the Internet. (5) Input required information (server, port etc.). You can obtain the information from the service provider, network administrator or the Internet. (6) Choose the server type for outgoing emails, and input required server information.
-
Page 16: Troubleshooting
Troubleshooting Reset this device In the event that the device freezes, you can force the device to shut down by holding the Power button for about seconds longer than powering off, and then restart the device. Specifications Item Description MT8127, Quad-core ARM Cortex-A7 LPDDR3 Display 7-inch LCD TN, Touchpad (capacitive touch pad), 1024X600 pixels... -
Page 17: Fcc Statements
FCC Statement This equipment has been tested and found to comply with the limits for a Class B digital device, pursuant to Part 15 of the FCC Rules. These limits are designed to provide reasonable protection against harmful interference in a residential installation. This equipment generates, uses and can radiate radio frequency energy and, if not installed and used in accordance with the instructions, may cause harmful interference to radio communication. - Page 18 updates can occur at any time without prior notice. No part of this manual may be copied, republished, reproduced, transmitted or distributed in any way without prior written consent of E Fun. Any unauthorized distribution of this manual is expressly forbidden. E Fun may find it necessary to modify, amend or otherwise change or update this manual.
- Page 19 Mesures de sécurité Ce produit est conforme aux normes actuelles limitant a un niveau sécuritaire le volume d’émission audio d’appareils destines a la consommation. En vous servant d’écouteurs ou d’oreillettes pour écouter votre appareil, vous courez le risque d’endommager votre ouïe. Même si vous devenez habitue d’écouter a volume élevé...
- Page 20 b) L’appareil se met automatiquement hors tension lorsqu’il est redémarré. c) Si le fait d’appuyer sur les touches alors qu’elles sont déverrouillées ne donne aucun résultat et que la batterie est complètement chargée. Lorsque l'appareil est en cours de formatage ou que le transfert de fichiers est en cours, ne pas interrompre la connexion.
- Page 21 humaine provenant de l’élimination non contrôlée des déchets, recyclez l’appareil de manière responsable afin de promouvoir la réutilisation rationnelle des ressources matérielles. Pour éliminer votre appareil usagé, veuillez utiliser les systèmes de retour et de cueillette disponibles dans votre région ou contacter le détaillant chez qui vous avez acheté le produit. Il peut prendre ce produit pour le recycler de façon sûre et respectueuse de l’environnement.
- Page 22 Tables des matières Sommaire des caractéristiques ................5 Accessoires ......................5 Boutons et ports ....................... 5 Connexions de base ....................6 Fonctionnement de base ..................7 Principales applications ..................11 Playing Videos ....................12 Dépannage ......................16 Specifications ......................17 Déclaration de la FCC ....................
-
Page 23: Sommaire Des Caractéristiques
Sommaire des caractéristiques ● Connectivité sans fil (Wi-Fi) ● Écran tactile (7 po) ● Soutien d’applications tierces ● Détecteur G intégré ● Divertissement et communication ● Avant Webcam Accessoires ● Câble USB ● Adaptateur secteur unité principale ● Carte de garantie ... -
Page 24: Connexions De Base
Connexions de base Chargement de la batterie Cet appareil est équipé d’une batterie rechargeable intégrée. Aucune installation additionnelle n’est requise pour la batterie. Chargez simplement l’appareil lorsque la batterie est faible. Pour charger la batterie, connectez l’appareil à une prise de courant murale standard via le port «... -
Page 25: Fonctionnement De Base
(2) Le système peut nécessiter l'installation du pilote USB si nécessaire;; (3) Le dispositif sera identifié et ouvert comme un périphérique MTP, son icône ressemble à un téléphone cellulaire; (4) Ouvrez le lecteur et copier des fichiers du PC vers elle; (5) Débranchez le câble USB une fois le fichier transfert est terminé. - Page 26 Ajouter un élément Déplacer / Supprimer un élément Maintenez votre doigt sur un élément Pour ajouter un élément à l'écran jusqu'à ce qu'il soit en surbrillance, puis d'accueil (raccourcis, widgets, dossiers faites-le glisser vers la position désirée. etc.), appuyez sur pour afficher les Pour supprimer un élément, faites-le applications puis maintenez l'élément...
- Page 27 Tapez sur le réseau auquel vous voulez vous connecter, saisissez les informations requises pour le réseau (mot de passe), puis tapez sur « Connect » (connecter). Votre NextBook tentera alors d’établir une connexion à un point d’accès sans fil avec les paramètres que vous avez saisis.
- Page 28 (Wi-Fi) est activé, votre NextBook se connectera automatiquement à vos réseaux configurés lorsqu’ils se trouvent à portée. c)Si votre NextBook trouve un réseau n’ayant jamais été configuré, il affichera une icône d’information. Gestion des applications 3rd Party Votre appareil prend en charge de nombreux utiles applications tierces.
-
Page 29: Principales Applications
Maintenez votre doigt sur l'application que vous souhaitez arrêter, puis sélectionnez « supprimer de la liste ». Principales applications Lancement du navigateur Web Pour lancer le navigateur Web, appuyez sur l'icône du navigateur sur l'écran Applications. Pour afficher les menus, appuyez sur Pour entrer une nouvelle adresse, appuyez sur la barre d'adresse puis tapez l'adresse. -
Page 30: Playing Videos
étiquettes d’informations sur les chansons. Si certains de vos fichiers musique contiennent d’étiquettes d’informations, ils seront classés comme étant « Unknown » (inconnus) dans la bibliothèque de musique. Lorsque de la nouvelle musique est copiée sur l’appareil, la bibliothèque de musique sera mise à... - Page 31 Remarque : Certains fichiers vidéo peuvent ne pas jouer correctement avec cet appareil. Référez-vous aux spécifications techniques à la fin du manuel et assurez-vous que la résolution vidéo, l’encodage ou le type de fichier est supporté(e). Affichage des photos Appuyez sur l'icône Galerie dans la page d'applications pour lancer la galerie de photos.
- Page 32 Affichage du menu Lorsque vous affichez l'image, vous pouvez appuyer sur l'écran ou sur l'icône Menu pour afficher un menu. Utilisation de la webcam Appuyez sur Appareil photo dans la page d'applications pour lancer l'appareil photo. Viseur Mode VCR Mode photographie Réglages du système Gestion des fichiers et des dossiers Vous pouvez explorer les fichiers et dossiers à...
- Page 33 Choisissez le type de serveur pour les courriels sortants et saisissez les informations requises au sujet du serveur. Cliquez sur « Next » pour poursuivre. Votre NextBook vérifiera les configurations du serveur. Lorsqu’il vous invite en disant « Your account is set up, and email is on its way »...
-
Page 34: Dépannage
Gérer les comptes Vous pouvez établir plus d’un compte et gérer ces comptes en vérifiant les informations au sujet du compte, en ajoutant un autre compte ou en supprimant un compte. Ajouter un autre compte Suivez ces étapes pour ajouter un autre compte si vous le souhaitez. Suivez ces étapes pour ajouter un autre compte si vous voulez. -
Page 35: Specifications
Specifications Élément Description MT8127,Quad-core ARM Cortex-A7 LCD TN Affichage 7 po , Pavé tactile (pavé tactile capacitif), 1024X600 pix. Système d’exploitation intégré Android OS 4.4 Matériel PC IBM ou PC compatible, ordinateur portable ou Macintosh avec port USB Mémoire interne 32GB Type de carte de mémoire Carte SD: 2 GB, 4 GB (SDHC), 8 GB (SDHC), 16 GB... -
Page 36: Déclaration De La Fcc
Déclaration de la FCC Avertissement de la FCC Le présent équipement a été testé et trouvé conforme aux limites pour les appareils numériques de classe B en vertu des normes prescrites au chapitre 15 des règles édictées par la FCC. Ces limites sont conçues pour apporter une protection appropriée contre les interférences nuisibles chez les particuliers. - Page 37 E Fun peut juger nécessaire de modifier, amender ou sinon changer ou mettre à jour le présent manuel. Nous nous réservons le droit de ce faire en tout temps sans préavis. Toutes les spécifications et les caractéristiques sont sujettes à changement sans préavis.
Need help?
Do you have a question about the Ares 7 NXA7QC132 and is the answer not in the manual?
Questions and answers