Table of Contents
Advertisement
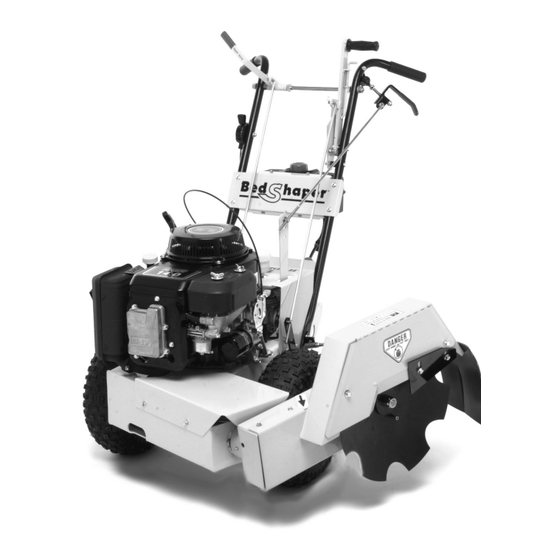
Little Wonder
®
Model 900 Walk Behind Edger
OPERATOR'S MANUAL
Manual Includes:
Safety Information
Operating Instructions
Maintenance Schedule
Tips For Better Operation
Illustrated Parts Breakdown
Please Read and Save These Instructions.
For safety, read all safety and operating instructions prior to operating machine.
Advertisement
Table of Contents

Related Manuals for Little Wonder BedShaper 900


Summary of Contents for Little Wonder BedShaper 900
- Page 1 Little Wonder ® Model 900 Walk Behind Edger OPERATOR’S MANUAL Manual Includes: Safety Information Operating Instructions Maintenance Schedule Tips For Better Operation Illustrated Parts Breakdown Please Read and Save These Instructions. For safety, read all safety and operating instructions prior to operating machine.
-
Page 3: Table Of Contents
Information ........1 Little Wonder... -
Page 4: Section 1: General Information
® are listed in Section 7, ILLUSTRATED PARTS BREAKDOWN, and are available through your Little Wonder ® dealer. The parts list was developed as a general overview. Contact your Little Wonder ® dealer for the most up to date information. -
Page 5: Section 3: Safety Instructions
Be familiar with all controls and how to disengage them quickly. Additional operator’s manuals for the BedShaper are available on request by sending the series and serial numbers to your Little Wonder Dealer or: Little Wonder 1028 Street Road Southampton, PA 18966 2. -
Page 6: Operation
SAFETY AND INSTRUCTION DECALS IMPORTANT Safety and instruction decals are installed at the factory. If any decals are missing, damaged or illegible, replacements should be ordered and installed immediately. Little Wonder ® ® ® to prevent Warning Decal Danger Decal... -
Page 7: Section 4: Operating Instructions
Further adjustments can be made to accommodate the desired performance. Section 4 Blade Engagement Lever ® can be adjusted Blade On/Off Lift Lever Rocker Switch (Kawasaki engine only) Throttle Little Wonder Operating Speed Control Photo 4-1 Photo 4-2 ®... -
Page 8: Starting Operation
(squeeze) the lever as shown in Photo 4-3. Transport speed is achieved by sliding the control handle rearward. Then slowly engage (squeeze) the lever as shown in Photo 4-4. Little Wonder ® 12. Reverse is achieved by pushing the control handle forward (away from your body), and should only be used with the blade disengaged. -
Page 9: Tips For Better Bed Shaping Results
Check blade nut to insure it is tight. Danger Never attempt to operate machine without blade shield securely fastened. Caution Hot Blade: allow blade to cool before servicing. Blade may be hot enough to cause burns. Little Wonder ®... -
Page 10: Maintenance Chart
Never use hand- blade may be sharp. 4. Close shield back into position. Securely fasten shield with two bolts. Never operate without shield securely fastened. Little Wonder ® Section 5 MAINTENANCE Daily 25 Hrs. -
Page 11: Adjustment- Dirt Scraper Gap
CLEANING- END OF SEASON 1. Remove bolts from all shields. 2. Tilt or remove shields so that internal parts of machine are exposed. Photo 5-1 . x2 ® blade lift lever into trans- " (1.3 cm). Photo 5-2 Little Wonder ® " (1.3... -
Page 12: Section 6: Replacement And Repair Instructions
3. Loosen idler mount bolt and slide idler to left. 4. Remove and replace belt. 5. Slide idler to right to tension belt and tighten Little Wonder ® 6. Lubricate all fittings with grease and perform all maintenance checks to prevent corrosion and to ready machine for new season. -
Page 13: Transmission
Hex bolt head to “tow position” as shown in figure 6-4. To re-engage, move the lever to the “run postion”. Gearbox & Differential The gearbox and differential require no servicing or maintenance. Photo 6-4 Little Wonder ®... -
Page 14: Section 7: Illustrated Parts Breakdown
Section 7 ILLUSTRATED PARTS BREAKDOWN... - Page 22 Little Wonder ®...
- Page 24 THIS WARRANTY shall only be effective if the enclosed Warranty/Registration card is properly filled out and returned to Little Wonder, Div. of Schiller-Pfeiffer, Inc. at time of purchase. Little Wonder ®...
Need help?
Do you have a question about the BedShaper 900 and is the answer not in the manual?
Questions and answers