Table of Contents
Advertisement
Advertisement
Table of Contents

Related Manuals for Linn IKEMI & GENKI


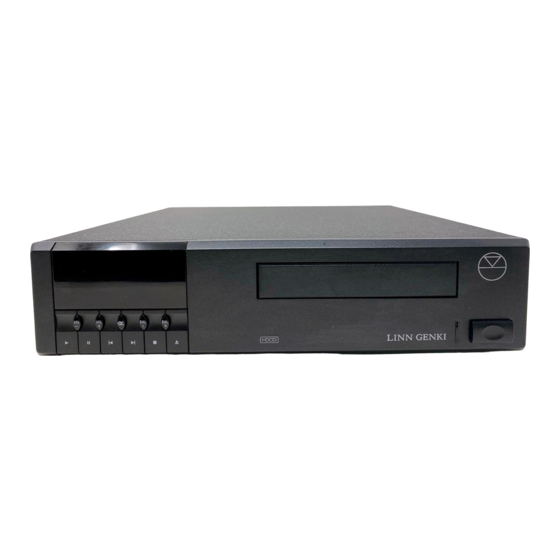
Summary of Contents for Linn IKEMI & GENKI
- Page 1 LINN IKEMI GENKI & C D P L A Y E R O W N E R S M A N U A L...
-
Page 2: Year 2000 Compliance
Year 2000 Compliant in such circumstances. Except to the extent implied by law and which by law cannot be excluded, Linn shall not be liable to any party for any costs, claims, losses (including indirect and consequential losses) or liabilities arising from the failure of Linn’s software to be Year 2000 Compliant if used in con-... -
Page 3: Important Safety Information
This appliance is supplied with a non-rewireable mains plug for the intended country. Replacement mains leads can be obtained from your Linn retailer. Should you need to change the plug please dispose of it carefully. A plug with bared conductors is dangerous if engaged in a live socket. -
Page 4: General Safety Instructions
GENERAL SAFETY INSTRUCTIONS Read instructions. Read the safety and operating instructions before operating the appliance. Retain instructions. Retain the safety and operating instructions for future reference. Heed warnings. Observe all warnings on the appliance and in the operating instructions. Follow instructions. Follow all operating and use instructions. Water and moisture. - Page 5 Mains plug replacement Should your mains plug need replacing and you are competent to do this proceed as follows. If you are in doubt contact your Linn retailer or a competent electrician. a) Disconnect the plug from the mains supply.
- Page 6 CE Declaration of Conformity Linn Products Ltd declare that this product is in conformance with the Low Voltage Directive 73/23/EEC and Electromagnetic Compatibility 89/336/ EEC as amended by 92/31/EEC and 93/68/EEC. The conformity of the designated product with the provisions of Directive...
-
Page 7: Table Of Contents
Contents Introduction ... 1 About the IKEMI and GENKI ... 2 Setting up the IKEMI and GENKI ... 7 Unpacking ... 7 Positioning ... 9 Connecting ... 10 Using the IKEMI and GENKI ... 12 Using the front panel ... 12 Using the handset ... -
Page 8: Copyright And Acknowledgements
Copyright and acknowledgements Copyright © Linn Products Limited. Linn Products Limited, Floors Road, Waterfoot, Glasgow, G76 0EP, Scotland, United Kingdom. All rights reserved. No part of this publication may be reproduced, stored in a retrieval system, or transmitted, in any form or by any means, electronic, mechanical, photocopying, recording, or otherwise, without the prior written consent of the publisher. -
Page 9: Introduction
Introduction Thank you for buying this product. The Ikemi and Genki are the latest Linn CD players. Both products are covered in this manual as they share many common attributes. If you just want to play music now, skip to the section on ‘Using the Ikemi and Genki’. -
Page 10: About The Ikemi And Genki
The CD12 is our ‘flagship’ CD player. A case machined from two solid aluminium plates contains the Linn ‘CD Engine’, the highest digital audio technology and countless hours of intense engineering work. With no expense spared in its design and... - Page 11 Details, similarities, differences. The most obvious external difference between the Ikemi and Genki is the CD loading slot. The slim aluminium drawer of the Ikemi is the only visible part of the CD mechanism. Inside is a precision machined and very ingenious CD loading mechanism. Its ‘mechatronic’...
- Page 12 the same laser, CD servo and decoding circuitry, D/A convertor and power supply. All the digital and analogue audio circuitry is contained on one high density surface mount circuit board. The ultra low noise power supplies, low jitter master clock and high resolution D/A convertor are all focussed on providing high musical performance through both the fixed and variable outputs.
- Page 13 HDCD ® Both the Ikemi and Genki are equipped with an HDCD HDCD ® is a digital signal processing system developed by Pacific Microsonics of California which conceals control codes into a very small fraction of the recorded CD digital audio stream. An HDCD decoder recognises these control codes and uses them to process the digital audio to increase its dynamic range and resolution, while leaving the original digital stream compatible with conventional CD...
- Page 14 There are other systems which try to achieve this goal, but they invariably involve sending a high speed (and high noise) clock signal from the DAC to the CD transport. The Linn sync link is unique in its silent effectiveness.
-
Page 15: Setting Up The Ikemi And Genki
CD player at a later date. WARNING: Do not connect the mains supply until you have verified that the CD player is set to the correct voltage for your mains supply. The IKEMI and GENKI are factory-set for a 230 volts mains supply... - Page 16 Replacing the fuses Before replacing the fuse identify the correct fuse for your local voltage: • 100V: T800mA • 115V: T800mA • 230V: T800mA The fuse compartment is on the mains inlet module to the left of the voltage selector. Disconnect the mains supply by removing the IEC mains cable from the mains inlet module.
-
Page 17: Positioning
Locating the IKEMI and GENKI for use with the handset The Linn infra-red remote control system is exceptionally sensitive, and you should be able to operate your CD player with the handset from almost anywhere in a room. For best results the infra-red sensor on the front panel should be kept out of direct sunlight, and it should not be obscured. -
Page 18: Connecting
Connecting the IKEMI and GENKI The following diagram shows the rear panel connections of the Ikemi and Genki. Switch OFF. Always switch off all equipment before changing any connections as surges may cause serious equipment damage. IKEMI. Analogue outputs. The Ikemi has two identical pairs of single ended (RCA phono socket) outputs. - Page 19 The digital outputs can all be switched off if they are not required. See ‘Using the Ikemi and Genki’. The Sync Link™ connector is only of use with a Linn DAC, such as the Numerik. The remote in/out connectors are for use in a Linn Knekt system. If you have the optional RS232 interface see the accompanying information for it’s use.
-
Page 20: Using The Ikemi And Genki
Using the IKEMI & GENKI This chapter explains how to use the IKEMI and GENKI. Using the front panel We designed the IKEMI and GENKI to be easy to use. The front panel display gives clear information about what you are doing and, although there are many sophisticated features, all the most commonly used ones require only one or two key presses. - Page 21 IKEMI display and controls CD.CA TRACK INDEX RANDOM PLAY REPEAT PLAY > PLAY GENKI display and controls CD.CA TRACK INDEX MUTE HDCD VOLUME DOWN VOLUME UP > PLAY > TOTAL 8888 REMAIN TRACK DIGITAL HDCD TIME BALANCE VOLUME REPEAT ¯ ˘...
-
Page 22: Using The Handset
Using the handset LINN CLASSIK CD/CA HANDSET MUTE STANDBY LISTEN RECORD RANDOM ” SKIP ’ INTRO ¯ SEARCH ˘ REPEAT < DISPLAY INDEX BAND SIGNAL MONO SCAN TUNE TUNER KEYS PRESET STORE - VOL L BAL PREAMPLIFIER - TREB KEYS... -
Page 23: Switching On And Off
Switching on and off CD.CA TRACK INDEX TRACK DIGITAL ¯ ˘ > å IKEMI and GENKI operation ® HDCD CD.CA TRACK INDEX > 8281 TRACK DIGITAL HDCD ¯ ˘ > å Press the power button on the front panel. The adjacent indicator will light whenever power is applied. -
Page 24: Display Information
Display information The display on the IKEMI and GENKI can show the following information by pressing the DISPLAY handset button or the DIS front panel button on the IKEMI, when a disc is playing. Only the GENKI has volume and balance displays. Display Description TRACK+INDEX... -
Page 25: Playing A Disc
Playing a disc CD.CA TRACK INDEX TRACK DIGITAL ¯ ˘ > å CD.CA TRACK INDEX > TRACK DIGITAL ¯ ˘ > å CD.CA TRACK INDEX TRACK DIGITAL ¯ ˘ > å CD.CA TRACK INDEX TRACK DIGITAL ¯ ˘ > å Open the drawer You can close the drawer by gently nudging it or by pressing OPEN again. -
Page 26: Skip And Search
Skip and Search CD.CA TRACK INDEX TOTAL 8601 REMAIN MUTE TRACK HDCD TIME BALANCE > CD.CA TRACK INDEX TOTAL 8501 REMAIN MUTE TRACK HDCD TIME BALANCE > CD.CA TRACK INDEX TOTAL 22. 3 6 REMAIN MUTE TRACK HDCD BALANCE TIME >... -
Page 27: Direct Track Number Selection
Note: If the track is not selected press any CD control button on the handset to tie the numbers to the CD player. RECORD To select a two digit track number press the first digit and hold for two seconds. -
Page 28: Repeat Play
Repeat Play CD.CA TRACK INDEX 8381 TRACK HDCD > CD.CA TRACK INDEX 8481 TRACK HDCD > CD.CA TRACK INDEX 8581 TRACK HDCD > CD.CA TRACK INDEX 8581 TRACK HDCD > Press REPEAT once. > This will repeat the entire disc or choose the DIGITAL start point for a section repeat. -
Page 29: Programming
Programming a selection of tracks (programme mode A) CD.CA TRACK INDEX > TOTAL P--A TRACK DIGITAL ¯ ˘ > å CD.CA TRACK INDEX > TOTAL P-00 TRACK DIGITAL ¯ ˘ > å CD.CA TRACK INDEX > TOTAL P2-A TRACK DIGITAL ¯... - Page 30 Programming excluding of tracks (programme mode B) CD.CA TRACK INDEX TOTAL P--b TRACK > CD.CA TRACK INDEX TOTAL P-00 TRACK > CD.CA TRACK INDEX TOTAL P2-A TRACK > CD.CA TRACK INDEX TOTAL P-01 TRACK > Load a disc and press OPEN. Wait until the display shows the disc time then the number of tracks.
-
Page 31: Genki Variable Output
GENKI variable output CD.CA TRACK INDEX TOTAL 8358 REMAIN MUTE TRACK DIGITAL HDCD TIME BALANCE VOLUME REPEAT – > å CD.CA TRACK INDEX 2~-_ BALANCE – > å CD.CA TRACK INDEX _-~3 BALANCE – > å CD.CA TRACK INDEX > 8281 MUTE TRACK... -
Page 32: Advanced Cd Functions
Advanced CD functions CD.CA TRACK INDEX TRACK > CD.CA TRACK INDEX TRACK > CD.CA TRACK INDEX TRACK > CD.CA TRACK INDEX TRACK > Random play mode. This will play and repeat all the tracks on the disc in random order. >... - Page 33 Advanced CD functions, continued CD.CA TRACK INDEX > TRACK ¯ ˘ > å CD.CA TRACK INDEX cd8? ¯ ˘ > å CD.CA TRACK INDEX U1i0 ˘ ¯ > å CD.CA TRACK INDEX init ¯ ˘ > å Digital output. Press and hold 0 on the handset to switch on and off the digital outputs.
-
Page 34: User Options
0 = Volume 25 1 = Volume 50 0 = Use volume from U5 1 = Power up at last volume 0 = Pre-amp 3 on Linn AV5101 handset (address 15) 1 = Kairn address (address 16) 2 = Knekt function 1/ function 2 keys on Linn handset. -
Page 35: Maintenance
Don’t attach paper or tape to either side of the disc. Never attempt to play a cracked or badly warped disc; it may damage the CD player laser. Cleaning. To remove fingerprints or other marks lightly wipe the disc with a soft cloth from the centre of the disc outwards. -
Page 36: Technical Support
Technical support For technical support, product queries and information please contact either your local retailer or: Linn Products Ltd Floors Road Waterfoot Glasgow G76 0EP Scotland Phone: +(44) (0)141 307 7777 fax: +(44) (0)141 644 4262 UK helpline: 0500 888909 email: helpline@linn.co.uk... -
Page 37: Technical Information
1V pp 110 OHMS pin 1 gnd pin 2 hot pin 3 cold RCA phono 0-10 Vdc 10k Ohms Linn use only Knekt use only 90 - 130Vac 180 - 260Vac manual switch 20 Watts max 80mm H x 320mm W x 325mm D (3.15 x 12.6 x 12.8 inches) - Page 38 GENKI Specifications Signal Connector Level Analogue, fixed level RCA phono 2V rms Analogue, variable RCA phono 2V rms max 300 Ohms SPDIF electrical 0.5V pp Knekt remote in/out RCA phono Mains input 90 - 130Vac 180 - 260Vac 20 Watts max Dimensions: 80mm H x 320mm W x 325mm D (3.15 x 12.6 x 12.8 inches)
Need help?
Do you have a question about the IKEMI & GENKI and is the answer not in the manual?
Questions and answers