Advertisement
Advertisement
Table of Contents

Related Manuals for Russell Hobbs RHB315


Summary of Contents for Russell Hobbs RHB315
- Page 1 INSTRUCTIONS AND WARRANTY RHB315 RUSSELL HOBBS SATIN JUG BLENDER...
-
Page 2: Important Safeguards
Thank you for purchasing the Russell Hobbs Satin Jug Blender. Each unit has been manufactured to ensure safety, reliability and ease of use. Before use, please read these instructions carefully and keep them for further reference. FEATURES OF THE RUSSELL HOBBS SATIN JUG BLENDER ... - Page 3 is in place. Do not use this to switch the blender on and off. Turn the switch to standby “0” / “OFF” before fitting/ removing the jug to/ from the motor/ base unit. Turn the switch to standby “0” / “OFF” and wait until the blades come to a complete stop before removing the lid from the jug, and before removing the jug from the motor/ base unit.
- Page 4 Do not run the motor for more than 2 minutes, either continuously, or using the pulse setting, otherwise it may overheat. After 2 minutes use, switch it off for at least 2 minutes allowing it to cool to room temperature and allowing it recover.
-
Page 5: Parts Diagram
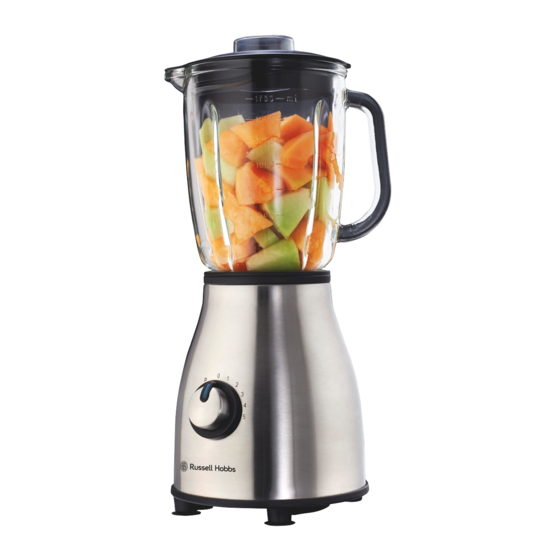
PARTS DIAGRAM Measuring Cup Jug Lid Glass Jug Blade Assembly Sealing Ring Blade Assembly Unit Blade Assembly Base Motor Unit Control Knob Assembled Glass Jug BEFORE FIRST USE Before using your appliance for the first time take it out of the box and take off any protective wrappings. - Page 6 OPERATING INSTRUCTIONS Assembly of the Glass Jug 1. Put the sealing ring (4) on the inner edge of the blade unit (5). 2. Put the blade unit (5) with sealing ring into the blade assembly base (6). 3. Mount the glass jug (3) onto the blade assembly base. Turn the blade assembly base in a clockwise direction until it is correctly tightened in place.
- Page 7 4. After using the blender, always move the switch into the ‘0’ setting and remove the mains plug from the power outlet. 5. To remove the glass jug just turn it in an anti-clockwise direction and then lift it up. Pulse Function The pulse function will give you a short burst at maximum speed, regardless of the current speed of the blades.
- Page 8 Tips for Using Your Blender Do not blend dry, thick or heavy mixtures for more than 60 seconds continuously. Let the appliance cool down before continue operating the appliance again. Do not place the lid into boiling water as it may deform. ...
- Page 9 3. Blend for about 2 minutes until smooth. This smoothie is great for sustained energy throughout the day. The banana has high levels of potassium, helping you to quickly replenish electrolytes. (The riper a banana, the higher the sugar content). The peanut butter is high in protein and the raw oats is a Low GI filler.
- Page 10 Banana - high in dietary fibre. Coconut Smoothie Ingredients: 1 Tin coconut milk 1 tablespoon sesame oil 1 tablespoon flax seeds 1 teaspoon vanilla extract 1 Tbsp Honey 1 Cup ice Method: 1. Add all ingredients into the blender. 2. Pulse it at first to break the ice. 3.
- Page 11 1 ripe banana ¼ cup chopped berries: strawberries, raspberries, blueberries 1-2 tablespoons muesli ½ Cup Rolled Oats 1 cup ice Method: 1. Add all ingredients into the blender. 2. Pulse it at first to break the ice. 3. Blend for about 2 minutes until smooth. Tip: This delicious smoothie is a meal in itself, rich in protein, complex carbohydrates, dietary fibre, vitamin C and antioxidants.
- Page 12 Tip: Green tea has tons of antioxidants, helps boost metabolism, and stabilizes Cholesterol. Fresh mint works as a decongestant for illness such as the common cold. High Fibre/ Low GI Smoothie Ingredients: ½ Papino 1Tbsp Flax Seeds 2Tbsp Digestive Bran 1/2Cup 100% Orange juice 1/2Cup Low Fat Cultured Yogurt 1 Tbsp Honey...
- Page 13 Low fat Chocolate Crunch Smoothie Ingredients: 1 Cup 2% milk 1 Tbsp Cocoa Powder ½ Cup peanuts/ cashews 1 Tbsp Honey ¼ tsp Vanilla essence 1 Cup Ice Method 1. Add all ingredients into the blender. 2. Pulse it at first to break the ice. 3.
- Page 14 ¼ Tsp Ground Cinnamon 1/8 Tsp Ground Cardamom ½ Tsp vanilla Extract 1 Cup Ice Method: 1. Add all ingredients into the blender. 2. Pulse it at first to break the ice. 3. Blend for about 2 minutes until smooth. Tip: This rendition of India's popular yogurt shake makes a cooling counterpoint to any spicy dish.
- Page 15 Tip: Cucumbers, part of the melon family, are rich in Vitamin C and dietary fibre. Ginger is a great source of anti-oxidants, making this smoothie a delightfully fresh way to strengthen your immune system. Tomato Smoothie Ingredients: 2 tomatoes (chopped then frozen) 1 small tin of tomato juice ¼...
-
Page 16: Cleaning And Maintenance
CLEANING AND MAINTENANCE This appliance is for household use only and is not user-serviceable. Do not open or change any parts by yourself. Please refer to a qualified electrical service department or return to the supplier if servicing is necessary. ... -
Page 17: Storing The Appliance
STORING THE APPLIANCE Unplug the unit from the wall outlet and clean all the parts as instructed above. Ensure that all parts are dry before storing. Store the appliance in its box or in a clean, dry place. ... -
Page 18: Changing The Plug
CHANGING THE PLUG Should the need arise to change the fitted plug, follow the instructions below. This unit is designed to operate on the stated current only. Connecting to other power sources may damage the appliance. Connect a three-pin plug as follows: The wires in this mains lead are coloured in accordance with the following code: Green/Yellow = Earth... -
Page 19: Warranty
IN THE EVENT OF A CLAIM UNDER WARRANTY THIS RECEIPT MUST BE PRODUCED. W A R R A N T Y Home Of Living Brands (Pty) Limited warrants to the original purchaser of this product (“the customer”) that this product will be free of defects in quality and workmanship which under normal personal, family or household use and purpose may manifest within a period of 1 (one) year from the date of purchase (“warranty period”).
Need help?
Do you have a question about the RHB315 and is the answer not in the manual?
Questions and answers