Linksys PSUS4 User Manual
Printserver for usb with 4-port switch
Hide thumbs
Also See for PSUS4:
- Quick installation manual (48 pages) ,
- User manual (41 pages) ,
- Quick installation (2 pages)

Related Manuals for Linksys PSUS4


Summary of Contents for Linksys PSUS4
-
Page 1: User Guide
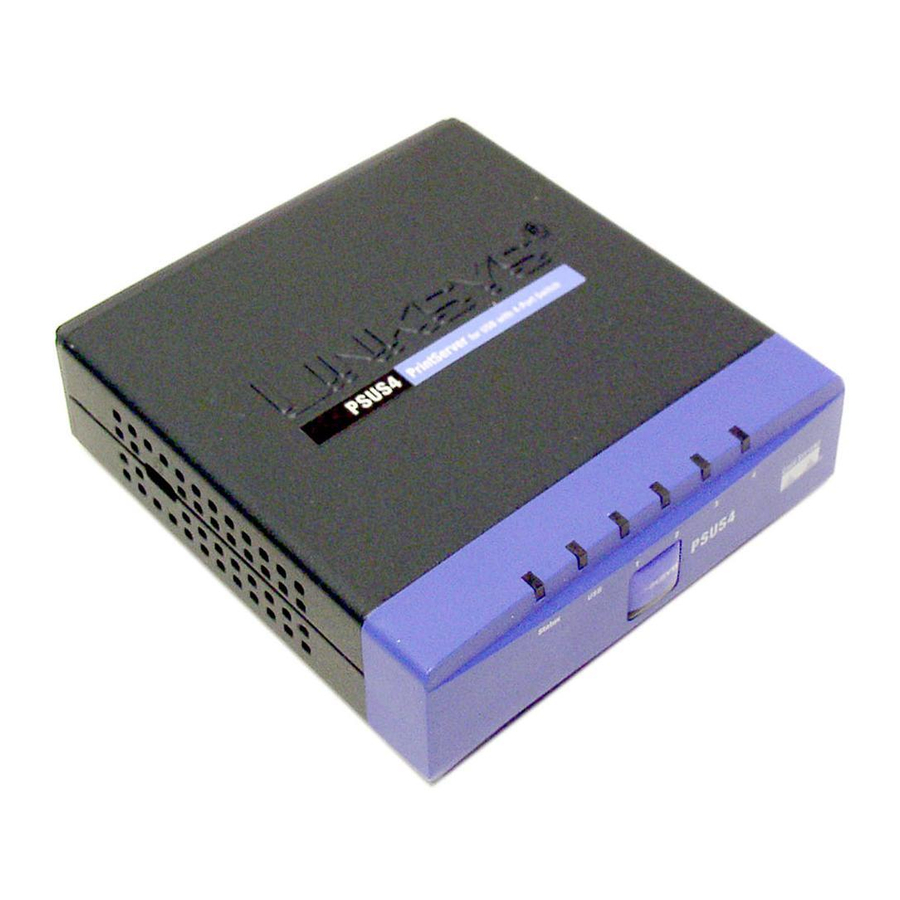
® A Division of Cisco Systems, Inc. PrintServer for USB with 4-Port Switch User Guide WIRED PSUS4 Model No. -
Page 2: Copyright And Trademarks
PrintServer for USB with 4-Port Switch Copyright and Trademarks Specifications are subject to change without notice. Linksys is a registered trademark or trademark of Cisco Systems, Inc. and/or its affiliates in the U.S. and certain other countries. Copyright © 2003 Cisco Systems, Inc. All rights reserved. -
Page 3: Table Of Contents
PrintServer for USB with 4-Port Switch Table of Contents Chapter 1: Introduction Welcome What’s in this Guide? Chapter 2: Getting to Know the USB PrintServer The Back Panel The Front Panel Chapter 3: Connecting the PrintServer Overview Connecting the USB PrintServer to your Network... - Page 4 PrintServer for USB with 4-Port Switch Common Problems and Solutions Appendix B: About Bi-Directional Printing Appendix C: Upgrading Firmware Appendix D: Windows Help Appendix E: Glossary Appendix F: Specifications Appendix G: Warranty Information Appendix H: Regulatory Information Appendix I: Contact Information...
-
Page 5: List Of Figures
PrintServer for USB with 4-Port Switch List of Figures Figure 2-1: USB PrintServer’s Back Panel Figure 2-2: The USB PrintServer’s Front Panel Figure 2-3: The USB PrintServer’s Side Panel Figure 2-13: The Broadband Router’s Front Panel Figure 3-1: Connecting to the LAN Port... - Page 6 PrintServer for USB with 4-Port Switch Figure 5-2: Driver’s Welcome Figure 5-3: Choose Destination Location Figure 5-4: Select Program Folder Figure 5-5: Copy Folder Figure 5-6: Setup Complete Figure 5-7: TCP/IP Figure 5-8: IP Address Figure 5-9: Added Successfully Figure 5-10: Configure Printer Port...
- Page 7 PrintServer for USB with 4-Port Switch Figure 8-6: Connected Protocol Figure 8-7: Searching for Device Figure 8-8: Setup Complete Figure 8-9: Bi-Admin Management Utility Figure 8-10: Device Information Figure 8-11: Verify Password Figure 8-12: Printer Status Figure 8-13: Printer Configuration...
-
Page 8: Chapter 1: Introduction
The Linksys PrintServer for USB with 4-Port Switch is a double upgrade for your network. First, it lets you connect a USB printer directly to your network, eliminating the need to dedicate a PC to print serving chores. Using a PrintServer frees up your "print share PC"... - Page 9 PrintServer for USB with 4-Port Switch • Chapter 4: Installing the PrintServer using the Setup Wizard This chapter instructs you on how to use the Setup Wizard to install your PrintServer. • Chapter 5: Windows Driver Installation This chapter explains how to install the Windows driver for the PrintServer.
- Page 10 • Appendix I: Regulatory Information This appendix supplies the regulatory information regarding the PrintServer.. • Appendix J: Contact Information This appendix provides contact information for a variety of Linksys resources, including Technical Support. Chapter 1: Introduction What’s in this Guide?
-
Page 11: Chapter 2: Getting To Know The Usb Printserver
PrintServer for USB with 4-Port Switch Chapter 2: Getting to Know the USB PrintServer The Back Panel The USB PrintServer's ports, where the cables are connected, are located on the back panel. Figure 2-1: USB PrintServer’s Back Panel Reset Button Pressing the Reset button will reset the PrintServer to the factory default settings. -
Page 12: The Front Panel
PrintServer for USB with 4-Port Switch The Front Panel The PrintServer's LEDs, where information about network activity is displayed, are located on the front panel. Figure 2-2: The USB PrintServer’s Front Panel Status Green. The Status LED will remain continuously lit when a printer is correctly connected to the PrintServer. -
Page 13: Chapter 3: Connecting The Printserver
1. Plug one end of the Ethernet network cable into one of the PrintServer’s LAN Ports (1-4). (See Figure 3-1.) 2. Connect the other end of the cable into your networked hub, switch, or router. The distance between the PrintServer and the other device should not exceed 328 feet (100 meters). -
Page 14: Chapter 4: Installing The Printserver Using The Setup Wizard
PrintServer for USB with 4-Port Switch Chapter 4: Installing the PrintServer using the Setup Wizard Installation 1. To begin installation of the PrintServer, you will use the Setup CD-ROM to run the Setup Wizard. 2. Insert the Setup CD-ROM into the computer’s CD-ROM drive. The Setup CD-ROM should run automatically. If it does not, click the Start button and choose Run. -
Page 15: Figure 4-4: Password
PrintServer for USB with 4-Port Switch 6. The Password screen, Figure 4-4, will appear next. Enter the default password admin in the field. Click Enter. 7. The Basic Settings screen, shown in Figure 4-5, will appear. If you want to change the Device Name or Domain Name, enter the Device Name and Domain Name in the respective fields. -
Page 16: Figure 4-6: Ip Settings
PrintServer for USB with 4-Port Switch 8. The IP Settings screen, Figure 4-6, appears next. If your network uses a router with a DHCP Internet Protocol setting that automatically assigns an IP address, select Automatically obtain an IP address (DHCP). If your network uses a static IP address, select Set IP configuration manually, and enter the IP Address, Subnet Mask, and Gateway in the fields provided. -
Page 17: Figure 4-8: Confirmation
PrintServer for USB with 4-Port Switch 10. The Confirmation screen appears next. See Figure 4-8. Your old and new settings will be displayed. If you want to make a change, click No and you will exit the Setup Wizard; You will have to start the Setup Wizard again. -
Page 18: Chapter 5: Windows Driver Installation
2. When you see Figure 5-1, click User Install to continue. Click Exit to end the installation. Chapter 5: Windows Driver Installation Overview HAVE YOU: already set up your printer? Linksys recommends that you set up your printer and install your printer’s driver before you install the PrintServer’s driver. -
Page 19: Figure 5-2: Driver's Welcome
PrintServer for USB with 4-Port Switch 3. The Welcome screen of the driver installation program, Figure 5-2, will appear first. You will need to close any other programs you have open before you continue. Click Cancel to quit the setup program, then close the open programs. -
Page 20: Figure 5-4: Select Program Folder
PrintServer for USB with 4-Port Switch 5. The next screen to appear is Select Program Folder, shown in Figure 5-4. An icon will be added to the program folder listed. You may change the name for the program folder, if you wish. Click Next. -
Page 21: Figure 5-7: Tcp/Ip
PrintServer for USB with 4-Port Switch 8. The Information screen appears next. See Figure 5-7. Read the information, then click OK. 9. The Printer Port Setup screen will appear, as shown in Figure 5-8, and list the PrintServer and the connected printers. -
Page 22: Figure 5-10: Configure Printer Port
PrintServer for USB with 4-Port Switch 11. The Configure Printer Port screen will appear, as shown in Figure 5-10. Your installed printer will appear in the field. Click the Connect button to connect the printer for configuration. To add another printer, click the Add New Printer button. -
Page 23: Chapter 6: Configuring The Printserver
PrintServer 's general settings. Change these settings as described here and click the Save button to apply your changes or click Cancel to cancel your changes. PSUS4 Device Name. Enter the PrintServer’s name in the field. The name can be located on a sticker that is on the bottom of the PrintServer. -
Page 24: The Protocol Tab - Tcp/Ip
PrintServer for USB with 4-Port Switch The Protocol Tab - TCP/IP Click the TCP/IP tab to view or change the TCP/IP values of the PrintServer. (See Figure 6-2.) IP Address. If you are using DHCP to assign IP addresses, select Obtain an IP Address Automatically. By default, Obtain an IP Address Automatically is enabled. -
Page 25: The Protocol Tab - Netbeui
PrintServer for USB with 4-Port Switch The Protocol Tab - NetBEUI NetBEUI connection settings of the PrintServer are available on this tab. (See Figure 6-4.) Domain Name. Enter the name of the domain that you want the PrintServer associated with in the Domain Name field. -
Page 26: The Printer Tab - Internet Printing
PrintServer for USB with 4-Port Switch The Printer Tab - Internet Printing Internet Printing allows you to automatically print any e-mails that are sent to a specific e-mail account on your network. This is especially useful for printing information when you are not connected to the network. You can print from anywhere that you can access e-mail. -
Page 27: The Printer Tab - Logical Port
PrintServer for USB with 4-Port Switch The Printer Tab - Logical Port The Logical Printers tab contains the logical printer settings of the PrintServer. Select from the following fields for each Logical Printer. (See Figure 6-6.) Select Printer. Select the number (1-3) from the drop-down menu of Logical Printer Port No: you wish to configure. -
Page 28: The Status Tab - Device
PrintServer for USB with 4-Port Switch The Status Tab - Device The Device tab allows you to view information about the PrintServer. No values can be changed on this screen. This screen is for information only. (See Figure 6-7.) Clicking the Refresh button causes the PrintServer to retrieve this information again. -
Page 29: Figure 6-9: Exit
PrintServer for USB with 4-Port Switch The Exit Tab This tab is used exclusively for exiting the Web-based Utility. (See Figure 6-9.) Select the Exit tab and the screen in Figure 6-9 will appear. Click the Yes button if you want to exit the Utility. -
Page 30: Chapter 7: Internet Printing Protocol
PrintServer for USB with 4-Port Switch Chapter 7: Internet Printing Protocol Overview Internet Printing Protocol (IPP) is a new standards-based system to allow remote printing from a PC to any accessible printer. Normally, the printer will be attached to a computer or other device that functions as an IPP Server. -
Page 31: Figure 7-2: Addport
PrintServer for USB with 4-Port Switch 2. If Internet access from your location is via a Proxy Server, check Access IPP Server via Proxy Server, and enter details of your Proxy Server. (This will be the same as your Browser configuration.) 3. -
Page 32: Figure 7-4: Locate Your Printer
PrintServer for USB with 4-Port Switch • Retry Interval sets the time interval (in seconds) between connection attempts. Increase this number if you have a poor connection, or the remote server is very busy. • Retry Count sets how many connection attempts will be made. Increase this number if you have a poor connection, or the remote server is very busy. - Page 33 PrintServer for USB with 4-Port Switch • It is powered off. • A printer problem has caused the IPP Server to cease responding, and a restart (reboot) is required. • The Server’s IP Address has changed. • The Internet connection for the IPP Server is down.
-
Page 34: Chapter 9: Bi-Admin Management
PrintServer for USB with 4-Port Switch Chapter 8: Bi-Admin Management Overview The PrintServer is managed by a utility program called Bi-Admin on the PrintServer’s Setup CD. Fully compatible with Windows 98, Me, 2000, and XP, Bi-Admin allows you to change the PrintServer’s internal settings, check on the unit’s status, and perform basic diagnostic tests. -
Page 35: Figure 8-3: Choose Destination Location
PrintServer for USB with 4-Port Switch 4. The next screen to appear is Choose Destination Location, as shown in Figure 8-3. You will be requested to choose the location of where the Bi-Admin folder will be installed. If you want the folder to be installed in a different location, click the Browse button and select the location. -
Page 36: Starting The Bi-Admin Management Utility
PrintServer for USB with 4-Port Switch Starting the Bi-Admin Management Utility 1. To start the Bi-Admin program, click on Start, Programs, Print Server Utility, and then Bi-Admin Management Utility, as shown in Figure 8-6. If the Bi-Admin Management Utility icon has been created, you can just double-click on it instead. -
Page 37: The Bi-Admin Management Utility
PrintServer for USB with 4-Port Switch The Bi-Admin Management Utility The Bi-Admin Management Utility screen will appear next. Any hardware found on the network will appear on the left-hand side of the screen, as shown in Figure 8-9. The Utility can be managed from this screen. The menu and... -
Page 38: Figure 8-12: Printer Status
PrintServer for USB with 4-Port Switch • Printer Status. This option allows you to view the printer status, and set port and printer parameters. If you click this option, a Verify Password screen will appear, as shown in Figure 8-11. Make sure that you enter the password in the field before you click OK or an Incorrect Password message will appear. -
Page 39: Figure 8-14: Verify Password
PrintServer for USB with 4-Port Switch • Configuration. You may configure the PrintServer with this option. If you click this option, a Verify Password screen will appear, as shown in Figure 8-14. Make sure that you enter the password in the field before you click OK or an Incorrect Password message will appear. -
Page 40: Figure 8-16: Dynamic Ip Address (Dhcp)
PrintServer for USB with 4-Port Switch TCP/IP If you are using DHCP to assign IP addresses, select Dynamic IP Address (DHCP) . (See Figure 8-16.) By default, Dynamic IP Address (DHCP) is enabled. If you need to assign the PrintServer a Fixed IP Address (also known as Static IP Address), select Fixed IP Address, (Figure 8-17) and enter the appropriate values under IP Address, Subnet Mask, and Gateway. -
Page 41: Figure 8-18: Apple Talk
PrintServer for USB with 4-Port Switch Apple Talk (Figure 8-18) AppleTalk is a network communications protocol that allows computers to talk to each other using Ethernet. Typically only Macintoshes use AppleTalk, although other platforms can be made to use it with extra software. -
Page 42: Figure 8-20: Internet Printing
PrintServer for USB with 4-Port Switch Internet Printing (Figure 8-20) Enter the address of your mail server in the Mail Server IP Address fields. (This value must be a fixed IP address.) Enter the Mail Account name and Password next. Enter the password again in the Confirm Password field. -
Page 43: Figure 8-22: Attached Remote
PrintServer for USB with 4-Port Switch If you click Attached Remote, the screen in Figure 8-22 appears. To add a cross segment print server, enter the IP address in the fields, and click the Set button. Click Cancel to undo any changes. For more information, click the Help button. -
Page 44: Appendix A: Troubleshooting
This appendix consists of “Common Problems and Solutions”. Provided are possible solutions to problems that may occur during the installation and operation of the PrintServer. Read the descriptions below to help you solve your problems. If you can’t find an answer here, check the Linksys website at www.linksys.com. Common Problems and Solutions If the PrintServer is not working correctly, follow the advice in this chapter. - Page 45 In other words, the PrintServer will revert to its original factory configuration. 8. I need to upgrade the firmware. In order to upgrade the firmware with the latest features, you need to go to the Linksys website and download the latest firmware at www.linksys.com.
-
Page 46: Appendix B: About Bi-Directional Printing
That does not mean that they can’t be used on a network, however. Linksys designed the PrintServers to function with both regular as well as bi-directional printers. Standard print servers cannot work with bi-directional printers, but the PrintServer features a custom design to support both parallel as well as bi-directional parallel interfaces. -
Page 47: Appendix C: Upgrading Firmware
PrintServer for USB with 4-Port Switch Appendix C: Upgrading Firmware The PrintServer's firmware is upgraded through the Bi-Admin Management utility. Follow these instructions: 1. Download the firmware from Linksys's website at www.linksys.com. 2. Open the Bi-Admin Management utility. 3. Click on Main => Upgrade Firmware. -
Page 48: Appendix D: Windows Help
PrintServer for USB with 4-Port Switch Appendix D: Windows Help All wireless products require Microsoft Windows. Windows is the most used operating system in the world and comes with many features that help make networking easier. These features can be accessed through Windows Help and are described in this appendix. -
Page 49: Appendix E: Glossary
PrintServer for USB with 4-Port Switch Appendix E: Glossary 802.11a - An IEEE wireless networking standard that specifies a maximum data transfer rate of 54Mbps and an operating frequency of 5GHz. 802.11b - An IEEE wireless networking standard that specifies a maximum data transfer rate of 11Mbps and an operating frequency of 2.4GHz. - Page 50 PrintServer for USB with 4-Port Switch Buffer - A block of memory that temporarily holds data to be worked on later when a device is currently too busy to accept the data. Cable Modem - A device that connects a computer to the cable television network, which in turn connects to the Internet.
- Page 51 PrintServer for USB with 4-Port Switch Dynamic IP Address - A temporary IP address assigned by a DHCP server. Encryption - Encoding data to prevent it from being read by unauthorized people. Ethernet - An IEEE standard network protocol that specifies how data is placed on and retrieved from a common transmission medium.
- Page 52 Passphrase - Used much like a password, a passphrase simplifies the WEP encryption process by automatically generating the WEP encryption keys for Linksys products. Ping (Packet INternet Groper) - An Internet utility used to determine whether a particular IP address is online.
- Page 53 Subnet Mask - An address code that determines the size of the network. Switch - 1. Device that is the central point of connection for computers and other devices in a network, so data can be shared at full transmission speeds. 2. A device for making, breaking, or changing the connections in an electrical circuit.
- Page 54 PrintServer for USB with 4-Port Switch TCP/IP (Transmission Control Protocol/Internet Protocol) - A network protocol for transmitting data that requires acknowledgement from the recipient of data sent. Telnet - A user command and TCP/IP protocol used for accessing remote PCs.
-
Page 55: Appendix F: Specifications
PrintServer for USB with 4-Port Switch Appendix F: Specifications Standards IEEE 802.3, 802.3u, USB 1.0/1.1 Ports/Buttons 4 10/100 RJ-45 Ports Auto MDI/MDI-X, Reset Cabling Type Category 5 or better, and USB1.1 cable with Type-B female and Type-A male connectors LEDs... -
Page 56: Appendix G: Warranty Information
Linksys product will be free of defects in materials and workmanship under normal use. Your exclusive remedy and Linksys's entire liability under this warranty will be for Linksys at its option to repair or replace the product or refund Your purchase price less any rebates. -
Page 57: Appendix H: Regulatory Information
Appendix H: Regulatory Information FCC STATEMENT This PrintServer for USB with 4-Port Switch has been tested and complies with the specifications for a Class B digital device, pursuant to Part 15 of the FCC Rules. These limits are designed to provide reasonable protection against harmful interference in a residential installation. -
Page 58: Appendix I: Contact Information
Can't find information about a product you want to buy on the web? Do you want to know more about networking with Linksys products? Give our advice line a call at: Or fax your request in to: If you experience problems with any Linksys product,...
Need help?
Do you have a question about the PSUS4 and is the answer not in the manual?
Questions and answers