Table of Contents
Advertisement
Advertisement
Table of Contents

Related Manuals for D&K Minikote


Summary of Contents for D&K Minikote
- Page 1 OWNERS MANUAL D&K Minikote Laminator.com www.laminator.com...
-
Page 2: Table Of Contents
B. Loading Film: 1” Mandrel .....................7 C. Threading Film ......................8 D. Laminating ........................9 E. Supply Roll Tension Adjustment ..................9 - 10 V. Maintaining the Minikote A. Care and Cleaning .......................10 B. Speci c Troubleshooting Guide ...................11 C. Removing a Wrap Around ...................11 - 12 Appendix A Replacing the Hand Held Cutter Blades ................12... -
Page 3: Specs
SPECIFICATIONS Height .................. 15”(381 mm) Width ................... 34” Depth (with feed tray ) ............20” Net Weight ................66 lbs. Shipping Weight ..............72 lbs. Capacity................27” Electrical ................120V AC, 60Hz, 1400w Laminator.com www.laminator.com... -
Page 4: Important Safeguards
IMPORTANT SAFEGUARDS • Read all the safety and operating instructions before connecting or using this unit. • Retain this notice and the owners manual for future reference. • Adhere to all warnings and operating instructions. • Do not use this unit near water (e.g. near a bathtub, etc.) •... -
Page 5: General Diagrams
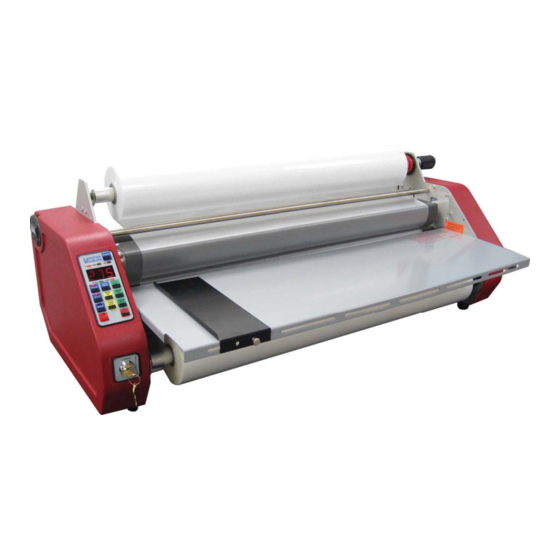
The D&K Minikote, offers variable speeds and a reverse feature. They are designed to laminate a variety of materials using up to 27” laminating lm. The D&K Minikote is capable of lamination from 1 to 9 feet per minute and can be reversed by the push of a button. - Page 6 GENERAL DIAGRAMS Laminator.com www.laminator.com...
-
Page 7: Unpacking
I. Unpacking I. Unpacking Remove the laminator from its box by grasping the housings and pulling up. Do not use rollers or shafts as handles - this could cause damage. Choose a location for the laminator that is clean, well-lit and draft free. - Page 8 Standard Presets (H) Standard Presets (H) The Laminator is equipped with 2 factory presets. The buttons are labeled 275 and 225. These buttons will set both a speed and temperature, that being (275°F and 3 feet per minute) and (225°F and 3 feet per minute).
-
Page 9: Loading Film: 1" Mandrel
B. Loading Film: 1” Mandrel (B) B. Loading Film: 1” Mandrel (B) Unpack the upper and lower supply man- drels. The upper and lower mandrels are different. The word “TOP” is stamped on the shaft of the upper mandrel and the word “LOW”... -
Page 10: Threading Film
C. Threading the Film C. Threading the Film Remove the feed tray and the heatguard. Thread the lm as shown in the gure on the right. Pull the lm around the idler rollers as shown. Do not mistake the reinforcing bar for the Do not mistake the reinforcing bar for the idler roller idler roller. -
Page 11: Laminating
D. Laminating D. Laminating After the machine is loaded with lm (see B. Loading Film: 1” Mandrel) and threaded (see C. Threading the Film), it is ready to laminate. Ensure that the laminator has reached the preset temperature. This will be indicated by the ready light being illu- minated. -
Page 12: Maintaining The Minikote
A. Care and Cleaning A. Care and Cleaning In the normal course of operating the D&K Minikote, dirt and adhesive will accumulate on the heat shoes and rubber rollers (Laminating produces static electricity which attracts airborne dust and dirt). Regular inspection and cleaning will assure that this does not become a problem. -
Page 13: Speci C Troubleshooting Guide
B. Speci c Troubleshooting Guide B. Speci c Troubleshooting Guide Wrinkles on Film (side to side) Wrinkles on Film (lengthwise) Plastic not bonding Bubbles or Blisters Impressions on product Squeaking sounds Film narrowing on shoes Film wrinkling on shoes Continuous blemish Cloudy lm “Orange Peel”... -
Page 14: Replacing The Hand Held Cutter Blades
Shut the machine off! Shut the machine off! D&K Minikotes have set screws at both ends of each laminating and pull roller. With the use of a 3/32 hex key, loosen all four set screws on the pull rollers. Cut the plastic between the laminating and pull rollers, grab the loose end and pull. -
Page 15: Wiring Diagrams
WIRING DIAGRAM Laminator.com www.laminator.com... -
Page 16: Exploded Diagram
EXPLODED VIEW Laminator.com www.laminator.com... -
Page 17: Warranty
This Warranty does not cover any defect or malfunction due to the use of faulty non- Minikote Laminator materials, un- reasonable use or abuse of the machine, or failure to provide reasonable and necessary maintenance.
Need help?
Do you have a question about the Minikote and is the answer not in the manual?
Questions and answers