Foscam FI8919W User Manual
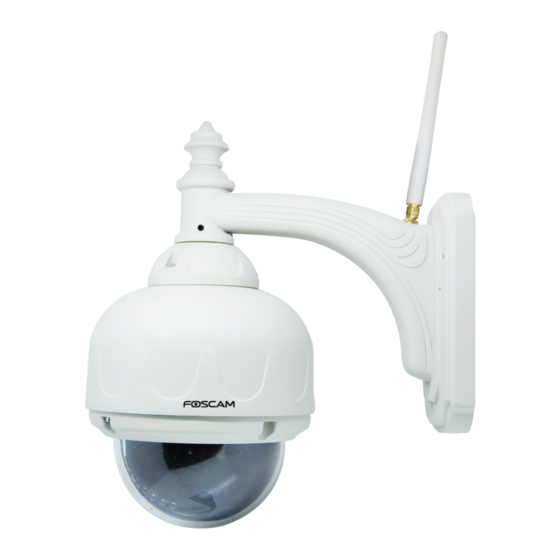
Outdoor pan/tilt wireless ip camera
Hide thumbs
Also See for FI8919W:
- User manual (79 pages) ,
- Quick installation manual (30 pages) ,
- How to upgrade firmware (5 pages)
Table of Contents
Advertisement
Quick Links
Advertisement
Table of Contents

Related Manuals for Foscam FI8919W


Summary of Contents for Foscam FI8919W
- Page 1 User Manual User Manual Model: FI8919W Outdoor Pan/Tilt Wireless IP Camera...
-
Page 2: Table Of Contents
Table of Contents Overviews..............................2 1.1 Key Features..................................3 1.2 Read Before Use................................3 1.3 Packing Contents................................4 1.4 Physical Description................................4 2 Surveillance Software GUI........................7 2.1 Login Window..................................7 2.2 Surveillance Window................................. 9 3 Advanced Camera Settings......................... 16 3.1 Device Status................................... -
Page 3: Overviews
Overviews Overviews FOSCAM FI8919W is an integrated wireless IP Camera with a color CMOS sensor. It combines a high quality digital video camera, with a powerful web server, to bring clear video to your desktop from anywhere on your local network or over the Internet. -
Page 4: Key Features
● Multi-level users’ management and passwords definition ● Embedded Web Server for users to visit by IE ● Wi-Fi compliant with wireless standards IEEE 802.11b/g/n ● Embedded FOSCAM DDNS (dynamic domain name service) Service ● Motion detection activates alarm ● Supports image snapshot ●... -
Page 5: Packing Contents
Packing Contents Packing Contents ● IPCAM×1 ● CD×1 ● Wi-Fi Antenna×1 ● Quick Installation Guide×1 ● DC Power Supply×1 ● Warranty Card×1 ● Mounting bracket×1(option) ● Network Cable×1 Physical Description Physical Description Front Panel Lens Infrared Led Infrared Led Figure 1.1... -
Page 6: Back View
Back View Antenna Figure 1.2 WIFI Antenna: Wireless Antenna Interface View Power Reset button Figure 1.3 LAN: RJ-45/10-100 Base T Power: DC 12V/2A Power supply Reset button: 1) Press and hold down the RESET BUTTON about 10 seconds. when released the IP camera will be reset back to factory default settings. -
Page 7: Bottom View
There are up to three labels located on the body of the camera; this is an important feature of original Foscam cameras. If your camera does not have labels as shown in Figure 1.3 ,it may be a clone one. Cloned Foscam cameras can not use original firmware and are not eligible for warranty or technical services. -
Page 8: Surveillance Software
Please check the login window above, it was divided to 6 sections from no. 1 to 6. Section1 Select Language FOSCAM camera supports multi-languages, such as English, Spanish, Deutsch and so on. You can select the language you need via pull down the dropdown toolbar and click on the language to switch. - Page 9 Section2 FOSCAM Website Link There is an access link to Foscam website homepage, if you need tech support you can contact Foscam directly. Section3 ActiveX Mode If your PC is windows based OS, such as Windows XP, Windows7, Windows Vista and you are using IE-based browsers like IE6, IE7, IE8, please choose IE ActiveX Mode login mode.
-
Page 10: Surveillance Window
2.2 Surveillance Window Select the ActiveX mode and you will enter the surveillance window. Figure 2.2 Section1 Device Name Default device name is Anonymous. You can define a name for your camera as you like (Please go to chapter 3.1 and read how to set it) - Page 11 Figure 2.3 Section3 Image Parameters Settings OSD is used to add timestamp on the video. There are five text colors to choose from: Black, red, yellow, white, blue. Shenzhen Foscam Intelligent Technology Co., Limited Shenzhen Foscam Intelligent Technology Co.,...
- Page 12 Add OSD on record Select this option if you want to add a timestamp to recordings. Resolution 1) 320x240-------QVGA 2) 640x480-------VGA There are two resolutions, the bigger one (VGA) is 640x480 pixels, and the smaller one (QVGA) is 320x240 pixels. The bigger the resolution, the better of the image quality is, but the lower the frame rate is.
- Page 13 2) Set----------- Click Set to save the position you need the camera to remember 3) Go----------- Click Go to make the camera move the preset position 4) Number button from 1 to 8--------You can click the number button with preset position, and the camera will go to the preset position.
- Page 14 : Click this icon; camera will rotate up and down. Click to stop. : Click this icon; camera will rotate left and right. Click to stop. : Click this icon, all the IR lights will turn on. Click to turn off them.
-
Page 15: Onscreen Mouse Control
Onscreen Mouse Control Double click right mouse on the surveillance window, then left click on the screen to indicate the camera move direction you prefer, press the left mouse and the camera’ Len will move to the corresponding direction.. Double click right mouse again, cancel onscreen mouse control. - Page 16 Figure 2.5 Shenzhen Foscam Intelligent Technology Co., Limited Shenzhen Foscam Intelligent Technology Co., Limited Tel: Tel: 2674 2674 5668 5668 Fax: Fax: 2674 2674 5168 5168...
-
Page 17: Advanced Camera Settings
Advanced Camera Settings Advanced Camera Settings Click the bar “Device Management”, goes to Administrator Control Panel to make advanced camera settings. 3.1 Device Status Figure 3.1 1------Device ID MAC ID of the camera by wired connection 2-----Device Firmware Version System Firmware version of the camera... - Page 18 Another Way: Double click the the icon “IP Camera.exe” , select the camera IP, right click and select the Basic Properties, you can also see the Firmware Version and MAC Address, such as the following screen: Figure 3.2 Figure 3.3...
-
Page 19: Alias Settings
Alias Settings Default alias is Anonymous. You can define a name for your camera here such as apple. Click Submit to save your changes. The alias name supports special characters. Click the option here to modify the device name Enter the device name as you like. -
Page 20: User Settings
User Settings User Settings Here you can create users and set permission levels, visitor, operator or administrator. Click Submit to save these settings. The camera will reboot. different permission levels, but at least one administrator Figure 3.6 Here you can also set one important file locations for the camera, the Alarm Record Path. -
Page 21: Multi-Device Settings
3.5 Multi-Device Settings If you want to view multi-surveillance screens on one window, you need to login one camera, and set it as the main device, and do Multi-Device Settings, add other cameras to the first one camera. Before you do multi-cams settings, you need to assign different port such as 81, 82, 83, 84, 85, 86, 87, 88 to the cameras if there is 8 cams installed. - Page 22 Click Submit after add all cameras Figure 3.7b Back to Surveillance Windows, and click Four Windows option, you will see four cameras you added. Figure 3.8 Shenzhen Foscam Intelligent Technology Co., Limited Shenzhen Foscam Intelligent Technology Co., Limited...
- Page 23 Figure 3.9 3.5.2 Add cameras in WAN If you want to view all cameras via the internet(remote computer), you will need to add them using DDNS domain name. Firstly, make sure all of the cameras you added can be accessed through the internet.
- Page 24 Use DDNS domain name and port to login Make sure each camera you need add could login with DDNS name and port Figure 3.10 If you have several cameras, you can use the same DDNS domain name; you only need to set a different port number for each camera.
- Page 25 Figure 3.11 1----- The 2nd camera’s name 2----- Fill in the 2nd camera’s DDNS host not LAN IP 3 ---- Enter the 2nd camera’s user name and password 4---- Click Add button and to take effect Add the other cameras in the same way. Click Submit to save.
- Page 26 Click submit after finishing all settings Figure 3.12 Return to video window. You will see all of the cameras accessible through the internet. When you are away from home, you can use the first camera’s DDNS domain name and port to view all the cameras via internet.
-
Page 27: Basic Network Settings
Basic Network Settings If you want to set a static IP for the camera, select Basic Network Settings. Keep the camera in the same subnet of your router or computer. Figure 3.14 Changing settings here is the same as using the IP Camera Tool. (Figure 3.17/3.18) It is recommended that you use the subnet mask, gateway and DNS server from your locally attached PC. - Page 28 Figure 3.15 Figure 3.16 If you don’t know the DNS server, you can use the same settings as the Default Gateway. Shenzhen Foscam Intelligent Technology Co., Limited Shenzhen Foscam Intelligent Technology Co., Limited Tel: Tel: 2674 2674 5668...
- Page 29 Another way to change the camera’s LAN IP and HTTP Port no. Open the IP Camera Tool, select the camera you want to change the port no, right click on the IP address link, and goes to Option ”Network Configuration”, it pops up another dialogue showed as...
-
Page 30: Wireless Settings
Http Port: The default Lan port is 80.You can set another port number, such as port 8005, 8100.etc. User&Password: Default administrator user name is admin with no password. If the prompt “Subnet doesn’t match, dbclick to change!” appears, please enable DHCP set camera’s IP address and gateway once again. - Page 31 Click Scan Button to search WIFI device Figure 3.19 Step 02) Click the SSID of your router in the list, the corresponding information (SSID & Encryption) will be filled in the following boxes automatically. You will only need to fill in the share key. Make sure that SSID, Encryption and share key you...
- Page 32 IP Cam Tool. You have done wireless connection of the camera successfully. If the camera has a dynamic IP, after the wireless settings, the IP will be changed.
- Page 33 Fill in a SSID to identify the IPCAM and then set the security mode, you can choose none or others. Click Apply. Figure 3.21 Step 02) Plug out the network cable and the camera will restart.. Open the wireless network card of PC and search the wireless network around the area. You can find the SSID you filled for the camera (Figure 3.21).
-
Page 34: Adsl
Open the IP Camera Tool, you can search the camera LAN IP again. ADSL ADSL Figure 3.23 If you are connecting the camera directly to a ADSL modem, you can do ADSL settings with your ADSL account &password provided by the ISP, then make the camera connected to the network. -
Page 35: Upnp Settings
UPnP Settings Figure 3.25 The default UPnP status is closed. You can select the checkbox and open UPnP, then the camera’s software will be configured for port forwarding. Back to the “Device Status” panel, you can see the UPnP status: There may be issues with your routers security settings, and sometimes may error. -
Page 36: Ddns Service Settings
3.10 DDNS Service Settings FOSCAM camera has embedded a unique DDNS domain name when producing, and you can directly use the domain name, you can also use the third party domain name. FOSCAM domain name Here take camera.myfoscam.org for example. Go to option of DDNS Service Settings on the administrator panel, you can see the domain name. - Page 37 Third Party Domain Name Settings User can also use third part DDNS, such as www.no-ip.com. ,www. dyndns.com Here take www.no-ip.com for example: ① Step 1, Go to the website www.no-ip.com to create a free hostname Firstly: Login on www.no-ip.com...
- Page 38 Figure 3.28 Figure 3.29 Please create the domain name step by step according to instructions on www.no-ip.com Step 2, DO DDNS Service Settings within the Camera Please set DDNS Service Settings within the camera by hostname, a user name and password you’ve got from...
- Page 39 Note The Third Party DDNS and the Manufacturer’s Domain Name cannot work at the same time. If you have set Third Party DDNS and meanwhile you enabled the Foscam Domain Name, the Third Party DDNS will take effect. ② Do port forwarding within the router Example: The camera’s LAN IP address is http://192.168.1.35:88 ,...
- Page 40 Figure 3.30 ③ Use domain name to access the camera via internet After the port forwarding is finished, you can use the domain name+ http no. to access the camera via internet. Take hostname ycxgwp.no-ip.info and http no. 88for example, the accessing link of the camera via internet would be http:// ycxgwp.no-ip.info:88...
-
Page 41: Mail Service Settings
3.11 Mail Service Settings If you want the camera to send emails when motion has been detected, Mail Service Settings will need to be configured. Figure 3.31 1----- Sender Mailbox for sender must support SMTP 2----- Receiver Mailbox for receiver need not support SMTP,you can set 4 receivers 3----- SMTP Server/ Port Enter SMTP server for sender. - Page 42 Figure 3.32 If the test fails with one of the following errors after clicking Test, verify that the information you entered is correct and again select Test . 1) Cannot connect to the server 2) Network Error. Please try later...
-
Page 43: Msn Setting
3.12 MSN Setting If you want the camera send its current internet IP address to you or your friends, please set MSN settings. Acquire an MSN ID for the IPCAM first, then follow the instructions as per Figure 3.33. - Page 44 Figure 3.34 When the MSN ID in the Friends list login the MAN, he can chat with camera. For example: Foscam13(this account contained in the Friends list) log in MSN, and double click the camera’s account (foscam31), then enter “url?”, the camera will send it’s current IP address to you.
-
Page 45: Ftp Service Settings
When the camera login uses the MSN account, this account cannot be used for anything else when the camera works. 3.13 FTP Service Settings If you want to upload images to your FTP server,you can set FTP Service Settings. - Page 46 Figure 3.37 FTP server: If your FTP server is located on the LAN, you can set as Figure 3.36. If you have an FTP server which you can access on the internet, you can set as Figure 3.37.
- Page 47 Click Submit to save these settings. Click Test, the following screen displays if successful. Figure 3.38 The following errors may occur: 1) Can not connect to the server. Check if the FTP Server is correct. 2) Network Error. Please try later.
-
Page 48: Alarm Service Settings
3.14 Alarm Service Settings IP Camera supports Motion Detection Alarmed, when the motion has been detected, it will send email alerts or upload images or record. Figure 3.39 1---- If you want to set Motion Detection Alarmed ,select the checkbox... - Page 49 Here you can see the alarm status Figure 3.40 There are four alarm indicators: 1) Camera will send emails when motion is activated. If you want to receive images when motion is detected, you must set Mail Service Settings first.
- Page 50 Select this option Set an interval for images to upload Figure 3.42 You can hear the beep sound when the alarm has been detected. Select this option Figure 3.43 4) The camera will record automatically for one minute after motion is detected. You can find the recording file in the folder which you set previously.
- Page 51 Select the checkbox When you enable motion alarm, the camera will record automatically and store the recording file to the folder you Figure 3.44 configured. This icon is used to control whether the folder opens or not. Alarm Scheduler: Here are two ways to set the alarm.
- Page 52 Figure 3.46 2) Specify an alarm schedule. If you want the camera to alarm during set times select Scheduler and set time range. If you want to select one serial area, you can click any number between 00 and 23 on the first row, the corresponding column will be selected and it will turn blue.
- Page 53 Figure 3.47 If you want to select discrete area, you click the left button on the box of time range. It will turn blue. If you want to delete it, just click the left button and it will turn grey.
-
Page 54: Pt Settings
3.15 PT Settings You can set pan/tilt speed. Normally, PT speed is 3. The larger the setting number, the lower speed. Don’t enable the checkbox “disable preset” if you want to use the function of preset, it will be effective after you reboot device. -
Page 55: Upgrade Device Firmware
3.16 Upgrade Device Firmware When you upgrade the camera, please upgrade system firmware first and then upgrade the Web Upgrade system firmware Upgrade Web UI Figure 3.50 Click Browse, choose the correct bin file and then click Submit to upgrade. - Page 56 Figure 3.51 Enter the User name and password Figure 3.52 CAUTION: If your camera works well with the current firmware, we recommend not upgrading. Please don’t upgrade the firmware unnecessarily. Your camera may be damaged if misconfigured during an upgrade.
-
Page 57: Backup & Restore Settings
3.17 Backup & Restore Settings Click Submit to save all the parameters you have set. These parameters will be stored in a bin file for future use. The bin file can be reloaded to restore the parameters that were set. -
Page 58: Reboot Device
3.19 Reboot Device Click Reboot Device to reboot the camera. This is similar to unplugging the power to the camera. 3.20 Log The log record shows who accessed the camera and when. (Figure 3.55). Figure 3.55 3.21 Back This will take you back to the surveillance window. -
Page 59: Appendix
APPENDIX APPENDIX 4.1 Frequently Asked Questions NOTE: Always verify network connections are working by checking the status of the indicators on the network server, hub and network card. 4.1.1 I have forgoten the administrator username and/or password To reset the administrator username and password, press and hold down the RESET BUTTON for 10 seconds. - Page 60 4.1.3 No Pictures Problems Video streaming is managed by the ActiveX controller. If the ActiveX controller isn’t installed correctly you will see no video image. There are two ways to resolve this problem: 1) Reinstall “IP Camera Tool” and ActiveX controller(recommended).
- Page 61 Change another port number Figure 5.2 NOTE: Make sure that your firewall or anti-virus software does not block the camera or ActiveX. If you cannot see live video, try shutting down the firewall or anti-virus software and try again.
- Page 62 4.1.7 Couldn’t find the shortcut on the desktop after install IP camera tool If you use Windows7 or Vista and the shortcut is missing after installing the IP camera tool, check the path of IP Camera program. For example, if it was pointing to C:\Windows\System32\IPCamera.exe.
-
Page 63: Default Parameters
Wi-Fi. 4.2 Default Parameters Default network Parameters IP address: obtain dynamically Subnet mask: 255.255.255.0 Gateway: obtain dynamically DHCP: Disabled DDNS: Embedded FOSCAM domain name Username and password Default administrator username: admin Default administrator password: No password 4.3 Specifications ITEMS FI8919W... -
Page 64: Obtaining Technical Support
User’s Guide has not answered. If you have problem with FOSCAM IP camera, please first contact FOSCAM reseller for solving the problems. If our reseller cannot provide service, pls contact our service department: tech@foscam.com...
Need help?
Do you have a question about the FI8919W and is the answer not in the manual?
Questions and answers