Panasonic KX-DT521 Quick Reference Manual
Digital proprietary telephone
Hide thumbs
Also See for KX-DT521:
- Quick reference manual (25 pages) ,
- Quick reference card (2 pages) ,
- User sheet (2 pages)
Table of Contents
Advertisement
Model No.
Thank you for purchasing a Digital Proprietary Telephone (DPT). Please read this
manual carefully before using this product and save this manual for future use. For
more details, please refer to the manuals of the PBX.
This product supports the following PBX versions and CODEC types:
R KX-NS1000: PCMPR Software File Version 3.1000 or later
R KX-NCP500/KX-NCP1000: PBMPR Software File Version 8.0100 or later
R KX-TDE100/KX-TDE200: PMMPR Software File Version 8.0100 or later
R KX-TDE600: PGMPR Software File Version 8.0100 or later
*1
R KX-TDA30
: PSMPR Software File Version 5.0100 or later
*2
R KX-TDA50
: PSMPR Software File Version 6.0100 or later
R CODEC: G.711
*1
For Canada only
*2
For the United States only
Note
R In this manual, the suffix of each model number is omitted unless necessary.
R The illustrations may differ from the appearance of the actual product.
Document Version: 2014–05
KX-DT521/KX-DT543/KX-DT546
Quick Reference Guide
Digital Proprietary Telephone
Digital DSS Console
Model No.
KX-DT590
Advertisement
Table of Contents

Related Manuals for Panasonic KX-DT521


Summary of Contents for Panasonic KX-DT521
-
Page 1: Quick Reference Guide
Quick Reference Guide Digital Proprietary Telephone KX-DT521/KX-DT543/KX-DT546 Model No. Digital DSS Console KX-DT590 Model No. Thank you for purchasing a Digital Proprietary Telephone (DPT). Please read this manual carefully before using this product and save this manual for future use. For more details, please refer to the manuals of the PBX. -
Page 2: Fcc And Other Information
Important Information Important Information WARNING Disconnect the telephone line cord from this product if this product emits smoke, an abnormal smell, or makes unusual noise. These conditions can cause fire or electric shock. Confirm that smoke has stopped and contact an authorized service center. - Page 3 Important Information When you hold the phone to your ear, noise might be heard in your Hearing Aid. Some Hearing Aids are not adequately shielded from external RF (radio frequency) energy. If noise occurs, use the speakerphone option (if applicable) when using this phone.
-
Page 4: Accessory Information
Accessory Information Accessory Information Included Accessories KX-DT521/KX-DT543/KX-DT546 Handset (1) Handset Cord (1) Telephone Line Cord (1) Stand (1) KX-DT521 KX-DT543 KX-DT546 KX-DT590 Stand (1) Telephone Line Cord (1) Wall mounting adaptor (1) Screws for attaching to the unit (2) Screws for wall mounting (3) Two screws for attaching the KX-DT590 to a wall. -
Page 5: Optional Accessories
Accessory Information Optional Accessories KX-DT521 KX-DT543 KX-DT546 Wall mount kit KX-A432 KX-A433 Digital DSS Console KX-DT590... -
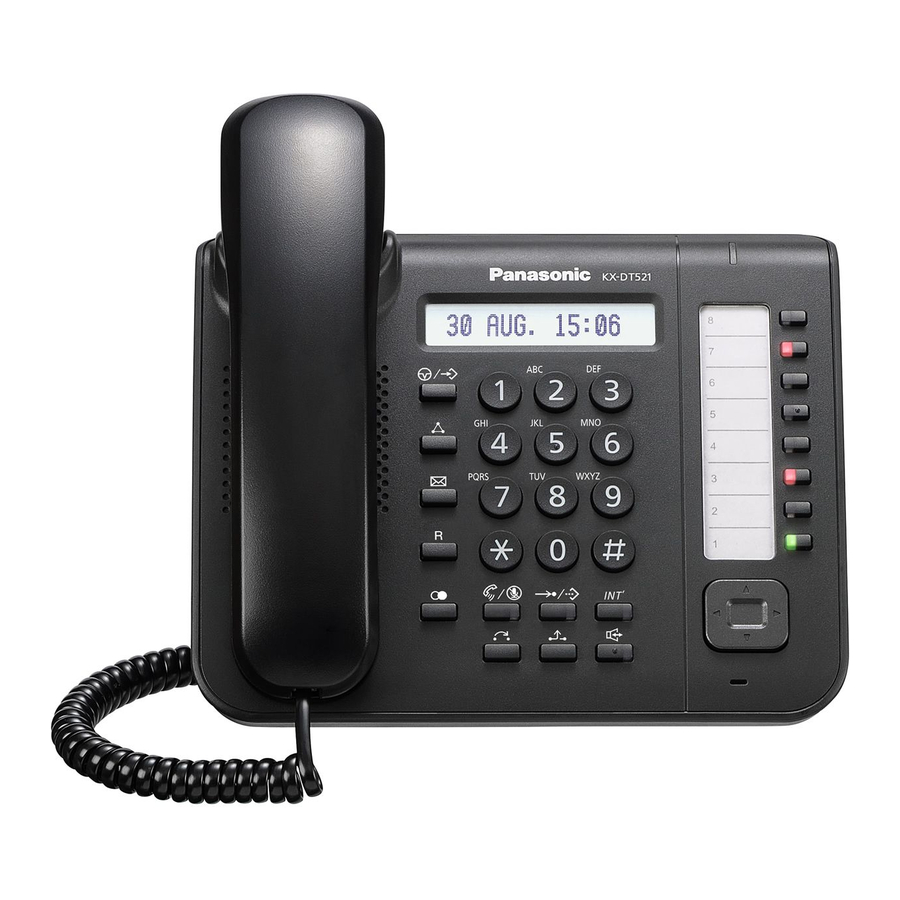
Page 6: Location Of Controls
Location of Controls Location of Controls KX-DT521... -
Page 7: Location Of Controls
KX-DT546 KX-DT590 A LCD (Liquid Crystal Display): KX-DT521: 1 line, KX-DT543: 3 lines, KX-DT546: 6 lines B Message/Ringer Lamp: When you receive an intercom call, the lamp flashes green, and on an outside call, the lamp flashes red. When someone has left you a message, the lamp stays on red. - Page 8 D Handset Hook: Keeps the handset stable when the unit is mounted on a wall. E Headset Jack F PAUSE/PROGRAM (KX-DT521 only): Used to insert a pause when storing a telephone number. This button is also used for programming this unit.
- Page 9 Location of Controls U EHS (Electronics Hook Switch) Jack V FWD/DND : Used to switch Call Forwarding or Do Not Disturb on your extension. W CANCEL : Used to cancel the selected item. KX-DT543/KX-DT546 only...
-
Page 10: Settings
3. Enter 2 digits (01-30) using the dial keys (0-9), or press [ ] or [ ] to select the ring tone. 4. Press [ENTER]. 5. Press [CANCEL]. If you hear your own voice through the handset or headset, decrease the volume. For KX-DT521, press [PAUSE/PROGRAM]. For KX-DT521, press [AUTO DIAL/STORE]. -
Page 11: Lcd Backlight
PROG 2. Enter 3. Press [ENTER]. 4. Press a dial key to select the LCD backlight mode. : Automatic : Always ON : Always OFF 5. Press [ENTER]. 6. Press [CANCEL]. For KX-DT521, press [PAUSE/PROGRAM]. For KX-DT521, press [AUTO DIAL/STORE]. -
Page 12: Making Calls
Feature Operations Feature Operations Making Calls Calling MTo an extensionN 1. Go off-hook. 2. Dial an extension number. MTo an outside partyN 1. Go off-hook. 2. Press a flexible CO button. 3. Dial the outside party’s phone number. Redial 1. Go off-hook. 2. -
Page 13: Personal Speed & One-Touch Dialing
6. Press [CANCEL]. MTo dialN 1. Go off-hook. 2. Press the flexible CO button assigned as a One-touch Dialing button. Enter the outside line access number before an outside phone number. For KX-DT521, press [PAUSE/PROGRAM]. For KX-DT521, press [AUTO DIAL/STORE]. -
Page 14: Call Hold/Transfer
Feature Operations During a Conversation Call Hold MTo holdN 1. Press [HOLD]. 2. After the confirmation tone, go on-hook. MTo retrieve a call at the holding extensionN 1. Go off-hook. 2. Press a flexible CO button or [INTERCOM]. MTo retrieve an outside call from another extensionN 1. -
Page 15: Setting The Telephone According To Your Needs
Feature Operations Setting the Telephone According to Your Needs Do Not Disturb 1. Go off-hook. 2. Enter 3. Press a dial key to select the setting. : Both outside and intercom calls : Outside calls only : Intercom calls only 4. -
Page 16: Multiple Party Conversation
Feature Operations Useful Features Multiple Party Conversation MTo add other parties during a conversationN 1. Press [CONF]. 2. After the confirmation tone, dial the phone number of the party to add. 3. Talk to the new party. 4. Press [CONF]. 5. -
Page 17: Attaching Kx-Dt590 To Kx-Dt543/546
Installation and Setup Installation and Setup Note R Panasonic assumes no responsibility for injuries or property damage resulting from failures arising out of improper installation or operation inconsistent with this documentation. Attaching a KX-DT590 to the KX-DT543/KX-DT546 The KX-DT590 allows 48 additional Flexible CO buttons to be added to this unit. -
Page 18: Removing Stand
Gently push the stand in the direction indicated until it locks into place. The stand will be mounted in the high position. Example: KX-DT546 Removing the Stand KX-DT521 Remove the stand in the direction indicated while pushing the catches of the stand with both hands as shown. - Page 19 Installation and Setup Connections The telephone line cord KX-DT521 Connect to a PBX. Connect to: a digital proprietary telephone — Digital XDP connection To a handset jack (handset) Clamp Headset jack KX-DT543/KX-DT546 The telephone line cord Connect to a PBX.
- Page 20 The following headsets can be used with this unit. (Not all operations with the headsets can be guaranteed.) – Wired headsets Panasonic KX-TCA400 or KX-TCA430 – EHS headsets (KX-DT543/KX-DT546 only) For up-to-date information about headsets that have been tested with this unit, please contact your dealer.
-
Page 21: Wall Mounting
R When mounting the KX-DT543/KX-DT546 with a KX-DT590 on a wall, only ONE KX-DT590 can be attached. Insert the tabs of the wall mounting adaptor into the designated openings in the base, and then slide the wall mounting adaptor in the direction of the arrow until it clicks. KX-DT521 KX-DT543/KX-DT546 with KX-DT590... - Page 22 Wall Mounting Fasten the wall mounting adaptor(s) to the base with the screw(s). (Recommended torque: 0.4 N·m [4.08 kgf·cm/3.54 lbf·in] to 0.6 N·m [6.12 kgf·cm/5.31 lbf·in]) Connect the cables to the unit, and run the cables through the wall mounting adaptor, as shown in the illustration below. Drive the screws into the wall either 83 mm (3 in) or 100 mm (3...
- Page 23 Notes...
- Page 24 2 screws for the DPT and the 2 screws for the KX-DT590, as indicated above. This space is abbreviated in this template and must be measured. One screw at either point One screw at either point © Panasonic System Networks Co., Ltd. 2014 PNQX6348YA PP0114MK1054...
Need help?
Do you have a question about the KX-DT521 and is the answer not in the manual?
Questions and answers
how to get rid of "Ring Off" on screen