Panasonic Lumix DMC-TZ57 Operating Instructions Manual
Hide thumbs
Also See for Lumix DMC-TZ57:
- User manual ,
- Basic operating instructions (2 pages) ,
- Operating instructions manual (188 pages)

Related Manuals for Panasonic Lumix DMC-TZ57


Summary of Contents for Panasonic Lumix DMC-TZ57
-
Page 1: Operating Instructions
Operating Instructions for advanced features Digital Camera DMC-TZ57 Model No. Please read these instructions carefully before using this product, and save this manual for future use. SQW0189-1 F0215HH1035... -
Page 2: Table Of Contents
Contents Before Use Care of the camera ...................... 6 Standard Accessories....................7 Names and Functions of Main Parts................8 Preparation Charging the Battery....................11 • Inserting the Battery.................... 12 • Charging ......................13 • Approximate operating time and number of recordable pictures ......16 Inserting and Removing the Card (optional) ............ - Page 3 • Extra Optical Zoom (EZ) ..................60 • Intelligent Zoom ....................60 • Digital Zoom......................61 Taking Pictures Using the Built-in Flash..............62 • Switching to the appropriate flash setting ............62 Taking Close-up Pictures ([AF Macro]/[Macro Zoom])........... 66 Taking Pictures with the Self-timer................67 Compensating the Exposure..................
- Page 4 • Registering Personal Menu Settings (Registering custom settings)....88 • Recording using registered custom set .............. 89 Entering Text......................90 Using the [Rec] Menu....................91 • [Picture Size]....................... 91 • [Quality]....................... 92 • [Sensitivity]......................93 • [White Balance]....................94 • [AF Mode] ......................97 •...
- Page 5 • Taking pictures via a smartphone/tablet (remote recording)......133 • Playing back pictures in the camera ..............133 • Saving images stored in the camera ..............134 • Sending location information to the camera from a smartphone/tablet .... 135 • Sending images to a smartphone/tablet by controlling the camera ....136 When sending images to PC ..................
-
Page 6: Before Use
Before Use Care of the camera Do not subject to strong vibration, shock, or pressure. • The lens, monitor, or external case may be damaged if used in the following conditions. It may also malfunction or image may not be recorded if you: –... -
Page 7: Standard Accessories
Before Use Standard Accessories Check that all the accessories are supplied before using the camera. • The accessories and their shape will differ depending on the country or area where the camera was purchased. For details on the accessories, refer to “Basic Operating Instructions”. •... -
Page 8: Names And Functions Of Main Parts
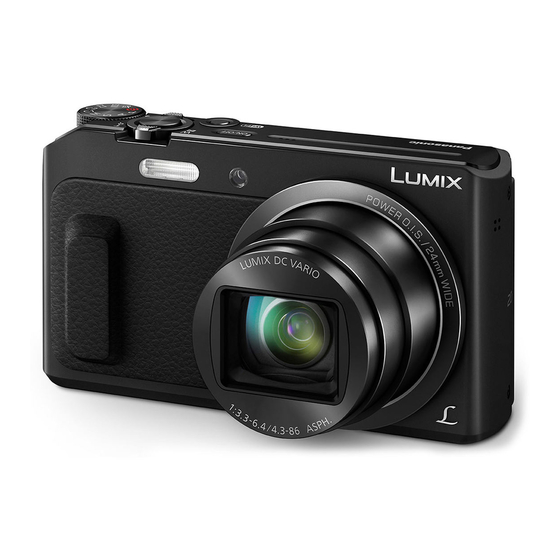
Before Use Names and Functions of Main Parts Flash (P62) Self-timer indicator (P67) AF Assist Lamp (P102) Lens (P6, 183) Speaker • Be careful not to cover the speaker with your finger. Doing so may make sound difficult to hear. Lens barrier Monitor (P58, 165, 183) -
Page 9: Tripod Mount
Before Use 15 Strap eyelet (P24) • To prevent dropping, be sure to attach the supplied strap and fit it to your wrist. 16 Lens barrel 17 [HDMI] socket (P155) • Do not connect with any cable other than an HDMI micro cable. - Page 10 Before Use Monitor You can adjust the angle of the monitor. When closing 1 Flip up the bottom of the monitor lightly to open. 2 Adjust the angle of the monitor. • Be careful not to catch your finger, etc. in the monitor. •...
-
Page 11: Preparation
Please be advised that we are not liable for any accident or failure occurring as a result of use of a counterfeit battery pack. To ensure that safe products are used, we recommend that a genuine Panasonic battery pack is used. -
Page 12: Inserting The Battery
Inserting the Battery Slide the release lever in the direction of the arrow and open the card/battery door. • Always use genuine Panasonic batteries. • If you use other batteries, we cannot guarantee the quality of this product. Being careful about the battery orientation, securely insert it all the way in, and then check that it is locked by the lever A. -
Page 13: Charging
Preparation Charging • Charge the battery in areas with an ambient temperature, between 10 oC and 30 oC (50 oF and 86 oF) (same as the battery temperature), is recommended. Insert the battery into this unit. Check that this unit is turned off. ... - Page 14 Preparation About the charging lamp ∫ Lit red: Charging. Off: Charging has completed. (When charging is complete, disconnect the camera from the power outlet or computer.) Blinking red: Charging error. (Refer to P170 for details.) Charging time ∫ When using the AC adaptor (supplied) Charging time Approx.
- Page 15 Otherwise, a fire and/or electric shocks may be caused by short-circuiting or the resulting heat generated. • Do not use any other USB connection cables except the supplied one or a genuine Panasonic USB connection cable (DMW-USBC1: optional). • Do not use any other AC adaptors except the supplied one.
-
Page 16: Approximate Operating Time And Number Of Recordable Pictures
CIPA is an abbreviation of [Camera & Imaging Products Association]. • Temperature: 23 oC (73.4 oF)/Humidity: 50%RH when monitor is on. • Using a Panasonic SD Memory Card. • Using the supplied battery. • Starting recording 30 seconds after the camera is turned on. - Page 17 Preparation Playback ∫ Playback time Approx. 270 min • The operating times and number of recordable pictures will differ according to the environment and the operating conditions. For example, in the following cases, the operating times will shorten and the number of recordable pictures is reduced: –...
-
Page 18: Inserting And Removing The Card (Optional)
• Check that this unit is turned off. • We recommend using a Panasonic card. Slide the release lever in the direction of the arrow and open the card/battery door. Push it securely all the way until you hear a “click”... -
Page 19: About The Built-In Memory/The Card
(48 GB, 64 GB) • Operation of the cards on the left has been confirmed with Panasonic’s cards. ¢2 SD Speed Class is the speed standard regarding continuous writing. Check via the label on the card, etc. e.g.: •... - Page 20 Preparation • During access (image writing, reading and deleting, formatting etc.), do not turn this unit off, remove the battery, card or disconnect the AC adaptor (supplied). Furthermore, do not subject the camera to vibration, impact or static electricity. The card or the data on the card may be damaged, and this unit may no longer operate normally.
-
Page 21: Approximate Number Of Recordable Pictures And Available Recording Time
Preparation Approximate number of recordable pictures and available recording time About the display of the number of recordable pictures and available recording time ∫ • Switch the display (number of recordable pictures, Number of Available recording available recording time, etc.) by pressing [DISP.]. recordable pictures time (P58) -
Page 22: Setting Date/Time (Clock Set)
Preparation Setting Date/Time (Clock Set) • The clock is not set when the camera is shipped. Press camera [ON/OFF] button. • If the language select screen is not displayed, proceed to step Press [MENU/SET]. Press 3/4 to select the language, and press [MENU/SET]. Press [MENU/SET]. -
Page 23: Changing The Clock Setting
Preparation Changing the Clock Setting Select [Clock Set] on the [Setup] menu and then press [MENU/SET]. (P41) • The clock can be reset as shown in steps • The clock setting is maintained for about 14 days using the built-in clock battery even without the battery. -
Page 24: Tips For Taking Good Pictures
Preparation Tips for taking good pictures Fit the strap and hold the camera carefully Hold the camera gently with both hands, keep your arms still at your side and stand with your feet slightly apart. • Do not swing around or pull forcefully on the unit with the strap attached. The strap may break. •... -
Page 25: Basic
Basic Selecting the Recording Mode Switching the mode by rotating the mode dial. • Rotate the mode dial slowly to select the desired mode. List of Recording Modes ∫ Intelligent Auto Mode (P26) ¦ The subjects are recorded using settings automatically selected by the camera. Programme AE Mode (P31) The subjects are recorded using your own settings. -
Page 26: Taking Pictures Using The Automatic Function (Intelligent Auto Mode)
Basic Taking pictures using the automatic function (Intelligent Auto Mode) Recording Mode: The camera will set the most appropriate settings to match the subject and the recording conditions so we recommend this mode for beginners or those who want to leave the settings to the camera and take pictures easily. - Page 27 Basic Press the shutter button halfway to focus. • The focus indication A (green) lights when the subject is focused. • The AF area B is displayed around the subject’s face by the Face Detection function. In other cases, it is displayed at the point on the subject which is in focus.
- Page 28 Basic Scene Detection When the camera identifies the optimum scene, the icon of the scene concerned is displayed in blue for 2 seconds, after which its colour changes to the usual red. When taking pictures [i-Portrait] [i-Scenery] [i-Macro] [i-Night Portrait] ¢1 [i-Night Scenery] [iHandheld Night Shot]...
-
Page 29: Changing The Settings
Basic Changing the settings Following menus can be set. Menu Item [Picture Size] ¢ /[Burst Shooting] ¢ /[Motion Deblur]/[iHandheld Night [Rec] Shot]/[iHDR]/[Self Shot] [Motion Picture] [Rec Quality] [Online Manual]/[Clock Set]/[World Time]/[Airplane Mode]/[Beep] ¢ [Language] [Setup] • Menu items other than those listed above are not displayed, but you can set them in other Recording Modes. - Page 30 Basic Menus specific to Intelligent Auto Mode [Motion Deblur] ∫ When [Motion Deblur] is set to [ON], [ ] is displayed on the recording screen. The camera automatically sets an optimal shutter speed according to the motion of the subject to reduce blur on the subject.
-
Page 31: Taking Pictures With Your Favourite Settings (Programme Ae Mode)
Basic Taking Pictures with Your Favourite Settings (Programme AE Mode) Recording Mode: The camera automatically sets the shutter speed and the aperture value according to the brightness of the subject. You can take pictures with greater freedom by changing various settings in the [Rec] menu. Set the mode dial to [ Aim the AF area at the point you want to focus on. -
Page 32: Focusing
Basic Focusing Aim the AF area at the subject, and then press the shutter button halfway. F3.3 1/60 1/60 1/60 F3.3 F3.3 When the subject is not Focus When the subject is focused focused Focus indication A Blinks AF area B White>Green White>Red Sound... - Page 33 Basic When the subject is not in focus (such as when it is not in the centre of the ∫ composition of the picture you want to take) Aim the AF area at the subject, and press the shutter button half way to fix the focus and exposure.
-
Page 34: Recording Motion Pictures
Basic Recording Motion Pictures Applicable modes: Start recording by pressing the motion picture button. A Available recording time B Elapsed recording time • You can record motion pictures fitting each Recording Mode. • Release the motion picture button right after you press it. •... - Page 35 Basic • Depending on the type of the card, the card access indication may appear for a while after recording motion pictures. This is not a malfunction. • The screen may be blacked out momentarily, or the unit may record noise due to static electricity or electromagnetic waves etc.
-
Page 36: Recording Still Pictures While Recording Motion Pictures
Basic Recording still pictures while recording motion pictures Still pictures can be recorded even while recording a motion picture. (Simultaneous recording) During motion picture recording, press the shutter button fully to record a still picture. • The picture is saved with the following conditions. Recording quality setting Picture size [FHD]/[HD]... -
Page 37: Playing Back
Basic Playing Back Press [(]. Press 2/1 to select pictures. A File number 100-0001 100-0001 100-0001 B Picture number • If you press and hold 2/1, you can play back the pictures in succession. • Speed of picture Forwarding/Rewinding changes depending on the playback status. -
Page 38: Displaying Multiple Screens (Multi Playback)
Basic • When the camera is turned off, press and hold [(]. If you turn it on this way, the playback screen will be displayed automatically. (If too many images are stored in the card, it may take a while for the camera to turn on.) •... -
Page 39: Creating Still Pictures From A Motion Picture
Basic Creating Still Pictures from a Motion Picture You can create a single still picture from a recorded motion picture. Press 3 to pause motion picture playback. Press [MENU/SET]. • Confirmation screen is displayed. It is executed when [Yes] is selected. •... -
Page 40: Deleting Pictures
Basic Deleting Pictures Once deleted, pictures cannot be recovered. • Pictures on the built-in memory or the card that are being played back will be deleted. • Pictures that are not in the DCF standard or those that are protected cannot be deleted. To delete a single picture Select the picture to be deleted, and then press [ ]. -
Page 41: Setting The Menu
Basic Setting the Menu The camera comes with menus that allow you to choose the settings for taking pictures and playing them back just as you like and menus that enable you to have more fun with the camera and use it more easily. In particular, the [Setup] menu contains some important settings relating to the camera’s clock and power. - Page 42 Basic Press 3/4 to select the menu item and then press [MENU/SET]. AF Mode Metering Mode A Menu screen page i.Exposure • It will switch to the next page when you reach the i.Zoom bottom. Select auto focus mode (It will also switch by rotating the zoom lever) Cancel Select Press 3/4 to select the setting and then...
-
Page 43: Using The Quick Menu
Basic Using the Quick Menu By using the Quick Menu, some of the menu settings can be easily found. • The features that can be adjusted using Quick Menu are determined by the mode or a display style the camera is in. Press [Q.MENU] when recording. -
Page 44: About The Setup Menu
Basic About the Setup Menu For details on how to select the [Setup] menu settings, refer to P41. • [Clock Set], [Economy] and [Auto Review] are important items. Check their settings before using them. • In Intelligent Auto Mode, only [Online Manual], [Clock Set], [World Time], [Airplane Mode], [Beep] ¢... - Page 45 Basic Restricts Wi-Fi settings. [ON]: Wi-Fi functions cannot be used. [Airplane Mode] [OFF] • When you bring the camera on an airplane or to a hospital, etc., set [Airplane Mode] to [ON], and turn off the camera because electromagnetic waves, etc. emitted by the camera may interfere with gauges. This allows you to set the beep and shutter sound.
- Page 46 Basic These menu settings make it easier to see the monitor when you are in bright places. [„] ([Auto Power Monitor]) ¢ The brightness is adjusted automatically depending on how bright it is around the camera. […] ([Power Monitor]): [Monitor Luminance] The monitor becomes brighter and easier to see even when taking pictures outdoors.
- Page 47 Basic Angle of view for motion picture recording can be checked. [Video Rec Area] [ON]/[OFF] • Motion picture recording area display is only an approximation. • Recording area display may disappear when zooming to Tele depending on the picture size setting. •...
- Page 48 Basic Set the length of time that the picture is displayed after taking the still picture. [1SEC] [2SEC] o [Auto Review] [HOLD]: The pictures are displayed until one of the buttons is pressed. [OFF] • [Auto Review] is activated regardless of its setting in the following cases. –...
- Page 49 Basic Set to match the colour television system in each country or the type of [|] ([Video Out]): [NTSC]: Video output is set to NTSC system. [PAL]: Video output is set to PAL system. | [TV Connection] • This will operate when the AV cable (optional) or HDMI micro cable is connected.
- Page 50 If the card has been formatted on a PC or other equipment, format it on the camera again. • It may take longer to format the built-in memory than the card. • If the card cannot be formatted, please try another card before contacting Panasonic. Set the language displayed on the screen. ~ [Language] •...
-
Page 51: Recording
Recording Taking Pictures of Yourself ([Self Shot]) Applicable modes: If you rotate the monitor, Self Shot Mode is activated. You can easily take pictures of yourself while looking at the screen. • When [Self Shot] (P104) in [Rec] menu is set to [OFF], even if you rotate the monitor, the camera will not be set to Self Shot Mode. - Page 52 Recording Press [MENU/SET] to set the soft skin effect, the number of pictures to be taken, and other details. (P53) • Operate the buttons on the back of the unit while looking at the screen. Be careful not to operate the wrong buttons and not to drop the camera.
- Page 53 Recording Recording settings in Self Shot Mode When you press [MENU/SET] in step , you can change the following settings. • You can also change the [Slimming Mode] setting in [Self Shot] in the [Rec] menu. (P54) Settings Description of settings Makes people’s faces look brighter and their skin tones look softer.
- Page 54 Recording • When the [Soft Skin] is set – The smoothing effect is applied to the part that has a similar tone to the complexion of a subject, as well. – This mode may not be effective under insufficient lighting. •...
- Page 55 Recording [Wink detector] ∫ When the camera detects a wink using the Face Detection function, it counts down from three and takes a picture. Check that a yellow frame is displayed on the face of the person who will wink. •...
- Page 56 Recording Taking panorama pictures in Self Shot Mode You can also take panorama pictures in Self Shot Mode. By recording with Panorama Shot Mode, you can enjoy a variety of self-portraits, such as those with your friends or those incorporating a wide background. •...
- Page 57 Recording Technique for Panorama Shot Mode ∫ Swivel the camera around its centre when moving it in the Example: recording direction. Hold the camera with both hands, When you have selected taking care not to shake it. ] in step •...
-
Page 58: About The Monitor
Recording About the Monitor Press [DISP.] to change. • During motion picture playback, panorama playback or a slide show, you can only select “Normal Display” or “No Display”. In Recording Mode ¢1, 2 Normal display ¢1 Normal display ¢1 No display Guidelines R1m10s R1m10s... -
Page 59: Using The Zoom
Recording Using the Zoom Applicable modes: You can zoom in to make people and objects appear closer or zoom out to record landscapes in wide angle. To make subjects appear further away use (Wide) Rotate the zoom lever towards Wide. To make subjects appear closer use (Tele) Rotate the zoom lever towards Tele. -
Page 60: Extra Optical Zoom (Ez)
Recording Extra Optical Zoom (EZ) This function works when any of the picture sizes (P91) indicated with is selected. You can zoom in further than you can with the Optical Zoom without deteriorating the image quality. Maximum magnification: 45k (This includes the optical zoom magnification. The magnification level differs depending on [Picture Size] setting.) •... -
Page 61: Digital Zoom
Recording Digital Zoom This function works when [Digital Zoom] (P100) in the [Rec] menu is set to [ON]. Although the image quality deteriorates every time you zoom in further, you can zoom in up to four times the original zoom magnification. •... -
Page 62: Taking Pictures Using The Built-In Flash
Recording Taking Pictures Using the Built-in Flash Applicable modes: Flash Do not cover it with your fingers or other objects. Switching to the appropriate flash setting Set the flash to match the recording. Press 1 [‰]. - 62 -... - Page 63 Recording Press 3/4 to select the setting and then press [MENU/SET]. Settings Description of settings [‡] ([Auto]) The flash is automatically activated when the recording conditions make it necessary. ¢1 ([iAuto]) The flash is automatically activated when the recording conditions make it necessary. It is activated once before the actual recording to reduce the red-eye phenomenon (eyes of the subject appearing red in ] ([Auto/Red-Eye])
- Page 64 Recording Available Flash Settings in Recording Mode ∫ The available flash settings depend on the Recording Mode. (±: Available, —: Not available, ¥: Scene Mode initial setting) ‡ ‰ Œ ¢ — — — ± ± ± ± ± ± ±...
- Page 65 Recording The available flash range (approximation) ∫ Wide Tele [AUTO] in 0.6 m (2.0 feet) to 6.0 m (20 feet) 1.0 m (3.3 feet) to 3.1 m (10 feet) [Sensitivity] Shutter speed for each flash setting ∫ Flash setting Shutter speed (Sec.) Flash setting Shutter speed (Sec.) ‡...
-
Page 66: Taking Close-Up Pictures ([Af Macro]/[Macro Zoom])
Recording Taking Close-up Pictures ([AF Macro]/[Macro Zoom]) Applicable modes: This mode allows you to take close-up pictures of a subject, e.g. when taking pictures of flowers. Press 4 [#]. Press 3/4 to select the item and then press [MENU/SET]. Item Description of settings You can take pictures of a subject as close as 3 cm (0.098 feet) ] ([AF Macro]) -
Page 67: Taking Pictures With The Self-Timer
Recording Taking Pictures with the Self-timer Applicable modes: Press 2 [ë]. Press 3/4 to select the setting and then press [MENU/SET]. Settings Description of settings ([10sec.]) Picture is taken 10 seconds after shutter is pressed. Picture is taken 2 seconds after shutter is pressed. •... -
Page 68: Compensating The Exposure
Recording Compensating the Exposure Applicable modes: Use this function when you cannot achieve appropriate exposure due to the difference in brightness between the subject and the background. Underexposed Properly exposed Overexposed Compensate the exposure Compensate the exposure towards positive. towards negative. Press 3 [È] to display [Exposure Comp.]. -
Page 69: Taking Pictures Using Auto Bracket
Recording Taking Pictures Using Auto Bracket Applicable modes: In this mode, 3 pictures are automatically recorded in the selected exposure compensation range each time the shutter button is pressed. With Auto Bracket d1 EV 1st picture 2nd picture 3rd picture d0 EV j1 EV i1 EV... -
Page 70: Taking Pictures By Specifying The Aperture/Shutter Speed
Recording Taking Pictures by Specifying the Aperture/ Shutter Speed Recording Mode: Aperture-Priority AE Mode Set the aperture value to a higher number when you want a sharp focus background. Set the aperture value to a lower number when you want a soft focus background. Set the mode dial to [ Press [EXPOSURE]. -
Page 71: Shutter-Priority Ae Mode
Recording Shutter-Priority AE Mode Set with a faster shutter speed when you want to take a sharp picture of a fast moving subject. Set to a slower shutter speed when you want to create a trail effect. Set the mode dial to [ Press [EXPOSURE]. -
Page 72: Manual Exposure Mode
Recording Manual Exposure Mode Determine the exposure by manually setting the aperture value and the shutter speed. Set the mode dial to [ Press [EXPOSURE]. Press 3/4/2/1 to set the aperture and shutter speed. 2/1: Aperture Value A 3/4: Shutter Speed B F 3.3 F 3.3 F 3.3... -
Page 73: Taking Panorama Pictures (Panorama Shot Mode)
Recording Taking panorama pictures (Panorama Shot Mode) Recording Mode: Pictures are recorded continuously while moving the camera horizontally or vertically, and are combined to make a single panorama picture. This mode allows you to add any of 13 types of effects before recording. Set the mode dial to [ Press 3/4 to select the recording direction and then press [MENU/SET]. - Page 74 Recording Press the shutter button fully and record a picture while moving the camera in a small circle in the direction selected in Step Recording from left to right Trace a half-circle with the camera, taking about 4 seconds. • Move the camera at a constant speed.
- Page 75 Recording • The zoom position is fixed to Wide. • [Stabilizer] is fixed to [OFF]. • The focus, White Balance, and exposure are fixed at the optimum values for the first picture. As a result, if the focus or brightness changes substantially during recording, the entire panorama picture may not be recorded at the suitable focus or brightness.
-
Page 76: Taking Pictures That Match The Scene Being Recorded (Scene Mode)
Recording Taking pictures that match the scene being recorded (Scene Mode) Recording Mode: You can select any of 16 types of Scene Modes according to the subject and scene. Set the mode dial to [ Press 3/4/2/1 to select the Scene Mode and Scene Mode then press [MENU/SET]. -
Page 77: [Portrait]
Recording [Portrait] When taking pictures of people outdoors during the daytime, this mode allows you to improve the appearance and make their skin tones look healthier. Technique for Portrait Mode ∫ To make this mode more effective: 1 Rotate the zoom lever as far as possible to Tele. 2 Move close to the subject to make this mode more effective. -
Page 78: [Night Portrait]
Recording [Night Portrait] This allows you to take pictures of a person and the background with near real-life brightness. • Use the flash. (You can set to [ • Ask the subject not to move while taking a picture. • We recommend using a tripod and the Self-timer for taking pictures. -
Page 79: [Hdr]
Recording [HDR] You can combine several pictures with different levels of exposure into a single picture with rich gradation. You can minimise the loss of gradations in bright areas and dark areas when, for example, the contrast between the background and the subject is large. What Is HDR? ∫... -
Page 80: [Baby1]/[Baby2]
Recording [Baby1]/[Baby2] This takes pictures of a baby with a healthy complexion. It is possible to set different birthdays and names for [Baby1] and [Baby2]. You can select to have these appear at the time of playback, or have them stamped on the recorded image using [Text Stamp] (P116). -
Page 81: [High Sens.]
Recording [High Sens.] This mode minimises the jitter of the subjects, and enables you to take pictures of these subjects in dimly lit rooms. Picture Size ∫ Select the picture size of 3M (4:3), 2.5M (3:2), 2M (16:9) or 2.5M (1:1). [Starry Sky] This mode allows you to take vivid pictures of a starry sky or a dark subject. -
Page 82: Taking Pictures With Different Image Effects (Creative Control Mode)
Recording Taking Pictures with different image effects (Creative Control Mode) Recording Mode: This mode allows you to add any of 15 types of effects before recording. You can set the effects to add by selecting example images and checking them on the screen. Set the mode dial to [ Press 3/4 to select image effects and then press [MENU/SET]. -
Page 83: [Expressive]
Recording For details on how to select the “Creative Control Mode” settings, refer to P82. ¢ These pictures are examples to show the effect. [Expressive] This effect emphasises the colour to make a pop art picture. [Retro] This effect gives a faded image. [Old Days] This effect adds a bright, soft and nostalgic feel to the overall image. -
Page 84: [Low Key]
Recording [Low Key] This effect adds a dark and relaxing feel to the overall image and enhances bright parts. [Sepia] This effect creates a sepia image. [Dynamic Monochrome] This effect gives a higher contrast to create an impressive black and white picture. -
Page 85: [High Dynamic]
Recording [High Dynamic] This effect produces the optimum brightness for both dark and bright parts. [Cross Process] This effect gives your photo a dramatic colour look. Items that can be set Colour Green tone/Blue tone/Yellow tone/Red tone • Press 2/1 to select the colour to enhance, and press [MENU/SET]. -
Page 86: [Miniature Effect]
Recording [Miniature Effect] This effect blurs peripheral areas to give the impression of a diorama. Items that can be set Direction of the blur Horizontal/Vertical • Press 2/1 to select the direction of the blur, and press [MENU/SET]. • Display of the recording screen will be delayed more than usual and the screen will look as if frames are being dropped during motion picture recording. -
Page 87: [Star Filter]
Recording [Star Filter] This effect transforms pin-points of light into a star effect. [One Point Color] This effect leaves one selected colour to emphasise impressiveness. Set the colour to leave in ∫ Fit the colour you want to leave in the frame at the centre of the screen, and then press [MENU/ SET]. -
Page 88: Taking Pictures In Custom Mode
Recording Taking Pictures in Custom Mode Recording Mode: You can register the current camera settings as custom settings. If you then record in Custom Mode, you can use the registered settings. • Initial setting of the Programme AE Mode is registered as the custom settings initially. Registering Personal Menu Settings (Registering custom settings) If you want to take pictures that have the same settings, you can register up to four items of the current camera settings to [Cust.Set Mem.]. -
Page 89: Recording Using Registered Custom Set
Recording Recording using registered custom set You can easily call up the settings you have registered using [Cust.Set Mem.]. (When calling up a custom set registered for [ Set the mode dial to [ • The custom set registered for [ ] is called up. -
Page 90: Entering Text
Recording Entering Text You can enter the name of your baby or pet when taking pictures. In addition, you can enter characters (comments) on the pictures you have taken. & When a screen that looks like the one on the right is displayed, PQRS WXYZ Delete... -
Page 91: Using The [Rec] Menu
Recording Using the [Rec] Menu For details on [Rec] menu settings, refer to P41. [Picture Size] Applicable modes: Set the number of pixels. The higher the numbers of pixels, the finer the detail of the pictures will appear even when they are printed onto large sheets. -
Page 92: [Quality]
Recording [Quality] Applicable modes: Set the compression rate at which the pictures are to be stored. Settings Description of settings ([Fine]) When giving priority to the picture quality When using the standard picture quality and increasing the number of [›] ([Standard]) pictures to be recorded without changing the number of pixels •... -
Page 93: [Sensitivity]
Recording [Sensitivity] Applicable modes: This allows the Sensitivity to light (ISO sensitivity) to be set. Setting to a higher figure enables pictures to be taken even in dark places without the resulting pictures coming out dark. Settings Description of settings The ISO sensitivity is automatically adjusted according to the [AUTO] brightness. -
Page 94: [White Balance]
Recording [White Balance] Applicable modes: In sunlight, under incandescent lights or in other such conditions where the colour of white takes on a reddish or bluish tinge, this item adjusts to the colour of white which is closest to what is seen by the eye in accordance with the light source. Settings Description of settings [AWB] ([Auto White Balance]) Automatic adjustment... - Page 95 Recording Auto White Balance ∫ Depending on the conditions prevailing when pictures are taken, the pictures may take on a reddish or bluish tinge. Furthermore, when a multiple number of light sources are being used or there is nothing with a colour close to white, Auto White Balance may not function properly. In this case, set the White Balance to a mode other than [AWB].
- Page 96 Recording Finely adjusting the White Balance You can finely adjust the White Balance when you cannot acquire the desired hue by setting the White Balance. • Fine adjustment is possible only when the White Balance is set to [V]/[Ð]/[î]/[Ñ]/[Ò]. Select the White Balance to finely adjust and then press [DISP.] to display [WB Adjust.].
-
Page 97: [Af Mode]
Recording [AF Mode] Applicable modes: This allows the focusing method that suits the positions and number of the subjects to be selected. Settings Description of settings The camera automatically detects the person’s face. (max. 12 areas) ([Face [š] The focus and exposure can then be adjusted to fit that face no matter Detection]) what portion of the picture it is in. - Page 98 Recording About [š] ([Face Detection]) ∫ The following AF area frames are displayed when the camera detects the faces. Yellow: When the shutter button is pressed halfway, the frame turns green when the camera is focused. White: Displayed when more than one face is detected. Other faces that are the same distance away as the faces within the yellow AF areas are also brought into focus.
-
Page 99: [Metering Mode]
Recording Setting up [ ] ([AF Tracking]) ∫ Align the subject with the AF tracking frame, and then press 4 to lock onto the subject. A AF tracking frame • AF area will be displayed in yellow when a subject is recognised, and focus will automatically adjust continuously following the subject’s movement (Dynamic tracking). -
Page 100: [I.exposure]
Recording [i.Exposure] Applicable modes: Contrast and exposure will be adjusted automatically when there is a big difference in brightness between the background and subject, to bring the image close to real life. Settings: [ON]/[OFF] • Compensation effect may not be achieved depending on the conditions. [i.Zoom] Applicable modes: Zoom magnification can be increased while minimising deterioration of the image quality. -
Page 101: [Burst Shooting]
Recording [Burst Shooting] Applicable modes: Pictures are taken continuously while the shutter button is pressed. Number of Settings Description of settings recordable pictures • The focus is adjusted for each picture recorded in ([2 fps the burst. max. • ¢ AF-Continuous]) The Burst speed changes according to the recording 100 pictures... -
Page 102: [Af Assist Lamp]
Recording • Depending on the operating conditions, it may take time to take the next picture if you repeat the recording of pictures. • It may take time to save pictures taken in Burst Mode on the card. If you take pictures continuously while saving, the maximum number of recordable pictures decreases. -
Page 103: [Red-Eye Removal]
Recording [Red-Eye Removal] Applicable modes: When Red-Eye Reduction ([ ], [ ]) is selected, Red-Eye Removal is performed whenever the flash is used. The camera automatically detects red-eye and corrects the picture. Settings: [ON]/[OFF] • This function works only when the camera detects a face. •... -
Page 104: [Date Stamp]
Recording [Date Stamp] Applicable modes: You can take a picture with date and time of recording. Settings Description of settings [W/O TIME] Stamp the year, month, and day. [WITH TIME] Stamp the year, month, day, hour, and minutes. [OFF] — •... -
Page 105: Using The [Motion Picture] Menu
Recording Using the [Motion Picture] Menu For details on [Motion Picture] menu settings, refer to P41. • The [Motion Picture] menu is not displayed in the following cases. – [Soft Focus]/[Star Filter] (Creative Control Mode) [Rec Quality] Applicable modes: This sets up the picture quality of motion pictures. Settings Size Frame rate... -
Page 106: [Continuous Af]
Recording [Continuous AF] Applicable modes: It will continually keep on focusing on a subject for which the focus was once set. Settings: [ON]/[OFF] • Set this function to [OFF] if you wish to fix the focus on the position where you started the motion picture recording. -
Page 107: Playback/Editing
Playback/Editing Various methods of playback You can play back the recorded pictures in various methods. Press [(]. Press [MENU/SET]. Press 3/4/2/1 to select [Playback Mode], and then press [MENU/SET]. Press 3/4 to select item, and then press [MENU/SET]. • Following items can be selected. ] ([All]) (P37) ] ([Slide Show]) -
Page 108: [Slide Show]
Playback/Editing [Slide Show] You can play back the pictures you have taken in sequence at specified intervals. In addition, you can play back the slideshow of a desired type of images, such as pictures or motion pictures. This playback method is recommended when you have connected the camera to a TV set to view the pictures you have taken. - Page 109 Playback/Editing To filter images for slide show playback ∫ You can filter images and play them back in a slide show by Filtering selecting [Filtering] on the slide show menu screen. • If you select [All], you can play back all images in a slide show. Picture Only You can also filter images by using the same setting as Video Only...
-
Page 110: [Filtering Play]
Playback/Editing [Filtering Play] You can play back images sorted by category or recording date. Settings Description of settings [Picture Only] Only still pictures are played back. [Video Only] Only motion pictures are played back. This mode allows you to search images by Scene Mode or other categories (such [Category as [Portrait], [Scenery] or [Night Scenery]) and sort the pictures into each of the Selection]... - Page 111 Playback/Editing You can play back pictures taken on each date Press 3/4 to select [Select Date] and then press [MENU/SET]. Press 3/4/2/1 to select the date to be played back, and then press [MENU/SET]. • If there were no pictures recorded during a month, that month is not displayed.
-
Page 112: [Calendar]
Playback/Editing [Calendar] You can search for images by recorded date. Press 3/4/2/1 to select the date you want to search. Press [MENU/SET] to display a list of pictures. 1/52 • Pictures are displayed with Multi Playback (30 screens). The cursor appears on the picture at the beginning of the selected date. -
Page 113: Having Fun With Recorded Pictures ([Creative Retouch])
Playback/Editing Having Fun with Recorded Pictures ([Creative Retouch]) You can add your desired effects to the pictures that you have taken. • The processed pictures are newly generated, so be sure that you have enough space in the built-in memory or on the card. Note also that processing will not be possible if the Write-Protect switch of the card is in the [LOCK] position. -
Page 114: Using The [Playback] Menu
Playback/Editing Using the [Playback] Menu For details on [Playback] menu settings, refer to P41. You can perform actions like cropping recorded pictures, as well as set up the protection of recorded images, etc. • With [Creative Retouch], [Text Stamp], [Resize] or [Cropping], a new edited picture is created. A new picture cannot be created if there is no free space on the built-in memory or the card so we recommend checking that there is free space and then editing the picture. -
Page 115: [Title Edit]
Playback/Editing To delete the received location information ∫ Select [Location Logging] on the [Playback] menu. Press 3/4 to select [Delete Location Data] and then press [MENU/SET]. Press 3/4 to select the period you want to delete, then press [MENU/SET]. • Confirmation screen is displayed. -
Page 116: [Text Stamp]
Playback/Editing [Text Stamp] You can stamp recording dates/times and names on recorded pictures. Select [Text Stamp] on the [Playback] menu. Press 3/4 to select [SINGLE] or [MULTI] and then press [MENU/SET]. Select the picture, and then press [MENU/SET] to set. •... -
Page 117: [Creative Retouch]
Playback/Editing Press [ ]. Press 3 to select [OK], and then press [MENU/SET]. • Confirmation screen is displayed. It is executed when [Yes] is selected. Exit the menu after it is executed. • When you print pictures stamped with text, the date will be printed over the stamped text if you specify printing of the date at the photo shop or on the printer. -
Page 118: [Video Divide]
Playback/Editing [Video Divide] Recorded motion picture can be divided in two. It is recommended for when you want to divide a part you need with a part you do not need. It cannot be restored once divided. Select [Video Divide] on the [Playback] menu. Press 2/1 to select the motion picture to divide, and then press [MENU/ SET]. -
Page 119: [Resize]
Playback/Editing [Resize] To allow easy posting to web pages, attachment to email etc., picture size (number of pixels) is reduced. Select [Resize] on the [Playback] menu. Press 3/4 to select [SINGLE] or [MULTI] and then press [MENU/SET]. Select the picture and size. [SINGLE] setting Press 2/1 to select the picture, and then press [MENU/SET]. -
Page 120: [Cropping]
Playback/Editing [Cropping] You can enlarge and then clip the important part of the recorded picture. Select [Cropping] on the [Playback] menu. Press 2/1 to select the picture, and then press [MENU/SET]. Use the zoom lever and press 3/4/2/1 to select the parts to be cropped. -
Page 121: [Print Set]
Playback/Editing [Print Set] DPOF “Digital Print Order Format” is a system that allows the user to select which pictures to print, how many copies of each picture to print and whether or not to print the recording date on the pictures when using a DPOF compatible photo printer or photo printing store. For details, ask at your photo printing store. - Page 122 Playback/Editing To print the date ∫ After setting the number of prints, set/cancel printing with the recording date by pressing [DISP.]. • Depending on the photo printing store or the printer, the date may not be printed even if you set to print the date.
-
Page 123: [Protect]
Playback/Editing [Protect] You can set protection for pictures you do not want to be deleted by mistake. Select [Protect] on the [Playback] menu. Press 3/4 to select [SINGLE] or [MULTI] and then press [MENU/SET]. Select the picture, and then press [MENU/SET]. •... -
Page 124: [Copy]
Playback/Editing [Copy] You can copy the data of the pictures you have taken from the built-in memory to a card or from a card to the built-in memory. Select [Copy] on the [Playback] menu. Press 3/4 to select the copy destination and then press [MENU/SET]. ] ([IN>SD]): All the picture data in the built-in memory are copied onto the card at one time. -
Page 125: Wi-Fi
LAN devices, ensure that the appropriate measures are taken for safety designs and defects for the systems used. Panasonic will not take any responsibility for any damage that arises when using the camera for any purpose other than as a wireless LAN device. - Page 126 Wi-Fi About the Wi-Fi connection lamp ∫ Lit blue: The Wi-Fi connection is on standby Blinking blue: Sending/receiving data through the Wi-Fi connection About the [Wi-Fi] button ∫ Pressing and holding [Wi-Fi] before connecting to Wi-Fi (When connecting to a smartphone/tablet) •...
-
Page 127: What You Can Do With The Wi-Fi Function
Wi-Fi What you can do with the Wi-Fi function Controlling with a Smartphone/Tablet Recording images remotely with a smartphone (P133) Playing back pictures in the camera (P133) Saving images stored in the camera (P134) Sending acquired location information to the camera (P135) When sending images to PC Sending an image each time a recording is made... -
Page 128: Controlling With A Smartphone/Tablet
Controlling with a Smartphone/Tablet Using a smartphone, you can record images on the camera and save them. You need to install “Panasonic Image App” (referred to as “Image App” from this point on) on your smartphone. Installing the smartphone/tablet app “Image App”... -
Page 129: Connecting To A Smartphone/Tablet
Wi-Fi Connecting to a smartphone/tablet By pressing and holding [Wi-Fi], you can easily connect the camera to a smartphone or tablet. Preparations • Install the “Image App” in advance. (P128) Press and hold [Wi-Fi]. • The information required for connecting the smartphone to this unit (QR code, SSID and password) is displayed. - Page 130 Wi-Fi If you are using an iOS device When scanning the QR code to set up a connection (If you are reconnecting the camera, steps 1 to 5 are not required) 1 Start “Image App”. (P128) 2 Select [QR code], and then select [OK]. 3 Using “Image App”, scan the QR code displayed on Please set on your smartphone the screen of the camera.
- Page 131 Wi-Fi When using an SSID and password to set up a connection 1 Turn on the Wi-Fi function in the setting menu of the smartphone/tablet. 2 Select the SSID displayed on the screen of the camera. Wi-Fi 0123456789ABC 3 Enter the password displayed on the screen of the camera. (Only when connecting for the first time) 4 Start “Image App”.
- Page 132 Wi-Fi When using an SSID and password to set up a connection 1 Start “Image App”. (P128) • If a message appears stating that a camera search is in progress, close the message. 2 Select [Wi-Fi]. 3 Select the SSID displayed on the screen of the Please set on your smartphone camera.
-
Page 133: Taking Pictures Via A Smartphone/Tablet (Remote Recording)
Wi-Fi Taking pictures via a smartphone/tablet (remote recording) Connect to a smartphone. (P129) Operate the smartphone. 1 Select [ 2 Operate the zoom to decide on the composition. 3 Release the shutter. • The recorded images are saved in the camera. •... -
Page 134: Saving Images Stored In The Camera
Wi-Fi Saving images stored in the camera Connect to a smartphone. (P129) Operate the smartphone. 1 Select [ • You can switch the images to be displayed by selecting the icon ( A ) on the top left of the screen. -
Page 135: Sending Location Information To The Camera From A Smartphone/Tablet
Wi-Fi Sending location information to the camera from a smartphone/tablet You can acquire location information from a smartphone, and write it on images afterwards. • You can write location information sent from a smartphone on images by using [Location Logging] in the [Playback] menu of the camera. -
Page 136: Sending Images To A Smartphone/Tablet By Controlling The Camera
Wi-Fi Sending images to a smartphone/tablet by controlling the camera Methods for sending and images that can be sent ∫ JPEG Sending an image each time a recording is made — ± ([Send Images While Recording]) Sending selected images ± ±... - Page 137 Wi-Fi Sending an image each time a recording is made ([Send Images While Recording]) Press [Wi-Fi]. Press 3/4/2/1 to select [New Connection], and then press [MENU/SET]. Press 3/4 to select [Send Images While Recording], Select a function and then press [MENU/SET]. Remote Shooting &...
- Page 138 Wi-Fi Sending selected images ([Send Images Stored in the Camera]) Press [Wi-Fi]. Press 3/4/2/1 to select [New Connection], and then press [MENU/SET]. Press 3/4 to select [Send Images Stored in the Select a function Camera], and then press [MENU/SET]. Remote Shooting & View Send Images While Recording Send Images Stored in the Camera Cancel...
-
Page 139: When Sending Images To Pc
Wi-Fi When sending images to PC You can send pictures and motion pictures recorded with this unit to a PC. You can also set this unit so that images on it are transferred automatically while it is being charged. (Smart Transfer) (P142) Methods for sending and images that can be sent ∫... - Page 140 Wi-Fi To create a folder that receives images • Create a PC user account [account name (up to 254 characters) and password (up to 32 characters)] consisting of alphanumeric characters. An attempt to create a receive folder may fail if the account includes non-alphanumeric characters. •...
- Page 141 Wi-Fi Sending selected images ([Send Images Stored in the Camera]) Press [Wi-Fi]. Press 3/4/2/1 to select [New Connection], and then press [MENU/SET]. Press 3/4 to select [Send Images Stored in the Camera], and then press [MENU/ SET]. Press 3/4 to select [PC], and then press [MENU/SET]. Press [MENU/SET].
-
Page 142: To Transfer Images Automatically ([Smart Transfer])
Panasonic assumes no responsibility for any damages caused by uploaded images. • Panasonic assumes no responsibility for any damages caused by the use of [Smart Transfer]. • When you bring the camera on an airplane or to a hospital, etc., set [Airplane Mode] to [ON], and turn off the camera because electromagnetic waves, etc. -
Page 143: Configuring [Smart Transfer]
Wi-Fi Configuring [Smart Transfer] When using Smart Transfer for the first time, follow the steps below to set it up. From the next time on, you can change the settings from [Set Destination] (P144). Select [Wi-Fi Setup] in the [Wi-Fi] menu, and press [MENU/SET]. (P41) Press 3/4 to select [Smart Transfer], and press [MENU/SET]. -
Page 144: [Set Destination]
Wi-Fi [Set Destination] Changing the transfer destination or settings of images. Select [Wi-Fi Setup] in the [Wi-Fi] menu, and press [MENU/SET]. (P41) Press 3/4 to select [Smart Transfer], and press [MENU/SET]. Press 3/4 to select [Set Destination], and press [MENU/SET]. Press 3/4 to select the item, and press [MENU/SET]. -
Page 145: About Connections
Wi-Fi About Connections You can select a connection method after selecting a Wi-Fi function and a destination. When connecting with the same settings as the previous ones, you can use the Wi-Fi function quickly by connecting via [History Connection] or [Favorite Connection]. Connecting to a PC ([Via Network]) (P146) Connects via a wireless access point. -
Page 146: Connecting To A Pc (Via A Network)
Wi-Fi Connecting to a PC (via a network) You can select the method for connecting to a wireless access Select connection method point. Use button on WPS (Push-Button) ¢ WPS refers to a function that allows you to easily configure the the WPS device WPS (PIN code) settings related to the connection and security of wireless LAN... - Page 147 Wi-Fi If you are not sure about the WPS compatibility (connecting by [From List]) Search for available wireless access points. • Confirm encryption key of the selected wireless access point if the network authentication is encrypted. • When connecting by [Manual Input], confirm SSID, encryption type, encryption key of the wireless access point you are using.
-
Page 148: Connecting To A Smartphone/Tablet (Direct Connection)
Wi-Fi Connecting to a smartphone/tablet (direct connection) You can directly connect your device and the camera. Enter SSID and Manual Connection password Cancel Connection method Description of settings Enter the SSID and password into the Please set on your smartphone device. -
Page 149: Connecting Quickly With The Same Settings As The Previous Ones ([History Connection]/[Favorite Connection])
Wi-Fi Connecting quickly with the same settings as the previous ones ([History Connection]/[Favorite Connection]) When the Wi-Fi function is used, a record is saved in the history. You can register records as favourites. Connecting from the history or favourites allows you to easily connect with the same settings as the previous ones. - Page 150 Wi-Fi Editing the items registered to favourites Press [Wi-Fi]. Press 3/4/2/1 to select [Favorite Connection], and then press [MENU/SET]. Select the favourite item you want to edit with 3/4, and then press 1. Press 3/4 to select the item, and press [MENU/SET]. Item Description of settings [Remove from Favorite]...
-
Page 151: About Settings For Sending Images
Wi-Fi About settings for sending images To send images, select [New Connection] , and select the method for sending them. Even after completing the connection, you can still change the size of the images to be sent. Select a function Remote Shooting &... -
Page 152: Changing The Settings For Sending Images
Wi-Fi Send Images While Recording A picture can be automatically sent to a specified device every time you take it. • Since the camera gives priority to recording, sending may take longer during the recording. • When connected with [Send Images While Recording], [ ] is displayed on the recording screen, and [ ] is displayed while... -
Page 153: [Wi-Fi Setup] Menu
Wi-Fi [Wi-Fi Setup] Menu For details on how to select the [Wi-Fi] menu settings, refer to P41. Configure the settings required for the Wi-Fi function. [Wi-Fi Setup] cannot be changed when connected to Wi-Fi. Select [Wi-Fi Setup] in the [Wi-Fi] menu, and press [MENU/SET]. Press 3/4 to select item, and press [MENU/SET]. - Page 154 Wi-Fi To prevent incorrect operation or use of the Wi-Fi function by a third party and to protect saved personal information, it is recommended that you protect the Wi-Fi function with a password. Setting a password will automatically display the password input [Wi-Fi Password] screen when the Wi-Fi function is used.
-
Page 155: Connecting To Other Equipment
Connecting to other equipment Playing Back Pictures on a TV Screen Pictures recorded with this unit can be played back on a TV screen. Preparations: Turn this unit and the TV off. • Confirm the terminals on your TV and use HDMI Video a cable compatible with the terminals. - Page 156 E Yellow: to the video input socket will face the [ ] mark side of the F White: to the audio input socket camera. • Always use a genuine Panasonic AV cable (DMW-AVC1: optional). • Check the [TV Aspect]. (P49) • [Wi-Fi] menu cannot be used.
-
Page 157: Saving Still Pictures And Motion Pictures On Your Pc
(Doing so will cause recorded images to be erased so do not choose to format.) If the card is not recognised, please refer to the below support site. http://panasonic.net/avc/sdcard/information/SDXC.html PC that can be used (OS) ∫... -
Page 158: Transferring Images To A Pc
(Otherwise the connectors may bend out of shape, which may cause malfunction.) • Do not use any other USB connection cables except the supplied one or a genuine Panasonic USB connection cable (DMW-USBC1: optional). A USB connection cable (supplied) B Insert the USB connection cable so that its [... - Page 159 Connecting to other equipment About the folder structure of the camera ∫ The content (folder structure) of the built-in memory of the camera/the card is displayed on a PC as follows: • Built-in Memory • Card DCIM: Images 1 Folder number DCIM 2 File number 100_PANA...
-
Page 160: Printing The Pictures
(Otherwise the connectors may bend out of shape, which may cause malfunction.) • Do not use any other USB connection cables except the supplied one or a genuine Panasonic USB connection cable (DMW-USBC1: optional). A USB connection cable (supplied) B Insert the USB connection cable so that its [... -
Page 161: Selecting A Single Picture And Printing It
Connecting to other equipment Selecting a single picture and printing it PictBridge PictBridge PictBridge Press 2/1 to select the picture and then press [MENU/SET]. Press 3 to select [Print start] and then press [MENU/SET]. • Refer to P162 for the items which can be set before starting to print the pictures. -
Page 162: Print Settings
Connecting to other equipment Print Settings Select and set the items both on the screen in step of the “Selecting a single picture and printing it” and in step of the “Selecting multiple pictures and printing them” procedures. • When you want to print pictures in a paper size or a layout which is not supported by the camera, set [Paper Size] or [Page Layout] to [{] and then set the paper size or the layout on the printer. - Page 163 Connecting to other equipment [Paper Size] Settings on the printer are prioritised. [L/3.5qk5q] 89 mmk127 mm [2L/5qk7q] 127 mmk178 mm [POSTCARD] 100 mmk148 mm [A4] 210 mmk297 mm [A3] 297 mmk420 mm [10k15cm] 100 mmk150 mm [4qk6q] 101.6 mmk152.4 mm [8qk10q] 203.2 mmk254 mm [LETTER]...
- Page 164 Connecting to other equipment [Page Layout] (Layouts for printing that can be set with this unit) Settings on the printer are prioritised. 1 picture with no frame on 1 page á 1 picture with a frame on 1 page â 2 pictures on 1 page ã...
-
Page 165: Screen Display
Others Screen Display In recording ∫ 9 10 11 3s 3s 3s F3.3 F3.3 F3.3 1/60 1/60 1/60 22 21 Recording Mode 19 Aperture value (P31) Recording Quality (P105) 20 AF area (P32) Picture Size (P91) 21 ISO sensitivity (P93) Quality (P92) 22 Metering Mode... - Page 166 Others In playback ∫ 5 6 7 100 0001 100 0001 0001 Playback Mode (P107) 12 Creative Retouch (P113) Protected picture (P123) Motion picture playback (P37) Date/Text stamped display (P104, 116) Play panorama (P75) After Creative Retouch (P113) 13 Recorded date and time Picture Size (P91) World Time (P44): “...
-
Page 167: Message Display
[Please turn camera off and then on again]/[System Error] • This is displayed when the lens has stopped operating normally due to being pressed on by a hand etc. Turn the camera off and on. If the message persists, contact the dealer or Panasonic. - 167 -... - Page 168 (P50) [This battery cannot be used] • Use a genuine Panasonic battery. If this message is displayed even when a genuine Panasonic battery is used, contact the dealer or Panasonic. • If the battery terminal is dirty, clean it and remove any objects.
- Page 169 Others [Failed to connect wireless access point]/[Connection failed]/[No destination found] • Check following regarding the wireless access point. – The wireless access point information set on this unit is wrong. Check the authentication type, encryption type, and encryption key. (P147) –...
-
Page 170: Troubleshooting
Others Troubleshooting First, try out the following procedures (P170–181). If the problem is not resolved, it may be improved by selecting [Reset] (P48) on the [Setup] menu. Battery and power source The camera cannot be operated even when it is turned on. The camera turns off immediately after it is turned on. - Page 171 Others Recording The picture cannot be recorded. • Is the mode dial correctly set? • Is there any memory remaining on the built-in memory or the card? > Delete the pictures which are not necessary to increase available space in the memory. (P40) •...
- Page 172 Others The recorded picture looks rough. Noise appears on the picture. • Is the ISO sensitivity high or the shutter speed slow? (ISO sensitivity is set to [AUTO] when the camera is shipped. Therefore, when taking pictures indoors etc. noise will appear.) >...
- Page 173 Others Subject cannot be locked. (AF tracking not possible) • Set the AF area to the distinctive colour of the subject if there is a part that is different from the surrounding colour. (P99) Recording by Panorama Shot Mode is ended before finishing. •...
- Page 174 Others Monitor The monitor becomes darker or brighter for a moment. • This phenomenon appears when you press the shutter button halfway to set the aperture value and does not affect the recorded pictures. • This phenomenon also appears when the brightness changes when the camera is zoomed or when the camera is moved.
- Page 175 Others Flash The flash is not activated. • Is the flash setting set to [Œ]? > Change the flash setting. (P62) • The flash cannot be used in the following cases: – When a setting other than [OFF] is selected for [Defocusing] in Self Shot Mode –...
- Page 176 Others With a Calendar Search, pictures display dates differing from the actual dates on which the pictures were taken. • Is the clock in the camera set properly? (P22) • When pictures edited using a PC or pictures taken by other equipment are searched, they may display dates differing from the actual dates on which the pictures were taken.
- Page 177 Others About the Wi-Fi function A Wi-Fi connection cannot be established. Radio waves get disconnected. Wireless access point is not displayed. (General tips for using a Wi-Fi connection) • Try [Reset Wi-Fi Settings] in the [Setup] menu. • Use within the communication range of the device to be connected. •...
- Page 178 Others This unit is not displayed in the Wi-Fi setting screen of the smartphone. • From the Wi-Fi setting menu on the smartphone, turn off and then on the Wi-Fi function. Images cannot be transmitted to a PC. • When the firewall of the OS, security software, etc. is enabled, connecting to the PC may not be possible.
- Page 179 The card is not recognised by the PC. (SDXC memory card is used) • Check if your PC is compatible with SDXC memory cards. http://panasonic.net/avc/sdcard/information/SDXC.html • A message prompting to format the card may be displayed when connecting, but do not format. •...
- Page 180 Others The ends of the pictures are cut at printing. • When using a printer with a Cropping or borderless printing function, cancel this function before printing. (For details, refer to the operating instructions for the printer.) • When you order photo studios to print pictures, ask the photo studio if the 16:9 pictures can be printed.
- Page 181 Others When pictures are taken using the zoom, they are slightly distorted and the areas around the subject contain colours which are not actually present. • It is possible that the subject may be warped slightly, or the borders get coloured, depending on the zoom magnification, due to the characteristics of the lens, but this is not a malfunction.
-
Page 182: Cautions For Use
Others Cautions for Use Optimal use of the camera Keep this unit as far away as possible from electromagnetic equipment (such as microwave ovens, TVs, video games etc.). • If you use this unit on top of or near a TV, the pictures and/or sound on this unit may be disrupted by electromagnetic wave radiation. - Page 183 Others Cleaning Before cleaning the camera, remove the battery or disconnect the power plug from the outlet. Then wipe the camera with a dry, soft cloth. • When the camera is soiled badly, it can be cleaned by wiping the dirt off with a wrung wet cloth, and then with a dry cloth.
- Page 184 Others Battery The battery is a rechargeable lithium ion battery. Its ability to generate power comes from the chemical reaction that takes place inside it. If the surrounding temperature is too high or too low, the operating time of the battery may become shorter. Always remove the battery after use.
- Page 185 Information including personal information may be altered or vanish due to erroneous operation, effect of static electricity, accident, malfunction, repair, or other handlings. Please note in advance that Panasonic is not liable in any way for any direct or indirect damage from the alteration or vanishing of information or personal information.
- Page 186 About the picture data • Recorded data may be damaged or lost if the camera breaks down due to inappropriate handling. Panasonic will not be liable for any damage suffered due to loss of recorded data. About tripods or unipods •...
- Page 187 • SDXC Logo is a trademark of SD-3C, LLC. • HDMI, the HDMI Logo, and High-Definition Multimedia Interface are trademarks or registered trademarks of HDMI Licensing LLC in the United States and other countries. • QuickTime and the QuickTime logo are trademarks or registered trademarks of Apple Inc., used under license therefrom.
Need help?
Do you have a question about the Lumix DMC-TZ57 and is the answer not in the manual?
Questions and answers