Advertisement
Table of Contents
- 1 Table of Contents
- 2 Standard Features
- 3 Optional Features
- 4 Transport Controls
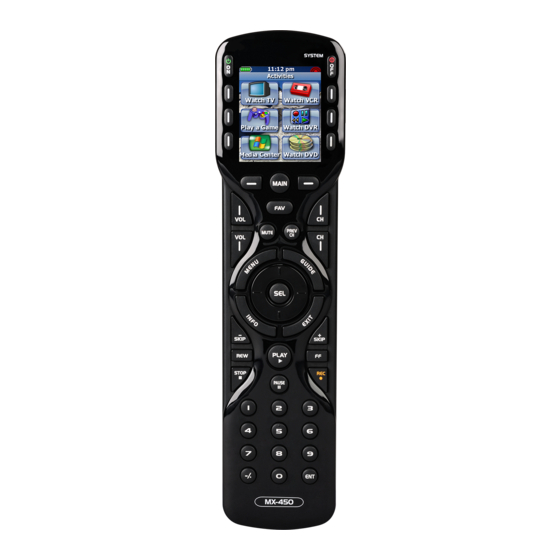
- 5 Tour Navigating the MX-450
- 6 Basic Setup LEARN
- 7 Advanced Setup
- 8 Advanced Setup Hide or Display
- 9 Advanced Setup Editing Labels
- 10 Advanced Setup Erasing
- 11 Advanced Setup RF Setup
- 12 Favorite Channels
- 13 User Settings
- 14 Display Tips
- Download this manual
Advertisement
Table of Contents

Related Manuals for URC MX-450


Summary of Contents for URC MX-450
- Page 2 Congratulations! You’ve purchased a unique synthesis of hardware and software engineering, the Complete Control MX-450. The MX-450 achieves a magnificent combination of power and flexibility, simplifying and automating operation of even the most complex system. MX-450 Owners Manual © 2011 Universal Remote Control, Inc.
-
Page 3: Table Of Contents
Table of Contents Advanced Setup: One-Touch Activities (Macros) Getting Started: Programming the MX-450 Standard Features Advanced Setup: Hide or Display Pages Optional Features Advanced Setup: Editing Labels Tour: Navigating the MX-450 Advanced Setup: Erasing Overview: Setup Screen Overview Advanced Setup: RF Setup... - Page 4 Getting Programming the MX-450 Started Decide on the position of each device on the remote’s page(s). Once a device is placed in a position, it may not be changed and must be Sony KD-7FS170 deleted and recreated. Audio: Denon AVR-2811...
-
Page 5: Standard Features
Easily record the steps it takes Switch STEREO to CaTV program up to 20 remotes into to perform your favorite Power ON Cable Box your new MX-450! activities and record them on a Instead of searching for the right Single Button Power ON Television single button. -
Page 6: Optional Features
Are you the type of person that likes the lights to be OFF? the device and DOES NOT work through walls, floors or cabinet Imagine that control, right at your fingertips with URC Lighting doors. products; just replace your existing lighting with, easy to install, Use an optional RF base station to eliminate the need to point the URC Lighting and you are ready. -
Page 7: Tour Navigating The Mx-450
Tour Navigating the MX-450 LCD Buttons These on-screen icons are On/Off Buttons accessed by using the By default, these will send an adjoining button On/Off command to the device that is displayed Volume & Channel LCD Navigation Controls These will help you to... - Page 8 Overview Set-Up Screen Overview The Main Setup Menu of the MX-450 is the heart of the remote. This menu will serve as your guide as you to add your TV, DVD, Satellite and other devices to the remote. To enter the Main Setup Menu, press and hold the MAIN button for 3 seconds.
-
Page 9: Basic Setup
Basic Setup Adding Devices Within the Search the Database section of Basic Setup, we will add each of your devices or components to the MX-450. Select Search the Database to search for device codes. Select an Icon Position to save your... - Page 10 OFF. Power On, Vol+ & Ch+ If the device responds When a device is to this code, press Pass. Pass-ed the MX-450 If not, press Back to will save the device find a better match. (blue progress bar Repeat this process (repeat step G.)
-
Page 11: Basic Setup Learn
Basic Setup LEARN Can’t find a code to control your device? Then learn the commands into the MX-450 from the original manufacturer’s remote. From the Basic Setup screen use Decide whether you want to save a Select a button where you want to the 5-way cursor to select Learn. - Page 12 Press the button on the original After the command is learned, the remote remote that you would like to indicates either: “teach” to the MX-450. SAVED: blue progress bar indicates saving RETRY: command did not translate, try again. Screen will show READY, indicating it is prepared to learn a command.
- Page 13 Basic Setup Delete Device & Review Code Set Delete a Device Review Code Set If you want to delete a device If you would like to review the use the 5-way cursor to select saved code for each device, use Delete a Device.
-
Page 14: Advanced Setup
Advanced Setup Copy & Paste Ever wish you could lower the volume or better yet change your television input without having to switch your audio receiver or television remote? Now you can. Groups Power Power only only Channel Volume Group Group Menu Group... - Page 15 Advanced Setup Copy & Paste The process ends here if To All Devices or Main & Fav was chosen. If To One Device was chosen go to Step E. Decide where you want to paste the Select a device to copy the Select a device to paste the commands.
- Page 16 Advanced Setup One-Touch Activities (Macros) One touch activities allow you to “record” multiple steps on a single LCD button, like all of the commands necessary to watch TV. Once programmed, a single button press will execute all of the commands to complete the activity. What’s an ACTIVITY? an action the end-user wants to perform but requires multiple steps to accomplish...
- Page 17 Advanced Setup One-Touch Activities (Macros) Add Delays End On A Page? Pressing the Pause button inserts a .5 sec A recorded macro will also save its last location. delay between commands. So, make sure you hit DONE on the page where you want the macro to end.
-
Page 18: Advanced Setup Hide Or Display
Advanced Setup Hide or Display Pages Want to hide a page of unnecessary commands? What about hiding a device from a loved one? If Inside a Device is chosen, Covert operation anyone?! the next screen will give a choice of Hide or Display Pages CQ Humor or Hide or Display Buttons. -
Page 19: Advanced Setup Editing Labels
Advanced Setup Editing Labels Make life easier by labeling buttons to say what YOU want! How about renaming a button to a newly created activity? (i.e. TV to Watch TV) Or, simply change the LOOK of an icon. From the Advanced Setup screen Decide on the location of the Navigate to the button in the location use the 5-way cursor to select... - Page 20 Advanced Setup Editing Labels These steps are only available if On the Main Menu is selected in Step B. Select a device type, for the Type in a name for the Change the device icon by icon, by using the device using the number pressing the left or right 5 way cursor and select...
-
Page 21: Advanced Setup Erasing
Advanced Setup Erasing Quickly erase unwanted activities (macros) and learned commands anywhere on the remote. From the Advanced Setup screen Decide whether you want to Select how you would like to use the 5-way cursor to select erase Macros or Learned erase : One Button, All on 1 Erasing. - Page 22 Advanced Setup Erasing If Inside a Device is chosen, select the device that contains the button to erase. Press a hard or soft button to An Erased confirmation will Choose whether the location of erase. indicate the macro or learned the button is On the Main Menu command is no longer or Inside a Device.
-
Page 23: Advanced Setup Rf Setup
Advanced Setup RF Setup Tired of leaving the cabinet doors open, just to control the cable box? RF travels right through those doors, and even floors and walls! Add an optional RF base station for “no An optional RF base station such as a MRF-260 or MRF-350 rules”... - Page 24 Advanced Setup RF Setup To use a RF base station, the following options should be addressed: IR or RF Signal: Turn OFF IR Signal (no need to point) and turn ON RF Signal (communicates with base station.) RF ID# (Address): Select an ID# between 1-F. The ID# identifies the base station to the remote. It is important to select the same # on the RF base station.
- Page 25 Advanced Setup RF Setup (base station) Adjust the RF ID# dial to reflect the selection made in the remote’s RF Setup. Plug the emitter for each device Note: DO NOT SELECT ID# 0, as into its designated any RF remote can control the IR OUTPUT.
-
Page 26: Favorite Channels
Favorite Channels Hate relying on the cable channel guide to find your favorite channels. Have trouble keeping track of cable’s ever-changing lineup? Use the Favorite Channels option to showcase multiple channels, up to six per page. Favorite Channels From the Main Setup screen Choose between Select a button position use the 5-way cursor to select... - Page 27 Favorite Channels Select for each category: Label: rename the channel icon Device: select the device where the favorite channel is found Channel: enter the channel number (See below for details of each) Label Device Channel Enter the channel number using the Enter the channel number pad.
-
Page 28: User Settings
User Settings Like creature comforts? Modify your preferred settings with the User Settings option. From the User Settings screen use the 5-way cursor to select a preference. From the Main Setup screen Color Screen Button Lighting use the 5-way cursor to select User Settings. - Page 29 User Settings From the User Settings screen use the 5-way cursor to select an option, one at a time. System & Battery Info. Factory Reset Power Remaining: Change the level between 0% - 100% System Info: Displays the memory usage. This option sets the remote to the original factory program.
-
Page 30: Display Tips
Display Tips The Display Tips is your personal MX-450 programming tutorial. From the Main Setup screen Use the 5-way cursor to turn use the 5-way cursor to select the display tips on or off. Display Tips. Press Save when done. - Page 31 An Liquid Crystal Display (LCD) screen with "soft" buttons that are backlit for easy viewing in low light conditions A code set is a series of commands (usually using infra-red) put together to control a single device. The MX-450 Code Set will automatically assign all commands in a code set to the appropriate "hard"...
- Page 32 (i.e. Watch TV, Watch DVD, Listen to CD) The MX-450 has different screen views. On the Main Menu are the screens that show devices or activities. Once a On the Main Menu device is chosen, the remote will typically jump to a page that is Inside a Device Also called MACROS, these are buttons (hard or soft) that trigger a recorded sequence of commands;...
- Page 33 Retry the problem The MX-450 has the ability to control device via direct IR, or route the IR commands through an RF base station. RF Setup Using an RF base station allows commands to be sent through walls, floors and doors. RF also allows for native command of URC lighting.
Need help?
Do you have a question about the MX-450 and is the answer not in the manual?
Questions and answers