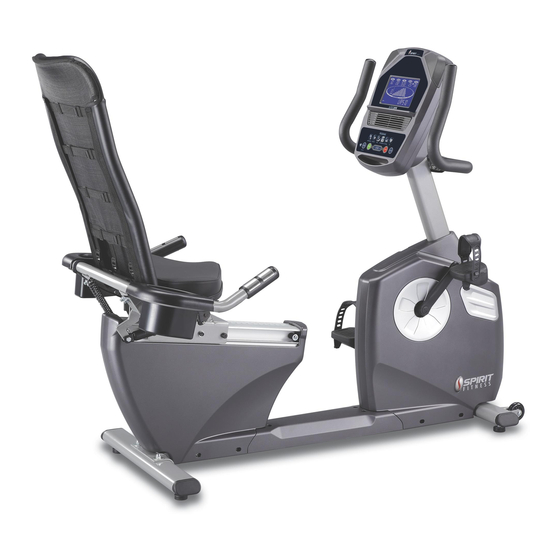
Spirit XBR25 Service Manual
Hide thumbs
Also See for XBR25:
- Owner's manual (36 pages) ,
- Owner's manual (26 pages) ,
- Owner's manual (34 pages)
Table of Contents
Advertisement
Advertisement
Table of Contents

Summary of Contents for Spirit XBR25
- Page 1 SERVICE MANUAL XBR25 XBR55...
-
Page 2: Table Of Contents
Procedure 4 (Tighten seat carraige)..........5 Procedure 5 (Engineering mode)..........6 XBR Series Warranty Contacting Technical Service…………………………………..7 Treadmill Warranty……………………………………………..8 Warranty Policy…………………………………………………...9 Parts Order Form………………………………………………..10 Warranty Labor Credit Form……………………………………...11 XBR25 Exploded view……………………………………………....12 Parts list..................13 - 15 XBR55 Exploded view…………………………………………………..16 Parts list..................17 - 20... -
Page 3: Electronic System
Bike Troubleshooting ELECTRONIC SYSTEM No power 1. Unit must be plugged into an outlet with power. There is no power to the console. Test adapter for DC voltage using volt meter. (procedure 1) 3. Remove the console and test the wire harness with a volt meter for DC voltage. -
Page 4: Procedure 1: Test Adapter For Voltage
Bike Troubleshooting PROCEDURE 1: Test Adapter for voltage Turn meter on setting to test for AC voltage. Put leads in the two holes in adapter plug. There should be at least 24 volts. 1.4 If you do have voltage but no power to display, go to procedure 2. If you dont have the voltage, replace the adapter (assuming the outlet has power). -
Page 5: Procedure 4: Tighten Seat Carraige
Bike Troubleshooting PROCEDURE 4: Tighten seat carraige If the seat assembly on the recumbent bike is loose and wobbles from side to side, follow these instructions to tighten it up. (Front wheel assembly on Left side) “B” “A” Push down on wrench (Rear wheel assembly on Left side) “B”... -
Page 6: Procedure 5: Engineering Mode
Bike Troubleshooting PROCEDURE 5: Engineering Mode 1. Press and hold the START, ENTER, and STOP buttons until display beeps. 2. “ENGINEERING MODE” will scroll across the screen, press ENTER. 3. Press the UP and/or DOWN buttons to scroll through the following sub menus: - Key Test - Display Test - Functions... -
Page 7: Xbr Series Warranty Contacting Technical Service
CONTACTING CUSTOMER SERVICE t is the responsibility of the Dealer to assemble and setup any Spirit product they have sold, as well as diagnose problems and perform service, regardless of the product’s location. Recognizing the importance of insuring the consumer’s satisfaction, Spirit technical support will always be available to assist the Dealer in diagnosing a problem. -
Page 8: Treadmill Warranty
BIKE WARRANTY Spirit Manufacturing Inc. warrants all its bike parts for a period of 5 years from the date of retail sale, as determined by sale receipt, or in the absence of a sales receipt eighteen (18) months from the original factory shipping date, whichever comes first. -
Page 9: Warranty Policy
If the unit is no longer covered under warranty the parts will be billed to you on 30 day payment terms. If a warranty replacement part is required to be returned to Spirit it will be noted on the packing list included in your shipment. -
Page 10: Parts Order Form
If a part is not accompanied by a serial number, it will be assumed that the dited shipping charges. part order is for stock. We encourage all dealers to stock parts. Spirit will always be fair to all dealers on credit for parts. Spirit reserves the right to Special Instructions: 2nd Day Air________________... -
Page 11: Warranty Labor Credit Form
TOTAL LABOR ____________ ALL PARTS MUST BE RETURNED TO FACTORY UNLESS INSTRUCTED OTHERWISE. ____________ Authorization No.___________________________ CLAIMS MUST BE RETURNED TO SPIRIT CORP. WITHIN 7 DAYS OF REPAIR. ____________ _________________________________________ SHADED AREAS FACTORY USE ONLY WARRANTY ADMINISTRATOR FAX TO SPIRIT (870) 930-9013... -
Page 12: Xbr25 Exploded View
XBR25 Exploded View... -
Page 13: Parts List
XBR25 Part List Parts No. Description Part # Main Frame 002160 Console Mast 002136 Handle Bar Front 002185 Seat Carriage 002188 Seat Back Frame 002189 Handle Bar Seat 002192 Rear Stabilizer Bar 002005 Drive Pulley Axle 002006 Seat Wheel Adjustment Plate... - Page 14 Rear Chain Cover (L) 002147 Rear Chain Cover (R) 002148 Rear Stabilizer Cover 002142 Beverage Holder (L) 002146 Release Lever 002031 Controller 002099 Computer Cable 002132 Sensor W/Cable 002133 002037 2P x 750mm_Wire Brake Coil Harness 1200mm_AC Wire Assembly 002127 002040 Crank Arm (L) 002041...
- Page 15 M6x15_Phillips Head Screw 030038 M5x12_Phillips Head Screw 030037 010150 5x16_Tapping Screw - Plated 5x19_Tapping Screw 030057 ˜3.5x12 _Self Tapping Screw 010113 0002051 ˜ 13.5x28.5 _Seat Release Spring ˜4×16 _Self Tapping Screw 000050 5/16" x1- 3/4"_Button Head Socket Screw 000086 ˜3.5x20_Self Tapping Screw 030021 002052 M10x1.0_Nut, Crank Arm...
-
Page 16: Xbr55 Exploded View
XBR55 Exploded View... -
Page 17: Parts List
022943 ~54 Transportation Wheel 000179 Console Assembly 002164 19~1 Top Console Cover 002130 19~2 Bottom Console Cover 006063 19~3 SPIRIT LOGO/P020029 002131 19~5 Deflector Fan Grill 000983 19~6 Fan Grill Anchor 000807 19~7 Fan Motor 000808 19~8 Fan Power Switch... - Page 18 Part No. Description Part # Round Disk Cover, Crank 002141 Rear Chain Cover (L) 002147 Rear Chain Cover (R) 002148 Rear Stabilizer Cover 002142 Beverage Holder (L) 002145 Beverage Holder (R) 002146 Release Lever 002031 Controller 002099 Computer Cable (Upper) 002132 Sensor W/Cable 002133...
- Page 19 Part No. Description Part # 3/8"x 7T_Nyloc Nut 000080 1/4" x 5T_Nyloc Nut 030098 5/16" x 6T_Nyloc Nut 030039 M6 x40mm_Socket Head Cap Screw 030024 M5x15_Flat Head Socket Screw 030022 ˜ 3.5x16_Tapping Screw 022979 ˜ 3x20_Tapping Screw 000839 M6x15_Phillips Head Screw 030038 M5x12_Phillips Head Screw 030037...
- Page 20 Part No. Description Part # “Down” Label 002205 Adjustment Switch Cable (Upper) 002153 Adjustment Switch with earphone cable Adjustment Switch Connecting Cable 002154 Adjustment Switch Cable (Lower) 002155 ˜ 8×20×1T_White Washer ˜ 13×19×1T_Flat Washer Hardware Kit 002184 Console Overlay 006198 Button Overlay 006199...


Need help?
Do you have a question about the XBR25 and is the answer not in the manual?
Questions and answers