Table of Contents
Advertisement
Advertisement
Table of Contents

Related Manuals for Advocate Redi-Code+ BMB-EA001


Summary of Contents for Advocate Redi-Code+ BMB-EA001
- Page 1 Glucose Meter...
-
Page 2: Glucose Meter
Thank you for considering Advocate. We believe that you will find our products and service to be of the highest quality. Our mission is to provide the highest quality home healthcare supplies and services in a cost-effective manner. We strive to improve the health of diabetic patients in a manner that distinguishes us in our industry. - Page 3 Benefits of Using the Advocate Glucose Meter Redi-Code - Advocate Speaks for you Hear and see the results in English and Spanish. - No Coding Required Insert test strip and you are ready to go. - Quick Results Hear and see the results in 5 seconds.
-
Page 4: Meter Specifications
No Coding Required! Meter Specifications Advocate Redi-Code+ BMB-EA001/BMB-EA001S Blood Glucose Monitor Characteristics Specifications Dimensions (mm) 64 x 95 x 29 Weight (g) 53 (without batteries) Micro Controller Name and Specifications MSP430FG439 Power Source (2) 1.5V AAA alkaline batteries Battery Low Warning Function (Voltage) 2.75V±0.1... -
Page 5: Test Strip
24 months Warning: - Do not use expired strip - This strip is only used with Advocate Redi Code+ Meters - Close the can immediately after strip has been removed - Fluoride: Cannot put fluoride into blood as the preservative - Iodoacetic Acid: It is impossible to put Iodoacetic Acid into blood as the preservative as well. -
Page 6: Front View
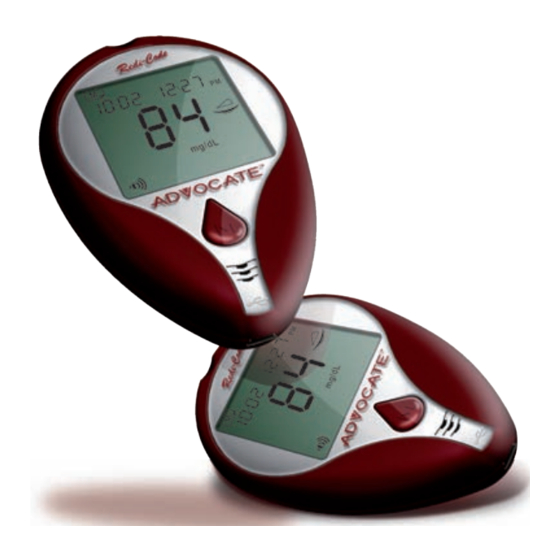
Test Strip Slot Strip is inserted here for testing. LCD Display Display readings and messages. Main Button “M” Turns meter on to enter memory mode. Speaker Allows you to hear your results. Port Download port to be used with Advocate’s free software. - Page 7 Orientation & Functions Back View - Closed Release Button Battery Door Back View - Open Battery Compartment Set Button Press to enter settings mode which allows changing data, time, setting the alarms and for memory deletion.
- Page 8 Orientation & Functions Batteries Notes: • Batteries should be replaced when your meter power is getting low indicated by displaying battery symbol, or the meter briefly shows “E-2” with battery symbol. • After replacing new batteries, the display check will appear briefly. That means the batteries are installed successfully.
- Page 9 Setting your Meter Your meter allows you to set the year, month, date, time, alarm, speaking language and volume, as well as delete memory. Step 1: Enter Setting Mode Start with the meter off. Press the “Set” button (on the back of the meter).
- Page 10 Meter Setup: Year Step 3: Press the “Set” button to enter Settings mode. The year will be flashing. Step 4: Press and release the “M” button until the correct year appears. Step 5: Press the “Set” button to move to the month setting.
- Page 11 Meter Setup: Month Step 6: With the month flashing, press and release the “M” button until the correct month appears. Step 7: Press the “Set” button to move to the day setting.
- Page 12 Meter Setup: Day Step 8: With the day flashing, press and release the “M” button until the correct day appears. Step 9: Press the “Set” button to move to the hour setting.
- Page 13 Meter Setup: Hour Step 10: With the hour flashing, press and release the “M” button until the correct hour appears. Step 11: Press the “Set” button to move to the minutes setting.
- Page 14 Meter Setup: Minutes Step 12: With the minutes flashing, press and release the “M” button until the correct minutes appears. Step 13: Press the “Set” button to move to the units of measurement setting.
-
Page 15: Meter Setup
Meter Setup: Unit of Measurement Step 14: With the mg/dL (mg/dL is the default setting) flashing, press and release the “M” button to change to mmol/L. *Note: the version for USA available in (mg/dL) only Step 15: Press the “Set” button to move to the alarms setting. - Page 16 Meter Setup: Alarms Step 16: 01 (Alarm1) and the alarm icon with flashing “On” displays, press the “Set” button to enter the hour setting. *The meter provides six alarms (1-6). You may set up any or all of them. Step 17: With the hour flashing, press and release the “M”...
- Page 17 Meter Setup: Language Step 19: Press the “M” button to toggle the language from English to Spanish. Step 20: Press the “Set” button to move to the volume setting mode. “E” = English “S” = Spanish...
- Page 18 Meter Setup: Volume Step 21: Press the “M” button to adjust the speaking volume (0 for the silent mode and 6 for the loudest speaking volume). Step 22: Press the “Set” button to move to memory deletion mode.
- Page 19 Meter Setup: Delete Memory Option Step 23: With memory symbol and flashing “dEL” appears, press the “M” button for 2 seconds to clear ALL memory. Step 24: With “CLr” displaying, that means ALL memory is deleted. Step 25: After pressing the “Set”...
-
Page 20: Control Solution Test
- Advocate Control Solution Step 1: Insert a test strip into the Test Strip Slot Redi-Code You will hear the Advocate Meter say: “Please apply blood to the strip” Step 2: While the “ ” symbol appears on the display, press the “M” button. The “CTL”... - Page 21 Control Solution Test Step 3: Obtain a small sample of the control solution. First Shake the vial well. Discard the first drop, and wipe off the dispenser tip to prevent contamination. Squeeze the vial again to get another drop and place the drop on your fingertip. Step 4: Apply the control solution to the test strip.
- Page 22 Remove the used strip, the meter will automatically turn off. • The control solution range printed on the test strip vial is for Advocate Redi-Code+ Control Solution only. It is not a recommended range for your blood glucose test results.
-
Page 23: Lancing Device
Preparing the Lancing Device 1. Remove lancing device cap 2. Insert lancet into lancing device 3. Pull lancet cap off 4. Replace lancing device cap 5. Set depth adjustment 6. Cock the lancing device The lancing device is now ready for use. -
Page 24: Blood Glucose Test
You will need the following items to perform a glucose test: Redi-Code + Glucose Meter - Advocate - Advocate Test Strips - Advocate Lancing Device - Advocate Lancets Step 1: Insert a test strip Fully insert a test strip into the meter with the contact bars end first. - Page 25 Perform Blood Glucose Test General Mode When the flashing apply blood symbol appears on the display, press M button twice and general mode appears (no marker displays). Go to Step 3 for obtaining a drop of blood. Step 3: Obtain a Drop of Blood Before puncturing, clean the puncture site with 70% alcohol cotton and let it air-dry.
- Page 26 Perform Blood Glucose Test Step 4: Apply Blood to the Test Strip Apply the blood sample to the test strip tip. The minimum blood sample size is 1.1μl (●). Blood will be drawn into the strip. Keep holding the drop of blood to the hole of the test strip until the confirmation window is full and the meter begins count down.
- Page 27 Expected Blood Glucose Values Many factors will affect blood glucose values such as food intake, medication dosages, health, stress, or exercise. The expected blood glucose values appropriate for you should be consulted and determined by your healthcare professional. People without diabetic blood glucose levels are expected to be in the following ranges Time Range (mg/dL)
- Page 28 Comparison of Your Meter and Laboratory Results Test results with this meter are plasma-calibrated. Since the laboratory tests provide plasma-calibrated results, your meter may differ from your laboratory result due to normal variation. Meter results can be affected by factors and conditions that do not affect laboratory results in the same way.
-
Page 29: Meter Memory
Meter Memory The meter stores the last 400 blood glucose test results along with the date and time. It also provides you with 7,14,28 and 60-day averages of your pre-meal, post-meal and general blood glucose test results, respectively. You can begin to review the results stored in meter’s memory by following the next steps. - Page 30 Meter Memory 3. 7-Day Average Post-Meal Result Press M button again and 7-day average post- meal result appears. 07 DAY AVG = your 7-day average. 30 = indicates the number of results included in your average. = post-meal marker 4. 7-Day Average General Result Press and release M button, then 7-day average general result appears.
-
Page 31: Test Results
Test Results 1. View Test Results After view 60-day average result, press M button again. The most recent result with date and time will be shown on the display. 2. View Second Most Recent Result Press the M button one by one to recall the test results stored in the meter consecutively 3. -
Page 32: Your System
The disinfection procedure is to destroy infectious virus capable of disease transmission. To prevent the transmission of infectious disease, the ADVOCATE® Redi-Code+ BMB-EA001S Blood Glucose Meter and Lancing Device should be cleaned and disinfected when the following situations happen. - Page 33 Area to be disinfected for the meter Possibility of contact with blood for all parts of meters Part Name of the Part Possibility of contact with blood Display Strip insert port High Meter housing High Battery cover Main button...
- Page 34 Possibility of contact with blood for all parts of meters Part Name of the Part Possibility of contact with blood Lancing device cap High Clear cap High Main body of the device Adjustable tip Lancet ejector ▪ Make sure the meter is turned off during cleaning and disinfection. ▪...
- Page 35 Cleaning Process Step 1: Put on disposable protective gloves and take disinfectant towelette from the container. Step 2: Wipe down the body of the meter and lancing device, including the clear cap used for alternate site testing, until the debris or the bioburden is removed. After air-drying, go to the disinfection process for the meter and lancing device.
- Page 36 Disinfection Process *A pre-cleaning step is required prior to each disinfection step. Step 1: Take a new disinfectant from the container. Step 2: Wipe down the body of the meter enough to thoroughly wet the surface. Repeat this step for six times (3 passes horizontal and 3 passes vertical as shown below) to complete the disinfection procedure.
- Page 37 Disinfection Process Step 4: The user should wash hands thoroughly with soap and water after handling the meter, lancing device, or test strips. After each cleaning or disinfecting process, you should perform the physical appearance check and performance check of the meter and lancing device for items shown in the tables blow.
-
Page 38: Troubleshooting
Messages and Troubleshooting This system displays messages when there are problems with the test strip, with the meter, or when your blood glucose levels are lower than 20 mg/dL or higher than 600 mg/dL. These messages help to identify certain problems but do not appear in all cases when a problem has occured. - Page 39 Use a new test strip to perform identified. A previously used test the test. Be sure you use strip may have been inserted. ADVOCATE Redi-Code+ BMB-002 test strips. Insufficient blood sample or the Remove the test strip and re- test strip is not completely filled test using a new test strip.
- Page 40 Messages and Troubleshooting Message What it means What to do Operating temperature is out of Move to an area between range. 50°F and 104°F, let the meter adjust to this temperature for 20 minutes before performing a test. No results are stored in the No action is required.
- Page 41 Messages and Troubleshooting Message What it means What to do Possible dead battery Replace the battery. Meter does not display a message after inserting a test Battery incorrectly installed or Check that the battery is correctly strip. missing. installed. Test strip inserted upside down or Insert the test strip correctly with incompletely.
- Page 42 Contact Information If further assistance is needed please contact one of the following: To Purchase: Call your local distributor To find a distributor: Call 1-888-469-3579 For technical support: Call 1-866-373-2824...
- Page 43 Redi-Code+ In-Service Presentation We thank you for choosing the Advocate products Important Information: The information in this Advocate Redi-Code+ In-Service Presentation serves as a training resource only. It is not designed to replace the product’s owner manual. Please refer to the Owner’s Manual for...
Need help?
Do you have a question about the Redi-Code+ BMB-EA001 and is the answer not in the manual?
Questions and answers