Table of Contents
Advertisement
Cisco VG310 and Cisco VG320 Voice Gateways Hardware Installation
Guide
First Published: July 25, 2014
Americas Headquarters
Cisco Systems, Inc.
170 West Tasman Drive
San Jose, CA 95134-1706
USA
http://www.cisco.com
Tel: 408 526-4000
800 553-NETS (6387)
Fax: 408 527-0883
Text Part Number: OL-31292-01
Advertisement
Table of Contents

Related Manuals for Cisco VG310


Summary of Contents for Cisco VG310
- Page 1 Cisco VG310 and Cisco VG320 Voice Gateways Hardware Installation Guide First Published: July 25, 2014 Americas Headquarters Cisco Systems, Inc. 170 West Tasman Drive San Jose, CA 95134-1706 http://www.cisco.com Tel: 408 526-4000 800 553-NETS (6387) Fax: 408 527-0883 Text Part Number: OL-31292-01...
- Page 2 © 2014 Cisco Systems, Inc. All rights reserved.
-
Page 3: Table Of Contents
Submitting a Service Request Definitions of Service Request Severity Obtaining Additional Publications and Information Overview of the Cisco VG310 and Cisco VG320 Voice Gateways C H A P T E R 1 Introduction to Cisco VG310 and Cisco VG320 Analog Voice Gateways... - Page 4 C H A P T E R 3 Safety Recommendations Maintaining Safety with Electricity General Safety Practices Safety Tips Preventing Electrostatic Discharge Damage What You Need to Know Before You Begin Unpacking and Inspecting Cisco VG310 and Cisco VG320 Voice Gateways Hardware Installation Guide OL-31292-01...
- Page 5 C H A P T E R 4 Getting Your Network Information Checklist for Power Up Power-On Procedure Performing the Initial Configuration on the Voice Gateway Using the setup Command Facility Cisco VG310 and Cisco VG320 Voice Gateways Hardware Installation Guide OL-31292-01...
- Page 6 Using Cisco Configuration Professional Express Using Cisco IOS CLI—Manual Configuration Troubleshooting Cisco VG310 and Cisco VG320 Getting Software Licenses for Cisco VG310 and Cisco VG320 Voice Gateways C H A P T E R 5 Activating a New Software Package or Feature...
- Page 7 Contents EIA/TIA-530 Connections USB Type A-to-USB 5-Pin Mini Type B Cable Cisco VG310 and Cisco VG320 Voice Gateways Hardware Installation Guide OL-31292-01...
- Page 8 Contents Cisco VG310 and Cisco VG320 Voice Gateways Hardware Installation Guide viii OL-31292-01...
-
Page 9: Preface
• Installing and Replacing Field Replaceable Units in Cisco VG310 and Cisco VG320 Voice Gateways—This document is intended for trained and qualified service personnel. This document describes how to install field-replaceable units (FRUs) in the Cisco VG310 and Cisco VG320 voice gateways. -
Page 10: Obtaining Documentation
Warnings are translated into several languages. For information about compliance guidelines and translated safety warnings, refer to the Regulatory Compliance and Safety Information document for the Cisco VG310 and Cisco VG320 Voice Gateways. -
Page 11: Obtaining Technical Assistance
For S1 or S2 service requests or if you do not have Internet access, contact the Cisco TAC by telephone. (S1 or S2 service requests are those in which your production network is down or severely degraded.) Cisco TAC engineers are assigned immediately to S1 and S2 service requests to help keep your business operations running smoothly. -
Page 12: Definitions Of Service Request Severity
Definitions of Service Request Severity To ensure that all service requests are reported in a standard format, Cisco has established severity definitions. • Severity 1 (S1)—Your network is “down,” or there is a critical impact to your business operations. You and Cisco will commit all necessary resources around the clock to resolve the situation. -
Page 13: Overview Of The Cisco Vg310 And Cisco Vg320 Voice Gateways
C H A P T E R Overview of the Cisco VG310 and Cisco VG320 Voice Gateways This chapter provides a brief description of the Cisco VG310 and Cisco VG320 voice gateways and contains the following sections: • Introduction to Cisco VG310 and Cisco VG320 Analog Voice Gateways, page 1 •... -
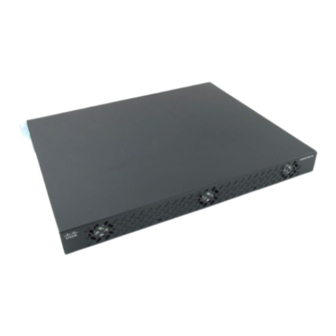
Page 14: Front Panel View
Figure 1: Front Panel of the Cisco VG310 and Cisco VG320 Chassis Back Panel View The following figures show the back panel views of the Cisco VG310 and Cisco VG320 chassis respectively. Figure 2: Back Panel of the Cisco VG310 Chassis... -
Page 15: Locating The Product Serial Number
Locating the Product Serial Number Locating the Product Serial Number The serial number label for the Cisco VG310 and Cisco VG320 Analog Voice Gateways is located on the back panel of the chassis, as shown in the following figure. Figure 4: Locating the Product Serial Number Note The serial number for Cisco VG310 and Cisco VG320 is 11 characters long. -
Page 16: Physical Description And Leds
Overview of the Cisco VG310 and Cisco VG320 Voice Gateways Physical Description and LEDs Port Interface Interface To Services Supported Details Configuration Auxiliary EIA/TIA-232 Modem Remote RJ-45 physical asynchronous serial administrative interface Port 0/1 (data terminal access equipment) Data backup... -
Page 17: Cisco Vg310 And Cisco Vg320 Voice Gateways Hardware Installation Guide
Overview of the Cisco VG310 and Cisco VG320 Voice Gateways Physical Description and LEDs The following figure describes the back panel features of Cisco VG310. Figure 5: Back Panel Features of Cisco VG310 Chassis ground connection Status LEDs for DC input power... -
Page 18: Cisco Vg310 And Cisco Vg320 Voice Gateways Hardware Installation Guide
Status LEDs for DC input power LED Indicators The following table summarizes the LED indicators that are located on the chassis of both VG310 and VG320, but not on the removable modules or interface cards. For descriptions of LEDs in removable modules and interface cards, see the applicable documentation for those products. -
Page 19: Gigabit Ethernet Ports And Led Indicators
LED will be Off. Gigabit Ethernet Ports and LED Indicators There are two RJ-45 Gigabit Ethernet (GE) ports (GE0/0 and GE0/1) on the Cisco VG310 and Cisco VG320 chassis. These ports support 10BASE-T, 100BASE-TX, and 1000BASE-T standards. The LED indicators for the GE ports display a sequence of blinks followed by a pause to indicate the link speed. -
Page 20: Port Numbering Conventions
This allows the system to verify the validity of the certification authority (CA) certificate. Cisco VG310 and Cisco VG320 have a lithium battery. This battery lasts for the duration of the life time of Cisco VG310 or Cisco VG320 under the operating environmental conditions specified for the chassis, and is not field replaceable. -
Page 21: Usb Serial Console Port
Mini-USB (Type USB Serial Console Port The Mini-USB Type B serial port is enabled to perform management tasks on Cisco VG310 and Cisco VG320. Before establishing physical connectivity between a personal computer and a voice gateway using this port, make sure that a Windows USB device driver is installed. -
Page 22: Supported Voice Interface Cards And Voice Wan Interface Cards
Configuration Methods, on page 11 Configuration Connections You can use an ASCII terminal or a PC to configure a Cisco VG310 or Cisco VG320 Analog Voice Gateway. The configuration can be performed in several ways: • Locally, with a direct connection through the console port... -
Page 23: Configuration Methods
Overview of the Cisco VG310 and Cisco VG320 Voice Gateways Configuration Methods • Remotely, with a connection through the auxiliary port and a modem • Through Telnet and TFTP Configuration Methods For information on performing the initial configuration on an analogy voice gateway, see... -
Page 24: Cisco Vg310 And Cisco Vg320 Voice Gateways Hardware Installation Guide
Overview of the Cisco VG310 and Cisco VG320 Voice Gateways Configuration Methods Cisco VG310 and Cisco VG320 Voice Gateways Hardware Installation Guide OL-31292-01... -
Page 25: Planning Your Installation
C H A P T E R Planning Your Installation Before you install your Cisco VG310 or Cisco VG320 Analog Voice Gateway, read the information provided in the following sections: • Safety Recommendations, page 13 • Preventing Electrostatic Discharge Damage, page 14 •... -
Page 26: Safety Tips
• Connect a clip to the ESD-strap connection jack (to the left of the power switch on the rear of the chassis) or to an unpainted chassis frame surface. Cisco VG310 and Cisco VG320 Voice Gateways Hardware Installation Guide OL-31292-01... -
Page 27: Temperature Control And Ventilation
The best location for baffles depends on the airflow patterns in the rack. You can test the airflow by experimenting with different equipment arrangements. Wall-Mounted If Cisco VG310 or Cisco VG320 is installed on a wall, there should be plenty of space on both sides to ensure that there is adequate airflow through the chassis. Bench-Mounted If the unit is placed on a bench top, do not stack other equipment or paper on the chassis. -
Page 28: Access To Chassis
Installing the Ground Connection, on page Power Source You can connect Cisco VG310 or Cisco VG320 to either an AC power source or a +12V DC power supply. Caution The chassis provides inputs for both AC and DC power. Design your installation to use only one type of power. -
Page 29: Distance Limitations For Interface Cables
USB Serial Console Use the USB console port on the chassis to access the Cisco IOS CLI and perform configuration tasks. A terminal emulation program, such as Microsoft HyperTerminal for Windows, is required to establish communication between the voice gateway and a PC. -
Page 30: Auxiliary Port Connections
For operation with Microsoft Windows, the Cisco USB Console Driver must be installed on the PC connected to the console port. If the driver is not installed, a series of prompts guide you through a simple installation process. -
Page 31: Interference Considerations
• Unshielded plant cabling can emit radio interference. • Strong electromagnetic interference (EMI), especially as caused by lightning or radio transmitters, can destroy the EIA/TIA-232 drivers and receivers in Cisco VG310 or Cisco VG320. Consider the following guidelines: • To prevent emitted radio interference, use twisted-pair cables with a good distribution of grounding conductors in your plant cabling. -
Page 32: Keeping Track-Checklist
Installation Checklist Include a copy of an installation checklist in your Site Log for each Cisco VG310 or Cisco VG320. The installation checklist provides a record of the tasks performed for installing a unit. Print a copy of this checklist and mark the entries as you complete each task. -
Page 33: Site Log
• Upgrades and maintenance—Use the Site Log to record ongoing maintenance and expansion history. Update the Site Log to display the following: ◦ Configuration changes ◦ Maintenance schedules, requirements, and procedures performed ◦ Comments, notes, and problems Cisco VG310 and Cisco VG320 Voice Gateways Hardware Installation Guide OL-31292-01... -
Page 34: Cisco Vg310 And Cisco Vg320 Voice Gateways Hardware Installation Guide
Planning Your Installation Site Log ◦ Changes and updates to Cisco IOS software Cisco VG310 and Cisco VG320 Voice Gateways Hardware Installation Guide OL-31292-01... -
Page 35: Installing The Cisco Vg310 And Cisco Vg320 Voice Gateways
C H A P T E R Installing the Cisco VG310 and Cisco VG320 Voice Gateways This document describes how to install and connect Cisco VG310 and Cisco VG320 voice gateways to LAN, WAN, and voice networks. The following sections are included: •... -
Page 36: Maintaining Safety With Electricity
Do not operate the system unless all cards, faceplates, front covers, and rear covers are in place. Statement 1029 Cisco VG310 and Cisco VG320 Voice Gateways Hardware Installation Guide OL-31292-01... -
Page 37: General Safety Practices
• Do not wear loose clothing that may get caught in the chassis. • Wear safety glasses if you are working under conditions that might be hazardous to the eyes. Cisco VG310 and Cisco VG320 Voice Gateways Hardware Installation Guide OL-31292-01... -
Page 38: Safety Tips
• Connect a clip to the ESD-strap connection jack (to the left of the power switch on the rear of the chassis) or to an unpainted chassis frame surface. For safety, periodically check the resistance value of the antistatic strap, which should be between 1 МΩ Caution and 10 МΩ. Cisco VG310 and Cisco VG320 Voice Gateways Hardware Installation Guide OL-31292-01... -
Page 39: What You Need To Know
What You Need to Know Slot and Port Numbers Cisco VG310 and Cisco VG320 have built in ports and slots to accommodate modules and interface cards that include the Enhanced High-Speed WAN Interface Card (EHWIC) and the Packet Voice and Data Module (PVDM3). -
Page 40: Mounting Screws
Statement 1024 Warning Take care when connecting units to the supply circuit so that wiring is not overloaded. Statement 1018 Cisco VG310 and Cisco VG320 Voice Gateways Hardware Installation Guide OL-31292-01... -
Page 41: Cisco Vg310 And Cisco Vg320 Voice Gateways Hardware Installation Guide
If the Cisco VG310 or Cisco VG320 is installed in an enclosed rack with a ventilation fan at the top, make sure that heated air drawn upward from other equipment does not pass through the Cisco VG310 or Cisco VG320 chassis. -
Page 42: Mounting The Chassis On A Wall
Note in the package. We recommend that you select the fasteners that are appropriate for the material the wall is made of. To mount the chassis on a wall: Cisco VG310 and Cisco VG320 Voice Gateways Hardware Installation Guide OL-31292-01... -
Page 43: Cisco Vg310 And Cisco Vg320 Voice Gateways Hardware Installation Guide
3/4 inch (20 mm) into the supporting wood or metal wall stud. For hollow-wall mounting, each bracket requires two wall anchors with washers. Wall anchors and Note washers must be #10. Cisco VG310 and Cisco VG320 Voice Gateways Hardware Installation Guide OL-31292-01... -
Page 44: Cisco Vg310 And Cisco Vg320 Voice Gateways Hardware Installation Guide
Installing the Cisco VG310 and Cisco VG320 Voice Gateways Mounting the Chassis on a Wall Figure 11: Mounting the Chassis on a Wall Wall Wall stud Bracket Keyhole for starter screw Cisco VG310 and Cisco VG320 Voice Gateways Hardware Installation Guide OL-31292-01... -
Page 45: Installing The Voice Gateway On A Bench
2 Place the unit on a smooth, flat surface. Installing the Ground Connection To ground the Cisco VG310 or Cisco VG320 chassis, follow this procedure: Before You Begin This equipment must be grounded. Never defeat the ground conductor or operate the equipment in the Warning absence of a suitably installed ground conductor. -
Page 46: Connecting Cables
Connect the other end of the ground wire to a grounding point at your site. Connecting Cables Do not work on the system or connect or disconnect cables during periods of lightning activity. Statement Warning 1001 Cisco VG310 and Cisco VG320 Voice Gateways Hardware Installation Guide OL-31292-01... -
Page 47: Lan And Power Cables
Modem for remote access RJ-45-to-DB25 auxiliary cable (included) Power (not Power 100–240 VAC, 50–60 Hz Grounding power cord (included) shown) Power cables may vary Note according to meet local requirements. Cisco VG310 and Cisco VG320 Voice Gateways Hardware Installation Guide OL-31292-01... -
Page 48: Connecting Power
Do not work on the system or connect or disconnect cables during periods of lightning activity. Statement Warning 1001 Read the installation instructions before you connect the system to its power source. Statement 1004 Warning Cisco VG310 and Cisco VG320 Voice Gateways Hardware Installation Guide OL-31292-01... -
Page 49: Connecting The Chassis To An Ac Power Source
Caution The Cisco chassis provides inputs for both AC and DC power. Design your installation to use only one type of power. Do not use AC and DC power at the same time. If you do, the unit stops operating, and you must reboot it with only a single power source. -
Page 50: Connecting A Ups To An Ac-Powered Voice Gateway
Power to a DC-powered chassis is provided by a 12 Volt battery. Follow these guidelines before you install a battery: • Review the documents accompanying the battery before setting up your system. Cisco VG310 and Cisco VG320 Voice Gateways Hardware Installation Guide OL-31292-01... -
Page 51: Cisco Vg310 And Cisco Vg320 Voice Gateways Hardware Installation Guide
The Cisco VG310 and Cisco VG320 analog voice gateways support the Molex Mini-Fit Jr. 5557 Series, 8-circuit dual-row, +12V DC power connector (Molex P/N 39-01-2085). The +12V DC power input is designed to be used with an external UPS system, and it has status signals that are reported to Cisco VG310 or Cisco VG320. -
Page 52: Cisco Vg310 And Cisco Vg320 Voice Gateways Hardware Installation Guide
Figure 15: Connecting a Battery to a DC-Powered Chassis DC plug AC wall plug Battery Connect the battery to the DC input connector on your Cisco VG310 or Cisco VG320. The following figure shows the DC power connector. Figure 16: +12V DC Power Connector Pin 1... -
Page 53: Connecting To A Console Terminal Or Modem
Connecting to a Console Terminal or Modem The Cisco VG310 or Cisco VG320 analog voice gateway unit has an asynchronous serial port and an auxiliary port. These ports provide administrative access to the unit either locally (with a console terminal or a PC) or remotely (with a modem). -
Page 54: Connecting To A Serial Port With Microsoft Windows
You may encounter USB driver-related errors if you are using a PC with Microsoft Windows 7, 64-bit operating system t Note with the voice gateway. As a workaround, you can install the Cisco USB Console Driver from the Cisco software section software.cisco.com/download/ release.html?mdfid=282774223&flowid=7438&softwareid=282855122&release=3.1&relind=AVAILABLE&rellifecycle=&... -
Page 55: Connecting A Gigabit Ethernet Port To A Gigabit Ethernet Switch
Before You Begin When a modem is connected to the auxiliary port, a remote user can dial in to Cisco VG310 or Cisco VG320 and configure it. Use the console cable and the DB-9-to-DB-25 connector adapter that comes with the accessory kit. -
Page 56: Cable-Connection Procedures And Precautions
• Organize cables in bundles so that cables do not intertwine. • Inspect the cables to make sure that the routing and bend radius is satisfactory. Reposition cables, if necessary. • Install cable ties in accordance with site requirements. Cisco VG310 and Cisco VG320 Voice Gateways Hardware Installation Guide OL-31292-01... -
Page 57: Voice Cables
FXS/T3/E3 Statement 1044 The following table describes the analog FXS voice cables and connections. Color or Type Connected To Cable RJ-21 Distribution panel RJ-21-to-RJ-21 straight-through cable (not included) Cisco VG310 and Cisco VG320 Voice Gateways Hardware Installation Guide OL-31292-01... -
Page 58: Connecting The Analog Voice Interface To A Distribution Panel
RJ-11 (phone) port wires (conductors), the conductors of a cable connected to the RJ-11 port, or the associated circuit-board when the ringer is active. The ringer is activated by an incoming call. Statement 1042 Cisco VG310 and Cisco VG320 Voice Gateways Hardware Installation Guide OL-31292-01... -
Page 59: Ports, Connectors, And Pinouts
Port Color Connector/Cable Interface To Pinout Information Console Light blue RJ-45/Rollover Console and Auxiliary Port Signals and Pinouts, on page ASCII terminal Console Port to ASCII Terminal, on page 72 Cisco VG310 and Cisco VG320 Voice Gateways Hardware Installation Guide OL-31292-01... -
Page 60: Remote Terminal Connections (If Applicable)
Connect the remote PC to the modem. Step 2 Set the PC terminal emulation software requirements as follows: • 9600 baud • 8 data bits • 1 stop bit Cisco VG310 and Cisco VG320 Voice Gateways Hardware Installation Guide OL-31292-01... -
Page 61: Connecting To A Remote Ascii Terminal
ATDT Removing and Installing a CompactFlash Memory Card This section describes how to remove and replace a CompactFlash memory card in Cisco VG310 and Cisco VG320: • Removing a CompactFlash Memory Card, on page 49 •... -
Page 62: Replacing A Compactflash Memory Card
Make sure that the ejector button is fully seated until it is flush with the chassis. If the ejector button is projecting out from the panel, push it in until it is flush with the chassis. Note Cisco VG310 and Cisco VG320 Voice Gateways Hardware Installation Guide OL-31292-01... -
Page 63: Cisco Vg310 And Cisco Vg320 Voice Gateways Hardware Installation Guide
CompactFlash memory card, press the ejector button until it clicks, and reinsert the CompactFlash memory card. Caution To prevent damage to the ejector mechanism, the ejector button must remain fully seated when not being used to eject a CompactFlash memory card. Cisco VG310 and Cisco VG320 Voice Gateways Hardware Installation Guide OL-31292-01... -
Page 64: Cisco Vg310 And Cisco Vg320 Voice Gateways Hardware Installation Guide
Installing the Cisco VG310 and Cisco VG320 Voice Gateways Replacing a CompactFlash Memory Card Cisco VG310 and Cisco VG320 Voice Gateways Hardware Installation Guide OL-31292-01... -
Page 65: Configuring The Cisco Vg310 And Cisco Vg320 Voice Gateways
C H A P T E R Configuring the Cisco VG310 and Cisco VG320 Voice Gateways This chapter describes how to power up the Cisco VG310 and Cisco VG320 and perform the initial configuration in the following sections: • Getting Your Network Information, page 53 •... -
Page 66: Power-On Procedure
Using Cisco Configuration Professional Express. • Cisco CLI—This enables you to configure the initial settings for the voice gateway manually. If you see the following messages, it indicates that the gateway has booted and is ready for initial configuration using the CLI: --- System Configuration Dialog --- At any point you may enter a question mark '?' for help. -
Page 67: Performing The Initial Configuration On The Voice Gateway
Using the setup Command Facility Before You Begin The setup command facility prompts you to enter the information that is needed to configure Cisco VG310 or Cisco VG320 quickly. The facility steps you through a initial configuration, including LAN and WAN interfaces. -
Page 68: Cisco Vg310 And Cisco Vg320 Voice Gateways Hardware Installation Guide
Step 11 Respond to the following prompts as appropriate for your network: Configuring interface GigabitEthernet0/1: Configure IP on this interface? [yes]: yes IP address for this interface [10.10.10.12]: Cisco VG310 and Cisco VG320 Voice Gateways Hardware Installation Guide OL-31292-01... -
Page 69: Cisco Vg310 And Cisco Vg320 Voice Gateways Hardware Installation Guide
CLI and you have just completed the initial configuration. Router> At this stage, you have the following two options: • Run the setup command facility again, and create another configuration: Router> enable Password: password Router# setup Cisco VG310 and Cisco VG320 Voice Gateways Hardware Installation Guide OL-31292-01... -
Page 70: Using Cisco Configuration Professional Express
Using Cisco IOS CLI—Manual Configuration Before You Begin This section shows how to access the CLI to perform the initial configuration on Cisco VG310 or Cisco VG320. If the system configuration dialog message does not appear, a default configuration file was installed on the voice gateway before it was shipped. -
Page 71: Troubleshooting Cisco Vg310 And Cisco Vg320
Enter enable to enter privileged EXEC mode: Router> enable Router# What to Do Next See the Using the Cisco IOS CLI to Perform Initial Configuration section in the Cisco VG310 and Cisco VG320 Voice Gateways Software Configuration Guide to complete the initial configuration settings on Cisco VG310 or Cisco VG320. - Page 72 Console screen display freezes Console fault. Reset or replace the console. Software error. Repeat the power-on procedure. Faulty Cisco VG310 or Cisco Contact Cisco or your Cisco VG320. reseller. Obtaining Technical Assistance. Cisco VG310 and Cisco VG320 Voice Gateways Hardware Installation Guide OL-31292-01...
-
Page 73: Getting Software Licenses For Cisco Vg310 And Cisco Vg320 Voice Gateways
When you order a new Cisco VG310 or a Cisco VG320, it is shipped with the software image and the corresponding permanent licenses preinstalled for the packages and features that you specified. The software does not need to be activated or registered before use. -
Page 74: Rma License Transfer
• Simple Network Management Protocol— This should be used to install and manage software licenses. RMA License Transfer To transfer a software license from a failed device to a new device, go to the Cisco licensing portal at: http:/ /www.cisco.com/go/license You need the serial number of the defective device to initiate an RMA replacement license. -
Page 75: Appendix A Technical Specifications
A P P E N D I X Technical Specifications The following sections list the technical specifications for the Cisco VG310 and Cisco VG320: • Physical Specifications, page 63 • Power Specifications, page 64 • Ports, page 64 • Environmental Specifications, page 65 •... -
Page 76: Power Specifications
Auxiliary port RJ-45 connector USB port One USB Type A, USB 2.0 compliant, high speed (480 Mb/s), 2.5 W (500 mA maximum) 10/100/1000 Gigabit Two RJ-45 connectors (GE0/0, GE0/1) Ethernet Cisco VG310 and Cisco VG320 Voice Gateways Hardware Installation Guide OL-31292-01... -
Page 77: Environmental Specifications
(Typical/Maximum) Transportation and Storage Description Value Nonoperating –40 °F to 158 °F (–40 °C to 70 °C) temperature Nonoperating humidity 5% to 95% Nonoperating altitude 15,000 ft (4570 m) Cisco VG310 and Cisco VG320 Voice Gateways Hardware Installation Guide OL-31292-01... -
Page 78: Regulatory Compliance
Technical Specifications Regulatory Compliance Regulatory Compliance This section provides the regulatory compliance pertaining to the Cisco VG310 and Cisco VG320 Analog Voice Gateways. Safety Compliance • IEC 60950-1, Safety of information technology equipment • EN 60950-1, Safety of information technology equipment •... - Page 79 • TCVN 7189 • VCCI: V-3 For detailed compliance information, see the Regulatory Compliance and Safety Information Guide Note pertaining to the Cisco VG310 and Cisco VG320 Analog Voice Gateways. Cisco VG310 and Cisco VG320 Voice Gateways Hardware Installation Guide OL-31292-01...
- Page 80 Technical Specifications Regulatory Compliance Cisco VG310 and Cisco VG320 Voice Gateways Hardware Installation Guide OL-31292-01...
-
Page 81: Appendix B Cable Specifications And Information
USB Type A-to-USB 5-Pin Mini Type B Cable, page 82 Console and Auxiliary Port Signals and Pinouts Cisco VG310 and Cisco VG320 come with the cable and adapters you need to connect a PC, an ASCII terminal, or a modem to your Cisco VG310 or Cisco VG320. -
Page 82: Console Port Signals And Pinouts
Table 17: Console Port Signaling and Cabling Using a DB-25 Adapter Console Port (DTE) RJ-45-to-RJ-45 Rollover Cable RJ-45-to-DB-25 Console Device Terminal Adapter Signal RJ-45 Pin RJ-45 Pin DB-25 Pin Signal Cisco VG310 and Cisco VG320 Voice Gateways Hardware Installation Guide OL-31292-01... -
Page 83: Auxiliary Port Signals And Pinouts
Table 18: Auxiliary Port Signaling and Cabling Using a DB-25 Adapter Auxiliary Port (DTE) RJ-45-to-RJ-45 Rollover Cable RJ-45-to-DB-25 Modem Modem Adapter Signal RJ-45 Pin RJ-45 Pin DB-25 Pin Signal Pin 1 is connected internally to pin 8. Cisco VG310 and Cisco VG320 Voice Gateways Hardware Installation Guide OL-31292-01... -
Page 84: Identifying A Rollover Cable
(Figure 20.) If your cable is from Cisco Systems, pin 1 is white on one plug, and pin 8 is white on the opposite plug. -
Page 85: Gigabit Ethernet Connector Pinouts (Rj-45)
RJ-45 Pin DB-9 Pin Signal Pin 1 is connected to pin 8 inside the Cisco VG310 or Cisco VG320. Gigabit Ethernet Connector Pinouts (RJ-45) The following figure shows the Gigabit Ethernet RJ-45 connector for the Gigabit Ethernet cable. The RJ-45 ports are capable of operating in both 100BASE-T and 1000BASE-T modes. -
Page 86: Isdn Bri Interface
NT1. Use a BRI cable (not included with...) to connect BRI ports on WAN interface cards (WICs) or on high-speed WICs (HWICs) directly to an ISDN. Cisco VG310 and Cisco VG320 Voice Gateways Hardware Installation Guide OL-31292-01... -
Page 87: Isdn Bri Pinouts
The following table lists the connector signals and pinouts for an ISDN BRI S/T port. Table 22: ISDN BRI S/T Port Signals and Pinouts (RJ-45) 8-Pin Polarity – – Cisco VG310 and Cisco VG320 Voice Gateways Hardware Installation Guide OL-31292-01... -
Page 88: E&M Pinouts
— — — — signaling battery M-lead Signaling input Ring, — — — — audio input R or Ring, audio i n put / o ut p ut output Cisco VG310 and Cisco VG320 Voice Gateways Hardware Installation Guide OL-31292-01... -
Page 89: Analog Voice Rj-21 Pinouts
Figure 23: RJ-21 Connector Wiring The following table lists the pinouts for the RJ-21 connector. Table 25: Pinouts for FXS and FXO Voice Ports Pair Ring Conductor Tip Conductor Cisco VG310 and Cisco VG320 Voice Gateways Hardware Installation Guide OL-31292-01... - Page 90 Cable Specifications and Information Analog Voice RJ-21 Pinouts Pair Ring Conductor Tip Conductor Cisco VG310 and Cisco VG320 Voice Gateways Hardware Installation Guide OL-31292-01...
-
Page 91: Serial Connection Signals And Pinouts
For connection to a Cisco VG310 or Cisco VG320 serial port, use the EIA/TIA-232 serial transition cable with the Cisco 12-in-1 connector on one end and a DB-25 connector on the other (Figure 24). The DB-25 Cisco VG310 and Cisco VG320 Voice Gateways Hardware Installation Guide... -
Page 92: Eia/Tia-449 Connections
25-pin EIA/TIA-232 connector). To make a connection to a Cisco VG310 or a Cisco VG320 voice gateway serial port, use the EIA/TIA-449 serial transition cable with the Cisco 12-in-1 connector on one end and a DB-37 connector on the other (Figure 25). -
Page 93: X.21 Connections
EIA/TIA-232. Use the X.21 serial transition cable (not included with...) the Cisco 12-in-1 connector on one end and a DB-15 connector on the other (Figure 27). The DB-15 connector can be male for DTE or female for DCE. To order... -
Page 94: Usb Type A-To-Usb 5-Pin Mini Type B Cable
The RJ-45 console port uses an eight-pin RJ-45 connector (Table 25 and Table 26). The supplied RJ-45-to-DB-9 adapter cable is used to connect the console port of Cisco VG310 or Cisco VG320 to a console PC. Provide a RJ-45-to-DB-25 female DTE adapter if you want to connect the switch console port to a terminal. - Page 95 Cable Specifications and Information USB Type A-to-USB 5-Pin Mini Type B Cable Switch Console Port RJ-45-to-DB-25 Terminal Console Device (DTE) Adapter No connection No connection Cisco VG310 and Cisco VG320 Voice Gateways Hardware Installation Guide OL-31292-01...
- Page 96 Cable Specifications and Information USB Type A-to-USB 5-Pin Mini Type B Cable Cisco VG310 and Cisco VG320 Voice Gateways Hardware Installation Guide OL-31292-01...
Need help?
Do you have a question about the VG310 and is the answer not in the manual?
Questions and answers