Table of Contents
Advertisement
Installation & Servicing Instructions
G l o w - w o r m B a c k B o i l e r U n i t o n l y
References in these instructions to British Standards and Statutory
Regulations/Requirements apply only to the United Kingdom.
One Contact Local Service
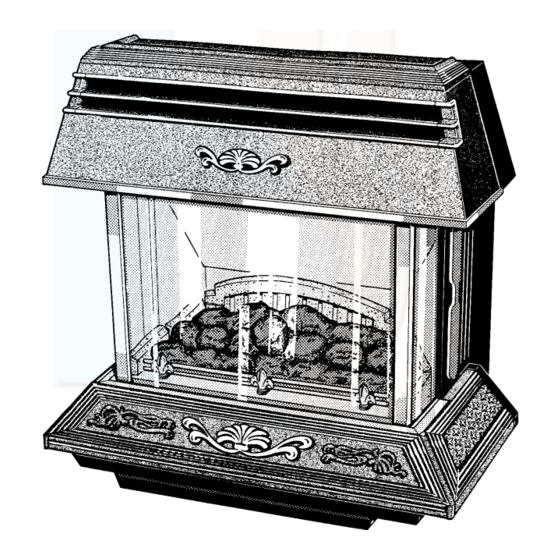
Supplied By www.heating spares.co Tel. 0161 620 6677
T o b e l e f t w i t h t h e u s e r
F o r u s e w i t h
a s p e c i a l l y d e s i g n e d
FIRE G.C No. 37 314 16
For Ireland the rules in force must be used.
This is a Cat I
Customer Services:
Tel: (01773) 828100
Fax: (01773) 828070
2
Appliance
2H
Hepworth Heating Ltd.,
Nottingham Road, Belper, Derbyshire. DE56 1JT
General/Sales enquiries:
Tel: (01773) 824141 Fax: (01773) 820569
221100C.08.98
BS 6332
BS 5258
Advertisement
Table of Contents

Related Manuals for Glow-worm Homeglow 2 BBU


Summary of Contents for Glow-worm Homeglow 2 BBU
- Page 1 221100C.08.98 Installation & Servicing Instructions T o b e l e f t w i t h t h e u s e r F o r u s e w i t h a s p e c i a l l y d e s i g n e d G l o w - w o r m B a c k B o i l e r U n i t o n l y FIRE G.C No.
- Page 2 All dimensions on diagrams are in millimetres (except as noted) Where no British Standards exist, materials and If this fire front is to be fitted to a Glow-worm back equipment should be fit for their purpose and of suitable boiler WITHOUT a combustion products discharge quality and workmanship.
- Page 3 Manufacturer’s instructions must not be taken as overriding statutory requirements. 1.4 Fire Front Location This fire front can only be fitted to a Glow-worm CE Mark 45/2 or 56/2 back boiler unit which itself has been The CE mark on this appliance shows compliance with:- installed in accordance with the Glow-worm Installation and Servicing Instructions.
- Page 4 2 T y p e s o f I n s t a l l a t i o n a n d F l u e Note. Refer to Section 2 in the Back Boiler Installation 13mm MIN book before starting. NON- COMBUSTIBLE MATERIAL 2.1 With Hearth...
- Page 5 3 F i r e F r o n t P r e p a r a t i o n INSULATION CONTROL KNOB FLUE SPIGOT CASING TRIM FUEL COALS SUPPORT GRID BODY ASSEMBLY HEARTH CASING CASTING FIXING PACK INCLUSIVE OF BACK BOILER SENSING TUBE GLASS...
- Page 6 3 F i r e F r o n t P r e p a r a t i o n 3.2 Flue Spigot Assembly Note. This is marked “Homeglow BBU”. FLUE SPIGOT Leave the fire front sitting in the base tray. Secure the spigot assembly to the fire front back with the self tapping screws provided, from the loose items pack, see diagram 3.3.
- Page 7 4 E l e c t r i c a l W i r i n g 4.1 General 4.3 Testing The fire front electrical supply, 230V~50Hz, is taken Checks to ensure electrical safety should be carried out from the back boiler electrical control box. by a competent person.
- Page 8 5 I n s t a l l a t i o n 5.1 Positioning the Fire Front Remove the fire front from the base tray. FLUE Place the fire front onto the back boiler air duct, check COLLECTOR that the fire front spigot is central in the flue collector ASSEMBLY assembly, push into contact with the fire front fixing face, see diagram 5.1.
- Page 9 5 I n s t a l l a t i o n 5.2 Gas and Electrical Connection JOINT (C) Place the tubing nut and olive, from the loose items pack, onto the prepared end of the gas supply tube, see diagram 5.4.
- Page 10 6 L i g h t i n g a n d T e s t i n g a n d F i t t i n g I n t e r n a l P a r t s Remove the pressure test point screw and fit a suitable pressure gauge, see diagram 6.2.
- Page 11 6 L i g h t i n g a n d T e s t i n g a n d F i t t i n g I n t e r n a l P a r t s 6.2 Internal Parts - Fitting COLOURED CAUTION.
- Page 12 6 L i g h t i n g a n d T e s t i n g a n d F i t t i n g I n t e r n a l P a r t s Note: Refer to GLASS and GRID ARRANGEMENT Note: Refer to GLASS and GRID ARRANGEMENT L.H.
- Page 13 6 L i g h t i n g a n d T e s t i n g a n d F i t t i n g I n t e r n a l P a r t s PIN FITS INTO HOLE...
- Page 14 6 L i g h t i n g a n d T e s t i n g a n d F i t t i n g I n t e r n a l P a r t s Note: 'Coal 5' sits on top of 'Coal 4' at R.H.S...
- Page 15 6 L i g h t i n g a n d T e s t i n g a n d F i t t i n g I n t e r n a l P a r t s 6.3 Heat Settings 6.4 Test for Clearance of Products Light the fire front as relevant part of Section 6.1.
- Page 16 6 L i g h t i n g a n d T e s t i n g a n d F i t t i n g I n t e r n a l P a r t s Test Where No fan is Present Close all outside doors and doors and windows in the room in which the appliance is installed.
- Page 17 6 L i g h t i n g a n d T e s t i n g a n d F i t t i n g I n t e r n a l P a r t s DIVERTER PLATE SIDE VIEW...
- Page 18 7 I n s t r u c t i o n s t o U s e r Hand the Instructions for Use to the user and instruct in the safe and economical use of the fire and back boiler, including lighting the fire with a spill, see below.
- Page 19 8 S e r v i c i n g a n d R e p l a c e m e n t o f P a r t s 8.2 Coal Effect Pieces, Supports and Glass Notes. Bases (a) To ensure the continued efficient and safe operation of the appliance it is recommended that it is checked and Remove the glass panel as above.
- Page 20 8 S e r v i c i n g a n d R e p l a c e m e n t o f P a r t s 8.3 Burner and Injectors 8.6 Ignition Lead Disconnect the supply pipe unions at the injectors, the Remove burner as Section 8.3.
- Page 21 8 S e r v i c i n g a n d R e p l a c e m e n t o f P a r t s 8.7 Gas Tap and Piezo GAS TAP BRACKET SECURING SCREW Note.
- Page 22 8 S e r v i c i n g a n d R e p l a c e m e n t o f P a r t s Note: COVER To carry out the work below, first generally follow the instructions in Section 3.1 and 6.1.
- Page 23 9 F a u l t F i n d i n g 9.1 Fire Front Ignition Remove casing as in Section 3.1 and refer to diagram 9.4. 9.2 Electrical 2 x 25W LAMPS Checks on the mains electrical system of the fire, that is, EDISON SCREW earth continuity, polarity and resistance to earth, should TYPE SES...
- Page 24 9 F a u l t F i n d i n g Isolate the electrical supply and remove the socket from the plug. Connect Voltmeter across the socket pins 'L' and 'N'. Turn on the electrical supply. Is Voltage between 216V and 240V? Refer to B.B.U.
- Page 25 9 F a u l t F i n d i n g START HERE Fire will not light Check that gas is available. Turn off appliance tap; turn Does the pilot light using a match. on appliance tap and observe spark Change pilot filter.
- Page 26 9 F a u l t F i n d i n g 9.3 Thermocouple Remove casing as described in Section 3.1. To test a thermocouple, a meter with a range of 0 to 30 mV is required together with a thermocouple interrupter test unit.
- Page 27 Disconnect appliance thermocouple from the gas tap. Check that all connections are clean and in good condition. Fit test meter interrupter into the magnet unit. Fit appliance thermocouple into the test meter interrupter. Hold down control tap in ignition position. Ignite burner, allowing thermocouple to attain operating temperature.
- Page 28 162 208 When replacement parts are required please apply to your local supplier. Please quote the name of the fire front, “Glow-worm Homeglow 2 BBU”. The GC No. 37 314 16 and serial number, to be found on the front after the Front Decorative plate is removed.
- Page 29 1 0 R e p l a c e m e n t P a r t s Diagram 10.1 221100C Supplied By www.heating spares.co Tel. 0161 620 6677...
- Page 30 “ ” is against its setting point, that is, set to “Off”. As these fire fronts may be fitted to a Glow-worm 45, Push in slightly and turn gas control knob “A” 56, 45R or 56R back boiler units WITHOUT a anticlockwise until “...
- Page 31 11 Supplementary Instructions INSET: Showing a Combustion Products Discharge Safety Device fitted. 'E' PILOT BURNER SETTING 'F' VIEWING POINT WINDOW SETTING POINT GAS VALVE 'D' PIEZO CONTROL THERMOSTAT UNIT KNOB CONTROL PILOT/IGNITION BUTTON KNOB MAIN BURNER Diagram 11.1 BOILER CONTROLS TO BOILER EARTH PERMANENT...
- Page 32 Control of Substances Hazardous to Health Information for the Installer and Service Engineer Under Section 6 of The Health and Safety at Work Act 1974, we are required to provide information on substances hazardous to health. The adhesives and sealants used in this appliance are cured and give no known hazard in this state. FUELBEDS, ARTIFICIAL FUEL - after handling wash hands thoroughly.
Need help?
Do you have a question about the Homeglow 2 BBU and is the answer not in the manual?
Questions and answers