Hytera X1e User Manual
Hytera x1e two-way radio user manual
Hide thumbs
Also See for X1e:
- Owner's manual (19 pages) ,
- System planner manual (182 pages) ,
- Upgrade manual (44 pages)
Table of Contents

Related Manuals for Hytera X1e


Summary of Contents for Hytera X1e
- Page 1 Preface Thanks for your favor in our product. To derive optimum performance from the product, please read this manual and the supplied Safety Information Booklet carefully before use. This manual is applicable to the following model:...
-
Page 2: Copyright Information
Squelch Functions marked with no function icons are available on both This technology can remove excessive background noises, analog and digital channels. improving your communication quality. Copyright Information Hytera is the trademark or registered trademark of Hytera... - Page 3 If you have any suggestions or would like to learn more any manner without the prior written consent of the Company. details, please visit our website at: http://www.hytera.com. The AMBE+2 voice coding technology embodied in this...
-
Page 4: Fcc Regulations
FCC Regulations control over their RF exposure to qualify for the higher exposure limits. Federal Communication Commission (FCC) requires that all RF Radiation Profile radio communication products should meet the requirements set forth in the above standards before they can be marketed Radio Frequency (RF) is a frequency of electromagnetic in the U.S, and the manufacturer shall post a RF label on the radiation in the range at which radio signals are transmitted. - Page 5 the limits for a Class B digital device, pursuant to part 15 of approved by the party responsible for compliance could void FCC Rules. These limits are designed to provide reasonable the user’s authority to operate the equipment.” protection against harmful interference in a residential EU Regulatory Conformance installation.
-
Page 6: Table Of Contents
Contents Checking Items in the Package ---------------------------2 Scan -----------------------------------------------------------------11 Product Overview ---------------------------------------------3 Talk Around --------------------------------------------------------11 Product Controls --------------------------------------------------3 Monitor ---------------------------------------------------------12 Programmable Keys ---------------------------------------------4 Squelch Off ---------------------------------------------------12 Before Use------------------------------------------------------5 Adjust Squelch Level ---------------------------------------12 Charging the Battery ---------------------------------------------5 One Touch Call ----------------------------------------------------13 Assembling Accessories ----------------------------------------6 Telemetry ------------------------------------------------------13... -
Page 7: Checking Items In The Package
Checking Items in the Package Please unpack carefully and check that all items listed below are received. If any item is missing or damaged, please contact your dealer. Radio Unit Battery Charger Antenna Power Adapter Strap Manuals Note: The antenna may vary with different frequency bands. And the frequency band is marked on the label of antenna;... -
Page 8: Product Overview
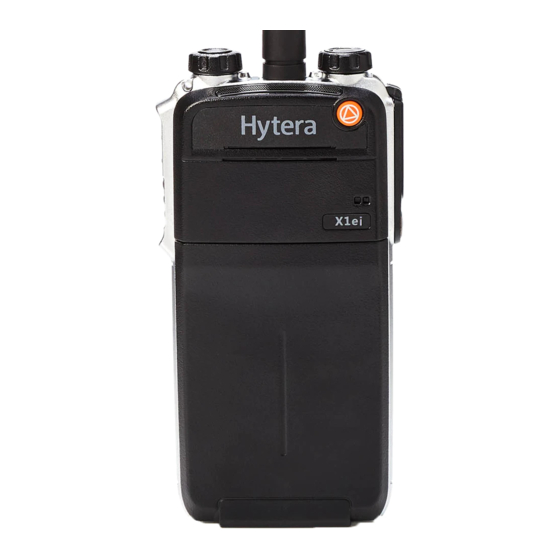
Product Overview Product Controls Part Name Accessory Jack Radio On-Off/Volume Control Knob LED Indicator Channel Selector Knob SK (Side Key) PTT Key Speaker Antenna TK (Top Key) Microphone Battery... -
Page 9: Programmable Keys
Product Overview Programmable Keys To summon help in emergent 11 Emergency situations For enhanced convenience, you may request your dealer to To temporarily adjust the squelch Adjust Squelch Level program the keys SK and TK as shortcuts to the functions threshold required for the radio listed below: to unmute... -
Page 10: Before Use
Long and short press of a key can be Power off the radio before charging it. assigned with different functions by Use only the charger and battery specified by Hytera. Charger your dealer. LED can indicate the charging process. T h e T K i s p r o g r a m m e d a s t h e... -
Page 11: Assembling Accessories
Before Use The charging process initiates when LED glows red, and is completed when LED glows green. Note: To achieve optimal battery performance, please charge the battery for 3 hours before initial use. LED Indicator To remove the antenna, rotate it counter-clockwise. LED Indicator Charger Status Assembling the Battery... - Page 12 Before Use Assembling the Audio Accessory Open the accessory jack cover as the arrow shown. Align the plug with the accessory jack. Tighten the screw on the plug. To remove accessories, loosen the screw. Caution: Please attach the accessory properly; otherwise, waterproof performance of the radio may get affected.
-
Page 13: Status Indication
Status Indication Basic Operations LED Indicator Turning the Radio On/Off The top LED indicator will help you easily identify the current Rotate the Radio On-Off/Volume Control knob clockwise/ radio status. counter-clockwise until a click is heard to turn the radio on/off. LED Indication Radio Status Adjusting the Volume... -
Page 14: Switching The Channel Mode
Call Basic Operations Switching the Channel Mode Note: Your dealer may preset a contact for Each channel can be programmed as either analog channel each digital channel. The preset contact or digital channel. If the current zone includes both analog and could be a Private Call contact, a Group digital channels, you may quickly switch between digital and Call contact or an All Call contact. -
Page 15: Group Call
Call Group Call Note: You cannot respond to an All Call. Transmitting a Group Call Calls on Analog Channels In standby mode, hold down the PTT key to transmit a Group To transmit on an analog channel, hold down the PTT key and Call to the Group Call contact preset for the current channel. -
Page 16: Functions And Operations
Functions and Operations Adjust Power Level After the feature is enabled, your radio will scan according to the scan list set for the channel on which scanning With this feature, you may switch power levels quickly. starts. The scanning process is as follows: Generally, we recommend you to adopt low power for battery ●... -
Page 17: Monitor
Functions and Operations Press the programmed Talk Around key to enable the feature pitched tone sounds). To disable the feature, press this (a high-pitched tone sounds). To disable the feature, press this key again (a low-pitched tone sounds). key again (a low-pitched tone sounds). ●... -
Page 18: One Touch Call
Functions and Operations One Touch Call Radio Enable You can enable the radio of a Private Call contact remotely You can request your dealer to set the One Touch Call key. By and allow it to be used normally. pressing such programmed key, you can make corresponding Radio Disable services detailed as below: You can disable the radio of a Private Call contact... -
Page 19: Roam
Functions and Operations ● To supervise the device via a third-party software must be assigned to the channel via the programming software. If the Telemetry feature is enabled for the radio by your In addition, the Emergency type, Emergency ID type and dealer, you can supervise the device connected with the Emergency mode are settable via the programming software. -
Page 20: Emergency Mode
Functions and Operations In this mode, press the programmed Emergency ID Type Description E m e r g e n c y k e y t o g o t o t h e No signaling is used when the None Revert Channel, and speak into the radio sends alarm information. - Page 21 Functions and Operations Alarm with Call (None & HDC1200) When the LED flashes orange, your radio is receiving. To exit the Emergency mode, long press the programmed Operation: Emergency key. Press the programmed Emergency key to send alarm information, and the LED glows red. (None: If “Local Note: Your dealer may set the number of Emergency Alarm”...
-
Page 22: Man Down
Functions and Operations Alarm with Call When the LED flashes orange, your radio is receiving. If the preset Voice Cycles expire, you can hold down the PTT Operation: key to make the emergency call again (the LED glows red). Press the programmed Emergency key to send alarm After the emergency call is transmitted, please release the PTT information. -
Page 23: Scrambler /Encrypt
Functions and Operations ● Turn on the radio if the feature is enabled via the to enable the feature, or exit the channel to disable the programming software. feature. Your radio will sound a pre-alert tone if it is positioned Lone Worker aslant for a preset time period, and will enter the Emergency mode if you do not place it vertically within... -
Page 24: Battery Strength Indicator
Functions and Operations Busy Channel Lockout Press the programmed Lone Worker key (a low-pitched tone sounds). If enabled via the programming software, this feature can prevent your radio interfering with other transmitting terminals Note: If the Lone Worker feature is not on the same channel. -
Page 25: Pseudo Trunking
Functions and Operations will transfer its positioning information to the system when the Pseudo Trunking system requires such information. If enabled via the programming software, If your radio operates on a channel with this feature enabled and one time slot is already occupied, it can transmit and receive on the other free time slot, allowing you to communicate timely under emergent situations. -
Page 26: Troubleshooting
Troubleshooting Phenomena Analysis Solution The battery may be improperly installed. Remove the battery and attach it again. The battery may run out. Recharge or replace the battery. The product can not be The battery may suffer from poor Clean the battery contacts. If the problem can not be powered on. - Page 27 Troubleshooting You may be interrupted by products Change the frequency, or adjust the squelch level. Irrelevant communication using the same frequency. or noise is heard on the The product may be set with no Set signaling for all member products to avoid interference channel.
-
Page 28: Care And Cleaning
Care and Cleaning To guarantee optimal performance as well as a long service life Caution: Power off and remove the battery of the product, please follow the tips below. before cleaning. Product Care ● Do not pierce or scrape the product with any edged instruments or hard objects.
Need help?
Do you have a question about the X1e and is the answer not in the manual?
Questions and answers