Table of Contents
Advertisement
Quick Links
Advertisement
Table of Contents

Summary of Contents for Grundig BABY WATCH G-BCAM-01
- Page 1 BABY WATCH BCAM AUS GUTEM GRUND...
-
Page 2: Safetyandinformation
This video camera is not a toy; do not let the children play with it. For this, you need a local network access and a GRUNDIG television This device is for transmission of on which the "BABYWATCH" appli- image/sound signals within a cation is installed. - Page 3 OVERVIEW _______________________________________ 2 0 ENGLISH...
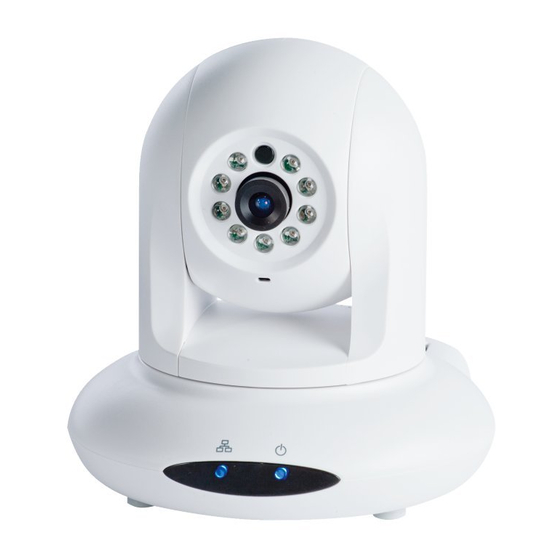
- Page 4 OVERVIEW _______________________________________ Camera lens and its cover. DO... DIR, no function. WPS/Reset, is the button to Brightness sensor determines the record the camera to the router; brightness of the location of the (If Router WPS supports, you camera. can make wireless connection Infrared LEDs turn on if the by pressing and holding the...
-
Page 5: Assemblyandconnection
ASSEMBLYANDCONNECTION ___________ You can position your GRUNDIG Remove the safety screw in the camera in a suitable place or mount mounting bracket (A) and loosen it onto the wall. Packaging of the the connection fittings (B). device contains an mounting brack- et and fixing elements. - Page 6 ASSEMBLYANDCONNECTION ___________ Drill the holes on the wall and Adjust the camera position onto insert the given plugs into these the mounting bracket and tighten holes. the safety screw (A). Fix the mounting bracket with the 4 supplied screws to the wall. For the WLAN operation, screw the WLAN antenna onto the de- vice;...
-
Page 7: Network Installation
NETWORKINSTALLATION _ _________________ Connectthecamerato Connectionofthecamera thehomenetworkand withaLANconnection signin andsigningin Note: In order to ensure that the camera Many home networks are Dy- view is displayed on your TV screen namic Networks. If you have over the "BABYWATCH" applica- a dynamic network, you must tion, your TV and Camera should be use a DSL modem that supports connected to the same network. - Page 8 NETWORKINSTALLATION _ _________________ Select the »Search Camera« line Last character/number can be de- with » « or » « and confirm it leted with » « (blue). Λ ▯▯▯▯ with »OK«. All entries can be deleted with – After a while, the found camera »...
- Page 9 NETWORKINSTALLATION _ _________________ RegistrationoftheCam- Enter the camera settings with »OK« and select the »Set Wire- eraviatheWirelessNet- less Connection« line with the » « work“WLAN” or » « and confirm with »OK«. Λ Notes: – After a while, available wireless In order to make the wireless networks will be displayed on network “WLAN”...
-
Page 10: Operationofthecamera
OPERATIONOFTHECAMERA _____________ AdjustingtheImagesharp- Close – function ends and the device returns to the ness current television show. Adjust the image sharpness by Select the desired mode with » « < using the adjustment ring on the or » « and confirm with »OK«. >... - Page 11 OPERATIONOFTHECAMERA _____________ Selectingthepositionof Turnthepicture–vertically theinsetpicture While “live streaming” is shown on the screen, turn the picture In the Widget mode you can select vertically with » « (green). the position at which the inset image ▯ is displayed on the screen. Turnthepicture–horizon-...
-
Page 12: Motion Detection Settings
SETTINGS _________________________________________ Notificationmodeoptions Select the »Movement Rate (%)« line with the » « or » « button Λ Deactivation/Activationofthe and adjust the movement rate MotionDetectionFunction with » « or » «. < > Note: While “live streaming” is shown Movement rate is the proportion on the screen, select the »Set- of the size of the moving object tings«... - Page 13 SETTINGS _________________________________________ Deactivation/Activationof SavingtheSettings theSoundDetection Select the push button »OK« with » « or » « and confirm with If the notification should be only Λ »OK«. made by video monitoring, select the »x« character in the box next Note: to the »Enable Sound Detection«...
-
Page 14: Changing The Password
SETTINGS _________________________________________ Changingthepassword Note: If the new password will not be While "live streaming" is shown saved, select the push button on the screen, select the »Set- »Cancel« with » « or » « and Λ tings« menu with » «... - Page 15 SETTINGS _________________________________________ Selectingthebackground Selectingothercameras imageforthemenu inthelocalnetwork While "live streaming" is shown While "live streaming" is on the screen, select the »Set- displayed on the screen, select tings« menu with » « (red) button. the »Settings« menu with the » « ▯...
- Page 16 1999/5/EC and 2011/65/EU. personal houses , there is general Complete and accurate text of the approval requirement for public use. Declaration of Conformity (DOC) can be accessed via the GRUNDIG ForthecustomersinNor- page on www.grundig.com/down- way: load/doc. This subparagraph is not valid for...
-
Page 17: Environmental Note
INFORMATION _________________________________ Maximum 100 mW EIRP. For the Environmentalnote collection of and compliance with This product has the telemetry data and the cal- been made from culation systems, the device is al- high-quality parts lowed to be used in the outdoors and materials which where it is located (at the same can be re-used and...


Need help?
Do you have a question about the BABY WATCH G-BCAM-01 and is the answer not in the manual?
Questions and answers