Table of Contents
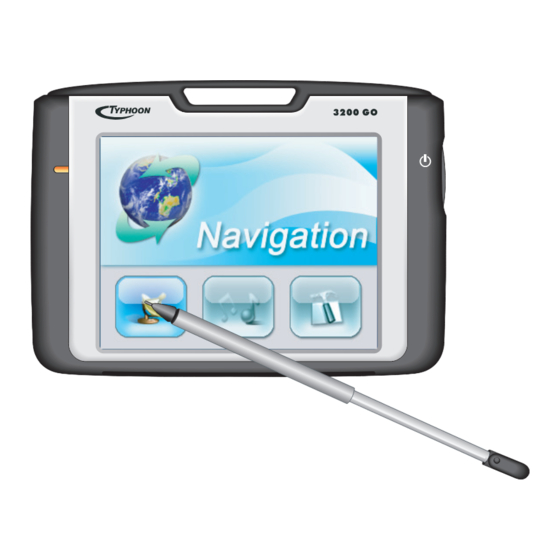
Advertisement
Advertisement
Table of Contents
Troubleshooting

Related Manuals for TYPHOON MyGuide 3200 Go

Summary of Contents for TYPHOON MyGuide 3200 Go
- Page 2 Trademarks All brand and product names are trademarks or registered trademarks of their respective companies. Note The information in this document is subject to change without notice. Great care was taken in preparing this manual. Constant product development may mean that some information is not entirely up-to-date.
-
Page 3: Table Of Contents
Table of Contents Precautions and Notices............... iii Getting Started ................. 1 1.1 Performing the Initial Start Up .............. 1 1.2 Connecting to AC Power and Charging the Battery ......3 1.3 Using Your Device in a Vehicle............4 Using the Car Holder................4 Connecting the Car Charger .............. - Page 4 MP3 Player..................23 4.1 Starting and Exiting the MP3 Player........... 23 4.2 Playing MP3 Files................24 MP3 Playback Control................ 25 4.3 Using Play Lists .................. 26 Creating a Play List ................26 Opening a Play List ................27 Managing Your Play Lists..............28 4.4 Equalizer.....................
-
Page 5: Precautions And Notices
Precautions and Notices For your own safety, do not operate the controls of the product while driving. Use this product prudently. The product is intended for use solely as a navigation aid. It is not for precise measurement of direction, distance, location or topography. - Page 6 A car holder is needed when using the device in a car. Be sure that you place the device in an appropriate place, so as not to obstruct the driver’s view, or deployment of airbags. Do not mount where the driver’s Do not place unsecured field of vision is blocked.
-
Page 7: Getting Started
Getting Started This chapter tells you step by step how to perform the initial startup and introduces the components of your device. 1.1 Performing the Initial Start Up 1. Slide the ON/OFF switch to the ON (right) position. CAUTION: Always leave the ON/OFF switch in the ON position for normal operation. 2. - Page 8 3. The “Date & Time” screen appears. Tap the appropriate arrow button to select the time zone, date, and time. Then tap to continue. NOTE: You can change the time zone, date, and time later on by tapping Setting Date&Time. (See section 3.5 for details.) 4.
-
Page 9: Connecting To Ac Power And Charging The Battery
1.2 Connecting to AC Power and Charging the Battery NOTE: When charging the battery for the very first time, you should charge it for at least 8 hours. When you connect the AC adapter to charge the battery after the battery power has been fully depleted, wait for at least one minute if you need to turn on the device. -
Page 10: Using Your Device In A Vehicle
1.3 Using Your Device in a Vehicle Using the Car Holder CAUTION: When placing the car holder, make sure that the device does not obstruct the driver’s view, or interfere with the operation of vehicle airbags and safety devices. If the car’s windshield is tinted with a reflective coating, an external antenna (optional) may be needed to route the antenna to the top of the car through a window. -
Page 11: Connecting The Car Charger
Connecting the Car Charger The car charger supplies power to your device when you are using the device in a car. CAUTION: To protect your device against sudden surges in current, connect the car charger only after the car engine has been started. 1. -
Page 12: Understanding Hardware Features
1.4 Understanding Hardware Features NOTE: Depending upon the specific model purchased, the color of your device may not exactly match the device shown in this manual. Front Components Component Description See Also Charge Indicator Glows bright amber to indicate that the Section 1.2 battery is charging, and turns green when the battery is fully charged. -
Page 13: Back Components
Back Components Component Description See Also Stylus Tap the touch screen to make selections and enter Section 2.2 information. Pull the stylus out of its slot to use it, and store it in the slot when not in use. External This connector (under rubber dust cover) allows Antenna use of an optional external antenna with magnetic... -
Page 14: Left-Side Components
Left-Side Components Ref Component Description See Also Headphone Connects to stereo headphones. Connector Right-Side Components Component Description See Also Power Button Turns the device on and off. Section 2.1... -
Page 15: Top Components
Top Components Component Description See Also Receives signals from the GPS satellites GPS Antenna overhead. SD/MMC Slot Accepts an SD (Secure Digital) or MMC Section 2.3 (MultiMediaCard) card for accessing data such as map data and MP3 music. Bottom Components Component Description See Also... -
Page 17: Basic Skills
Basic Skills This chapter familiarizes you with the basic operations of your device such as using the Home screen and the hardware components. 2.1 Turning Your Device On and Off Use the power button on the side of your device to turn on and off your device. -
Page 18: Using The Stylus
Enables you to play MP3 files. Chapter 4 Allows you to customize system settings. Chapter 3 Whenever you quit an application, you are back to the Home scr een. Using the Stylus The stylus is your input device. You use it to navigate and select objects on the scre en. -
Page 19: Using A Sd/Mmc Card
Tap and hold Tap and hold the stylus until an action is complete, or a result or menu is shown. ing a SD/MMC Card Your device has a SD/MMC slot where you can insert an optional Secure Digital or Mult iMediaCard storage card. -
Page 21: System Settings
System Settings Your device has default system settings. You can customize the settings to suit your own personal needs. Once you change the settings, your new settings will remain until you change them again. 3.1 Using System Settings To open the Settings screen, tap the button on the Home screen. -
Page 22: Backlight
3.2 Backlight 1. Tap the button on the Home screen to open the Settings screen. Setting 2. Tap the button on the Settings screen. Backlight 3. Move the slider along the track bar to adjust the backlighting. To darken the screen, move the slider to the left. -
Page 23: Volume
3.3 Volume 1. Tap the button on the Home screen. Setting 2. Tap the button on the Settings screen. Volume 3. Move the slider along the track bar to adjust the volume. To decrease the volume, move the slider to the left. To increase the volume, move the slider to the right. - Page 24 3. Tap to start the calibration. 4. Tap and hold the centre of the target. 5. When the target moves to another position, tap and hold the centre of the new target. Repeat each time to complete the calibration process. 6.
-
Page 25: Power
3.5 Power To check the remaining power level of your battery and/or set up the power saving feature: 1. Tap the button on the Home screen. Setting 2. Tap the button. Power 3. The Power screen appears showing the remaining power of your battery. NOTE: If the level of power is too low, be sure to charge the battery with the AC adapter or the car charger. -
Page 26: Date&Time
3.6 Date&Time To set the date and time: 1. Tap the button on the Home screen. Setting 2. Tap the button. Date&Time 3. To change the time zone, tap the left/right arrow in the Time Zone item. 4. To change the date, tap the down arrow in the Date item. A calendar pops up. Tap the left arrow on the calendar to go to the earlier month and year or the right arrow to the later month and year. -
Page 27: Change Language
5. To set the time, first tap the hour, minute, or second in the Time item and then tap the up arrow to increase or down arrow to decrease the value. 6. Tap the button to save the changes and go back to the Settings screen. 3.7 Change Language To change the system and voice language: 1. -
Page 28: Back
4. Tap the button to save the changes. 3.8 Back button brings you back to the Home screen. Back... -
Page 29: Mp3 Player
MP3 Player This chapter tells you how to play MP3 files on your device. 4.1 Starting and Exiting the MP3 Player The MP3 Player program turns your device into an MP3 player. It features: Playback of MP3 files Basic playback controls such as play, pause, stop, next and previous Graphic equalizer settings with 17 presets Playback includes single selection playback, repeat, single repeat, sampling... -
Page 30: Playing Mp3 Files
To exit the program, tap on the lower right of the screen. 4.2 Playing MP3 Files 1. To play MP3 files on your device, you must have the files ready in any of the two locations: • The \MP3 folder on a storage card •... -
Page 31: Mp3 Playback Control
4. To exit the program, tap on the lower right of the screen. You will return to the Home screen. MP3 Playback Control You can control the MP3 Player via the control buttons. See the table below for details: Control Name Description Button... -
Page 32: Using Play Lists
Sequence* Normal sequence (Default) Random sequence Open Play List Open play list. (See Section 4.3 for more information.) Equalizer Open or close the equalizer panel. (See Section 4.4 for more information.) Help Introduce the function and operation of each icon. Tap an icon to see a description line at the bottom of the screen. -
Page 33: Opening A Play List
2. To add a song in the play list, tap the Add Song button at the bottom of the screen. A screen appears displaying all the MP3 files. Tap the song you wish to add and then tap Add Song 3. -
Page 34: Managing Your Play Lists
Managing Your Play Lists When you have opened a play list, you can edit or remove the list. To remove a song from the list: Tap the song and then tap the Delete Song button at the bottom of the screen. -
Page 35: Using The Application Cd
Using the Application CD Using the Application CD This chapter tells you how to install ActiveSync for transferring data between your This chapter tells you how to install ActiveSync for transferring data between your device and a computer. device and a computer. 5.1 About the Application CD 5.1 About the Application CD The Application CD provides two function items:... -
Page 36: About Activesync
5.2 About ActiveSync ActiveSync allows you to establish the connection between your device and computer. CAUTION: Do not connect your device to your computer before ActiveSync is installed. Installing ActiveSync 1. Turn on your computer and your device. 2. Insert the Application CD into the CD-ROM drive of your computer. The auto run screen appears. -
Page 37: Using Activesync
NOTE: This device does not support synchronization with your computer. Therefore, you do not need to establish Standard Partnership. Using ActiveSync Once ActiveSync is installed on your computer, you can use it to transfer files (i.e. MP3 files) between your device and your computer. CAUTION: Be discreet when you delete files from your device. -
Page 39: Troubleshooting And Maintenance
Troubleshooting and Maintenance Troubleshooting and Maintenance This chapter gives solutions to common problems you m ay encounter. It also vides guidelines on how to take care of your device. NOTE: If you encounter a problem you cannot solve, contact an authorized service center for assistance. -
Page 40: Troubleshooting
4. Your device turns on and displays the initial start up screen. Complete the settings as described in section 1.1. 6.2 Troubleshooting Power Problems Power does not turn on when using battery power The remaining battery power may be too low to run your device. Connect the AC adapter to your device and to AC power. -
Page 41: Connection Problems
Screen freezes Reset your system. Screen is hard to read Make sure that the backlight of the display is on and if necessary adjust the brightness. Inaccurate response to stylus taps Recalibrate the touch screen. (See section 3.4 for instructions.) Connection Problems Cable Connection Problems Make sure that your device and your computer are both turned on before trying... -
Page 42: Maintaining Your Device
6.3 Maintaining Your Device Taking good care of your device will ensure trouble-free operation and reduce the risk of damage to your device. Keep your device away from excessive moisture and extreme temperatures. Avoid exposing your device to direct sunlight or strong ultraviolet light for extended periods of time. -
Page 43: Reference
Reference 7.1 Specifications Processor: 300 MHz Memory: 512 MB Flash ROM; 64 MB SDRAM Screen: 3.5" 320x240x65536 colours TFT LCD Battery: Internal Lithium battery, 1200 mAh Dimensions: 112.7 mm (Length) x 89.3 mm (Width) x 24.8mm (Height) Weight: 200 grams Integrated GPS receiver: 20 channel “All-in-view”... -
Page 44: Safety Precautions
7.2 Safety Precautions Global Positioning System The Global Positioning System (GPS) is a satellite-based system that provides location and timing information around the globe. GPS is operated and controlled under the sole responsibility of the Government of the United States of America, who are responsible for its availability and accuracy. -
Page 45: About The Battery
Connect the adapter to a proper power source. The voltage requirements are found on the product case and/or packaging. Do not use the adapter if the cord becomes damaged. Do not attempt to service the unit. There are no serviceable parts inside. Replace the unit if it is damaged or exposed to excess moisture. -
Page 46: Regulatory Information
The battery must be recycled or disposed of properly. Use the battery only in the specified equipment. 7.3 Regulatory Information NOTE: Marking labels located on the exterior of your device indicate the regulations that your model complies with. Please check the marking labels on your device and refer to the corresponding statements in this chapter. -
Page 47: European Notice
If the user modifies the equipment or its peripherals in any way, and these modifications are not approved by Anubis, the FCC may withdraw the user's right to operate the equipment. For customers in the USA, the following booklet prepared by the Federal Communications Commission may be of help: "How to Identify and Resolve Radio-TV Interference Problems". -
Page 48: Ce Marking
supply system EN60950 / IEC 60950: Product Safety The manufacturer cannot be held responsible for modifications made by the User and the consequences thereof, which may alter the conformity of the product with the CE Marking. CE Marking This product fully satisfies the requirements for CE marking when used in a residential, commercial or light industrial environment.
Need help?
Do you have a question about the MyGuide 3200 Go and is the answer not in the manual?
Questions and answers