Table of Contents
Advertisement
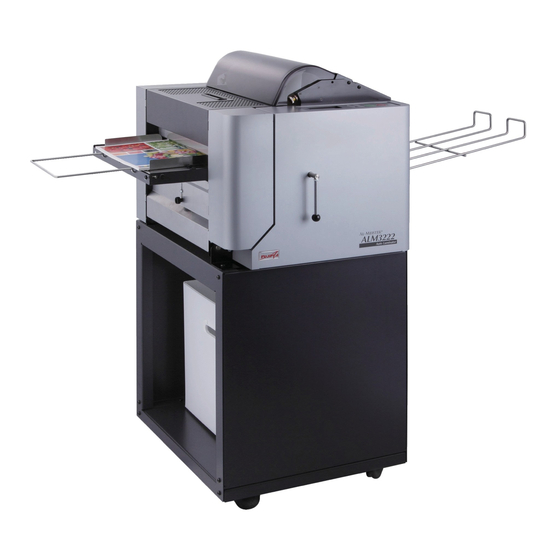
AL-MEISTER ALM3222 Instruction Manual <Rev.2>
AL-MEISTER
ALM3222
Instruction Manual
Thank you very much for purchasing the FUJIPLA ALM3222 Auto
Laminator. Due to the possibility of damage and for personal safety
reasons only trained personnel should operate this machine! Please
read through this manual carefully before operation. Please keep this
manual and refer to it whenever necessary.
Ver 1.1 [US]
Ver 2 by Brian Jennett (includes Ver 1.2 [US]) 11/6/13
Rev by Brian Jennett: 11/22/13, 11/27/13, 12/2/13, 12/9/13, 12/17/13, 3/10/14, 3/20/14, 3/27/14,
4/4/14, 6/6/14, 6/26/14, 7/7/14, 8/12/14, 8/26/14, 10/16/14, 1/23/15, 2/26/15, 5/8/15, 6/29/15
Page 1 of 63
Advertisement
Table of Contents

Related Manuals for FUJIPLA AL-MEISTER ALM3222


Summary of Contents for FUJIPLA AL-MEISTER ALM3222
- Page 1 AL-MEISTER ALM3222 Instruction Manual Thank you very much for purchasing the FUJIPLA ALM3222 Auto Laminator. Due to the possibility of damage and for personal safety reasons only trained personnel should operate this machine! Please read through this manual carefully before operation. Please keep this manual and refer to it whenever necessary.
-
Page 2: Table Of Contents
AL-MEISTER ALM3222 Instruction Manual <Rev.2> Contents SPECIFICATIONS ............................4 MAIN FEATURES ............................5 IMPORTANT SAFETY PRECAUTIONS ......................6 INSTALLATION ............................... 7 REQUIREMENTS OF PAPER TO BE LAMINATED .................... 8 RECYCLING INFORMATION ........................... 9 INCLUDED COMPONENTS ........................... 10 2. NAMES AND FUNCTIONS ........................11 2-1. - Page 3 AL-MEISTER ALM3222 Instruction Manual <Rev.2> 5-2-9. PAPER FEED ADJUST (SOFTWARE) .................... 47 5-2-10. TOTAL COUNT ......................... 48 5-2-11. CHECK FILM INFO........................49 5-2-12. PAPER FEED RESIST ROLLER PRESSURE ADJUSTMENT (MECHANICAL) ........50 5-2-13. PAPER SKEW ADJUST ......................52 5-3. SET PAPER ............................53 5-4.
-
Page 4: Specifications
AL-MEISTER ALM3222 Instruction Manual <Rev.2> SPECIFICATIONS Model ALM3222 Minimum Maximum 200 pages (20# copy paper), less for thicker paper Feeder Tray Capacity 13” Paper Width 8-1/8” 13” Finished & Trimmed Width 8-9/16” 20” in normal mode, unlimited length in “LONG MODE”... -
Page 5: Main Features
AL-MEISTER ALM3222 Instruction Manual <Rev.2> MAIN FEATURES The AL-MEISTER ALM3222 is a fully automatic hot laminator that will feed, laminate, cut and trim around all four sides of paper. Once threaded and set up properly, place printed paper on the Feeder Tray and press the [START] button for full automatic operation. -
Page 6: Important Safety Precautions
AL-MEISTER ALM3222 Instruction Manual <Rev.2> IMPORTANT SAFETY PRECAUTIONS The following safety precautions must be observed for your safety during the operation of this product. Please read the cautions and warnings carefully. Please keep this manual and refer to it whenever necessary. -
Page 7: Installation
AL-MEISTER ALM3222 Instruction Manual <Rev.2> INSTALLATION To avoid fire, electric shock, or any danger, do not install the machine in a place like: In direct sunshine or near an air conditioner. In an extremely humid/dry area. In an extremely cold area. -
Page 8: Requirements Of Paper To Be Laminated
AL-MEISTER ALM3222 Instruction Manual <Rev.2> REQUIREMENTS OF PAPER TO BE LAMINATED Always follow these instructions for safe operation. 1. What to wear In order to avoid any possible danger • Do not wear neck-ties or necklaces that are loose. • Do not wear loose clothes. If entangled, turn off the power or unplug immediately. -
Page 9: Recycling Information
AL-MEISTER ALM3222 Instruction Manual <Rev.2> REQUIREMENTS OF PAPER TO BE LAMINATED (cont’d) Do not laminate: • Money or valuable securities. • Paper with staples. • Magnets or magnetic documents. • Flammable paper or material that is affected by heat such as vinyl chloride or polyethylene. -
Page 10: Included Components
AL-MEISTER ALM3222 Instruction Manual <Rev.2> INCLUDED COMPONENTS Please check all these components are included. ALM3222 Feeder Tray Feeder Tray Extension Exit Tray Power Cord Wastebasket Stand Stand Assembly Instructions Tool for assembling Stand ... -
Page 11: Names And Functions
AL-MEISTER ALM3222 Instruction Manual <Rev.2> 2. NAMES AND FUNCTIONS 2-1. EXTERIOR Stand 10 Skew Control Knob Lower Tension Controller 11 Feeding Control Knob Controller Knob 12 Feeder Feeder Tray 13 Operation Panel Lamination Handle 14 Trimmer Adjustment Knobs Upper Tension Controller... -
Page 12: Interior
AL-MEISTER ALM3222 Instruction Manual <Rev.2> 2. NAMES AND FUNCTION (cont’d) 2-2. INTERIOR SECTIONS FUNCTION Feeder Section Lamination Section Cutter Section Trimmer Section COMPONENTS Feeder Tray Extension For longer double letter and digital paper size laminations. Feeder Tray Tray for letter size paper. -
Page 13: Operation Panel
AL-MEISTER ALM3222 Instruction Manual <Rev.2> 2. NAMES AND FUNCTION (cont’d) 2-3. OPERATION PANEL START Press to start operation. STOP Press to stop operation. RESET Press to return to the operation mode and to reset the counter. SCROLL (UP) Press to raise cursor or the set value. -
Page 14: Lcd Display
AL-MEISTER ALM3222 Instruction Manual <Rev.2> 2. NAMES AND FUNCTION (cont’d) 2-4. LCD DISPLAY POWER ON/WARM UP When powered up the LCD will indicate the model and software version. The next screen will show the type of film, if installed. Indicates the machine is being heated up, however operation is not possible during this time. - Page 15 AL-MEISTER ALM3222 Instruction Manual <Rev.2> 5) [SET COUNT] indicates number of the papers to be processed. See chapter 5-2-5 on page 34. Page 15 of 63...
-
Page 16: Other Switches And Buttons
AL-MEISTER ALM3222 Instruction Manual <Rev.2> 2. NAMES AND FUNCTIONS (cont’d) 2-5. OTHER SWITCHES AND BUTTONS Open the trimmer cover. 1) Manual MOVE Switch Use to set/feed film or to take out paper when it is stuck To feed forward, turn the switch to left. - Page 17 AL-MEISTER ALM3222 Instruction Manual <Rev.2> *After the film waste has been pulled from the discharge the machine is ready to be run in automatic mode. Do NOT run the MOVE switch again unless CUT is performed immediately afterward. Page 17 of 63...
-
Page 18: Installation
AL-MEISTER ALM3222 Instruction Manual <Rev.2> 3. INSTALLATION 3-1. INSTALLING THE ALM3222 Allow an area about 18”' around the machine and trays for operation. *Read the safety instructions about the installation carefully. Always contact the DryLam Tech-Line if there are any questions or concerns during installation. -
Page 19: Set Waste Collection Box
AL-MEISTER ALM3222 Instruction Manual <Rev.2> 3. INSTALLATION (cont’d) 3-4. SET WASTE COLLECTION BOX Install the waste collection box just underneath the film waste outlet to collect trimming and cutting scrap. 3-5. CONNECT POWER CORD Connect power cord to the machine firmly. -
Page 20: Set Lamination Film/Manual Mode
AL-MEISTER ALM3222 Instruction Manual <Rev.2> 4. SET LAMINATION FILM/MANUAL MODE 1. AL-ROLL film is the exclusive lamination film for ALM3222. Always use a combined set of upper and lower film together (even if using one-sided film) from the same box. Prior to loading film inspect the rolls for possible shipping damage. - Page 21 AL-MEISTER ALM3222 Instruction Manual <Rev.2> 4. SET LAMINATION FILM/MANUAL MODE (cont’d) 3. Open the Feeder Cover and Film Cover. NOTE: Components on the inside of the machine get very hot. Always be careful. 4. Loosen the two tension controllers, if necessary. Set the upper roll of film in the upper mandrel holders.
- Page 22 AL-MEISTER ALM3222 Instruction Manual <Rev.2> 4. SET LAMINATION FILM/MANUAL MODE (cont’d) NOTE: If the film roll(s) are incorrectly loaded adhesive may contact the heat rollers or other interior components and cause damage. 5. Remove the lower Film Guide Bar. Push the bar to one side to compress the spring and pull the other end out of the machine.
- Page 23 AL-MEISTER ALM3222 Instruction Manual <Rev.2> 4. SET LAMINATION FILM/MANUAL MODE (cont’d) 7. Pull about 8-10” of the film off the roll. Loosen the two tension controllers, if necessary. Place the film roll in the lower mandrel holders firmly and carefully (with the RFID tag at the non-operator side).
- Page 24 AL-MEISTER ALM3222 Instruction Manual <Rev.2> 4. SET LAMINATION FILM/MANUAL MODE (cont’d) 8. Raise the Lamination Handle to the OPEN position to separate the heat and pull rollers for threading. 9. Pull the upper film off the roll. Pull it down and over the upper rotating idler bar.
- Page 25 AL-MEISTER ALM3222 Instruction Manual <Rev.2> 4. SET LAMINATION FILM/MANUAL MODE (cont’d) 11. Using an 11” long (by 8.5” wide) threading card (DryLam part number 964202), push both sheets of film between the rollers (and into the ‘nip’). Holding the card level continue to push both sheets of film all the way through the machine.
- Page 26 AL-MEISTER ALM3222 Instruction Manual <Rev.2> 4. SET LAMINATION FILM/MANUAL MODE (cont’d) 13. Turn on the power switch. The heat rollers should begin to get hot. If they do not, check that the RFID tag is in place on the lower film roll, that it is facing the non-operator side of the machine and was not damaged during the installation.
- Page 27 AL-MEISTER ALM3222 Instruction Manual <Rev.2> 4. SET LAMINATION FILM/MANUAL MODE (cont’d) If the threading card and film do not emerge from the discharge within 5 seconds pull the threading back out of the nip and repeat the threading process from step 6. If the machine is not threaded properly damage to interior components will occur.
- Page 28 AL-MEISTER ALM3222 Instruction Manual <Rev.2> 4. SET LAMINATION FILM/MANUAL MODE (cont’d) 17. Adjustment of tension controllers There are four (4) tension controllers- two for the lower film roll and two for the upper film roll. The purpose of the tension controllers is to apply a resistance, or "drag" on the film rolls which forces the film lay flat on the heat rollers and thereby eliminates creases and bubbles in the lamination.
- Page 29 AL-MEISTER ALM3222 Instruction Manual <Rev.2> 4. SET LAMINATION FILM/MANUAL MODE (cont’d) 19. Test for film curl. This is important. If film will not exit the machine in a “flat” state there may be jams and wraparounds occurring when the machine is run in “automatic mode”.
- Page 30 AL-MEISTER ALM3222 Instruction Manual <Rev.2> 4. SET LAMINATION FILM/MANUAL MODE (cont’d) 20. Hold the film vertically about 2 inches from the cut side. Look at the film from the side. •If the curl is less than 1/2'' from the vertical plane, there is no Within 1/2 inch need to adjust.
- Page 31 AL-MEISTER ALM3222 Instruction Manual <Rev.2> 4. SET LAMINATION FILM/MANUAL MODE (cont’d) Minimizing the curl may avoid problems as shown below. If film is allowed to curl it will curl up or down into interior areas of the machine. This will results in errors and possible damage to the machine.
- Page 32 AL-MEISTER ALM3222 Instruction Manual <Rev.2> 4. SET LAMINATION FILM/MANUAL MODE (cont’d) 21. When film is properly overlapped, there are no wrinkles or bubbles, and film exits without curl press the CUT button and pull the waste out of the discharge of the ALM3222.
-
Page 33: Automatic Operation
AL-MEISTER ALM3222 Instruction Manual <Rev.2> 5. AUTOMATIC OPERATION 5-1. WARM UP CAUTION: Automatic mode should not be performed until the machine has been set up properly in Manual Mode. See page 17 for details. 1. Connect the power cord to the wall socket. Turn on the power switch. - Page 34 AL-MEISTER ALM3222 Instruction Manual <Rev.2> Warm Up display appears. Page 34 of 63...
-
Page 35: Settings
AL-MEISTER ALM3222 Instruction Manual <Rev.2> 5. AUTOMATIC OPERATION (cont’d) 5-2. SETTINGS 5-2-1. SET TEMPERATURE On the “READY” screen press TEMP./SPEED button once. * The default is set at 210F. This is only a power on default and may not be proper for some paper stocks and thicknesses of film. -
Page 36: Set Speed
AL-MEISTER ALM3222 Instruction Manual <Rev.2> 5. AUTOMATIC OPERATION (cont’d) 5-2-2. SET SPEED 1. On the “READY” screen press TEMP./SPEED button twice. * The default is set at 40 ipm. This is only a power on default and may not be proper for some paper stocks and thicknesses of film. -
Page 37: Set Trimmer Margin
AL-MEISTER ALM3222 Instruction Manual <Rev.2> 5. AUTOMATIC OPERATION (cont’d) 5-2-3. SET TRIMMER MARGIN CAUTION: Do not adjust the Trimmer Levers or Adjustment Knobs while the machine is running or film is in the Trimmer Unit. 1. Open the trimmer cover. - Page 38 AL-MEISTER ALM3222 Instruction Manual <Rev.2> 5. AUTOMATIC OPERATION (cont’d) 4. After the levers have been set the cut can be further “fine-tuned” by using the Trimmer Adjustment Knobs (2). 5. Loosen (1) locking knob and adjust the Trimmer Adjustment Knob (2). Repeat for the other side.
-
Page 39: Mode Menus
AL-MEISTER ALM3222 Instruction Manual <Rev.2> 5. AUTOMATIC OPERATION (cont’d) 5-2-4. MODE MENUS Press MODE button. The Mode Menu screen will appear: ---- MODE ---- >SET COUNT MARGIN SET CUT ADJUST FINE MODE PAPER FEED ADJUST TOTAL COUNT FILM INFO Move cursor to your choice by using UP or DOWN button. Note that some menu choice are below the current screen. - Page 40 AL-MEISTER ALM3222 Instruction Manual <Rev.2> 5. AUTOMATIC OPERATION (cont’d) [CUT ADJUST] Adjusts the cutting positions of the leading and trailing edges of sheets. See section 5-2-7. NOTE: These settings are retained in memory after a power outage. [FINE MODE] Hides any “dwell line” that may be present. See section 5-2-8.
-
Page 41: Set Count
AL-MEISTER ALM3222 Instruction Manual <Rev.2> 5. AUTOMATIC OPERATION (cont’d) 5-2-5 SET COUNT Select SET COUNT. ---- SET COUNT ---- FREE NOTE: Defaults to FREE after power outage. Press UP or DOWN button to enter numeric values. You can set from 1 to 200 sheets. - Page 42 AL-MEISTER ALM3222 Instruction Manual <Rev.2> Example of setting 100 sheets: ---- READY ---- TEMP: 210 SPEED: 40 MARGIN: YES SET COUNT: 0/100 In the above example: 0: finished number/100: set value NOTE: Lamination errors will not affect the count. Example of setting FREE:...
-
Page 43: Margin Set
AL-MEISTER ALM3222 Instruction Manual <Rev.2> 5. AUTOMATIC OPERATION (cont’d) 5-2-6. MARGIN SET Select MARGIN SET. ---- MARGIN SET ---- >YES NOTE: Defaults to YES after power outage. Press UP or DOWN button to turn MARGINS on (YES) or off (NO). -
Page 44: Cut Adjust
AL-MEISTER ALM3222 Instruction Manual <Rev.2> 5. AUTOMATIC OPERATION (cont’d) 5-2-7. CUT ADJUST This function adjusts the cutting positions at both the leading, and trailing edges of the paper. NOTE: These settings are retained in memory after a power outage. NOTE: These settings only affect the leading and trailing edge cuts. They do not affect the side cuts made by the Trimmer Unit. - Page 45 AL-MEISTER ALM3222 Instruction Manual <Rev.2> 5. AUTOMATIC OPERATION (cont’d) HINT: The more positive (higher) the number the more margin of film around the paper will remain. The maximum margin is approximately ¼”. The more negative (lower) the number the closer to the paper cuts will occur (including the possibility of cutting into the paper itself).
-
Page 46: Fine Mode Adjust
AL-MEISTER ALM3222 Instruction Manual <Rev.2> 5. AUTOMATIC OPERATION (cont’d) 5-2-8. FINE MODE ADJUST When enabled and set to one of three setting FINE MODE addresses the “dwell line” which can be an issue with certain combinations or paper, print, speed and temperature. “Fine Mode” attempts to “hide”... -
Page 47: Paper Feed Adjust (Software)
AL-MEISTER ALM3222 Instruction Manual <Rev.2> 5. AUTOMATIC OPERATION (cont’d) 5-2-9. PAPER FEED ADJUST (SOFTWARE) PAPER FEED ADJUST is a parameter that adjusts the aggressiveness of the feeding section to enhance compatibility of varying paper stocks. This should be utilized in conjunction with the Paper Feed Resist... -
Page 48: Total Count
AL-MEISTER ALM3222 Instruction Manual <Rev.2> 5. AUTOMATIC OPERATION (cont’d) 5-2-10. TOTAL COUNT 1. Press MODE and use the cursor buttons to select TOTAL COUNT. Press MODE again. ---- TOTAL COUNT ---- 123456789 2. Select TOTAL COUNT from MODE menu. The accumulated number of laminations is shown. Counts up to 99999999 until counter is reset. -
Page 49: Check Film Info
AL-MEISTER ALM3222 Instruction Manual <Rev.2> 5. AUTOMATIC OPERATION (cont’d) 5-2-11. CHECK FILM INFO 1. Press MODE and use the cursor buttons to select FILM INFO. Press MODE again. ---- FILM INFO ---- 38mic. 320mm LEFT: 80% This display appears along with the following information: ... -
Page 50: Paper Feed Resist Roller Pressure Adjustment (Mechanical)
AL-MEISTER ALM3222 Instruction Manual <Rev.2> 5. AUTOMATIC OPERATION (cont’d) 5-2-12. PAPER FEED RESIST ROLLER PRESSURE ADJUSTMENT (MECHANICAL) EARLY MODELS (MC #166, and below): LATER MODELS (MC #167, and later): The Paper Feed Resist Roller Pressure Adjust knob located under the Feed Tray controls the amount of resistance applied to the stack of paper in the feeder tray to keep more than one sheet from being drawn from the tray and entering the lamination area. - Page 51 AL-MEISTER ALM3222 Instruction Manual <Rev.2> PROCEDURE: 1. Loosen the Paper Feed Resist Roller Pressure Adjust knob and adjust in small 1/8” increments (or, about one mark at a time on appropriate labels) as follows: a. If too many sheets are being fed at once loosen and slide the knob upwards.
-
Page 52: Paper Skew Adjust
AL-MEISTER ALM3222 Instruction Manual <Rev.2> 5. AUTOMATIC OPERATION (cont’d) 5-2-13. PAPER SKEW ADJUST If necessary, correct for paper skewing by adjusting the Paper Skew Adjust knob. Page 52 of 63... -
Page 53: Set Paper
AL-MEISTER ALM3222 Instruction Manual <Rev.2> 5. AUTOMATIC OPERATION (cont’d) 5-3. SET PAPER 1. Loosen knobs and adjust the paper guides according to paper size. Always use the reference marks and set the paper in the center of the tray Letter Size Digital Size (Double letter) 2. - Page 54 AL-MEISTER ALM3222 Instruction Manual <Rev.2> 5. AUTOMATIC OPERATION (cont’d) 5-3. SET PAPER (cont’d) 3. Place paper in the feeder tray correctly. * The picture shows how to set letter size. 4. Release your hand from the tray. The spring action will push the paper upwards towards the feeder roller.
-
Page 55: Start Operation
AL-MEISTER ALM3222 Instruction Manual <Rev.2> 5. AUTOMATIC OPERATION (cont’d) 5-4. START OPERATION 1. Make sure Lamination Handle is down in the Laminate position. 2. Check the settings. 3. Make sure READY lamp is on. NOTE: Do not press the START button until the machine has been threaded. See sections above on the proper threading process. -
Page 56: Eco Mode (Power Saving Mode)
AL-MEISTER ALM3222 Instruction Manual <Rev.2> 5. AUTOMATIC OPERATION (cont’d) 5-5. ECO MODE (Power Saving Mode) ECO MODE enters when the machine is idle and any buttons on the operation panel* have not been pressed in the past 15 minutes. *This does not apply to the “MOVE” switch. -
Page 57: Long Mode
AL-MEISTER ALM3222 Instruction Manual <Rev.2> 6. LONG MODE All model ALM3222 auto laminators, regardless of programming version, feature LONG MODE capability. In Long Mode there is no limit to the length of paper that the machine will laminate. To utilize LONG MODE function, the ALM3222 is started in this manner: 1. -
Page 58: Troubleshooting/Error Messages
AL-MEISTER ALM3222 Instruction Manual <Rev.2> 7. TROUBLESHOOTING/ERROR MESSAGES Problem Check if: Solution Page ●Laminated sheet is not Laminated paper is stuck in the [1]Open the Feeder cover. Cut the discharged. On the display: lamination section, the trimmer upper and lower film just below the... - Page 59 AL-MEISTER ALM3222 Instruction Manual <Rev.2> ●”FEEDING ERROR” No paper on the tray to feed. This error is often caused by SET COUNT set to “FREE” and no paper on the tray. Press RESET to clear the error, place paper on the tray and try again.
- Page 60 AL-MEISTER ALM3222 Instruction Manual <Rev.2> from the discharge as the START button and pull waste from the button is being pressed. discharge. Then START. Laminated film has a curl and has [1] Press RESET button. [2] Cut the either curled UP into the area...
- Page 61 AL-MEISTER ALM3222 Instruction Manual <Rev.2> pulled in at least 2” by friction feeder sensor the ALM3222 assumed from the actual sheet of paper the first sheet was longer than that the error occurred on. This machine specifications allow. This second sheet covered the Feeder was actually a multiple feed.
- Page 62 AL-MEISTER ALM3222 Instruction Manual <Rev.2> not dismantle. ●”TEMP. SENSOR POSITION” A sudden drop in roller Inspect temperature sensor. Possible temperature was detected. wrap around of film on the roller. Or, build up of debris on the sensor caused it to be moved away from the roller.
-
Page 63: Cleaning The Heat Rollers
AL-MEISTER ALM3222 Instruction Manual <Rev.2> 8. CLEANING THE HEAT ROLLERS With continuous use the heat rollers will accumulate adhesive and dirt. It is recommended that you periodically inspect them for adhesive build-up. Suggested solvents are: Rubbing alcohol (isopropyl 70%, or higher) Goof-Off®,...
Need help?
Do you have a question about the AL-MEISTER ALM3222 and is the answer not in the manual?
Questions and answers
A que se debe el error 20 en una al- meister ALM-3222 AUTO LAMINATOR?