
Related Manuals for Akai APC40

Summary of Contents for Akai APC40
- Page 1 QUICKSTART GUIDE ENGLISH ( 1 - 3 ) GUÍA DE INICIO RÁPIDO ESPAÑOL ( 4 - 6 ) GUIDE D'UTILISATION RAPIDE FRANÇAIS ( 7 - 9 ) KURZANLEITUNG DEUTSCH ( 10 - 12 ) GUIDA RAPIDA ITALIANO ( 13 - 15 )
-
Page 3: Software Installation
APC40 is designed for performance with Ableton Live. In this manual, you will find instructions on how to connect the APC40 and use its basic features with Ableton Live – Akai Professional APC Edition. APC40 can also be used in "generic mode" as a controller with other virtual DJ applications that use MIDI protocol. -
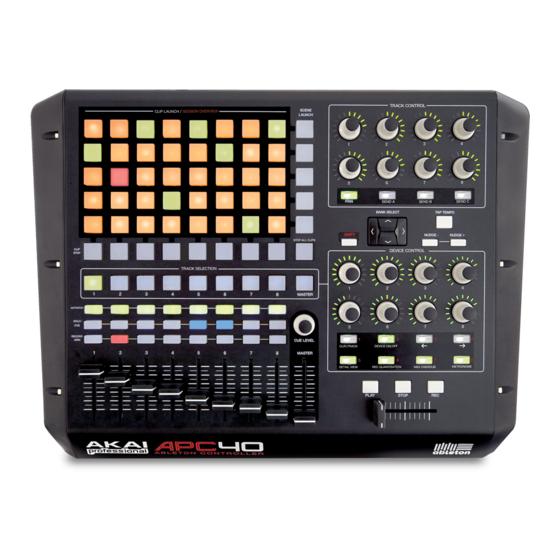
Page 4: Top Panel Overview
Clip Launch View. You can change/shift the Clip Launch View track. In this view, the button LED colors represent the following: with APC40's controls (e.g. in the OFF – empty Session Overview). AMBER – clip present, not playing GREEN – clip present, playing RED –... -
Page 5: Rear Panel Overview
POWER ON / OFF – Turns the APC40 on or off. USB CONNECTION – Plug a standard USB cable into this outlet and into the USB port of your computer. -
Page 6: Instalación Del Software
“modo genérico” como controlador con otras aplicaciones de DJ virtual que usan el protocolo MIDI. Si bien es posible que usted ya tenga Ableton Live, debe instalar la edición especial Akai Professional APC que está en el CD de software incluido para aprovechar plenamente las ventajas de la funcionalidad del controlador con el software. - Page 7 LED de los botones representan lo siguiente. desplazar la vista Clip Launch con APAGADO – vacío los controles del APC40 (por ej. en la vista Session Overview). ÁMBAR – clip presente, sin reproducirse VERDE – clip presente, en reproducción ROJO –...
-
Page 8: Vista Del Panel Trasero
ENCENDIDO Y APAGADO – Con este control se enciende y apaga el APC40. CONEXIÓN USB - Enchufe un cable USB estándar en este conector y en el puerto USB de su computadora. Esta conexión se usa para enviar y recibir datos MIDI hacia y desde la computadora. -
Page 9: Installation Logiciel
Ableton Live [numéro de la version] Afin que le logiciel Ableton Live puisse reconnaître le APC40, vous devez raccorder le contrôleur avant de lancer le logiciel en plus d’avoir configuré les paramètres correctement. Reportez-vous aux sections SCHÉMA DE CONNEXION et CONFIGURATION LOGICIELLE pour les instructions. - Page 10 APC40. Vous pouvez modifier touches DEL est la suivante : l'affichage Clip Launch à l’aide des ÉTEINTE – vide commandes du APC40 (p. ex., AMBRÉE – clip présent, mais ne joue pas Session Overview). VERTE– clip présent, en mode lecture ROUGE –...
-
Page 11: Caractéristiques Du Panneau Arrière
POWER – Cette touche permet de mettre le APC40 sous et hors tension. USB – Branchez un câble USB standard dans cette entrée et l'autre extrémité dans le port USB d'un ordinateur. Cette connexion permet d’envoyer et de recevoir des données MIDI depuis et à un ordinateur. -
Page 12: Installation Der Software
Diese Kurzanleitung gibt Ihnen einen kurzen Überblick über die Funktionalität und die Eigenschaften des Akai APC40 Ableton Controllers. Der APC40 ist für den Einsatz mit Ableton Live entwickelt worden. In dieser Anleitung erfahren Sie, wie Sie den APC40 anschließen und die grundlegenden Funktionen mit Ableton Live – Akai Professional APC Edition verwendet werden. Der APC40 kann auch im "Generic Modus"... - Page 13 Clip Launch View Ableton Live verwendet. Die acht vertikalen 8 Spalten stehen für 8 Tracks in der APC40 durch ein rotes Viereck der Software, während die 5 horizontalen Zeilen 5 Clip Slots jedes Tracks um ein 8x5 großes Clipsegment repräsentieren.
-
Page 14: Übersicht Über Die Rückseite
POWER ON / OFF – Schaltet den APC40 ein oder aus. USB ANSCHLUSS – Verbinden Sie den APC40 mit einem normalen USB Kabel mit einem USB Port Ihres Computers. Diese Kabelverbindung wird zur Übertragung von MIDI Daten von und zu Ihrem Computer benötigt. -
Page 15: Installazione Del Software
è sempre possibile accedervi nuovamente dal menu Help.) Nota sulla mappatura MIDI: abbiamo già mappato i comandi dell’APC40 per alcune delle funzioni più utili di Ableton Live, ma se si desidera modificare le mappature MIDI è possibile farlo cliccando il pulsante "MIDI" posto nell’angolo superiore destro della finestra del software. - Page 16 Clip Launch View per OFF – Vuoto servendosi comandi dell’APC40 (ad es. in Session GIALLO – Clip presente, non in corso di riproduzione Overview). VERDE – Clip presente, in corso di riproduzione ROSSO – Clip presente, in via di registrazione Quando viene tenuto premuto il tasto SHIFT, questa griglia passa su “Panoramica sessione”...
-
Page 17: Panoramica Pannello Posteriore
Si può fissare il cavo dell’adattatore a questa sicura per evitare che si scolleghi accidentalmente. ALIMENTAZIONE ON/OFF – Accende o spegne l’APC40 . PORTA USB – Inserire un cavo standard USB a livello di questa presa e nella porta USB del computer. Questo collegamento serve a inviare e ricevere dati MIDI da e verso il computer. - Page 19 7-51-0279-C...
Need help?
Do you have a question about the APC40 and is the answer not in the manual?
Questions and answers