Table of Contents
Advertisement
Quick Links
MYE Entertainment
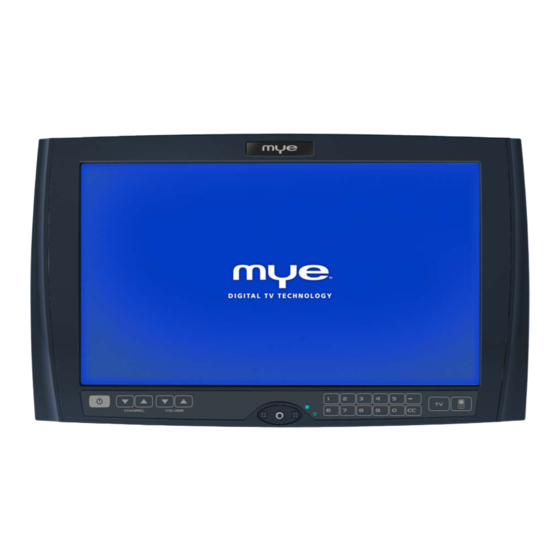
MYE PERSONAL DIGITAL TV SYSTEM
M156TV-NAQ2
Owners Manual
Installation Notice
Instant Channel Programming Feature
TV is Preset to Cable Standard - QAM
Complete the Signal / Power Connections and
press 0001 to Begin Channel Programming Scan
February, 2012 (Version 6)
www.myeclubtv.com
Page 1/27
Advertisement
Table of Contents

Related Manuals for MYE M156TV-NAQ2


Summary of Contents for MYE M156TV-NAQ2
- Page 1 MYE Entertainment MYE PERSONAL DIGITAL TV SYSTEM M156TV-NAQ2 Owners Manual Installation Notice Instant Channel Programming Feature TV is Preset to Cable Standard - QAM Complete the Signal / Power Connections and press 0001 to Begin Channel Programming Scan February, 2012 (Version 6) www.myeclubtv.com...
-
Page 2: Table Of Contents
CONTENTS page(s) page GENERAL SAFETY and CARE In the Box…………………………………….. Mounting the Screen………………………... FCC Statement………………. MENU: SETUP and OPERATION Main MENU – Access CHANNEL MENU Tuning Band…………………... Cable Mode……………. DTV Signal…………………….. Auto CH Search………. Manual CH…………………….. Channel Label Options.. Menu Language………………. Video Menu Contrast……………………….. -
Page 3: General Safety And Care
GENERAL SAFETY and CARE Thank you for your purchase of the MYE Entertainment MYE PERSONAL DIGITAL TV SYSTEM. This product has been designed specifically for use in the health & fitness industry, ensuring maximum performance and longevity in the harsh fitness club environment. Properly cared for, this product will provide years of high-quality entertainment. -
Page 4: Important Safety Instructions
Relocate or turn the antenna of the receiving device. • Increase the distance between this product and the receiving device. If these steps do not resolve the interference, please contact your local installing company or MYE Entertainment at 1-661-964-0217. February, 2012 (Version 6) www.myeclubtv.com... -
Page 5: In The Box
In The Box The shipping carton for the screen should contain the following components: POWER SUPPLY and 15.6” LCD TV MANUAL AC POWER CABLE CONNECTION IDENTIFICATION Audio In Audio Out 3.5mm 3.5mm DC Power In RJ45 A/V IN (RCA STYLE) RF “F”... -
Page 6: Main Menu Access
Key Pad Orientation KEY PAD ORIENTATION Power (On / Off) Channel (Up / Down) Volume (Up / Down) Intellijack Faulty Headphone Jack Indicator* ( Blue = Faulty Headphone Jack Detected)(See below) TV Status (Green = TV On) (Red = TV Stand by) Direct Channel Access (1-0) Dash Key / Direct Digital Channel Access (Ex: 88 - 2) Closed Caption. -
Page 7: Channel Menu
MAIN MENU To access all MENU functions you must enter MENU mode. Press “0002.” Sub-menu page “Channel” To ENTER MENU 1) Push “0002” on the TV keypad. 2) Use CHANNEL keys to select Sub-Menu. SUB-MENU pages are: Channel Video Audio Setup 3) Push Volume key to enter a Sub-Menu. - Page 8 +5dBmV to +15 dBmV when read on analog channels. A signal level outside of this range will provide less than optimum results. In order to ensure the highest degree of satisfaction, MYE Entertainment recommends using a MYE Entertainment Certified Installer for installation &...
- Page 9 1-4 Auto CH Search Instant Channel Programming Feature Installation Notice! This TV is equipped with an instant channel programming feature. The television tuner is preset to Cable Standard – QAM. To program the TV in one step, complete the Signal / Power Connections and press 0001 to begin channel programming Scan.
- Page 10 1-6 Channel Label Options CHANNEL Enter MENU (0002) and “Channel” Use Volume to enter. 1) Use Channel to select Channel Label. 2) Push Volume to enter. 3) Use Channel to select channel. 4) Use Volume to move to first character entry. 5) Use Channel to select character.
-
Page 11: Video Menu
2-VIDEO MENU Contains 3 video presets (Soft – Standard – Vivid) and 1 user adjustable option (User). CHANNEL to move to Enter MENU (0002) and use “Video” 2) Push Volume to enter Video Mode. 3) Push Volume to change setting. (Soft – Standard – Vivid – User) 2-Video Menu - USER Contrast Brightness... - Page 12 2-3 Sharpness CHANNEL Enter MENU (0002) and “Video” Use Volume to enter. 1) Use CHANNEL to select Sharpness. 2) Push Volume to enter. 3) Use Volume to adjust level. Wait for the level display to disappear. To EXIT: push VOLUME 2-4 Color CHANNEL Enter MENU (0002) and...
- Page 13 2-6 Aspect Ratio CHANNEL Enter MENU (0002) and “Video” Use Volume to enter. 1) Use CHANNEL to select Aspect Ratio. 2) Push Volume to enter / change setting. (16:9 – 4:3) To EXIT 1) Push VOLUME to exit Sub MENU / MENU 2-7 Settings CHANNEL Enter MENU (0002) and...
-
Page 14: Audio Menu
3 AUDIO MENU Contains 4 audio presets (Standard – Music – Movie -Sports) and 1 user adjustable option (User). CHANNEL to move to Enter MENU (0002) and use “Audio” 2) Push Volume to enter Audio Mode. 3) Push Volume to change setting. (Standard – Music – Movie – Sports – User) To EXIT 1) Push VOLUME to exit Sub MENU / MENU... - Page 15 3-2 Bass CHANNEL Enter MENU (0002) and “Audio” Use Volume to enter. 1) Use CHANNEL to select Bass. 2) Push Volume to enter. 3) Use Volume keys to adjust level. Wait for the level display to disappear. To EXIT: push VOLUME 3-3 Treble CHANNEL Enter MENU (0002) and...
-
Page 16: Digital Audio Output
3-5 Digital Audio Output CHANNEL Enter MENU (0002) and “Audio” Use Volume to enter. 1) Use CHANNEL to select Digital Output. 2) Push Volume to enter / change setting. (AC-3 – PCM) To EXIT 1) Push VOLUME to exit Sub MENU / MENU 3-6 Settings CHANNEL Enter MENU (0002) and... -
Page 17: Setup Menu
4 SETUP MENU Set Time Sleep Mode Timer Advanced Video Menu Set Password Parental Control Closed Caption Options Display Closed Caption 4-1 Set Time CHANNEL Enter MENU (0002) and “Setup” Use Volume to enter. 1) Use CHANNEL to select Set Time. 2) Push Volume to enter Set Time. -
Page 18: Set Password
4-3 Advanced Video Menu CHANNEL Enter MENU (0002) and “Setup” Use Volume to enter. 1) Use CHANNEL to Advanced Video Menu. 2) Push Volume to enter Advanced Video Menu. 3) Use CHANNEL to select setting. Noise Reduction Color Temperature 3D Y/C Adaptive Contrast Live Scan LCD Brightness... -
Page 19: Close Caption Options
4-6 Closed Caption Options CHANNEL Enter MENU (0002) and “Setup” Use Volume to enter. 1) Use CHANNEL to Closed Caption Options. 2) Push Volume to enter Closed Caption Options. 3) Factory setting is “Automatic” 4) Press Volume enter / change to “Custom” 5) Use CHANNEL to select Custom CC function. - Page 20 CUSTOM FEATURES – ACCESS To ENTER CUSTOM FEATURES 1) Push “0003” on the TV keypad. 2) Use CHANNEL keys to select needed feature. 3) Push Volume key to change. C usto m Features Detect Vibration Channel Default Time Channel Default Auto Default Auto Power On Manual Channel Setting...
- Page 21 5-2 HOME CHANNEL DEFAULT Program any channel for one touch Home channel access. Popular Home channels include child care camera and digital signage. • Program any designated Home Channel • Home Channel displayed when TV is first powered on. • Home Key button for direct access on keypad C usto m Features Enter Custom Features (0003)
- Page 22 5-3 PRIVATE NETWORK CHANNEL DEFAULT Exclusive feature works with in-club private TV networks including ClubCom™ and Digital Signage systems. When turned on the TV will automatically go the club promotional channel. The user cannot change the channel until the promotional programming has ended. The TV then changes to the secondary club ‘Home Channel” at which time the user can change to any desired TV channel.
- Page 23 5-4 Auto Power ON Used when locations want to turn all TVs on at the beginning of the day through 1 main circuit breaker. Upon being energizing from a NO POWER state the TV will automatically turn on. Enter Custom Features (0003) C usto m Features 1) Use CHANNEL to Auto Power On.
- Page 24 7- M156TV-IPD* DOCKING STATION INSTALLATION (*OPTIONAL) REMOVE ALL POWER BEFORE YOU BEGIN DO NOT USE POWER TOOLS 1) REMOVE ENDCAP FROM TV ENCLOSURE BY UNSCREWING 2 SIDE SCREWS. FRONT VIEW 2) CONNECT DOCKING STATION PLUG TO MATING CONNECTOR ON TV. 3) CAREFULLY PUSH ACCESS WIRE BACK INTO DOCK CAVITY AND ATTACH DOCKING STATION TO TV ENCLOSURE.
- Page 25 8- Specifications MYE Entertainment Inc. 15.6” Wide LCD TV Specifications Model Number M156-NAQ/M TV M156TV-NAQ2 LCD Module 15.6 Inch Color Active Matrix TFT-LCD Active Area 344.232 x 193.536 mm Resolution 1366 x 768 (XGA) 1366 X 768 (WXGA) Pixel Pitch 0.252 x 0.252 mm...
- Page 26 FOLLOWING WARRANTY TERMS AND CONDITIONS. LIMITED WARRANTY MYE ENTERTAINMENT (MYE) WARRANTS ALL NEW MYE PRODUCTS TO BE FREE FROM DEFECTS IN MATERIALS AND MANUFACTURERS FOR THE WARRANTY PERIODS SET FORTH BELOW. THE WARRANTY PERIODS COMMENCE ON THE INVOICE DATE OF THE ORIGINAL PURCHASE. THIS WARRANTY APPLIES ONLY AGAINST DEFECTS DISCOVERED WITHIN THE WARRANTY PERIOD AND EXTENDS ONLY TO THE ORIGINAL PURCHASER OF THE PRODUCT.
- Page 27 THOSE WARRANTIES THEREAFTER. SOME STATES DO NOT ALLOW LIMITATIONS ON HOW LONG AN IMPLIED WARRANTY LASTS, SO THE ABOVE LIMITATION MAY NOT APPLY TO YOU. MYE ENTERTAINMENT ALSO HEREBY DISCLAIMS AND EXCLUDES ALL OTHER OBLIGATIONS OR LIABILITIES, EXPRESS OR IMPLIED, ARISING BY LAW...
Need help?
Do you have a question about the M156TV-NAQ2 and is the answer not in the manual?
Questions and answers