Table of Contents
Advertisement
INSTALLATION & USER INSTRUCTIONS
Focal Point Fires plc.
Christchurch, Dorset BH23 2BT
Tel: 01202 499330
Fax: 01202 499326
www.focalpointfires.co.uk
Email: sales@focalpointfires.co.uk
Questions or problems with your appliance?
Don't take it back to the store
01202 588601
just give us a call on
lines open between 9am and 5pm, Monday to Friday
Please note: Except where otherwise stated, all rights,
including copyright in the text, images and layout of this
booklet is owned by Focal Point Fires plc. You are not
permitted to copy or adapt any of the content without
the prior written permission of Focal Point Fires plc.
WALL MOUNTED ELECTRIC FIRE
MODELS COVERED BY THESE INSTRUCTIONS
EF11-36
PASADENA
LIMOUSIN
we're here to help
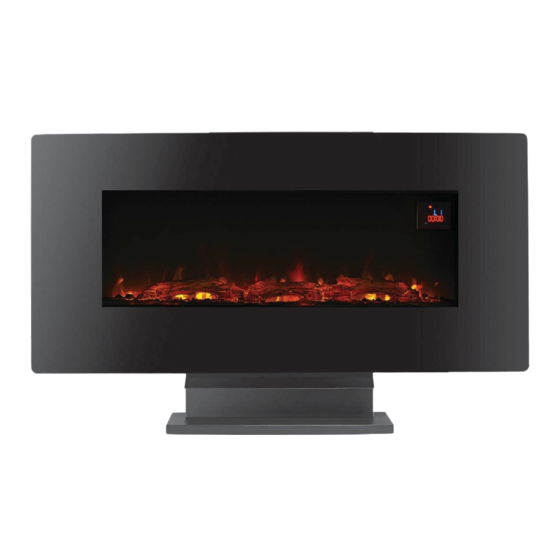
PASADENA LED ELECTRIC FIRE
All instructions must be handed to the user for
Revision A - 09/14
1
GB IE
safekeeping.
©
2014 Focal Point Fires plc.
Advertisement
Table of Contents

Related Manuals for FocalPoint EF11-36 PASADENA LIMOUSIN


Summary of Contents for FocalPoint EF11-36 PASADENA LIMOUSIN
- Page 1 INSTALLATION & USER INSTRUCTIONS WALL MOUNTED ELECTRIC FIRE GB IE MODELS COVERED BY THESE INSTRUCTIONS EF11-36 PASADENA LIMOUSIN Focal Point Fires plc. Christchurch, Dorset BH23 2BT Tel: 01202 499330 Fax: 01202 499326 www.focalpointfires.co.uk Email: sales@focalpointfires.co.uk PASADENA LED ELECTRIC FIRE Questions or problems with your appliance? Don’t take it back to the store 01202 588601 just give us a call on...
-
Page 2: Table Of Contents
I N S TA L L AT I O N & U S E R I N S T R U C T I O N S GB IE Section Contents Page No. Section Contents Page No. Important Notes Installation Wall Mounted Installation Requirements Installation Table Top Appliance Data... -
Page 3: Installation Requirements
2.0 INSTALLATION REQUIREMENTS GB IE The appliance is supplied with a pre-wired three pin plug (13 Amp fuse rated) and 1.8 metres of electrical cable. It is therefore necessary for a suitable electrical socket to be located within this distance and be easily accessible.This appliance is designed to be wall hung, using the wall fixtures/fixings provided. -
Page 4: Site Requirements
5.0 COMPONENT CHECKLIST - CONTINUED GB IE 7. Logs 8. Pebbles Dependent On Model 9. Fuel Bed Holder 10. Remote Control 6.0 SITE REQUIREMENTS It should be noted that the appliance creates warm convected air currents.These currents move heat from the room surroundings to, and up the wall surfaces adjacent to the heater. -
Page 5: Installation Wall Mounted
8.0 INSTALLATION WALL MOUNTED GB IE CAUTION: DO NOT CONNECT THE APPLIANCE TO THE WARNING ELECTRICAL SUPPLY AT THIS TIME. Focal Point Fires plc. assumes absolutely no responsibility for injuries and damages The wall where the appliance is to be that may occur due to improper installation or handling. - Page 6 8.0 INSTALLATION WALL MOUNTED - CONTINUED GB IE 3. Find the optimal place to mount your Wall-mounted Fireplace. Consider the proper position relative to your room, placement of furniture and windows. 4. Hold the Mounting Bracket up to the wall to verify the correct location and ensure that the Mounting Bracket is level. Use a pencil to mark the four mounting holes on the wall at the desired mounting location, using the Mounting Bracket as a template.
- Page 7 8.0 INSTALLATION WALL MOUNTED - CONTINUED GB IE 8. Hang the Firebox on the hooks at the bottom of the Mounting Bracket , and push the top of the Firebox into the Mounting Bracket. As shown. 9. Ask a friend to hold the Electric Firebox into place and secure it to the Mounting Bracket by refitting the two small screws which were removed in step 2.
-
Page 8: Installation Table Top
8.0 INSTALLATION WALL MOUNTED - CONTINUED GB IE 12. Lift the Glass Fascia into place, making sure the 2 hooks on the top back of the Glass Fascia fit securely into the slots on the top of the Firebox. As shown. NOTE: It is recommended that you use two people at this stage to prevent to the Glass Fascia or the Firebox. - Page 9 9.0 INSTALLATION TABLE TOP - CONTINUED GB IE Front brace Front brace Deflector Table top support Table top base 3. Fasten the Deflector to the Front Brace with two M4 x 8 mm Screws (1). As shown. 4. Slide the Front Brace assembly onto the Table Top Support and rest it onto the Table Top Base . As shown. Firebox Table top support Firebox...
-
Page 10: Operating The Appliance
9.0 INSTALLATION - TABLE TOP - CONTINUED GB IE 7. Repeat steps 10 and 11 on the Installation wall mounted to change the log fuel bed to pebble. 8. Repeat steps 12 on the Wall Mount configuration to install the Glass Fascia on the firebox. 10.0 OPERATING THE APPLIANCE On the top right side plate of the Electric Fireplace is the control panel.This panel contains the buttons to properly operate the electric fireplace.The buttons on the... - Page 11 10.0 OPERATING THE APPLIANCE - CONTINUED GB IE Remote Control The fire is supplied with an IR multifunction remote. Before the remote will operate the plastic insulating sheet needs to be removed. Battery Replacement Battery Requirements: CR2025 1. Locate and remove the battery bracket. 2.The battery has two sides, one with a button feature, and the other is flat.
-
Page 12: Cleaning And Maintenance
10.0 OPERATING THE APPLIANCE - CONTINUED GB IE Using theTimer Control Button Pressing the timer control button (5) will set the timer. NOTE: If this product experiences exceptionally high temperature, it may automatically stop heating. If this occurs the product should be unplugged or isolated from the main supply for a period of 30 seconds before the power is then re-supplied. -
Page 13: Troubleshooting Guide
12.0 TROUBLESHOOTING GUIDE GB IE Fire is not switching on Ensure mains switch is on Replace the fuse in the plug Fire is not emitting any heat The fire is fitted with an energy saving thermostat. If the temperature in the room is higher than the temperature selected on the fire, then the thermostat will stop the heater from turning on.
Need help?
Do you have a question about the EF11-36 PASADENA LIMOUSIN and is the answer not in the manual?
Questions and answers