Advertisement
Assembly and Operating Instructions for
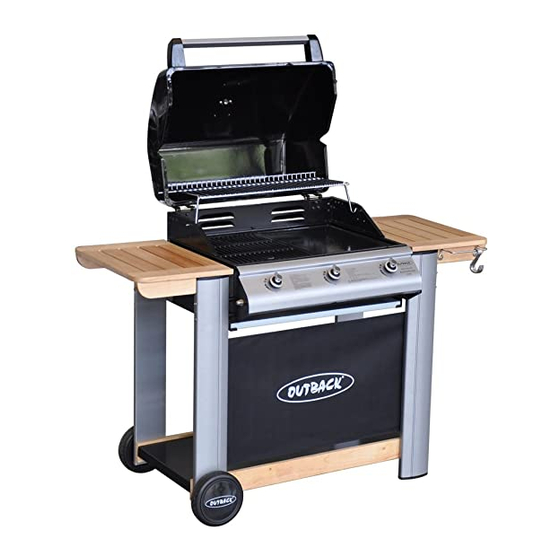
Outback® Spectrum 3 Burner Hooded Gas Barbecue
Photographs are not to scale.
Specifications subject to change
without prior notice.
•
•
•
•
•
•
WARNING
•
•
FOR YOUR SAFETY
If you smell gas:
1.
Shut off gas to the appliance.
2.
Extinguish any open flame.
3.
Open barbecue lid or hood.
4.
If odour continues, discontinue use and
contact your local dealer.
Check the box and make sure you have all the parts and fittings listed. If not, contact your local store or
the Helpline
THG3302P
For outdoor use only.
Read instructions before using the appliance. Failure to follow instructions could
result in death, serious bodily injury, and/or property loss.
Warning: accessible parts may be very hot. Keep young children away.
Do not move the appliance during use.
Turn off the gas supply at the gas bottle after use.
Any modification of the appliance, misuse, or failure to follow the instructions may
be dangerous and will invalidate your warranty. This does not affect your statutory
rights.
Retain these instructions for future reference.
Leak test annually, and whenever the gas bottle is removed or replaced.
1.
2.
0162-267-1771
who will be able to help you.
FOR YOUR SAFETY
Do not store or use petrol or other flammable
vapours or liquids in the vicinity of this or any
other appliance.
A gas bottle not connected for use shall not be
stored in the vicinity of this or any other
appliance.
0359
Advertisement
Table of Contents

Related Manuals for Outback THG3302P


Summary of Contents for Outback THG3302P
-
Page 1: For Your Safety
Assembly and Operating Instructions for Outback® Spectrum 3 Burner Hooded Gas Barbecue THG3302P Photographs are not to scale. Specifications subject to change 0359 without prior notice. • For outdoor use only. • Read instructions before using the appliance. Failure to follow instructions could result in death, serious bodily injury, and/or property loss. -
Page 2: Parts List
A. Parts List Quantities vary according to model purchased. Specifications subject to change without prior notice. For more details on hardware, please see ‘Hardware Reference Diagram’. Outback® Spectrum CODE PART 3 Burner Hooded Hood Handle L/H Hood Handle Bracket R/H Hood Handle Bracket... - Page 4 Lay the assembled trolley on its side. Lay the body (B1) on its back and slide into position between the trolley legs. Warning: Care must be taken to ensure hood does not fall open unexpectedly. When positioning the body of the barbecue, ensure the control panel is on the same side as the legs with Velcro fastenings.
- Page 5 Carefully stand the barbecue upright. Remove the plastic wrap from the flame(B5, B6) and lay them carefully into the body ensuring they lie level within the body. Lay the cooking grill(s) (B7, B8)and griddle (B9) into place. 2 burner model configuration: Left — Large Cooking Grill, Flame Tamer, Right — Small Cooking Grill, Flame Tamer;...
- Page 6 Attach the drip tray handle (B12) to the drip tray using the M5x10 bolts (D1). Put the drip tray underneath the body (B1) from back side. (Rear view of the barbecue trolley.) Attach the warming rack (B14) to the Attach the screen (C6) to the front left/right hood as shown.
- Page 7 Connect the hose and regulator (B13) to the BBQ. Ensure the mating faces of the connection are clean and not damaged. Do not use any sealing tape, paste or liquid on the joint. The nut must be tightened with a spanner. Do not use force which may damage the assembly.
-
Page 8: Installation
Open the barbecue hood before lighting. Model Propane Bottle Size Do not move the barbecue while alight. Outback® Spectrum 5kg or 13kg This barbecue must not be left unattended 3 Burner Hooded when lit. -
Page 9: Operation
is switched off, and that there are no sources of foods from sticking to the porcelain, please use a ignition (cigarettes, open flame, sparks, etc.) near long handled brush to apply a light coat of cooking before proceeding. Inspect the gas hose to ensure or vegetable oil before each barbecuing session. -
Page 10: Care And Maintenance
To reduce flare-ups, the burners should available from your local Outback® stockist. be turned down to the low setting. Flare–ups can be extinguished by applying baking soda or salt Even when your barbecue is covered for its directly onto the flame tamers. - Page 11 the cover. Any rust that is found that does not Clean the venturi tube with a pipe cleaner or piece come into contact with the food should be treated of wire. You may need a torch to see into the with a rust inhibitor and painted with barbecue venturi tube to make sure it is clear.
-
Page 12: Technical Specifications
Heat Input Burners Injector Size end connections are regularly inspected and Approval replaced if showing signs of: • Outback® Physical damage such as – cuts or abrasion, Spectrum 0359 cracking, stretching, flattening or kinking; 11.88kW 1.05mm... -
Page 13: Troubleshooting
K. Troubleshooting Problem Possible Cause Solution Burners will not light using LP gas bottle is empty Replace with full bottle the ignition system Faulty regulator Have regulator checked or replace Obstructions in burners Clean burners Obstructions in gas jets or gas hose Clean jets and gas hose Electrode wire is loose or disconnected Reconnect wire...
Need help?
Do you have a question about the THG3302P and is the answer not in the manual?
Questions and answers