Table of Contents
Advertisement
Quick Links
Advertisement
Table of Contents

Related Manuals for Whistler D19VR


Summary of Contents for Whistler D19VR
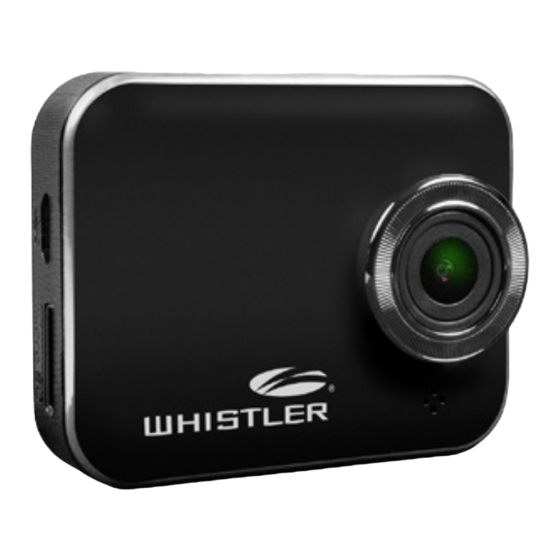
- Page 1 D19VR OWNER’S MANUAL DVR Camera...
-
Page 2: What's Included
PORT ADAPTER MANUAL Welcome Thank you for choosing a Whistler product. We are dedicated to providing products that represent both quality and value. Please read the user manual carefully before using this product. If you have additional questions, please visit the FAQ page on our website at www.whistlergroup.com or call... -
Page 3: Feature Description
FEATURE DESCRIPTION Features Camera Lens Micro USB Port Microphone Speaker MicroSD Card Slot Status Indicator Emergency/Enter/ Power/Menu/ GPS Reciever Slot Stop Button Mute/Home Micro HDMI Port Record/Select/ Button Adapter Rail Pause Button LCD Display... - Page 4 FEATURE DESCRIPTION Button and Function 1. Camera Lens - 1600 ultra wide-angle lens. 2. Speaker - Provides audio for playback and device tones. 3. Emergency/Enter/Stop Button - Press button to display menu settings. 4. Record/Select/Pause Button - Press and hold to start recording.
-
Page 5: Inserting A Microsd Card
OPERATIONS Inserting a MicroSD Card Before initial use, insert a microSD card. (for best results, use at least a 4GB card High Capacity, up to 64GB). Charging the Unit Fully charge DVR for initial use by: • Car charger • PC USB port Display screen will show while charging. - Page 6 OPERATIONS Installing the Windshield Bracket The included windshield bracket securely places the DVR onto the vehicle’s windshield. Follow the procedure below to secure the bracket: 1. Screw the TRIPOD ADAPTER onto the threaded shaft of WINDSHIELD BRACKET. 2. Slide the TRIPOD ADAPTER into the ADAPTER RAIL on the top of the DVR.
- Page 7 OPERATIONS Power Connection in Vehicle 1. Plug the Micro USB end of the vehicle power cord into the Micro USB port of the DVR. 2. Insert 12V Power Port Adapter into available vehicle 12V power port. 3. Insert the other end of the power cord into the vehicle’s lighter socket/power port NOTE: Unit will automatically turn on and start recording when power is applied.
-
Page 8: Menu Settings
OPERATIONS to exit Playback mode. 5. Press 6. Power off: Press and hold for 2 seconds. Home Select Item/Pause Enter/Stop Menu Settings DVR has eight menu settings. Advanced settings can be set up via mobile APP. Play recorded images Playback Action Cam Mode Dash Cam is default option, press to switch to Action cam... - Page 9 OPERATIONS NOTE: After 10 seconds (approx.) of non-operation in menu settings, screen returns to preview. DVR has two recording modes for different applications: Action Cam Mode: Shoot normal videos. Dash Cam Mode: Shoot loop and emergency videos. Comparison between modes: Mode Action Cam Mode Dash Cam Mode...
-
Page 10: Wireless Remote Operation
Before the wireless feature can be used, type the Whistler Group application name: D19VR, in the search field from Google Play Store or the Apple App Store, then download the app to your smart phone or mobile device. - Page 11 OPERATIONS Google Play Store Apple App Store The App allows control over the D19VR in two ways: 1) Local access (directly to a smart phone via WiFi) or 2) over the internet via a hot spot or Wireless router system.
-
Page 12: Local Access
OPERATIONS Local Access Smart Phone connects to unit directly via WiFi for remote control, live view, album management and Local setup features. Local Mobile Via Internet Smart Phone connects to cloud server to view live videos uploaded from internet remote DVR. Internet Wireless Router... - Page 13 OPERATIONS Local Access Setup 1. For Android: Turn on WiFi. For iOS: Go to Settings / WiFi. Turn on WiFi and select the unit’s name (WH-xxxxxxxx). 2. Run 3. Select then the unit’s ID to enter View Page. Select to scan again if unit is not found. NOTE: • Local Access cannot connect while the unit is recording.
- Page 14 OPERATIONS View Page Items Descriptions Shoots videos and files are saved into DVR microSD card Tap DVR button to start and stop recording video. Tap Camera button to take a photo. These files will be saved to your mobile device’s camera roll (on iOS) or Photo Gallery (on Android).
- Page 15 OPERATIONS Album Page (for DVR) Folders Descriptions View or delete video files recorded in Action Cam Mode View or delete video files recorded in Dash Cam Mode NOTE: 1. In Setup Page, select Save to complete settings to DVR. 2. Mobile media player may not support SuperHD video. The following sections are part of the Wireless Access features.
-
Page 16: Motion Detector Setup
OPERATIONS 1. Go to Setup / Internet Settings: Edit Email and AP 2. Select Save to complete Email & AP settings. NOTE: AP (Access Point) can be: • Wireless Router or • 3G/4G Mobile Wireless Router or • 3G/4G Mobile Hotspot Wireless 3G/4G 3G/4G... -
Page 17: G-Sensor Setup
OPERATIONS G-Sensor Setup When DVR is recording and any impacts happen, DVR can automatically record emergency events if G-Sensor is set. 1. Go to APP Setup / Car DVR Settings / Select G-Sensor, H / L Select Save. NOTE: H = High sensitivity. L = Low sensitivity. - Page 18 OPERATIONS Status Descriptions Connection successful. Preview shows and DVR ID Login failed: • Invalid AP name or password • Weak WiFi signal or not in WiFi coverage Connection failed: • No internet or cloud server accessibility • Blocked by a firewall Remote Internet Live View 1.
-
Page 19: Special Functions
SPECIAL FUNCTIONS Special Functions • G-sensor function. If a sudden shock is detected (such as in an accident) the video segment recorded is protected from being overwritten. • Automatic power ON/OFF function when using car adapter plugged into 12V power port controlled by vehicle ignition. -
Page 20: Troubleshooting
DVR WiFi is disabled or not in WiFi coverage. Mobile cannot Mobile WiFi is disabled. find DVR - Local iOS user doesn’t choose DVR name in WiFi settings button on Whistler Driver. Weak WiFi signal. Mobile cannot DVR is recording. watch live view DVR is occupied by other mobile. -
Page 21: Specifications
SPECIFICATIONS , HD eatures camera viDeo recorDing sensor iF a suDDen sHock is DetecteD sucH as in an acciDent tHe viDeo segment recorDeD is protecteD From being overwritten 2.0Ltps screen size 160 o camera uLtra wiDe angLe Lens MENU anguage supporteD Languages are ListeD in settings iLes Format... - Page 22 SPECIFICATIONS Hoto moDe megapixeLs Hoto Format sD - c4 . / 64gb emory carD icro uiLt HDmi iDeo output paL/ntsc iDeo Format 50Hz/60Hz urrent Frequency attery uiLt System Requirements • Apple iOS 6.0 or above Smartphone / Tablet • Android 4.0 or above...
-
Page 23: Warranty Information
WARRANTY INFORMATION Consumer Warranty This Whistler product is warranted to the original purchaser for a period of one (1) year from the date of original purchase against all defects in materials and workmanship, when purchased from an authorized Whistler retailer. This limited warranty is void if the unit is abused, misused, modified, installed improperly, or if the housing and/or serial numbers have been removed. - Page 24 • The unit has been misused, abused, modified, installed improperly, or had its housing removed. The minimum out of warranty service fee for your Whistler DVR Camera is $75.00 (U.S.). If you require out of warranty service, please return your unit as outlined in the section “Service Under Warranty”...
- Page 25 WARRANTY INFORMATION In the event repairs cannot be covered by the minimum service fee, you will be contacted by a Whistler technical service specialist who will outline options available to you. IMPORTANT: When returning your unit for service, be certain to include a daytime telephone number and an email address (if applicable).
-
Page 26: Corporate Headquarters
Bentonville, AR 72712 Toll Free (800) 531-0004 TEL (479) 273-6012 FX (479) 273-2927 www.whistlergroup.com CUSTOMER RETURN CENTER 1412 South 1st St. Rogers, AR 72756 Customer Service Tel (800) 531-0004 Email: info@whistlergroup.com P/N 403801a 03M15 © 2015 The Whistler Group, Inc.
Need help?
Do you have a question about the D19VR and is the answer not in the manual?
Questions and answers