Advertisement
Table of Contents
- 1 Table of Contents
- 2 Important Safety Instructions
- 3 Important Electrical Information
- 4 Important Electrical Instructions
- 5 Assembly Instructions
- 6 Folding/ Transport Instructions
- 7 Operation of Your New Treadmill
- 8 Exploded View Diagram/Parts List
- 9 General Maintenance
- 10 Manufacturer's Limited Warranty
- Download this manual
Advertisement
Table of Contents

Related Manuals for Body Break 1611325


Summary of Contents for Body Break 1611325
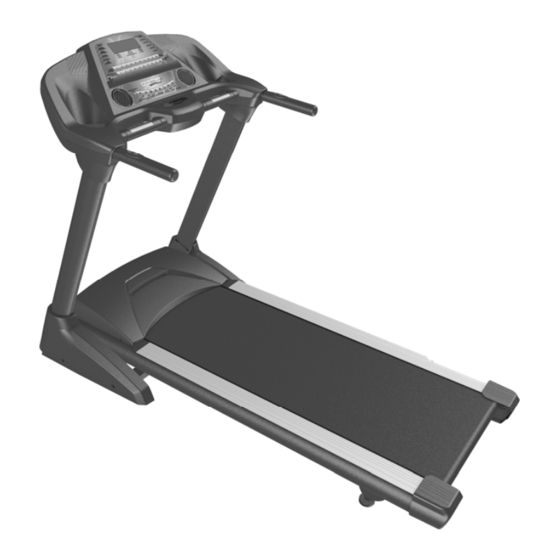
- Page 1 Owner’s Manual Model No. 1611325 - Assembly - Operation - Adjustments - Parts - Warranty CAUTION: Read and Understand this Manual before Operating unit Retain For Future Reference...
-
Page 2: Table Of Contents
TABLE OF CONTENTS Important Safety Instructions…………………………………………………. 2 Important Electrical Instructions……………………………………………… 4 Assembly instructions…………………………………………………………. 5 Folding/ Transport Instructions………………………………………………..11 Operation of Your New Treadmill……………………………………….……12 Exploded View Diagram/Parts List………………………………………...…17 General Maintenance……………………………………..……………………21 Manufacturer’s Limited Warranty………………………………………..…..24 Customer Service 1-888-707-1880 Dyaco Canada Inc. 2013 Email: customerservice@dyaco.ca... -
Page 3: Important Safety Instructions
IMPORTANT SAFETY INFORMATION THIS UNIT IS INTENDED FOR HOUSEHOLD USE ONLY READ ALL INSTRUCTIONS BEFORE USING THIS TREADMILL ▲CAUTION: Before starting any exercise program, it is recommended that you consult your physician. ▲WARNING: Connect this unit to a properly grounded outlet only. ▲DANGER: To reduce the risk of electric shock, always unplug the treadmill from the electrical outlet immediately after using and before cleaning. - Page 4 13. Handicapped individuals should have medical approval and close supervision when using this treadmill. 14. Do not place hands or feet under the treadmill. Always keep hands and legs off of the treadmill when others are using it. 15. Never turn on treadmill while standing on treadbelt. Always hold the handrails while using the treadmill. Always return the treadmill to the slowest speed to provide for safe dismount and low speed restart.
-
Page 5: Important Electrical Instructions
Important Electrical Information WARNING! NEVER use a ground fault circuit interrupt (GFCI) wall outlet with this treadmill. Route the power cord away ● from any moving part of the treadmill including the elevation mechanism and transport wheels. NEVER remove any cover without first disconnecting AC power. ●... -
Page 6: Assembly Instructions
Assembly Instructions !!ATTENTION: IMPORTANT UNPACKING INSTRUCTIONS. PLEASE READ BEFORE UNPACKING YOUR FOLDING TREADMILL!! Serious injury could occur if this folding treadmill is not unpacked properly. There is a Velcro strap installed around the treadmill base that prevents the treadmill from unfolding accidentally during shipping. - Page 7 Assembly Instructions #96. M5×10m/m #95. Ø8×Ø19×1.5T Phillips Head Screw (6pcs) Curved Washer (8pcs) #94. 5/16" × 15m/m #90. Ø3.5 × 12m/m Button Head Socket Bolt Sheet Metal Screw (4pcs) (14pcs) #93. Lubricant (1pc) #102. Safety Key (1pc) #97. Combination M5 Allen Wrench & #98.
- Page 8 Assembly Instructions Step 1. Remove the treadmill from the carton and lay it on a smooth level surface. Step2. Connect the Lower Computer Cable(38) to the Extension Computer Cable(37). Customer Service 1-888-707-1880 Dyaco Canada Inc. 2013 Email: customerservice@dyaco.ca...
- Page 9 Step 3 Insert the Left Upright(4 into the Frame Base (2). Secure using four 5/16 x15mm Button " Head Socket Bolts (94) and four 8 x 19 x 1.5T Curved Washers (95) using the Ø Combination M5 Allen Wrench & Phillips Head Screw Driver (97). Repeat for the Right Upright (5).
- Page 10 Step 5. Connect the Extension Computer Cable(37) to the Upper Computer Cable (36). Step 6. Install the Console Assembly (39) into the Right and Left Uprights (4,5). Secure using six 5/16 x15mm Button Head Socket Bolts (94) and four 8 x 19 x 1.5T Curved Washers (95) "...
- Page 11 Step 7. Secure the Left and Right Handrail Base Covers (41, 40) to the Console Assembly (39) using four 3.5x12mm Sheet Metal Screws (90) by using the Combination M5 Allen Wrench & Phillips Head Screw Driver (97). Step 8. Install the Left Frame Base Cover (44) onto the Frame Base (2). Secure using six M5x10mm Phillips Head Screws (96) by using the Combination M5 Allen Wrench &...
-
Page 12: Folding/ Transport Instructions
Folding Instructions Do not attempt to move the unit unless it is in the folded and locked into position. Be sure the power cord is secured to avoid possible damage. Use both handrails to maneuver the unit to the desired position. ■... -
Page 13: Operation Of Your New Treadmill
Operation of Your New Treadmill Initial Display: When the power is turned on, the main display will light up showing all characters. The console will be performing an internal test to make sure the console is operational. The display will then scroll through three numbers, the first showing the current software version, second is how many hours the treadmill has been in use and third is how many virtual miles the treadmill has gone. - Page 14 WINDOW DISPLAY DATA: SPEED: Displays the current belt speed from starting at 0.8 mph to 12.0 mph. TIME: Accumulates total workout time from 00:00 to 99:59. DISTANCE: Accumulates total workout distance from 0.00 to 99.99 miles. CALORIES: Accumulates the user’s calorie consumption during exercise. Max. Value is 9999 calories.
- Page 15 PROGRAMS MANUAL(P0) STEP 1: Press Program UP/DOWN button to highlight Manual (P0) and press enter. STEP 2: You can set count down time from 10:00 to 99:00. Press FAST/SLOW to adjust the value and then press the ENTER button to continue to the next step. If you leave the value at 00:00, the time will count up.
- Page 16 USER (U1~U2) STEP 1: Press PROGRAM UP/DOWN buttons to select the program you desire. STEP 2: The pre-set value of time is 20:00, and the range is from 00:00 to 99:00. Press FAST/SLOW (UP/DOWN) buttons to modify and then press ENTER to continue. STEP 3: Press FAST/SLOW (UP/DOWN) buttons to adjust the weight, then press enter.
- Page 17 SPEED PROFILE INCLINE PROFILE Customer Service 1-888-707-1880 Dyaco Canada Inc. 2013 Email: customerservice@dyaco.ca...
-
Page 18: Exploded View Diagram/Parts List
Parts List and Diagram KEY NO. PART NO. DESCRIPTION Q'TY 132501 Main Frame 132502 Frame Base 132503 Incline Bracket 132504 Left Upright 132505 Right Upright 132506 Console Support 132507 Outer Slide 132508 Inner Slide 132509 Locking Knob 132510 Frame Cover 132511 Belt Guide 132512... - Page 19 KEY NO. PART NO. DESCRIPTION Q'TY 39~2 132539~2 Console Bottom Cover 39~3 132539~3 Front Console Cover (Inner) 39~4 132539~4 Console Speaker Cover (R) 39~5 132539~5 Console Speaker Cover (L) 39~6 132539~6 START Key (L) 39~7 132539~7 STOP Key (R) 39~8 132539~8 Speaker Grill Anchor 39~13 132539~13 Amplifier Controller...
- Page 20 KEY NO. PART NO. DESCRIPTION Q'TY 132572 M8 × 60m/m_Hex Head Bolt 132573 M8 × 65m/m_Socket Head Cap Bolt 132574 M8 × 25m/m_Flat Head Countersink Bolt 132575 1/2" × 8.0T_Nyloc Nut 132576 3/8" × 7.0T_Nyloc Nut 132577 5/16" × 6T_Nyloc Nut 132578 M8 ×...
-
Page 21: Parts Diagram
PARTS DIAGRAM Customer Service 1-888-707-1880 Dyaco Canada Inc. 2013 Email: customerservice@dyaco.ca... -
Page 22: General Maintenance
General Maintenance Belt and Bed - Your treadmill uses a very high-efficient low-friction bed. Performance is maximized when the bed is kept as clean as possible. Use a soft, damp cloth or paper towel to wipe the edge of the belt and the area between the belt edge and frame. Also reach as far as practical directly under the belt edge. -
Page 23: Treadbelt Tracking Adjustment
TREADBELT TRACKING ADJUSTMENT: The performance of your treadmill is dependent on the frame running on a reasonably level surface. If the frame is not level, the front and back roller cannot run parallel, and constant belt adjustment may be necessary. The treadmill is designed to keep the treadbelt reasonably centered while in use. - Page 24 Service Checklist – Diagnosis Guide Before contacting your dealer for aid, please review the following information. It may save you both time and expense. This list includes common problems that may not be covered under the treadmill’s warranty. PROBLEM SOLUTION/CAUSE Display does not light.
-
Page 25: Manufacturer's Limited Warranty
Manufacture’s Limited Warranty Dyaco Canada Inc. warrants all its home use treadmills parts for a period of time listed below, from the date of retail sale, as determined by a sales receipt or in the absence of a sales receipt. Dyaco Canada Inc.’s responsibilities include providing new or remanufactured parts, at...
Need help?
Do you have a question about the 1611325 and is the answer not in the manual?
Questions and answers