
Related Manuals for AAton Penelope


Summary of Contents for AAton Penelope
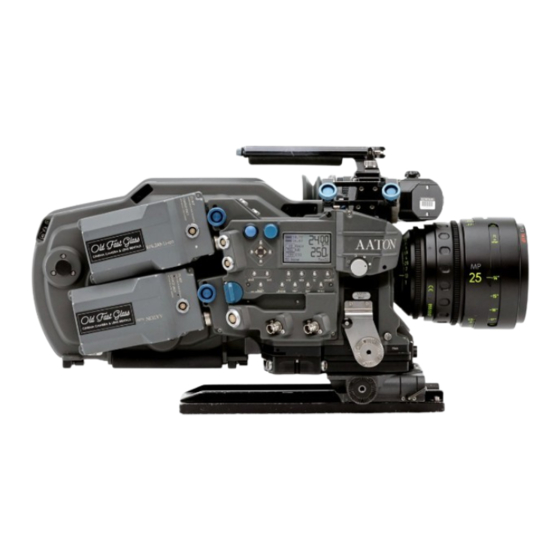
- Page 1 Aaton Aaton 35mm 2-Perf & 3-Perf motion picture camera User’s guide v1.33 (rev.1) Aug. 19 2010 Aaton...
-
Page 2: Table Of Contents
Power down the camera electronics and video-assist The «set» key TEST mode Adjusting the Aatonite (glow) Film camera status Warning messages Magazine footage adjustment Foot or meter setting Footage counting Manual footage counter Video-assist direct access Aaton Table of content... - Page 3 The eyepiece shutter Viewing screen Changing the viewing screen Adjusting the viewing screen 2.3 The variable shutter Concept Adjusting the shutter 2.4 Film gate and pulldown claw Adjusting the pitch The side pressure bar The film gate Aaton Table of content...
- Page 4 ISO setting SYNC speed VAR speed EXT speed EXT SYNC speed Low battery alert Technical menu LEMO start mode Video Out menu System Time Adjusting the low-battery alert level Display contrast adjustment External Sync Footage Mode Aaton Table of content...
- Page 5 Claw rear pressure plate Picture rear pressure plate 3.3 Loading the film (in 17 steps) In the light In the dark Still in the dark Still in the dark In the light again Installing the magazine Removing the magazine Aaton Table of content...
- Page 6 • Color/B&W out (Output). 4.2 Frame & mask 4.3 Proxies capture 4.4 Metadata insert • AatonCode • Battery voltage • VITC line & parity (not yet functional) • Lens Data • Film status • Software/hardware 4.5 Logos Technical drawings Aaton Table of content...
-
Page 7: General Overview
General overview... -
Page 8: Front View
Run/Stop connector LEMO-2 connector Rosette For accessories compatible with ARRI rosettes Video (VHR) ND knob To adjust the video light level Protects the CCD unit Video housing Top rod holder To install a rod (15, 15.8 or 19mm) Aaton General overview... -
Page 9: Rear View
Magazine release lever Used to release the magazine from the camera body LEMO-5 socket Timecode communication Removable gate, 2-Perf or 3-Perf Gate Run/Stop switch Runs/stops the film Magazine locking lever Secures the magazine to the camera body Aaton General overview... -
Page 10: Assistant's Side
Magazine release lever Unlocks the magazine from the camera body LEMO-8 socket Provides +Batt., Start, Sync and Ground for accessories Lower battery locking screw Fastens the lower onboard battery LEMO-6 socket (x2) Provides +Batt., Start and Ground for accessories Aaton General overview... -
Page 11: Assistant's Controls
Lower battery locking screw Fastens the lower onboard battery Ethernet cable locking lever Locks Ethernet cable LEMO-6 socket (x2) Provides +Batt., Start and Ground for accessories Run/Stop switch Runs/stops the film Fastens the upper onboard battery Upper battery locking screw Aaton General overview... -
Page 12: Assistant's Controls - Detailed View
(«set» + «sync») «var» key access variable speed settings («set» + «var») and external speed control «iso» key access ISO and magazine IDs («set» + «iso») «mag» key access magazine footage settings («set» + «mag») Aaton General overview... -
Page 13: Operator's Side
Adjusts loop size while loading the magazine Lower display key Modifies camera parameters Operator’s LCD display Displays camera speed and magazine footage Modifies camera parameters Middle display key Upper display key Modifies camera parameters Run/Stop switch Runs/stops the film Aaton General overview... - Page 14 Hour : minute : second [initialization] Film ISO ISO for correct AatonCode matrix exposure Video-assist white balance 5600°K, 3200°K and Assistant entered values Current gain setting Video-assist gain Lower battery meter Lower battery voltage Upper battery meter Upper battery voltage Aaton General overview...
-
Page 15: Top View
Secures the magazine to the camera body Collimation cap Gives access to ground glass collimation adjustment Viewfinder friction screw Adjusts the viewfinder up-down freedom of movement Holds the focus distance tape on the gate plane Tape hook Aaton General overview... -
Page 16: Getting Started
Getting started... -
Page 17: Power Up The Camera Electronics
When finished, the screen displays Au revoir. The «set» key The «set» key gives access to the camera’s settings. While pressing the «set» key, a window appears for a few seconds allowing you to access the desired parameters. Aaton Getting started... -
Page 18: Test Mode
(B) or upper (C) keys located on the Operator’s side. The configuration of these markings is different from one screen to another (see the screen illustrations, Chapter 5). NOTE: the brightness level can also be adjusted while the film is running. Aaton Getting started... -
Page 19: Film Camera Status
The camera is in RUN, but has not yet reached the selected speed. Green The camera is in RUN at the selected speed. Purple The camera is at end of film A problem has been detected, e.g. film jam. Aaton Getting started... -
Page 20: Warning Messages
It is equipped with a position sensor which does not allow the camera to run if this lever is unlocked; the message MAG NOT LOCKED is displayed and the camera refuses to run. Lock the lever and press RUN. Aaton Getting started... -
Page 21: Magazine Footage Adjustment
While in the Mag menu, press the «left» or «right» key to select the desired measuring unit. Footage counting Penelope can display either the remaining or the elapsed footage. To select the mode, press the «set» key then the «tech» key to open the Technical Menu. -
Page 22: Manual Footage Counter
Dark is displayed. When the white balance is correct, OK is displayed. NOTE: The video-assist switches automatically to the User’s Color Tempera- ture mode. The stored RGB values can be modified in the Video Menu, see Chapter 4. Aaton Getting started... -
Page 23: Camera Body
Camera body... -
Page 24: Lenses
Refers to the critical distance from the lens seat to the film The PL lens port plane. With the PL port, the precise FFD of Penelope is 52mm -30 to -40 microns as measured with a depth gauge in the lens The PL lens port is the standard mounting system delivered with Penelope port. -
Page 25: Viewing System
2.2 Viewing System Eyepiece Penelope viewfinder is designed to be fully orientable, providing left or right side viewing and upright image in any position. The viewfinder arm is equipped with an eyepiece that can be used for handheld and tripod opera- tion. -
Page 26: Viewfinder Tension Adjustment
Find the knurled knob (D) located on top of the viewfinder. While looking through the viewfinder, turn the knob in order to adjust the image’s upright position. NOTE: the knob needs to be turned 180° when installing an eyepiece exten- sion. Aaton Camera body... -
Page 27: Adjusting The Diopter
To close or open the eyepiece shutter, use the small silver lever located on the eyecup ring (F). Viewing screen The viewing screen (ground-glass) is interchangeable. Viewing screens for 2-Perf and 3-Perf formats can be selected in «Viewing Screens List», Chap- ter 5. Aaton Camera body... -
Page 28: Changing The Viewing Screen
Get a sharp image on the ground-glass by moving the holder up or down with the Allen key. Double check the focus of the viewing screen using the focus ring of the lens. If the image is still not sharp, perform this operation again. Aaton Camera body... -
Page 29: The Variable Shutter
Make sure the white line to the immediate right of the 172.8°, 150° and 144° markings meets the left edge of the mirror. When the adjustment is done, remove the tool and store it back in the carry- ing handle. Aaton Camera body... -
Page 30: Film Gate And Pulldown Claw
NOTE: Make this adjustment with the film stock you will be using. The side pressure bar The film gate also features a side pressure bar (B) at the level of image expo- sure to insure maximum lateral steadiness. The film gate Penelope offers 2-Perf and 3-Perf capabilities. Aaton Camera body... -
Page 31: Camera Power
2.5 Camera power Penelope requires a minimum 12.4V power source. An Aaton 14.8V 4.2Ah Lithium-Ion onboard battery can run the camera for twenty 400’ magazines, i.e. three hours of 2-Perf shooting. When the video-assist is activated and power hungry accessories such as... -
Page 32: Charging The Batteries
Charging the batteries The Aaton Li-Ion batteries must be charged with the Aaton Cha-Li three-hour charger. If you can’t even tolerate the low noise level of its fan (around 30dBA at one meter), use a silent Aaton Chascot five-hour charger. -
Page 33: Motors
2.6 Motors Three crystal controlled tri-phase motors are in use: one for the claw mecha- nism, one for the magazine drive, one for the shutter. Penelope is capable of speeds between 3 and 40fps with a standard Li-Ion 14.8V battery. -
Page 34: Using External Speed Control
Using external speed control Penelope can be driven externally from devices such as film to video syn- chronisers and external speed controls. In these situations, the camera «var» selector must be set to EXT mode. If such a device is connected and the selector is not set to EXT, the camera will run at the speed indicated on the display. -
Page 35: Basics: «Sync», «Var», «Iso», «Mag
Press «set» to accept your choice, press «exit» to leave things unmodified. AatonCode initialization As a standard feature, Penelope is equipped with the AatonCode in-camera timecode recording. Timecode is exposed onto the film by optical projection of seven micro-diodes located in the gate. -
Page 36: Timecode Generator
• The «a» flag indicates that the timecode has been initialized using the Aaton OriginC+ master clock through ASCII communication. • The «s» flag indicates that the timecode has been jammed from the internal system time of the camera. • The «o» flag indicates that the timecode has been manually entered by the operator. -
Page 37: Iso Setting
ISO setting When using AatonCode in Penelope, the ISO setting must be adjusted to the exposure index of the film stock. The ISO selection insures that the matrixes recorded on the edge of the film are correctly exposed. This ISO value is stored for each RFID magazine, identified by a letter from A to J. -
Page 38: Ext Speed
After this initial phas- ing this relationship remains identical every time the camera is turned on, the roll bar remains off-screen. NOTE: If the source signal is faulty or invalid, the camera runs at 3fps, the speed icon is blinking. Aaton Camera body... -
Page 39: Low Battery Alert
Load Soft, SlowStart, NoFilm Mode. To access the Technical Menu press the «set» key then «tech». Select one of the sub-menus and press the «right» key. Select the mode by rotating the «jog» wheel, or pressing the «up» or «down» key. Aaton Camera body... -
Page 40: Lemo Start Mode
LEMO start mode Two Run/Stop modes are available for accessories using Penelope’s LEMO connectors. • IMPULSION for accessories using a pulse signal. • PERMANENT for the Aaton wooden handgrip, and ON/OFF switches and cable made for the 35-III, Xtera, XTR-prod cameras. -
Page 41: System Time
Once you have set all of the date and time fields, press the «set» key to vali- date your selection. Adjusting the low-battery alert level Penelope displays alerts when the battery voltage falls below a preset level. The thresholds set for Batt.1 and Batt.2 do not overide the cameras default minimum levels. -
Page 42: Display Contrast Adjustment
Use the «down» key to select the Ftg Mode item and press the «right» key to access it. Choose between Remaining or Elapsed by pressing the «left» or «right» key. Press «set» to validate your selection, then the «exit» key. Aaton Camera body... -
Page 43: Software Version
Video-assist proxies Still images (jpeg format) can be captured from the video-assist camera and copied onto a FAT32 formatted USB key. When the USB key is recognized, a disk icon appears on the screen. See p.61 . Aaton Camera body... -
Page 44: Firmware Install
NOTE2: do NOT power down the camera until you are told to. NOTE3: following a firmware installation, at camera start up a message might appear indicating an automatic update of both the motor and logic boards. Aaton Camera body... -
Page 45: Slow Start
10°C. - Slow mode : forced slow start mode No Film Mode To allow a start of the camera without film, activate the NoFilm menu. note : in this mode, the camera can’t start with film ! Aaton Camera body... -
Page 46: Operator's Side Settings
• Press the «lower» key and «upper» keys to select the MAG item, press the «lower» key to make it blink, you can now set the magazine footage. Press the «middle» or «upper» key to modify the footage value. Press the «lower» key to validate. Aaton Camera body... -
Page 47: Cold Weather Tips
• The raw stock should also be kept below zero. For the same reason as above, the magazine should be loaded in the cold. • The Aaton Li-Ion onboard batteries should be used in preference to battery belts, several small batteries can be warmed up much more easily than one large heavy one. -
Page 48: Magazine
Magazine... -
Page 49: Concept
3.1 Concept The Penelope magazine is designed to be installed or removed quickly, and to be loaded easily, it handles up to 400ft (122m) loads of 35mm film stock. The magazine sprockets are driven through a magnetic clutch by a motor located in the camera body itself. -
Page 50: Loading The Film (In 17 Steps)
2 Turn the mechanical footage counter (A) clockwise until it locks in place. 3 Unfasten the three blue locking levers (B), turning them counterclockwise. 4 Open the door. 5 Check the magazine for dust and debris. 6 Put the magazine in a dark room or changing bag. Aaton Magazine... -
Page 51: In The Dark
DON’T FORGET to press the center of the core lock mechanism to lock the core in place (A). 8 Push the film head into the center slot (B), until it engages the inner sprocket wheel. Aaton Magazine... -
Page 52: Still In The Dark
10 When the film comes out of the sprocket assembly, gently pull on it. 11 Pull the film out about 20 cm (8 inches) and insert it in the bottom slot until it meets the lower sprocket teeth. Aaton Magazine... -
Page 53: Still In The Dark
Fit the film end into the plastic take-up core and wind on a few turns clockwise with the emulsion in. 14 Close the door door and make sure that it is closed securely. The remaining steps are performed in the light. Aaton Magazine... -
Page 54: In The Light Again
NOTE: the loop adjustment tool makes a loop corresponding to approxi- mately 37 visible perforations. 17 Once the loop has been set, check that the lower sprocket release but- ton has returned to its UP position. Aaton Magazine... -
Page 55: Installing The Magazine
To remove the magazine, stay at the rear of the camera body, Operator’s side. Unlock the magazine upper lock lever and push the magazine release lever (A) toward the front of the camera. Pull the mag off the camera body. Aaton Magazine... -
Page 56: Video-Assist
Video-assist... -
Page 57: Image Look (Video Menu)
The «up», «down», «right» and «left» keys modify the parameters. The «exit» key enters the change. 4.1 Image look (Video menu) Opens access to: • Gain • Color temp. • Color saturation • Color Bars • Color/B&W out Aaton Video... -
Page 58: Gain
Saturation goes up to 200% (factory: 160%). • Color bars These bars are useful to calibrate an NTSC monitor by tuning the color pha- se setting while displaying the monitor’s blue only channel. • Color/B&W out (Output). Aaton Video... -
Page 59: Frame & Mask
The rectangular frame can be set in size and position to perfectly match the camera viewing screen markings. Press the «set» key to enter and modify the corner position using the «up», «down», «left» or «right» key, • Bottom right corner Proceed in the same way as above. Aaton Video... -
Page 60: Proxies Capture
Select the mode by pressing the «left» or «right» key: OFF, Evry 1s (every second), Evry Ns (every N seconds), AUTO (three seconds after RUN, middle of the take, three seconds before STOP). Press «set» to validate the selection. Aaton Video... -
Page 61: Metadata Insert
Ask your editing staff the line # they prefer to work with. Batt voltage : ON ODD or EVEN parity interleave: ODD is common practice. VITC position : 23 Parity : ODD Software : V1.25 • Lens Data As transmitted from the Cooke i/lens system. Aaton Video... -
Page 62: Film Status
Logos can be inserted anywhere in the video picture. This function is not yet functional. • To upload a Logo, connect your computer through the ‘LEMO-5 Serial Port’ cable. • Once the Logo has been imported, you can modify its transparency and its position. Aaton Video... -
Page 63: Technical Drawings
Technical drawings... - Page 64 Fischer-2 Heating cable 1 Ground 2 + Batt. LEMO-5 Timecode 1 Ground 2 SMPaTE In 3 ASCII In/out 4 NC 5 NC LEMO-6 Power 1 Ground 2 NC 3 NC 4 + Batt. 5 NC 6 Start Aaton Technical specifications...
- Page 65 5 Tach. out 6 Start 7 Tach. in 8 Ground XLR-4 Power In 1 Ground 2 Start (only wired on cameras identified by an engraved white dot close to the bottom XLR) 3 + Batt. 4 + Batt. Aaton Technical specifications...
- Page 66 2-Perf S35 centered Penelope Penelope AATON Penelope AATON AATON AATON Penelope AATON Penelope 2 Perf 2 Perf 2 Perf 2 Perf 2 Perf Ref : 33-230-20 Ref : 33-230-21 Ref : 33-230-22 Ref : 33-230-23 Ref : 33-230-24 1.78 1.85 2.35...
Need help?
Do you have a question about the Penelope and is the answer not in the manual?
Questions and answers