Advertisement
READ AND SAVE THESE INSTRUCTIONS
Please read and understand this entire manual before attempting to assemble,
operate, or install the product.
Address: 4405 Cushing Parkway, Fremont, CA 94538
US Toll Free Number: 1-888-979-9889
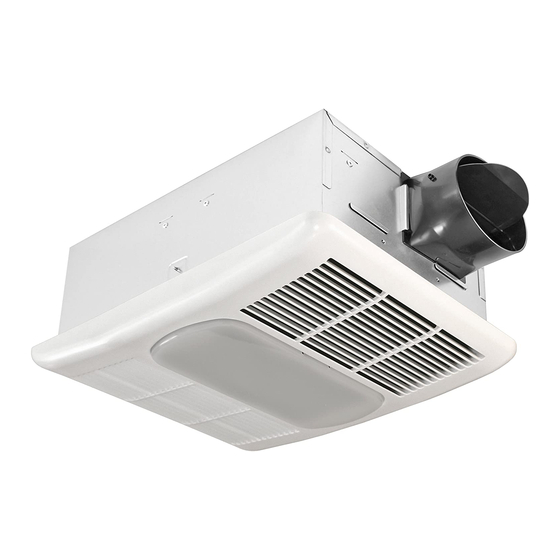
VENTILATION FAN WITH
LIGHT AND HEATER
TABLE OF CONTENTS
MODEL RAD80L
2
3
4
6
10
10
11
13
14
14
15
Advertisement
Table of Contents

Summary of Contents for Delta RAD80L
-
Page 1: Table Of Contents
VENTILATION FAN WITH LIGHT AND HEATER MODEL RAD80L TABLE OF CONTENTS Package Contents Important Instructions Preparation Assembly Instructions Wiring Instructions Operating Instructions Care and Maintenance Troubleshooting Dimensions Warranty READ AND SAVE THESE INSTRUCTIONS Please read and understand this entire manual before attempting to assemble, operate, or install the product. -
Page 2: Package Contents
PACKAGE CONTENTS PART DESCRIPTION Fan Body Grille Assembly 26W(max.) type GU24 Fluorescent Lamp Light Lens Suspension Bracket I Suspension Bracket II HARDWARE CONTENTS Short Machine Screw (M4x12) Qty.4 Machine Screw (M5x14) Qty.1 Wood Screw( 4x14) Qty.8 Model: RAD80L... -
Page 3: Important Instructions
Install in ceiling only, at least 6 in. from any wall. Use this unit in the manner intended by the manufacturer. If you have any questions, please call the manufacturer tub or shower area. Avoid directing toward walls or windows. (customer service number located on last page). Model: RAD80L... -
Page 4: Preparation
DIMENSION REQUIREMENTS Ceiling Ceiling Ceiling Housing Housing Housing Opening (L) Opening (W) Opening (H) Dimension (L) Dimension (W) Dimension (H) 14.62 in. 8.50 in. 5.50 in. 14.38 in. 8.25 in. 5.50 in. Model: RAD80L... -
Page 5: Fan Body
CAUTION: Check area above installation location to ensure that: • Wiring can be run to the planned location. • No wiring or other obstructions can interfere with installation. WARING: • heater. Model: RAD80L... -
Page 6: Assembly Instructions
Secure the suspension brackets to joists with the wood screws e. Secure the suspension brackets to fan body with the short machine screws f. Remove tap before connecting the duct as shown in Figure 1-2. Hardware Short Machine Screw (M4x12) Qty.4 Wood Screw( 4x14) Qty.8 Model: RAD80L... - Page 7 (not supplied), connect house wires to fan wires as shown in the wiring diagram on page 10. Wire connections are as follows: black to live switch wire, white to neutral, green to ground. Reattach fan junction box cover Model: RAD80L...
-
Page 8: Grille Assembly
Plug the Light Connector into the receptacle marked “Light” c. Install the Grille Assembly into the Fan Body using the Machine Screw CAUTION: Do not use Wood Screw in place of Machine Screw Wood screw ( 4x14) Machine screw (M5x14) Model: RAD80L... -
Page 9: Light Lens
ASSEMBLY INSTRUCTIONS lamp into Grille Assembly e. Install the Light Lens into Grille Assembly Model: RAD80L... -
Page 10: Wiring Instructions
1. Turn on the light switch to turn on the light bulb. 2. Turn on the vent switch to operate the fan mode. 3. Turn on the heat switch to operate the heater mode. Model: RAD80L... -
Page 11: Care And Maintenance
• only. • Allow lamp to cool before replacing. To clean fan, disassemble using the following steps: 1. Remove Light Lens cover. 2. Remove 26W(max.) type GU24 Fluorescent Lamp 3. Remove Machine Screw Hardware Machine Screw (M5x12) Qty.1 Model: RAD80L... - Page 12 Never use solvents, thinner or harsh chemicals when cleaning the fan. Vacuum cleaner 6. Replace Grille Assembly back onto Fan Body Please refer to Completing the Installation. Follow the steps on pages 8-9 to assemble fan back together. Model: RAD80L...
-
Page 13: Troubleshooting
5. Be sure the fan is securely attached to your ceiling attached joists. The fan is not clearing 1. Be sure a door or window is slightly ajar or opened the room 2. Be sure the CFM rating on the fan matches the requirements for your room size. Model: RAD80L... -
Page 14: Dimensions
DIMENSIONS 5.50 16.81 1.91 Unit: inch 14.38 PRODUCT SPECIFICATIONS SPECIFICATIONS Model No. RAD80L 80 CFM Noise 1.3 Sones Voltage 120V Hertz 60Hz Power Consumption 1340W Duct Diameter 4 in. Weight 12.1 lbs. Main light output 1850 Lumens, 2700K TYPE IC INHERENTLY PROTECTED. -
Page 15: Warranty
6. To qualify for warranty service, you must notify Delta Electronics at the address or telephone number below. 7. Delta Electronics shall have no liability to the original owner-user with respect to any defect caused by abuse, misuse, neglect, improper transportation or storage, improper testing, improper installation, improper operation,... - Page 16 Model: RAD80L...


Need help?
Do you have a question about the RAD80L and is the answer not in the manual?
Questions and answers