Table of Contents
Advertisement
Advertisement
Table of Contents

Related Manuals for Suzuki Micro Grand Digital Piano


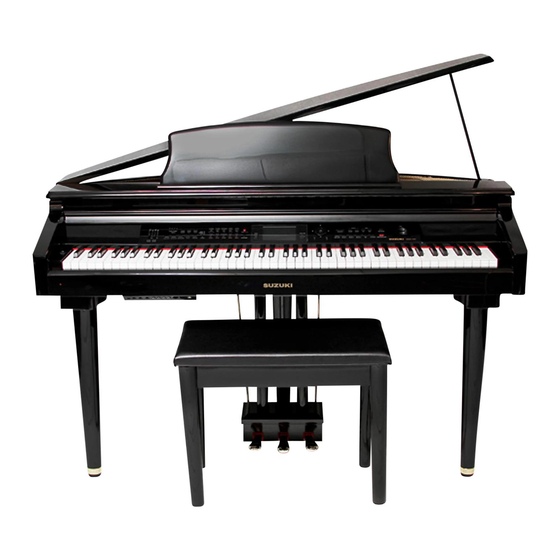
Summary of Contents for Suzuki Micro Grand Digital Piano
- Page 1 Micro Grand Digital Piano Owner’ s Manual...
- Page 2 Suzuki Musical Instrument Corporation P.O. Box 710459 Santee, California 92072-0459 800-854-1594 www.suzukimusic.com Copyright Suzuki Musical Instrument Corporation...
-
Page 3: Table Of Contents
Table of Contents General Precautions ..... 4 Starting And Stopping The Auto Accompaniment ....26 Taking Care Of Your Digital Piano. -
Page 4: General Precautions
General Precautions CAUTION RISK OF ELECTRIC SHOCK DO NOT OPEN CAUTION: TO REDUCE THE RISK OF ELECTRIC SHOCK, DO NOT REMOVE COVER OR BACK NO USER-SERVICEABLE PARTS INSIDE REFER SERVICING TO QUALIFIED SERVICE PERSONNEL INSTRUCTIONS PERTAINING TO A RISK OF FIRE, ELECTRIC SHOCK OR INJURY: The lightning flash with arrowhead symbol, within an equilateral triangle, is intended to alert the user to the presence of uninsulated or “dangerous voltage”... - Page 5 Welcome We would like to express our appreciation and • Interface Your Computer with On-Board MIDI congratulate you for purchasing this mini grand and USB ports digital piano. This piano has been designed to • Never Needs Tuning provide you with years of musical enjoyment. •...
-
Page 6: Taking Care Of Your Digital Piano
Taking Care Of Your Digital Piano This digital piano will supply you with years of musical enjoyment if you follow the simple rules listed below. Important Safety Instructions Warning High Gloss Lacquer Finish Furniture may be used on the cabinet. Do not use paint thinner or petrochemical When using electrical products, basic safety precautions based polishes. -
Page 7: Panel Controls
Panel Controls – TEMPO + HARMONY LAYER LOWER MASTER VOLUME SYNCH FILL IN VARIATION START/ INTRO/ ACCOMP VOLUME START STOP ENDING The elegant control panel is divided into several distinct sections. The following is a brief description of all the features located on the control panel. POWER SWITCH —... - Page 8 SINGLE FINGERED – TEMPO + HARMONY LAYER LOWER MASTER VOLUME PIANO SYNCH FILL IN VARIATION START/ ACCOMP INTRO/ ACCOMP VOLUME START STOP ENDING HARMONY — When selected, the single note played on the right-hand section of the keyboard will sound with additional auto harmony notes. The note played in the upper section of the piano determines the root key of the harmony.
- Page 9 SINGLE FINGERED – TEMPO + HARMONY LAYER LOWER MASTER VOLUME PIANO SYNCH FILL IN VARIATION START/ ACCOMP INTRO/ ACCOMP VOLUME START STOP ENDING START/STOP — This button starts or stops the selected rhythm style. The auto accompaniment will start with the first recognized chord played in the auto accompaniment section of the keyboard, depending on the fingering mode selected.
- Page 10 PIANO E. PIANO HARPSICHORD ORGAN USER 1 SINGLE GUITAR STRINGS TRUMPET FLUTE USER 2 FINGERED PIANO BOSSA NOVA ROCK USER 1 BALLAD BLUES JAZZ GOSPEL USER 2 METRONOME LOUNGE ACCOMP A/B BUTTON — The five quick select voice and five quick select style buttons are each assigned to a line A and line B.
- Page 11 +/YES VOICE STYLE SONG/DEMO FUNCTION PAGE PAGE USER REG –/NO INSTRUMENT VOICE — There are 128 GM (General MIDI) instrument voices, plus ten Asian folk instrument voices available on this piano. You can instantly select an instrument voice by pressing one of the voice select buttons. Or you can use the number pads to select a voice, the voice name and its number will be shown on the display.
- Page 12 +/YES STYLE – TRANSPOSE + LOAD PLAY ALL USER REG USER SONG ACCOMP MELODY 1 –/NO USER REG — Registration is used to store keyboard settings. Press the USER REG button to engage the registration memory mode, the indicator will light up. Press one of the numeric buttons 1-9, the stored setting will be recalled instantly.
- Page 13 2& EFFECT SONG – TRANSPOSE + REVERB CHORUS LEFT RIGHT PLAY ALL LOAD SAVE UTILITY PLAY/STOP USER SONG ACCOMP MELODY 1 MELODY 2 PLAY/STOP CARD REVERB — The reverb effect is engaged automatically when the power is turned on. Reverb simulates the effect of playing in a big room or hall where the sound reverberates off the walls and ceiling.
- Page 14 2& EFFECT SONG – TRANSPOSE + REVERB CHORUS LEFT RIGHT PLAY ALL LOAD SAVE UTILITY PLAY/STOP USER SONG ACCOMP MELODY 1 PLAY/STOP MELODY 2 CARD ACCOMP — The ACCOMP button is used to select the auto accompaniment track of a song for recording or playback. Please see the Record section of this manual for more information.
-
Page 15: Connector Panel
Connector Panel MIDI AUDIO PHONES This connector panel, with its various jacks, is located on the bottom left of the piano, under the keybed. MICROPHONE INPUT — The Microphone Input is for use of the microphone. PHONE 1 / PHONE 2 — You can play in total silence, without disturbing others in the room, by plugging a set of headphones into one of the appropriate sockets. -
Page 16: Piano Pedals
Piano Pedals q w e SOFT PEDAL — When the left pedal is engaged the piano volume is reduced and the timbre slightly altered on the notes that are played. FUNCTION PEDAL — This center pedal can be used to trigger various events, such as START/STOP and Fill In. -
Page 17: Demo
Demo Playing The Demo Songs — This piano has twelve different demonstration songs that are designed to showcase the different sampled voices that are available. The display will show the song number with a “d” prefix. When playing all the songs, “ALL” will appear on the display initially, and will change to the demo song number as it plays. -
Page 18: Keyboard Voices
Keyboard Voices Voice Selection — There are 128 GM voices in 16 groups plus 10 Asian ethnic folk instrument voices. There is a complete list of all 138 voices in the back of the manual. PIANO E. PIANO HARPSICHORD ORGAN USER 1 GUITAR STRINGS... -
Page 19: User Defined Quick Selection Button
User Defined Quick Selection Button You can assign a favorite voice to the voice quick select button in the follow manner. USER 1 1. Select the desired voice by using the numeric pad or the +/YES, –/NO buttons. Please refer to Selecting one of the 138 Voices. USER 2 2. -
Page 20: Rhythm Section
Rhythm Section Rhythm Style Selection — This piano offers 100 rhythm styles and a variation of each style pattern to choose from. There is a complete list of all 100 styles in the back of the manual. BOSSA NOVA ROCK BALLAD USER 1 JAZZ... -
Page 21: User Defined Quick Selection Button
User Defined Quick Selection Button You can assign a favorite rhythm style to the style quick select button in the following manner. 1. Select the desired rhythm style by using the STYLE button and the numeric pad or the +/YES, –/NO buttons. Please refer to Selecting one of the 100 Styles. STYLE 2. -
Page 22: Variation
Synchronized Start — Synchronized Start engages the accompaniment in the standby mode. SYNCH START Press the SYNC START button, the beat indicator dots above the TEMPO buttons will blink at the current tempo, showing that the synchronized start mode is ready. The rhythm style will start as soon as you play in the auto accompaniment section of the keyboard. -
Page 23: Auto Accompaniment
Auto Accompaniment Auto Accompaniment (Auto Bass Chord) — The rhythm styles have their own auto accompaniment, dedicated to that rhythm style. These auto accompaniments patterns create fully orchestrated rhythm, bass and chord progressions based on the chords that you play with your left hand. -
Page 24: Fingered Mode
Seventh Chord: Press the root key and one key to its left (7th key) in the auto accompaniment section of the keyboard simultaneously. Minor-Seventh Chord: Press the root key and both the first and second keys to its left in the auto accompaniment section of the keyboard simultaneously. Fingered Mode The fingered mode is ideal if you already know how to play chords on the SINGLE... -
Page 25: Fingering Guide
Fingering Guide CHORD MARK FINGERING Major 1-3-5 Major sixth 1-3-5-6 Major seventh 1-3-(5)-7 Major seventh sharp eleventh M7 #11 1-(2)-3-#4-(5)-7 Major add ninth M 1-2-3-5 Major seventh ninth M7 9 1-2-3-(5)-7 Major sixth add ninth 9 1-2-3-(5)-6 Augmented 1-3-#5 Minor 1-b3-5 Minor sixth 1-b3-5-6... -
Page 26: Piano Chord Mode
Piano Chord Mode When the Piano fingering chord mode is engaged you may enter chords anywhere SINGLE on the keyboard, and the auto accompaniment will make complete styled FINGERED PIANO arrangements. You are not limited to the auto accompaniment section or the range of the split point. -
Page 27: Variation
Synchronized Start — Synchronized Start mode makes the auto accompaniment standby. The auto accompaniment will start as soon as you play a recognized chord SYNCH in the auto accompaniment section of the keyboard. START 1. Press the SYNC START button, the beat indicator dots above the TEMPO buttons will blink at the current tempo, indicating that the synchronized start mode is ready. -
Page 28: Metronome
Metronome The built in metronome is a timing device. It is used as a timing reference to aid with practice or performance. Press the METRONOME button to engage the metronome feature. The button’s LED Indicator will turn on, the display screen will show the Metronome menu and METRONOME the metronome sound will start immediately. -
Page 29: Function
Function The Function mode is used to set up or to adjust various parameters related to the operation of this keyboard. With the FUNCTION button engaged you may access the menu for the Metronome, Reverb level, Chorus level, Touch sensitivity, Lower Split point for voice, Split point for auto accompaniment, tuning, the Drum kit selection, and Harmony type selection. -
Page 30: Chorus Level Setting
Chorus Level Setting The Chorus effect enriches your selected instrument voice by adding depth and texture. CHORUS Press the CHORUS button to engage the chorus effect, the indicator will light up. Adjust the level of chorus in the Function menu. Chorus Level VOICE STYLE... -
Page 31: Changing The Split Point For Lower Voice
1. Press the FUNCTION button. 2. Press the PAGE or the PAGE buttons until the “Touch” menu appears. 3. Press the +/YES button to confirm your selection. The current touch response setting will be shown. 4. Use the +/YES, –/NO buttons to select a touch response. 5. -
Page 32: Changing The Split Point For Auto Accompaniment
Changing The Split Point For Auto Accompaniment The split point that divides the keyboard can also be changed in the function SINGLE menu. FINGERED PIANO Auto A.Split ACCOMP VOICE STYLE 1. Press the FUNCTION button. 2. Press the PAGE or the PAGE buttons until the “Auto A.Split” menu appears. 3. -
Page 33: Auto Harmony Type Selecting
Auto Harmony Type Selecting When the HARMONY button is engaged, a single note on the right-hand section of the keyboard will sound with additional auto harmony notes, when the auto HARMONY accompaniment is engaged. There are four types of harmony that can be selected. Duet adds a harmonizing note sounding below the single right hand note that you supply when the chord accompaniment is playing. -
Page 34: Record
Record This piano is equipped with a real time recorder, able to store four songs, each with a 3-track sequencer. It will record all note events and the accompaniment as they are performed. This recorded information is nonvolatile and therefore will not be lost when the power is turned off. All the tracks can playback separately or together as a complete song. - Page 35 4. Record - Your performance can be recorded in the following ways: LOAD Record Melody Track Only If the MELODY 1 or MELODY 2 buttons are selected the recording will begin as soon MELODY 1 as you play the keyboard. SAVE Please Note: It is suggested to turn off the fingering mode when recording on a melody track alone.
-
Page 36: Playback
Playback To listen to the recorded passage: 1. Press the USER SONG button and select the song you want to play back, using the +/YES, –/NO buttons. The display will show the song number. +/YES 1: User Song USER SONG –/NO VOICE STYLE... -
Page 37: Registration Memory
Registration Memory Registration Memory can recall particular settings of style, voice, chord and other parameters or features you have engaged. This piano has nine registration memories to hold your favorite settings so that they can be recalled quickly by pressing a button. The unit is equipped with a backup battery will not be lost when the power is turned off. -
Page 38: Play Along Songs
Play Along Songs Press the SONG button to access the play along song function. There are 50 songs built into the piano for your musical enjoyment. Please Note: If you press the SONG button, hold it down, and then press the DEMO button, all the training songs will play back. -
Page 39: Ipod Dock Instruction
iPod Dock Instruction The iPod docking station is located on the right hand side the piano underneath the keys. 1. Pull out the the iPod docking station from under the keyboard. 2. Turn the Piano’s Master Volume to mid level to ensure that the initial iPod volume will not damage the Piano’s Sound Delivery System. -
Page 40: Sd Card
SD Card Card Features The card features allows you to Load Songs, Save Songs, Delete Song Files and Rename your song files. Insert The Card Insert the SD Memory Card in to Memory Card Slot with the label side up and the metal teeth leading into the slot. -
Page 41: Load Song
Load Song If you would like to listen to a specific song from the SD Card then you must first load it into the music sequencer. Load Song retrieves one of your previously stored Music Performances or MIDI File songs from the SD Card. 1. - Page 42 Utility Selecting the UTILITY Button on the control panel will access the following UTILITY Options: Solo Channel The Solo Channel Screen allows you to select certain individual track of your MIDI File Song to Solo on (play along with). Therefore depending on your Standard MIDI File Formatted Song you would be able to Solo on one of the sixteen Channels or Tracks that you have selected.
- Page 43 One of the many places you can order these disks is from the Suzuki Corporation by visiting us on the web at www. suzukipianos.com/. However there are also many web sites that offer SMF Music files that can be downloaded from the Internet.
-
Page 44: Midi
Whether you interface with computers, sequencers, expanders or other keyboards your musical horizons will be greatly enhanced. For further information on MIDI and MIDI equipment that is available, please contact your local Suzuki music store. MIDI... -
Page 45: Midi Implementation Chart
MIDI Implementation Chart FUNCTION TRANSMITTED RECOGNIzED REMARK Basic Channel 1 CH 1-16 CH Channel changed 1-16 CH 1-16 CH Default Mode Note Number 9-120 0-127 Velocity: Note On • • Velocity: Note Off • Pitch Bender • • Control Change: 0 •... -
Page 46: Voice List
Voice List NAME DISPLAY NAME DISPLAY PIANO Electric Bass (finger) Finger Bass Acoustic Grand Piano Grand Piano Electric Bass (pick) Pick Bass Bright Acoustic Piano Bright Piano Fretless Bass FretlessBass Electric Grand Piano El.G.Piano Slap Bass 1 SlapBass1 Honky-Tonk Piano Honky-Tonk Slap Bass 2 SlapBass2... - Page 47 NAME DISPLAY NAME DISPLAY Baritone Sax Baritone Sax FX 6 (goblins) Goblins Oboe Oboe FX 7 (echoes) Echoes English Horn English Horn FX 8 (sci-fi) Sci-Fi Bassoon Bassoon ETHNIC Clarinet Clarinet Sitar Sitar PIPE Banjo Banjo Piccolo Piccolo Shamisen Shamisen Flute Flute Koto...
- Page 48 Asian Folk Instruments NAME DISPLAY PROG. CHANGE BANK Yangquin Yangqin Sanxian Pipa Zheng Zheng Erhu Erhuvib Banhu Banhu Suona Suona Sheng Sheng Dizi Dizi Erhu + Yangqin ErhuYangqin2 Dizi + Zheng DiziZheng2 Please Note: When the touch sensitivity is in the “Soft,” “Normal,” or “Hard,” mode, voice No.
-
Page 49: Style List
Style List NAME DISPLAY NAME DISPLAY NAME DISPLAY Swing Organ Swing Organ Disco Disco Hawaiin Hawaiin Swing Trio Swing Trio Disco Dance 1 Disco Dance 1 Hula Hula Swing Swing Disco Dance 2 Disco Dance 2 Boogie Boogie Slow Swing Slow Swing Disco Shuffle Disco Shuffle... -
Page 50: Specifications
Specifications Keyboard 88 Key, Advanced Balanced Graded Hammer Action, Velocity Sensitive Sound Source 3D and Stereo Deluxe Instrument Samples Polyphony 64 Note Polyphony Preset Tones 128 GM (General MIDI Voices) Function Tune, Transpose, MIDI Functions, Demo, Chorus (8 types), Reverb (8 types), Song (Left Hand and Right Hand), Layer, Split, Upper, Lower, Arpeggio, One Touch, Auto Bass Chord (Fingered Single, Fingered, Piano Mode), Harmony (Duet, Arpeggio, Repeat), Synchro, Fill In 1, Fill in 2, Intro/Ending, Touch Control, 36 Registration... -
Page 51: Warranty
For a period of one year from the date of purchase, the Suzuki Corporation will pay the labor charges to repair the defective product. After this one year period, you must pay all labor charges. - Page 52 P.O. Box 710459 Santee, California 92072 (619) 873-2000 Visit us on the web at www.suzukimusic.com Copyright Suzuki Musical Instrument Corporation...
Need help?
Do you have a question about the Micro Grand Digital Piano and is the answer not in the manual?
Questions and answers
where can I purchase preprogrammed sd cards for my Suzuki MDG 300? For instance, 70's music.