Table of Contents
Advertisement
OMRON HEALTHCARE Co., Ltd.
Manufacturer
53, Kunotsubo, Terado-cho, Muko, Kyoto
617-0002 JAPAN
OMRON HEALTHCARE EUROPE B.V.
EU-representative
Scorpius 33, 2132 LR Hoofddorp THE NETHERLANDS
www.omron-healthcare.com
Asia Pacific HQ
OMRON HEALTHCARE SINGAPORE PTE LTD.
438A Alexandra Road, #05-05/08
Alexandra Technopark, Singapore 119967
www.omronhealthcare-ap.com
Production facility
OMRON HEALTHCARE MANUFACTURING VIETNAM CO., LTD.
Binh Duong Province, VIETNAM
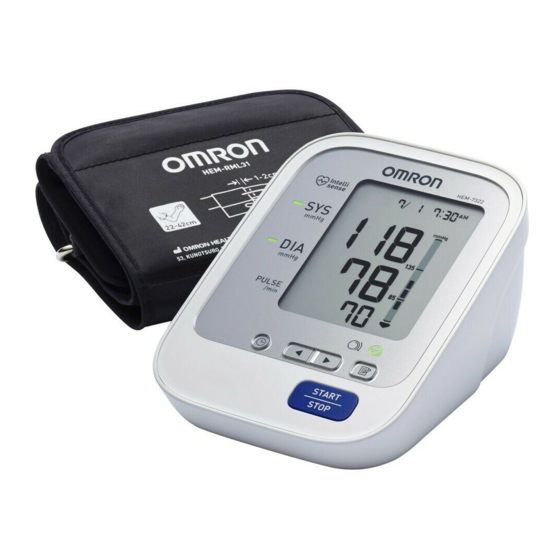
Automatic Blood Pressure Monitor
Model HEM-7322
Instruction Manual
Made in Vietnam
Check following components!
English
5342279-3A
HEM-7322-AU_A_M04_130726.pdf
Advertisement
Table of Contents
Troubleshooting

Related Manuals for Omron HEM-7322


Summary of Contents for Omron HEM-7322
- Page 1 Automatic Blood Pressure Monitor Asia Pacific HQ OMRON HEALTHCARE SINGAPORE PTE LTD. 438A Alexandra Road, #05-05/08 Model HEM-7322 Alexandra Technopark, Singapore 119967 www.omronhealthcare-ap.com Instruction Manual Production facility OMRON HEALTHCARE MANUFACTURING VIETNAM CO., LTD. Binh Duong Province, VIETNAM Made in Vietnam 5342279-3A...
-
Page 2: Important Safety Information
Important Safety Information Consult your doctor prior to using in pregnancy or if diagnosed with arrhythmia or arteriosclerosis. Please read this section carefully before using the unit. Warning: Indicates a potentially hazardous situation which, if not avoided, could result in death or serious injury. - Page 3 Important Safety Information (AC Adapter (optional) Usage) • Fully insert the power plug. • When disconnecting the power plug, do not pull the power cord. Be sure to hold the power plug. • When handling the power cord, observe the following: Do not damage.
-
Page 4: Overview
1. Overview Open the rear cover page to read following: The alphabet in the rear cover page correspond to those in the body page. Main unit Display Display Memory symbol Cuff wrapping guide lamp Average value symbol Memory button Systolic blood pressure START/STOP button Diastolic blood pressure Up/Down (... -
Page 5: Preparation
2. Preparation 2.1 Installing/Replacing the Batteries Remove the battery cover. Insert 4 “AA” batteries as indicated in the battery compartment and then replace the battery cover. Notes: • If the low battery symbol ( ) appears on the display, turn the monitor off then replace all batteries at the same time. -
Page 6: Setting The Date And Time
2. Preparation 2.2 Setting the Date and Time Press the button. Set the monitor to the correct date and time before taking a measurement for the first time. Push buttons to change. Year Month Push the button to confirm. Next setting appears. Hour Minute Press the START/STOP button to store the setting. -
Page 7: Using The Unit
• The blood pressure can differ between the right arm and the left arm, and therefore also the measured blood pressure values can be different. OMRON recommends to always use the same arm for measurement. If the values between the two arms differ substantially, please check with your physician... -
Page 8: How To Sit Correctly
3. Using the Unit 3.2 How to Sit Correctly To take a measurement, you need to be relaxed and comfortably seated, under comfortable room temperature. No bathing, drinking alcohol or caffeine, smoking, exercising or eating 30 minutes before taking a measurement. •... -
Page 9: Taking A Reading
3. Using the Unit 3.3 Taking a Reading Notes: • To cancel a measurement, press the START/STOP button to turn the unit off and to release the air in the arm cuff. • Remain still while taking a measurement. Press the START/STOP button. The arm cuff will start to inflate automatically. - Page 10 3. Using the Unit Cuff Wrapping Guide Lamp The Cuff Wrapping Guide is a unique feature that indicates if the cuff is not wrapped tightly enough around the arm. Even when lights in orange, a blood pressure reading will be taken. Note: This reading is NOT reliable due to the incorrect wrapping of the cuff.
- Page 11 3. Using the Unit Important: • If your systolic or diastolic pressure is outside the standard range, the blood pressure colour indicator will light in orange when the measurement result is displayed. If they are within the standard range, the blood pressure colour indicator will light in green.
- Page 12 3. Using the Unit Using the Guest Mode The monitor stores measurement values for one user in the memory. The guest mode can be used to take a single measurement for another user. No measurement values are stored in the memory when the guest mode is selected. Press and hold the START/STOP button for more than 3 seconds.
-
Page 13: Using The Memory Function
3. Using the Unit 3.4 Using the Memory Function The monitor automatically stores the result up to 90 sets. It can also calculate an average reading based on the measurements from the last three readings taken within 10 minutes. If there are only two readings in memory for that period, the average will be based on two readings. -
Page 14: To Delete All The Values Stored In Memory
3. Using the Unit To View the Average Value Press the button for more than 3 seconds. Notes: • If the previous reading was taken without setting the date and time, the average value is not calculated. • If there are no measurements results stored in the memory, the screen to the right is displayed. -
Page 15: Troubleshooting And Maintenance
4. Troubleshooting and Maintenance 4.1 The Icons and Error Messages Error Display Cause Remedy Remove the arm cuff. Wait 2-3 minutes and then take another measurement. Irregular heartbeats are detected. Repeat the steps in section 3.3. If this error continues to appear, contact your doctor. Carefully read and repeat the steps in section Movement during measurement. - Page 16 Repeat measurement. Remain still and do not talk during measurement. Movement during measurement. Refer to section 3.3. Remove any clothing interfering with the arm cuff. Clothing is interfering with the arm cuff. Refer to section 3.1. Device error. Contact your local OMRON representative.
-
Page 17: Troubleshooting
4. Troubleshooting and Maintenance 4.2 Troubleshooting Problem Cause Remedy Apply the arm cuff correctly. Arm cuff not applied correctly. Refer to section 3.1. Remain still and do not talk during Movement or talking during measurement. The reading is extremely low (or measurement. - Page 18 Refer to section 2.1. • Press the START/STOP button and repeat measurement. • If the problem continues, try replacing the batteries with new ones. Other problems. If this still does not solve the problem, contact your local OMRON representative.
-
Page 19: Maintenance
• Do not use petrol, thinners or similar solvents to clean the arm cuff. • Do not carry out repairs of any kind yourself. If a defect occurs, consult your local OMRON representative. • The unit should be cleaned with a soft, dry cloth. -
Page 20: Storage
4. Troubleshooting and Maintenance 4.4 Storage Keep the unit in its storage case when not in use. Unplug the air plug from the air jack. Gently fold the air tube into the arm cuff. Note: Do not bend the air tube excessively. Place the arm cuff and main unit in the storage case. -
Page 21: Optional Parts
AC adapter S Arm circumference 22 - 42cm Note: Please check with your local OMRON representatives for the appropriate optional part models. Using the Optional AC Adapter Insert the AC adapter plug into the AC adapter jack on the rear side of the main unit. -
Page 22: Technical Data
6. Technical Data Product Description Automatic Blood Pressure Monitor Model OMRON HEM-7322 Display LCD Digital Display Measurement Method Oscillometric method Measurement Range Pressure: 0 to 299 mmHg Pulse: 40 to 180 beats/ min. Pressure: 3 mmHg Accuracy Pulse: 5% of display reading... - Page 23 Part 1: General Requirements and Part 3: Supplementary requirements for electromechanical blood pressure measuring systems. • This OMRON product is produced under the strict quality system of OMRON HEALTHCARE Co., Ltd., Japan. The core component for OMRON blood pressure monitors, which is the...
- Page 24 EN60601-1-2:2007 standard has been implemented. This standard defines the levels of immunity to electromagnetic interferences as well as maximum levels of electromagnetic emissions for medical devices. This medical device manufactured by OMRON HEALTHCARE conforms to this EN60601-1-2:2007 standard for both immunity and emissions.
-
Page 25: Pressure
7. Some Useful Information about Blood Pressure What is Blood Pressure? Blood pressure is a measure of the force of blood flowing against the walls of the arteries. Arterial blood pressure is constantly changing during the course of the heart’s cycle. The highest pressure in the cycle is called the Systolic Blood Pressure;... - Page 26 7. Some Useful Information about Blood Pressure Why is it a Good Thing to measure Blood Pressure at Home? Many factors such as physical activity, Upper curve: systolic blood pressure anxiety, or the time of day, can Lower curve: diastolic blood pressure influence your blood pressure.
- Page 27 7. Some Useful Information about Blood Pressure Classification of Blood Pressure by the World Health Organization The World Health Organization (WHO) and the Systolic blood pressure (mmHg) International Society of Hypertension (ISH) developed the Blood Pressure Classification shown in this figure. Severe hypertension This classification is based on the blood pressure Moderate hypertension...
-
Page 28: Table Of Contents
Contents Thank you for purchasing the OMRON HEM-7322 Automatic Blood Pressure Monitor. The OMRON HEM-7322 is a compact, fully automatic blood pressure monitor, operating on the oscillometric principle. It measures your blood pressure and pulse rate simply and quickly. For comfortable controlled inflation without the need of pressure pre-setting or re-inflation the device uses its advanced “IntelliSense”...
Need help?
Do you have a question about the HEM-7322 and is the answer not in the manual?
Questions and answers
my HEM 7222 machine will not turn on. I have changed the batteries and still no luck. What can I do ???
If your Omron HEM-7322 machine does not turn on after changing the batteries, follow these steps:
1. Ensure the batteries are inserted correctly, matching the polarity (+/-) as indicated in the battery compartment.
2. Replace all four “AA” batteries at the same time with new ones.
3. If the issue persists, contact your local OMRON representative for further assistance.
This answer is automatically generated
How do I change from PM to ****
To change the settings from PM to AM on the Omron HEM-7322, follow these steps:
1. Press the button to enter the date and time setting mode.
2. Use the push or buttons to adjust the hour.
3. Continue adjusting until the desired AM time appears.
4. Press the button to confirm the setting.
5. Proceed with setting the minutes if needed.
6. Press the START/STOP button to store the setting.
If the batteries are replaced, the date and time settings will need to be reset.
This answer is automatically generated
How do I change the battery