Boss BV9386NV User Manual
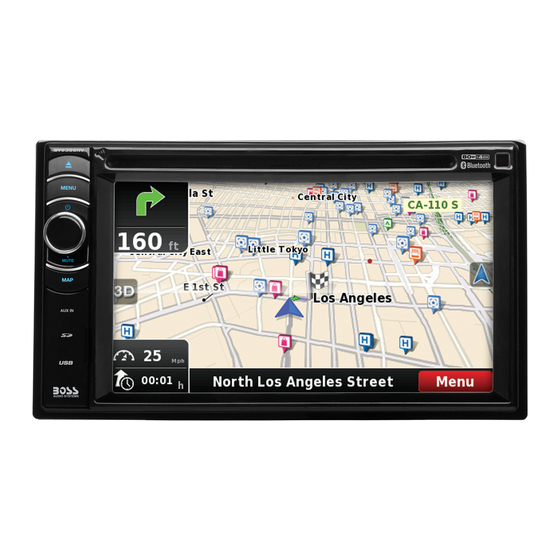
Boss bv9386nv built-in navigation/ bluetooth-enabled, dvd/mp3/cd am/fm
receiver featuring 6.2" (157mm) widescreen
touchscreen digital tft monitor
Hide thumbs
Also See for BV9386NV:
- User manual (29 pages) ,
- User manual (83 pages) ,
- User manual (31 pages)

Related Manuals for Boss BV9386NV


Summary of Contents for Boss BV9386NV
- Page 2 TO ensure safety while driving and to comply with laws, drivers should not watch video or operate the video device while driving.
-
Page 3: Safety Precautions
Safety Precautions P l e a s e d o n ' t c h a n g e t h e f u s e o n Please read through these operating the power cord without professional instructions so you will know how to guidance, using improper fuse may cause damage to this unit or even cause keep this manual in a safe place for... - Page 4 Safety Precautions dirty, please use a clean silicone cloth and neutral detergent Expanding Systems Note:...
-
Page 5: Table Of Contents
Contents Safety Precautions ........1 Contents ............3 Before Using ..........4 Front Panel Basic Operations ........7 Zoom Mute Power On / Off Bluetooth Mode ........18 Basic Operations ........8 Settings ...........20 Radio Mode ..........10 Other Modes ..........23 .........24 Troubleshooting ........26 Wire Connections ........27 Playback Mode........14 Play/Pause Previous/Next... -
Page 6: Before Using
Before Using Front Panel Notice: ] Button: [MENU] Button: / MUTE] Knob [MAP] Button: Reset Button Press to reset system settings to factory default (except password and parental lock Map Slot A/V Input USB Connector SD Interface Connector Remote sensor Disc slot Internal Microphone... - Page 7 Before Using Remote Control 1. Return to the home menu 2. Eject the disc 3. Access to tuner source 4. Access to disc source 5. - Search an available radio station by decreasing tuning frequency - Select the previous chapter/track for playback 6.
- Page 8 Before Using Notes on Remote Control Usage Uninstall Battery Install Battery PULL OUT PUSH IN...
-
Page 9: Basic Operations
Basic Operations Parking Brake display video only when the vehicle is applied. preventing the driver from watching content while driving. Rear video screens are not affected. Mute Power On / Off Press the knob on the unit to turn the unit on. The buttons on the front of the unit light up for a moment and the current mode status appears in the LCD. -
Page 10: Basic Operations
Basic Operations Select Preset Audio Adjust Audio Parameters Adjust FAD BAL Notes:... - Page 11 Basic Operations Set Date /Time Set Date Set Clock Mode Set Time Tip:...
-
Page 12: Radio Mode
Radio Mode Radio Display 2 3 4 Select Radio as Playing Source Select One Radio Band Tune Auto Tuning Note: Manual Tuning Method 1: Method 2:... - Page 13 Radio Mode Preset Station Search Stations Automatically Manual Store Tune to a Preset Station Local Seeking Audio Selection...
- Page 14 Radio Mode RDS Basics Adjust RDS Settings RDS ( Radio Data System ) AF Function Note: EON ( Enhanced Other Networks ) TA Function...
- Page 15 Radio Mode CT (Clock Time) PTY Function...
-
Page 16: Playback Mode
Playback Mode Load/eject Note: Eject a Disc Touchscreen Controls Controlling Playback Connect a USB Device Remove a USB Device Insert/Remove a SD Card Play/Pause... -
Page 17: Previous/Next
Playback Mode Previous/Next Search for a Folder For Video Files For Audio Files For Picture Files For Folder Control Repeat For DVD/VCD movie disc:... - Page 18 Playback Mode Repeat A-B Select Audio Mode Select Subtitle Language Video Setup...
-
Page 19: Zoom
Playback Mode Playback Information For DVD DVD T:01/08 C:005/012 For VCD Track:01/08 Elapsed Time 00:01:20 00:30:17 Direct Track Entry Rotate Pictures Zoom... -
Page 20: Bluetooth Mode
Bluetooth Mode Pair a Bluetooth Device the Bluetooth device ID in the pairing list. Disconnect Bluetooth Device Make a Call... - Page 21 Bluetooth Mode Receive a Call Adjust Bluetooth Settings Music Mode A2DP AVRCP...
-
Page 22: Settings
Settings Display System Adjust General Settings General settings Options Description Japan Off/10s/20s Calibration calibrate the touch screen through calibration setting function. Adjust the response positions of the touch panel as followings: 1. Press the [ Calibration ] option on the setup menu to enter. 2. -
Page 23: Adjust Bluetooth Settings
Settings Adjust SUB settings Sound settings Options Description Adjust Time Settings Time settings Options Description 12Hr/24Hr Adjust Language Settings Language settings Description Adjust Bluetooth Settings Bluetooth settings Options Description Pairing code... - Page 24 Settings Adjust Disc Rating DVD rating Options Description On/Off Adjust Volume Settings...
-
Page 25: Other Modes
Other Modes Listen to Other Devices Reset Replace a Fuse Steering Wheel Control Programming... -
Page 26: Speci Cations
Speci cations General Negative Screen DVD Player AUX IN Preout Video Environment 14°F °F 4°F Operating Humidity Notice: the temperature is over 158... - Page 27 Speci cations Supported Formats: Unsupported Formats: Supported MP3 Disc Format: Supported Video Formats: ·MP4 Region Code Disc Cautions...
-
Page 28: Troubleshooting
Troubleshooting Problem Cause Corrective action General Unit fuse blown. Install new fuse with correct rating. Car battery fuse blown. Install new fuse with correct rating. Unit can not power on Illegal operation Reset the unit. Improper audio output connection. Check wiring and correct. Volume set too low. - Page 29 RADIO ANT White / Front L (+) White with black stripe / Front L (-) Grey / Front R (+) Grey with black stripe / Front R (-) Purple / Rear R (+) Purple with black stripe / Rear R (-) Green / Rear L (+) Green with black stripe / Rear L (-) Yellow / Battery 12V(+)
- Page 32 Copyright note The product and the information contained herein is subject to change without prior notification. This manual may not, in whole or in part, be reproduced or transmitted in any form either electronically or mechanically, including photocopying and recording, without the express written consent of NNG.
- Page 33 Thank you for choosing the PNA as your in-car navigator. Read the Quick Start Guide first and start using the PNA right away. This document is the detailed description of the navigation software. You can easily discover the PNA while you are using it; however, we still recommend that you read this manual to understand the screens and the features of iGO8.
- Page 34 Table of contents 1 Warnings and Safety information .................. 7 2 Getting started with iGO8 ....................8 2.1 Simple and Advanced modes ....................10 2.2 Buttons and other controls on the screen ................11 2.2.1 Using keyboards..........................12 2.3 Using the map......................... 12 2.3.1 Checking the details of a map location ..................13 2.3.2 Manipulating the map ........................13 2.3.3 Lane information and Signposts ....................15...
- Page 35 3.1.2.6 Entering an address with a postal code ....................35 3.1.2.7 Tips on entering addresses quickly ......................36 3.1.3 Selecting the destination from your Favourites................37 3.1.4 Selecting the destination from the POIs..................37 3.1.5 Selecting the destination with saved POI search criteria ...............38 3.1.6 Selecting the destination from the History..................39 3.1.7 Selecting the destination by entering its coordinates ..............39 3.2 Creating a multi-point route (inserting a via point)...............
- Page 36 4.4.1 Manage Saved Routes........................65 4.4.2 Manage History..........................65 4.4.3 Manage Track Logs ........................65 4.4.4 Manage Favourites.........................66 4.4.5 Manage POIs..........................66 4.4.6 Manage Saved Search Criteria .......................68 4.4.7 User Data Management........................68 4.5 Settings menu.......................... 69 4.5.1 Map Screen settings ........................70 4.5.2 Sound settings ..........................71 4.5.3 Route Planning options ........................71 4.5.4 Regional settings..........................73 4.5.5 Navigation settings.........................74...
-
Page 37: Warnings And Safety Information
1 Warnings and Safety information iGO8 is a navigation system that helps you find your way to your destination with its GPS receiver. iGO8 does not transmit your GPS position; others cannot track you. It is important that you look at the display only when it is safe to do so. If you are the driver of the vehicle, we recommend that you operate iGO8 before you start your journey. -
Page 38: Getting Started With Igo8
2 Getting started with iGO8 iGO8 is optimised for in-car use. You can use it easily by tapping the screen buttons and the map with your fingertips. iGO8 can plan routes throughout the whole installed map set; you do not need to change maps or switch to a poorly detailed general map to navigate between map segments or countries. - Page 39 Tasks Instructions right corner to the bottom left corner on any screen. Shortcut to open the Navigation menu: slide your finger from the top left corner to the bottom left corner on any screen. Start using iGO8 When iGO8 is started the first time, you need to do the following: Select the written language of the application interface.
-
Page 40: Simple And Advanced Modes
2.1 Simple and Advanced modes The two operating modes of iGO8 mainly differ in the menu structure and the number of available features. The controls and screen layouts are the same. Simple mode: you have easy access to the most important navigation functions and the basic settings only. -
Page 41: Buttons And Other Controls On The Screen
2.2 Buttons and other controls on the screen When you are using iGO8, you usually tap buttons on the touch screen. You only need to confirm selections or changes in iGO8 if the application needs to restart, it needs to perform a major reconfiguration, or you are about to lose some of your data or settings. -
Page 42: Using Keyboards
2.2.1 Using keyboards You only need to enter letters or numbers in iGO8 when you cannot avoid it. You can type with your fingertips on the full-screen keyboards and you can switch between various keyboard layouts, for example ABC, QWERTY, or numerical. Task Details Switching... -
Page 43: Checking The Details Of A Map Location
2.3.1 Checking the details of a map location If you are interested in the details of your current position during navigation: Check the bottom line of the map. It shows the current street and house number information. For further details, tap to open the Position menu. - Page 44 Action Button(s) Description Zoom in/out Rotate left/right (3D map only) Tilt up/down (3D map only) Zoom preset buttons (2D map only) Tilt and zoom preset buttons (3D map only) Return to GPS position button Smart Zoom button Zooming in and out Changes how much of the map is displayed on the screen.
-
Page 45: Lane Information And Signposts
Action Button(s) Description recognise your manoeuvre at the next junction. If the next turn is at a distance, iGO8 zooms out and lowers the view angle to show you the road in front of you. Tap this button once to enable Smart Zoom. Tap&hold the button to set the zoom limits of Smart Zoom. -
Page 46: Status Information And Hidden Controls On The Map
2.3.4 Status information and hidden controls on the map The following information appears in the rounded field in the top left corner, the Turn Preview field. When tapping this area, the result depends on the information currently shown. Icon Information Details Action There is no active... - Page 47 Icon Information Details Action There is no valid GPS Tap this area to open the GPS If there is no valid GPS position Data screen to check the signal position, this symbol status or the connection settings. appears here. Traffic restriction When position Nothing happens if you tap this...
- Page 48 Icon Description A TMC receiver is connected and a radio station with TMC broadcast is received. There are new, unread Traffic events. A part of the route is bypassed based on Traffic events. A part of the route is mentioned in Traffic events but it has not been bypassed (for example, even the best detour would be too long) or it could not be bypassed (for example, the destination is on a congested street).
-
Page 49: Using The Cursor (The Selected Map Location)
The next area is a combined status indicator field. Tap this area to open the Quick menu (page 60). Icon Status for More information GPS position A higher number of lit bars indicates better GPS position quality accuracy. Battery status The device is running on battery power. -
Page 50: Igo8 Concepts
Button Action Marks the map with a Pin at the Cursor (available in Advanced mode only) Saves the Cursor as a POI (available in Advanced mode only) Saves the Cursor as a Road Safety Camera location (available in Advanced mode only) This button is not displayed when GPS position is not available or if you are in certain countries where Road Safety Camera warning is prohibited. -
Page 51: Position Markers
2.4.2 Position markers 2.4.2.1 Current GPS position and Lock-on-Road When your GPS position is available, iGO8 marks your current position with the icon on the map. The exact location of the position marker depends on the vehicle type used for route calculation. The vehicle type can be selected in Route settings (page 71) or in the Quick Menu (page 60). -
Page 52: Original Position In The Cursor Menu
the destination of a route You can also search for POIs around the Cursor. Or you can save the location of the Cursor as: a Favourite a Road Safety Camera a POI a map marker Pin 2.4.2.4 Original position in the Cursor menu When the Cursor menu is open, a special icon ( ) shows the Cursor position the menu was opened with. -
Page 53: Itinerary
Route calculation method: Fast Short Economical Easy Vehicle types : Taxi Emergency vehicles Bicycle Pedestrian Road types Unpaved Roads Permit Needed Motorways Toll Roads Charge Roads Ferries Cross-border Planning iGO8 automatically recalculates the route if you deviate from the proposed itinerary. Depending on the type of the TMC event, iGO8 also recalculates the route if a TMC event concerns a part of the recommended route. -
Page 54: Track Logs
You have the following options on the Itinerary screen: Button Description Any of the list items Opens the map with the selected manoeuvre in the middle. Changes the detail level of the Itinerary. The levels are as follows: Detailed Instructions: all intersections are listed Itinerary: only significant intersections (the ones announced in voice guidance) are listed Road list: the list of the roads used while navigating the route... -
Page 55: Poi (Points Of Interest)
You can use it, for example, to see which bridge iGO8 planned for the route; if you do not want to take that bridge, you can avoid it. Route demonstrations can be started from the Route menu by tapping the (high speed simulation) or the (simulation at normal speed) button. -
Page 56: Camera Types
To save the location of a Road Safety Camera, place the Cursor ( ) at the desired location, then tap the following buttons: Note! This button is not displayed when GPS position is not available or if you are in certain countries where Road Safety Camera warning is prohibited. -
Page 57: Camera Directions
Icon Type Description cameras. Both identify your car and record the exact time you pass them. They use the difference between the two points in time to calculate your average speed. iGO8 warns you when you approach one of these speed cameras, but as you pass by, the warning stays on, and your average speed is measured until you reach another speed camera of this type. -
Page 58: Speed Limit Warning
2.4.11 Speed limit warning Maps sometimes contain information about the speed limits of the road segments. This information may not be available for your region (ask your local dealer) or may not be fully correct for all roads on the map. You can configure iGO8 to warn you if you exceed the current limit. -
Page 59: Navigating With Igo8
3 Navigating with iGO8 You can set up your route in iGO8 in several ways: if you need a simple route (a route with only one destination, without any intermediate via points), you can select the destination and start navigating to it right away you can plan a multi-point route (available in Advanced mode only) you can also plan a route independently of your current GPS position or even without GPS reception (available in Advanced mode only) -
Page 60: Entering An Address Or Part Of An Address
point. 3.1.2 Entering an address or part of an address If you know at least a part of the address, it is the quickest way to select the destination of the route. Using the same screen, you can find an address by entering: the exact address, including house number the centre of a settlement an intersection... -
Page 61: Entering An Address If House Numbering Is Restarted
Enter the street name: Start entering the street name on the keyboard. Get to the list of results: After entering a couple of characters, the names that match the string appear in a list. to open the list of results before it appears automatically. Select the street from the list. -
Page 62: Entering An Address Without Knowing The District/Suburb
Get to the list of search results: After entering a couple of characters, the names that match the string appear in a list. to open the list of results before it appears automatically. Select the settlement from the list. Enter the street name: Start entering the street name on the keyboard. - Page 63 To select the settlement from the list of recently used ones, tap the button. To enter a new settlement: Tap the button with the name of the settlement, or if you have changed the country/state, tap Start entering the settlement name on the keyboard. Get to the list of search results: After entering a couple of characters, the names that match the string appear in a list.
-
Page 64: Selecting An Intersection As The Destination
3.1.2.4 Selecting an intersection as the destination The procedure is explained starting from the Navigation menu. Tap the following buttons: (Simple mode), or (Advanced mode). By default, iGO8 proposes the country/state and settlement where you are. If needed, tap the button with the name of the country/state, and select a different one from the list. -
Page 65: Selecting A City Centre As The Destination
3.1.2.5 Selecting a city centre as the destination The City Centre is not the geometric centre of the settlement but an arbitrary point the map creators have chosen. In towns and villages, it is usually the most important intersection; in larger cities, it is an important intersection. -
Page 66: Tips On Entering Addresses Quickly
After entering a couple of numbers, matching results appear in a list. to open the list of results before it appears automatically. Pick the settlement from the list. Enter the street name: Start entering the street name on the keyboard. Get to the list of results: After entering a couple of characters, the names that match the string appear in a list. -
Page 67: Selecting The Destination From Your Favourites
if you enter the first letter of the street type: For example, enter Pi A to obtain Pine Avenue and skip all Pine Streets and Pickwick Roads. You can also search in postal codes. This is useful when a street name is common and it is used in several districts of a city. -
Page 68: Selecting The Destination With Saved Poi Search Criteria
Select the POI group (e.g. Accommodation), and after that, if needed, select the POI subgroup (e.g. Hotel or Motel). To find the POI by its name, tap , and use the keyboard to enter a part of the name. To list all POIs in a given POI group, tap [optional] When finally the list of results appear, you can sort the list: : sort the list alphabetically (available when you search around a single location) -
Page 69: Selecting The Destination From The History
The map appears with the selected point in the middle. Tap (Simple mode) or (Advanced mode) from the Cursor menu. The route is then automatically calculated, and you can start navigating. 3.1.6 Selecting the destination from the History The destinations that you have set earlier appear in the History. The procedure is explained starting from the Navigation menu. -
Page 70: Creating A Multi-Point Route (Inserting A Via Point)
3.2 Creating a multi-point route (inserting a via point) Multi-point routes are created from simple routes, so a route must be active first. One of the ways of expanding the route is to keep the destination, and to add via points (intermediate destinations). This feature is available in Advanced mode only. -
Page 71: Editing The Route
to add the point as a new final destination demoting the previous one to the last intermediate destination. [optional] To add more points to the route, repeat the above steps as many times as you like. Every time a new point is added, the route is recalculated automatically and you can start navigating right away. -
Page 72: Watching The Simulation Of The Route
Via the Route Information screen using a shortcut: tap In Simple mode the last option is available only. 3.6 Watching the simulation of the route This feature is available in Advanced mode only. The procedure is explained starting from the Map screen. Tap the following buttons: The Route menu appears. -
Page 73: Deleting The Next Via Point From The Route
3.9 Deleting the next via point from the route The easiest way to delete the upcoming route point (the next via point) is to open the Route Information screen by tapping the Turn Preview field ( ) on the Map screen, and then tapping Alternatively, you can do it through the Navigation menu: 3.10 Deleting the active route The easiest way to delete the active route in both Simple mode and Advanced mode is to open the... -
Page 74: Saving The Active Route
Recording the travelled path (creating a Track Log) Start driving. Tap the following buttons: Start the recording: tap the button. You return to the map and you can continue driving. Repeat the above steps, then tap later to stop the recording. iGO8 labels the Track Log with a time stamp. -
Page 75: Loading A Saved Route
When you save a route, iGO8 not only saves the route points but the whole itinerary: The saved route might have been influenced by TMC information. When you later use the route, it appears as it was saved. But if it needs to be recalculated, the current TMC information will be used in the new route. -
Page 76: Reference Guide (Advanced Mode)
4 Reference Guide (Advanced mode) On the following pages you will find the description of the different menu screens of iGO8 in Advanced mode. In Simple mode, these functions work the same way, but only a few of them are available. - Page 77 Symbol Name Action Trip data Opens the Trip Information screen Battery status Opens the Quick menu Opens the Quick menu GPS position quality Opens the Quick menu Vehicle used in route calculation Additional buttons and controls appear Top row Next street or Next settlement for a few seconds Additional buttons and controls appear Bottom row...
- Page 78 Symbol Name Action Smart Zoom button Rotate left, rotate right Rotates the 3D map left or right Tilt up, tilt down Tilts the 3D map Zoom in, zoom out Scales the map Return to GPS position Tap this button to move the map back (appears when GPS position is to the current GPS position.
-
Page 79: Icons On The Map
Symbol Name Action Map scale (2D map only) Speed limit 4.1.1 Icons on the map There are several status icons on the map. Most of them also function as a button. The information they provide is as follows: GPS position quality Battery status Vehicle type used for route calculation Sound status (muted or enabled) -
Page 80: Status Indicator Strip
Icon Description GPS navigation is possible, but the position error may be significant. Altitude information is available, the position is a 3D position. GPS navigation is possible. The remaining part of the field shows the vehicle type used for route calculation. Icon Vehicle type Taxi... -
Page 81: Next Two Route Events (Turn Preview Fields)
4.1.1.3 Next two route events (Turn Preview fields) There are two fields reserved on the Map screen to display the next two manoeuvres (route events that are listed in the Itinerary). Both the type of the event (turn, roundabout, exiting motorway, etc.) and its distance from the current GPS position is displayed. -
Page 82: Object Types
Tip! If you prefer not to see street names during navigation, turn them off (page 70). 4.1.2.2 3D object types iGO8 supports the following 3D object types: Type Description 3D landmarks Landmarks are 3D artistic or block representations of prominent or well-known objects. - Page 83 Symbol Name Description needs to be turned off to keep the selected point as the start point. If automatic off-route recalculation is disabled for any of the above, tapping the icon in the Turn Preview field not only initiates route recalculation from the current GPS position, but it will re-enable the automatic off-route recalculation as well.
-
Page 84: Detour Menu
4.1.3 Detour menu This screen contains quick detour possibilities during navigation. It can be opened directly from the Map screen by tapping You have the following options: On the main part of the screen you can see the first page of Saved Search Criteria. Select any of the criteria to quickly receive the list of nearest matching POIs, and instantly plan a new route to the desired one, or insert it as a via point in your active route. - Page 85 Button Description Favourite. Opens a new screen with the address and coordinate of the Cursor, and the list of nearby POIs. The following options are available in Advanced mode only: Button Description Creates a new route with the Cursor as the destination. The previous route (if exists) is deleted.
-
Page 86: Position Menu
Button Description is legal to use this feature at your location. If the Cursor is at or near a Road Safety Camera, this button replaces the previous one, and opens a new screen where you can edit the details of the camera. -
Page 87: Trip Information Screen
Name Description Function Distance Left Shows the distance you need to travel on the route Tap this field to change the before reaching your final destination. content of all data fields to via point information. Time Left Shows the time needed to reach the final Tap this field to change the destination of the route based on information content of all data fields to via... - Page 88 When you open the screen, all route data fields contain information about reaching your final destination. Tap and the fields concerning your route display data for the next via point. Tap the button repeatedly to toggle between the two options. You have the following data and functions on this screen: Name Description...
-
Page 89: Trip Computer Screen
Most of the fields on this screen have a symbol next to them. This symbol shows whether the field it is attached to is shown on the map as a Trip Data. It also shows the position of the data as follows: Symbol Description This value is not shown on the map screen. -
Page 90: Quick Menu
4.1.8 Quick menu The Quick menu is a selection of controls that are frequently needed during navigation. It can be opened directly from the Map screen by tapping If you tap any of the switches in the Quick menu except for the Vehicle type, the Map screen immediately returns. -
Page 91: Tmc Events Screen
4.1.9 TMC Events screen You can access the list of TMC events, change TMC related settings, and select or ignore specific radio stations in the Quick menu. Tap the following buttons: , and then The list of current TMC events is displayed first, ordered by their distance from your current position. To change the content or the list or the sequence of the list items, tap Button Description... -
Page 92: Gps Data Screen
4.1.10 GPS Data screen Tap the following buttons: , and then to open the GPS Data screen and to see the status of GPS reception. Icon Colour Name Description Green GPS position quality iGO8 has a connection to the GPS indicator receiver and GPS position information is available in 3D: iGO8... -
Page 93: Find Menu
Icon Colour Name Description current location. Coordinates Your current GPS position in WGS84 format. Status bar for the satellites Dark bars are for the yellow and lit bars are for the green satellites. The more satellites your GPS tracks (the green ones), the better is your calculated position. -
Page 94: Manage Menu
Button Description Reference You can modify the route: remove route points or change their page 41 order. Erase the active route with all its route points (start point, via page 43 points and destination). If you later decide that you need the same route, you will have to rebuild it from scratch. -
Page 95: Manage Saved Routes
4.4.1 Manage Saved Routes You can manage the previously saved routes. Tap the following buttons: Button Description Button with the name of the Opens the selected route for editing. saved route Deletes the selected route. Clears the list of saved routes. Moves between pages for additional list items. -
Page 96: Manage Favourites
Button Description Moves between pages for additional list items. When track log details are shown: Button Description Button with the name of the Opens a keyboard screen to let you rename the Track Log. Track Log Tap this button to hide the Track Log on the map. No colour will be assigned to the Track Log. - Page 97 Button / Icon Description Opens the selected POI group for editing. Tap to filter the list to contain only the POIs that you saved. Tap to see all POIs in the list. Creates a new POI group at the given group level. Moves between pages for additional list items.
-
Page 98: Manage Saved Search Criteria
Button Description Tap this button to move the POI to another POI group or subgroup. 4.4.6 Manage Saved Search Criteria You can manage the list of search criteria previously saved to easily find frequently searched POI types. Tap the following buttons: Button Description Button with the name of the... -
Page 99: Settings Menu
4.5 Settings menu You can configure the program settings, and modify the behaviour of iGO8. Tap the following buttons: The Settings menu has two pages of submenus. Tap to access the other options. Button Description Reference You can fine-tune the appearance and content of the Map page 70 screen. -
Page 100: Map Screen Settings
4.5.1 Map Screen settings You can fine-tune the appearance and content of the Map screen. Tap the following buttons: Button Description 3D Settings Use 3D settings to determine which of the present 3D objects are shown on the map, and adjust the level of 3D visual detail. The options are as follows: Landmarks: Landmarks... -
Page 101: Sound Settings
4.5.2 Sound settings You can adjust the sounds of iGO8. Tap the following buttons: Button Description Master Volume Use the switch to mute all sounds of the device and then to re-enable them again. The position of the slider determines the volume level. Voice Guidance Volume The slider adjusts the loudness of voice prompts. - Page 102 Button Description use that information in route planning. Recalculate to Avoid Traffic This setting determines how iGO8 uses the received TMC information in route recalculation: Automatic: When route recalculation becomes necessary based on the received TMC events, iGO8 recalculates the route automatically.
-
Page 103: Regional Settings
Route Calculation Method types: Option Description Fast Gives the quickest possible route if you can travel at or near the speed limit on all roads. Usually the best selection for fast and normal cars. Short Gives a route that has the smallest total distance of all possible routes between the route points. -
Page 104: Navigation Settings
Time and Time Zone Settings: Button Description Auto Time Correction to GPS Use this feature to synchronise the clock of your device to the highly accurate time provided by the GPS receiver. Use Auto Time Zone Use this feature to synchronise the time zone of the clock of your device to the time zone based on your current GPS position. -
Page 105: Warning Settings
Button Description Default Zoom Level: Overview mode will appear with this zoom level. You can scale the map in Overview mode but next time Overview appears again, this zoom level will be applied. 4.5.6 Warning settings You can enable some useful warnings, and disable the touch screen in a moving vehicle with Safety Mode. -
Page 106: Gps Settings
Button Description your attention on the road. While driving, you will not be able to set a new destination or to change settings. The only screen control that remains enabled is the gesture that puts you back on the Map screen. 4.5.7 GPS settings You can set up the connection to the GPS receiver. -
Page 107: Menu Settings
With a TMC receiver already connected, you can manage the radio stations that broadcast TMC messages: Button Description Use Auto-tuner If Auto-tuner is enabled, the tuner of iGO8 sweeps through the FM CCIR radio band searching for a TMC signal. The first station with TMC data will be used automatically. -
Page 108: Track Log Settings
Button Description Backlight at Daytime You can set the backlight level for daytime use. Backlight at Night You can set the backlight level for night use. Screen Calibration You can fine-tune the position of the screen content on the display. Tap this button, use the arrows to reposition the application window, and then tap to save the changes and exit. -
Page 109: Glossary
5 Glossary 2D/3D GPS reception The GPS receiver uses satellite signals to calculate its (your) position and needs at least four signals to give a three-dimensional position, including elevation. Because the satellites are moving and because objects can block the signals, your GPS device might not receive four signals. If three satellites are available, the receiver can calculate the horizontal GPS position but the accuracy is lower and the GPS device does not give you elevation data: only 2D reception is possible. - Page 110 Overview mode You can instruct iGO8 to automatically switch to Overview mode if the next route event is in a distance. In Overview mode the map is shown in 2D but scaled down to a predefined zoom level. When you approach the next route event, the previous 2D or 3D map view returns automatically. Route A series of destinations to be reached one after the other.
-
Page 111: End User Licence Agreement
6 End User Licence Agreement 1 The contracting parties 1.1 This Agreement has been entered into by and between NNG Kft. (registered seat: 23 Bérc utca, H-1016 Budapest, Hungary; Company reg.no.: 01-09-891838) as Licensor (hereinafter: Licensor) and You as the User (hereinafter: User; the User and the Licensor jointly referred to as: Parties) in subject of the use of the software product specified in this Agreement. - Page 112 6.2 The User is entitled to make one backup copy of the Software Product. However, if the Software Product operates after installation without the use of the original media copy, then the original media copy shall be deemed to be a backup copy. In all other cases, the User is only entitled to use the backup copy if the original media copy of the Software Product has been ascertainably and unequivocally rendered unsuitable for its lawful and intended use.
- Page 113 9.1 The Licensor hereby informs the User that, if the Licensor finds its rights under the Copyright Act to be breached, the Licensor may 9.1.1 seek judicial recognition of this breach; 9.1.2 demand that the breach cease and order the person in breach to refrain from continuing such actions;...
- Page 115 For SWC interfacing we only recommend using the Metra Axxess ASWC with our models. Please use the below steps as a guide to help with wiring to the Boss Audio BV9386NV. If you have any questions, please call our Tech Support: 805.751.4853 (M-F 8:30a-5:00p PST) Use the wired 3.5mm adapter that came with the interface, and connect the following:...
- Page 119 Boss Audio Systems Free Extended Warranty Program When you purchase directly from BossAudio.com, one of our “Authorized Platinum Online Dealers” or have your product installed at an authorized Boss Audio dealer at the time of purchase, you qualify a free extended warranty on the product you purchased as shown below. Mobile Video & CD and DVD Receivers: 3 Years Total Boss Audio will extend the warranty for an additional two years, 3 years total, directly to the original consumer. Woofers, Speakers, ATV/UTV and Motorcycle Sound Systems: 3 Years Total Boss Audio will extend the warranty for an additional two years, 3 years total, directly to the original consumer. Amplifiers: 6 Years Total Boss Audio will extend the warranty for an additional five years, 6 years total, directly to the original consumer. Other Electronics and Accessories: There is No extended warranty available. Terms and Conditions: Purchases made online from dealers other than Bossaudio.com or an Authorized Platinum Online Dealer listed on this site do not qualify for the free extended warranty program. The online extended warranty program cannot be combined with the Installation Extended Warranty program. The extended warranty is valid only on purchases made and shipped within the US and covers parts and labor to repair only. This program is effective as of 3/1/2015. Any purchase made prior to this date will not qualify for this program. All other conditions of original warranty apply. To see a list of Authorized Platinum online Dealers, please click here. To get service on any product that falls under the Extended Warranty (800)999‐1236 ext. 2239 or email to: http://bossaudio.com/support/, an original or copy of dated purchase receipt is required to validate the warranty and a statement of the problem with the product is needed. ...
Need help?
Do you have a question about the BV9386NV and is the answer not in the manual?
Questions and answers