Neptronic SK 300 series Installation Instructions Manual
Steam humidifiers
Hide thumbs
Also See for SK 300 series:
- Installation instructions and user manual (52 pages) ,
- Installation instructions & user manual (43 pages) ,
- Installation instructions and user manual (4 pages)
Table of Contents
Advertisement
Quick Links
installation
and service manual
n a t i o n a l
4 0 0 b l v d . l e b e a u , s t . l a u r e n t , q u e b e c , c a n a d a H 4 N - 1 R 6
tel.:(514) 333-1433 fax:(514) 333-3163 toll free (canada) 1-800-361-2308
s s t t e e a a m
h h u u m
e n v i r o n m e n t a l
m
m i i d d i i f f i i e e r r s s
p r o d u c t s ,
JANUARY, 2002
l t d .
Advertisement
Table of Contents

Subscribe to Our Youtube Channel
Related Manuals for Neptronic SK 300 series


Summary of Contents for Neptronic SK 300 series
- Page 1 s s t t e e a a m h h u u m m i i d d i i f f i i e e r r s s installation and service manual JANUARY, 2002 n a t i o n a l e n v i r o n m e n t a l p r o d u c t s , l t d .
-
Page 2: Table Of Contents
page table of contents 1.00 dimensions 2.00 output and power consumption 3.00 positioning & installation 3.10 general recommendations 3.20 positioning of SK300 3.30 wall mounting 3.31 mounting to a stud partition wall 3.32 mounting to a masonry wall 3.33 mounting holes dimensions 3.40 steam output positions 3.50 SK300 (SDU) space distribution unit 4.00 plumbing connections... -
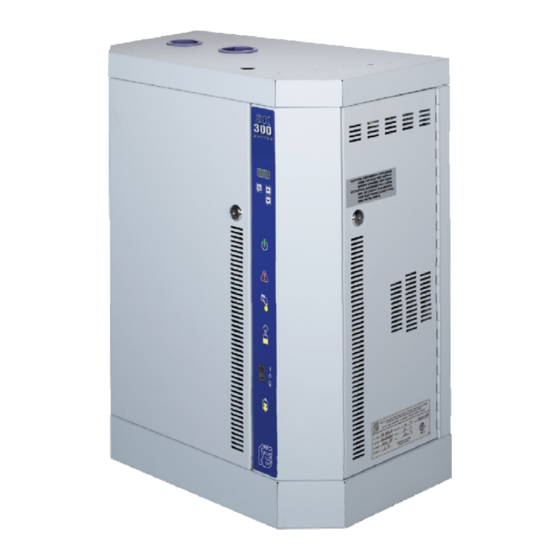
Page 3: Dimensions
SK300 (fig. #1 ) dimensions: model 597mm 470mm 292mm 143mm 740mm SDU-1 SK302 23½ “ 18½ “ 11½ “ 5-5/8“ 29-1/8 “ 597mm 470mm 292mm 143mm 740mm SDU-1 SK304 23½ “ 18½ “ 11½ “ 5-5/8“ 29-1/8 “ 597mm 470mm 292mm 143mm 740mm... -
Page 4: Output And Power Consumption
amperage Ø of model power capacity outlets outlets 240/1 208/1 208/3 480/1 480/3 600/1 600/3 6 lb/hr 2 Kw SK302 " 2.73 kg/hr 12 lb/hr 4 Kw SK304 " 11.5 5.5 kg/hr 18 lb/hr 6 Kw SK306 " 10.5 16.5 8 kg/hr 30 lb/hr 10 Kw... -
Page 5: 3.10 General Recommendations
3.10 general recommendations: I M P O R T A N T The humidifier should be installed in an easily acces- FOR SAFETY REASONS, POWER MUST BE sible location to allow proper access for inspection TURNED OFF AT THE EXTERNAL BREAK- and maintenance. -
Page 6: Mounting To A Stud Partition Wall
3.31 mounting to a stud partition 3.32 mounting to a masonry wall wall: (brick, concrete, solid block): The wall must be sufficiently solid to provide a t is necessary to mount the humidifier directly to secure anchorage. Use ¼" threaded x 2¼" minimum the wall studs. -
Page 7: Steam Output Positions
3.40 steam output positions: Small cabinet (SK302, 304, 306) 302, 310, 314 320, 330, 340,360 304,306 110mm Medium cabinet 4-5/16“ (SK310, 314) (SK320, 330) 122mm 4-13/16“ 134mm 5-9/32” 102mm 102mm 4“ 4“ 143mm 143mm 5-5/8“ 5-5/8“ 179mm Large cabinet 7“ (SK340) (SK360) 179mm... - Page 8 SK300 (SDU): space distribution unit-remote mounted The SDU units are mounted in the same fashion as standard units. Note that: a) The humidifier should be mounted such that the (SDU) fan section is at least 2m (7 feet) above the floor. b) A minimum clearance of 45 cm (1½...
-
Page 9: Plumbing Connections
4.00 plumbing connections: drain connector ¾" copper pan drain connector The SK300 humidifiers are independent of vari- ½" copper able water conditions and can operate equally fill valve well with hard or soft water. Therefore, for normal connector 3/8” operation, no pre-treatment of water is ne-ces- sary. -
Page 10: 4.20 Water Connections
4.30 water connection of the SK300: ATTENTION! Please respect the following sequence of installation. Connect 3/8” copper pipe to the bottom 3/8” compression fit- tube valve ting. Finger tighten the swivel top fitting to the male threaded part of the valve. (Do not tighten with a wrench!) bottom of cabinet 4.40 water connections:... -
Page 11: Steam Absorption
steam absorption: distribution to provide the client with the In order to prevent the accumulation of most economical solution for any particu- condensation in air ducts, NEP has lar application. designed 4 basic configurations of steam (fig. 9) A) "MULTI-STEAM" system: system is to be MULTI STEAM... - Page 12 manifold bracket (fig. 11) manifold C) "S.A.M.E2" (steam absorption manifold) The S.A.M.E2 is to be installed where absorption distances are short (less than 5 feet) and /or low duct temperatures are in effect. S.A.M.E2 are used in applications with restricted duct dimensions. S.A.M.E2 S.A.M.
-
Page 13: Installation Of Steam Hoses And Steam Pipes
5.10 installation of steam hoses and steam pipes: Follow these general rules when installing rigid copper piping or flex- ible hose to carry the steam from the humidifier to the steam distribu- tors. A) At no point of the installation should the slope of the steam hose minimum or pipe be less than 15% which... -
Page 14: Installation Of "S" Straps Wit Steam Supply Hose And Pipe
5.20 installation of "S" straps with steam supply hose and pipe: steam outlet use "S" 8” separator when the steam (fig. #15) distributor is lower than the humidifier's steam outlet 8” steam use "S" outlet separator when ceiling space is limited and you need to create 15%... - Page 15 5.30 positioning of REGULAR or S.A.M. manifolds in the horizond duct: (fig. 17) unit 35mm (1-3/8") Note: Since the manifold is sloped at a ration of 8 diameter duct mounting D = 2" horizontal lengths to 1 vertical length, ensure that the detail of steam distribu- unit 54mm (2-1/8") minimum distance of the end of the manifold is at least...
- Page 16 5.40 installation of S.A.M. or REGULAR steam distribution pipes: typical rigid installation 1 clamps 2 flexible hose 3 rigid copper pipe 4 insulation 5 steam distribution manifold 6 duct typical flexible installation 1 clamp (fig. #23) SK300 2 flexible hose 3 steam distribution Notes: manifold...
-
Page 17: 54Mm) In Vertical Ducts
5.6 positioning of . or manifolds (1-3/8", 35mm or 2-1/8", 54mm) in vertical ducts: Follow the drawings below to determine proper placement of the steam pipes in the duct. (fig. 28) one pipe vertical two pipes vertical S.A.M. S.A.M.E2 (fig. #25) (fig. -
Page 18: 18 5.70 M.s. ( Multi Steam ) Manifold
5.70 M.S. (Multi Steam) manifold: Min 2” (5cm) 2” (5cm) 4” (10cm) 2” (5cm) (fig. #30) Main Steam Header stainless steel Duct Width Steam Manifolds 1-3/8" stainless steel Duct Height Typical Steam Nozzle Hangers (by others) Condensation Run 3/4" (by others) “U”... -
Page 19: Sk300 On/Off Units: (Low Voltage Control Terminals)
WARNING! High voltage power terminal block are designated L1, L2, L3 Low voltage control terminal blocks are designated 1,2,3,4 DO NOT INTERCHANGE!! 6.10 SK300 ON/OFF units: (Low voltage control terminals) SK300 ON/OFF control terminal block wiring L 1 L 2 L 3 5 volt DC 5 volt DC humidistat... -
Page 20: Sk300 Modulating Units: (Low Voltage Control Terminals)
6.20 SK300 modulating units: (Low voltage control terminals) WARNING! High voltage power terminal block are designated L1, L2, L3 Low voltage control terminal blocks are designated 1,2,3,4 DO NOT INTERCHANGE!! (electrical compartment detail) (fig. 33) (fig. 34) - Page 21 Controls placement The airflow switch must be positioned to A typical humidifier control system accurately open on a loss of air flow, to includes a wall or return duct humidistat, prevent the humidifier from running when a high limit duct humidistat, and an air there is no air to absorb the moisture.
-
Page 22: Power Supply Connections
6.30 power supply connections: The wiring to the SK300 unit should be done by a qualified electrician, and external over current protection should comply with local codes. A disconnect circuit breaker should be connected and placed adjacent to the unit. Appropriately sized cable connectors should be used in the knock-outs at the bottom of the elec- trical compartment of the humidifier for strain relief. -
Page 23: Sk300M Proportional Unit
6.40 SK300M proportional unit: To connect proportional controls to the humidifier: * Ensure proper connection to the appropriate terminal blocks. * Position the shunt jumpers on the proportional board to correspond to the appropriate control signal. terminal block modulating p.c. board extra jumper F 1 2 control... -
Page 24: Front Panel Display Features
indicators and switches: 1. Alphanumeric Display operates in 3 modes: A. S Continuously indicates %RH, CROLL ACTUAL STEAM OUTPUT WATER LEVEL B. D Indicates some operational parameters such IAGNOSTIC as time delay on power contact or abnormal conditions such as overheating in the container, end of season automatic drain, service hours, etc. -
Page 25: Alphanumeric Display And Control
8.10 alphanumeric display and control The Alphanumeric display is the information center whose function is to inform on the actual status of the unit and in case of abnormal operation to describe the malfunction. Through the display menu parameters and may be changed as described below. 8.20 off mode: When the rocker switch (fig. -
Page 26: Diagnostic Mode
8.40 diagnostic mode: When the following conditions occur, the diagnostic messages override the scrolling information. comments: example of display: description: When the control input signal is 0 vdc or the set point has been NO DEMAND reached on the high limit humidistat or the pressure switch The unit is in the automatic drain DRAIN CYCLE... -
Page 27: Menu Driven Program Mode
8.50 menu driven program mode: The MENU button is used to place the SK300 into the program mode and to advance the program function to the next programming step in the menu. Use the UP /DOWN buttons to make changes. example of display: comments: description:... -
Page 28: 27 9.10 Main P.c. Board (Pcb970819)
The SK300 humidifier is controlled by an advanced microprocessor-based control system. The basic control sys- tem is the same for the ON/OFF or Modulating units. Modulating units are equipped with an additional P.C. board that is mounted on top of the main P.C. board as shown below. 9.10 main p.c. -
Page 29: Start Up Procedure
After all the mechanical and electrical installation steps (as outlined previously) have been car- ried out, the following start-up procedure should be followed. A) Turn on the water feed and check that the drain connections are made correctly. B) Ensure that the power connections and control connections are made correctly. C) Turn on the power to the humidifier. -
Page 30: Steam Container Cleaning Instructions
The steam container and its contents may be extremely hot! Follow these directions to ensure your safety. 1) Ensure that the steam container and its contents are cool. Set the front panel switch to DRAIN. Drain out all the water in the steam container. When the container is empty, turn the front panel switch to AUTO. -
Page 31: Exploded View Of Sk300 Humidifier
sdu cabinet plastic grill steam trap assembly cabinet SK300 container base SK310 to SK360 container base SK302 to SK306... -
Page 32: Sk300 Humidifier Parts List
13.10 SK300 humidifier parts list: item part number description item part number description SW CONTSMA-ASS SK302 to 306 container c/w clamps SK302 to 306 level sensor chamber SP 4196 SW CONTMED-ASS SK310 to 330 container c/w clamps SW CONTLAR-ASS SK340 to 360 container c/w clamps SK310/314/320/340 level sensor chamber SP 4197 SP 4198... -
Page 35: Warranty
General any direct or indirect losses that may arise for any reason what- · Unless otherwise arranged, in writing, the acceptance of the Order soever as a result of our failure to adhere to such promises. 10.Return of good Confirmation by the purchaser includes acceptance of the "General Goods received by the purchaser cannot be returned unless a Conditions of Sale and Warranty"...
Need help?
Do you have a question about the SK 300 series and is the answer not in the manual?
Questions and answers