Table of Contents
Advertisement
Quick Links
• Never attempt to swim after a stalled R/C boat.
• Never operate your R/C boat while standing in the water.
• Never operate your R/C boat in the presence of swimmers.
• Always use a Personal Flotation Device (PFD) when boarding and operating your retrieval craft, i.e. Jon
boat or duck boat. NOTE: Because of the sharp running hardware included with this R/C boat, we do not
recommend a rubber blow up raft.
• R/C boat running hardware is very sharp. Be very careful when working on and around the metal parts.
• While the motor is running pay close attention to the propeller. Do not come in contact with the propeller at
any time the engine is running or serious injury will result.
• AquaCraft products are to be used by ages 14 and over.
WARNING:
www.aquacraftmodels.com
www.aquacraftmodels.com
www.aquacraftmodels.com
™
™
Advertisement
Table of Contents

Related Manuals for AquaCraft VS1


Summary of Contents for AquaCraft VS1
- Page 1 • While the motor is running pay close attention to the propeller. Do not come in contact with the propeller at any time the engine is running or serious injury will result. • AquaCraft products are to be used by ages 14 and over. www.aquacraftmodels.com www.aquacraftmodels.com...
-
Page 2: Items Included
STANDARD REPAIR SERVICE defects in materials or workmanship of original manufacture. AquaCraft, After the 90-day warranty has run out you can still have your VS1 at their option, will repair or replace at no charge, the incorrectly made repaired for a service fee by the experts at AquaCraft. -
Page 3: Specifications
AquaCraft maintains no responsibility for inadvertent errors in this manual. • If your VS1 should happen to stall, water currents will slowly carry it to shore. The bad news is that the boat could be carried to the opposite shore. When surveying areas to run your boat, keep variables in mind such as wind direction, size of the lake, etc. -
Page 4: Tools Needed To Complete
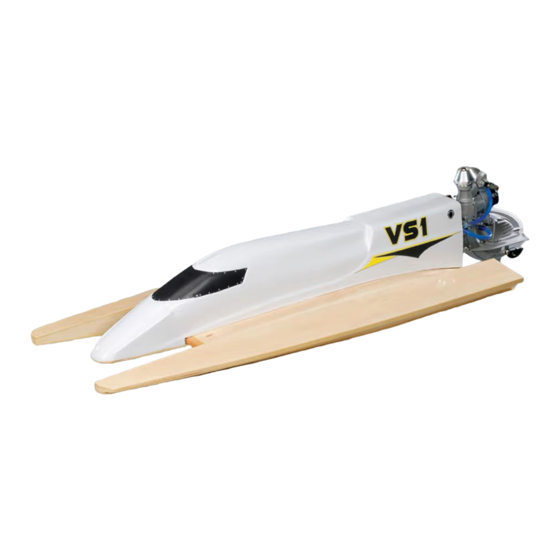
• Solder • Small Phillips Screwdriver • 5-64 Hex Wrench Your VS1 does not include a boat stand. You can build one • Needle Nose Pliers out of wood or make one from PVC tubing that you buy from • Hand Drill your local home store. - Page 5 When we talk about blueprinting the bottom of your VS1, we are mostly talking about the bottom of the sponsons. Your VS1, like other hand built performance boats, will likely need to be trued (blueprinted) get maximum performance.
- Page 6 Output (VS1 Kit) your best to remove them, making sure you do not change Eight 2 x 8mm wood screws (VS1 Kit) the sponsons’ angle. Once that sponson is completely fl at, Servo Tray (VS1 Kit) sand the other sponson bottom fl...
- Page 7 This step requires the following kit parts and tools: 35mm pull-pull wheel (VS1 Kit) Five 2 x 6mm machine screws (VS1 Kit) Five 2mm machine nuts (VS1 Kit) .049" pull-pull silver cable (VS1 Kit)
- Page 8 The wire will fl ex around the tank mount block. This step requires: Install the small lock collar on the end of the wire to complete On/Off rod wire .069" dia. 16" long (VS1 Kit) this step. 3/32" collar with M3 set screw (VS1 Kit) Needle nose pliers 1.5mm hex wrench...
-
Page 9: Installing The Engine
INSTALLING THE ENGINE ASSEMBLING THE FUEL TANK MOUNT Parts and tools you are going to need: Engine Four 6-32 x 1" Socket head bolts (VS1 Kit) Four #6 washers (VS1 Kit) Metal backing plate (VS1 Kit) 7/64" hex wrench 1. Take a few moments to study the parts layout in the picture. -
Page 10: Installing The Fuel Tank
INSTALLING THE FUEL TANK Parts and tools you are going to need: Pre-built mount (VS1 Kit) Four 2 x 10mm wood screws (VS1 Kit) Small Phillips screwdriver Fuel tank (VS1 Kit) O-rings (VS1 Kit) Fuel line 4. Next, epoxy the front (longer) upright into the base. - Page 11 Two 2-56 nuts (VS1 Kit) Solder Two threaded couplers (VS1 Kit) Two 1/4" lengths of fuel line (VS1 Kit) Rotary tool w/cutoff wheel 4. Using a rotary tool and safety glasses, cut the cable on the marks. Install the end of the cables into the threaded couplers and solder them together.
-
Page 12: Installing The Throttle Cable
Inner metal cable (VS1 Kit) Four metal clevises (VS1 Kit) Four threaded couplers (VS1 Kit) Four 1/4" lengths of fuel line (VS1 Kit) 1/2" length of fuel line (VS1 Kit) Two zip ties (VS1 Kit) Rotary tool with cut off wheel... - Page 13 Allow the servos to center. If you are using a multiple memory radio system, select a model and rename your model VS1. Reinstall the servo horns and 5. Next slide the short length of fuel line over the clevis so check the directions and centering of the servos.
-
Page 14: Safety First
TAPING THE RADIO BOX LID 3. Finish by taping the sides. Check again to make sure you’ve pressed all the tape fi rmly in place, and you’re done. Remember: After running the boat, pull up the tape to remove the lid and unplug the battery from the switch. PAINTING TIPS SAFETY FIRST! 1. -
Page 15: Launch Procedure
Mix up some primer using the mixing ratios that come with the primer. Prime the cowl starting with a light tack When you are done running your VS1 for the day it is coat followed by a slightly heaver coat. No need to go to a important to properly maintain the engine. -
Page 16: Care And Maintenance
Too much negative (–) and the boat will • If you should happen to fl ip your VS1 you are going to need run too wet. Typical modern R/C tunnel boats run with about to remove any water that might have entered the engine. - Page 17 Rudder Defl ection: Your VS1 needs very little rudder defl ection to make it around a corner. Obviously your boat will The VS1 responds best if you drive it as if you were driving turn tighter with more rudder defection but the truth is this can a car or any other type of wheeled vehicle.
-
Page 18: Ordering Replacement Parts
Precision Prop Balancer Precision Prop Balancer ™ To order replacement parts for the AquaCraft VS1 use the order numbers in the replacement parts list that follows. Replacement parts can be purchased from your local hobby shop or by mail order. If you need assistance locating a dealer to purchase parts, visit www.hobbico.com and click... -
Page 19: Engine Mount Template
Precision cast from Copper-Beryllium-Titanium! Give your VS1 an added burst of speed — as easily as bolting on a high-quality copper-beryllium-titanium GrimRacer metal prop! Racer-designed and USA-made, these are the most accurately cast metal props available. Ultra-clean casting and true center-bore hubs place each prop near its balance point right out of the package. - Page 20 COPYRIGHT © 2008 COPYRIGHT © 2008 AQUB0006MNL v1.0 AQUB0006MNL v1.0...
Need help?
Do you have a question about the VS1 and is the answer not in the manual?
Questions and answers