Advertisement
Advertisement
Table of Contents

Subscribe to Our Youtube Channel
Related Manuals for Ayra oso 240b mkii

Summary of Contents for Ayra oso 240b mkii
- Page 1 192-channel DMX controller User manual...
- Page 2 Introduction Thank you for purchasing this Ayra DMX controller. This unit was designed to control DMX lighting fixtures, especially intelligent lighting fixtures. The unit is capable of sending out a maximum amount of 192 DMX channels, spread over 12 fixtures with 16 channels each. The device can store up to 6 chases, which gives you the opportunity to create your own lightshows and adjust them to the music that you are playing.
-
Page 3: Features
Features This DMX controller has an output of 192 DMX channels max. These channels are spread over 12 fixtures, each with a maximum of 16 channels. This way, you are able to select and deselect connected fixtures, to change settings and/or values. The unit is designed for intelligent DMX fixtures, such as movingheads, scanners, lighting effects and static (RGB) LED lighting which consume several DMX-channels. -
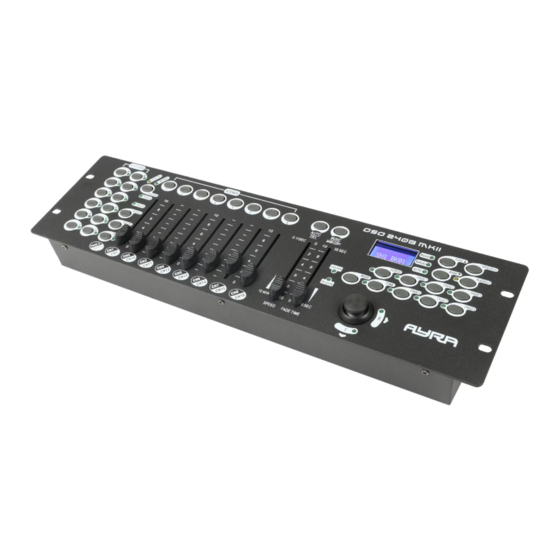
Page 4: Product Overview
Product overview 1. Scanner select button: Select the fixture you wish to operate with the faders 2. Scanner indicator LEDs: Indicates if a scanner is active or not 3. Scene select buttons: 8 scene buttons, representing storing locations for sceens 4. - Page 5 27. Fog machine button: Activates the fog machine (NOTE: not all fog machines work with this function) 28. Fog machine ready indicator 29. Fog machine heating indicator 30. Audio input jack: direct audio input from a line signal audio source, connected with 6.35mm jack 31.
-
Page 6: Common Terms
Common terms Blackout: A state where all DMX values are set to 0, causing all output to be blocked from your lighting fixtures. The functions on your controller will be still operating Fixture: Also called scanner, a term which describes a lighting device, such as a movinghead, scanner, lighting effect or LED-projector. -
Page 7: Programming And Configuration
Programming and configuration Setting up the system Place the unit on a solid surface, or mount it in a 19 inch flightcase/rack. Connect the included DC power supply at the rear of the panel and plug it into a suitable wall outlet or power distribution box. Plug in the DMX-cables from the controller to all your fixtures and daisy-chain every fixture you wish to connect. - Page 8 NOTE: The joystick can be reassigned to an output on another DMX channel. Press Auto/Del and Mode buttons at the same time to delete the assignment NOTE: You can re-assign the DMX channel to all controller fader channels Reverse review - Press and hold Fine &...
- Page 9 Manual operation The manual mode provides direct access to all scanners. This way, you are able to move and change attributes by using the channel faders and/or joystick. - Press the Auto Del button repeatedly until the Manual LED is lit - Select a Scanner button - Move faders and/or joystick as you wish - Select Page A (1-8) or Page B (9-16) to change values for all channels in a fixture...
- Page 10 Running a program NOTE: A ‘Program’ in this manual is described as a series of scenes inside a bank, placed after each other in a continuous loop. It is comparable to a Chase, but has a logical order and only consists of the scenes that are stored in that bank.
- Page 11 Running a chase - Press the Chase button, then press the Auto/Del button - Adjust the Speed and Fade Time by using the corresponding faders (or use Tap Sync) Review a chase - Press and hold the Program button until the LED is lit - Select the desired Chase button - Press the Tap Display button to switch the LCD button to steps - Review each scene/step individually by using the Bank UP/DOWN buttons...
- Page 12 Scene programming (steps) Insert a scene - Press and hold the Program button to enter programming mode - Press the desired Chase button - Press the Tap Display button to switch the LCD display to steps view - Use the Bank UP/DOWN buttons to navigate steps and locate the insert point of the new scene. The display will read the step number - Press the MIDI/REC button to prepare the insert - Use the Bank UP/DOWN buttons locate the Scene...
- Page 13 Auto mode playback - Press the Auto/DEL button until the AUTO LED turns on - if a Chase button is not pressed, the controller will automatically run a bank program - Change Bank programs by using the Bank UP/DOWN buttons OR press a chase button OR press several chase buttons (which will loop all pressed chases in sequence - Adjust the fade time as you wish Run multiple chases simultaneously...
- Page 14 Data transfer (file dump) NOTE: This function will transfer all stored data from one controller to another. This function does not work with different types and/or brands of DMX controller. Trying so may permanently damage your DMX console memory. NOTE: For this function, you will need a standard XLR-XLR cable. Connect the output from the source unit to the input of the destination unit.
- Page 15 Also the order of the connected fixtures is not important. DMX-controlled devices can be daisy-chained using XLR-XLR cables. AYRA recommends the use of 110 Ohm DMX cables and a DMX terminator (110 Ohm, see below) at the end of a DMX chain.
- Page 16 DMX Display quick reference chart...
-
Page 17: Technical Specifications
Technical specifications Type: OSO 240B MKII DMX output channels: 192 Storage capacity: 240 scenes (8 scene x 30 storage banks) Chases: 6 Fixtures: 12 (with 16 channels each) Faders: 8 (16 total, switchable with Page A/B function) Joystick for pan/tilt (X/Y) movement Speed and fade time fader Music activated: 6.35mm jack line audio source or internal mic...
Need help?
Do you have a question about the oso 240b mkii and is the answer not in the manual?
Questions and answers