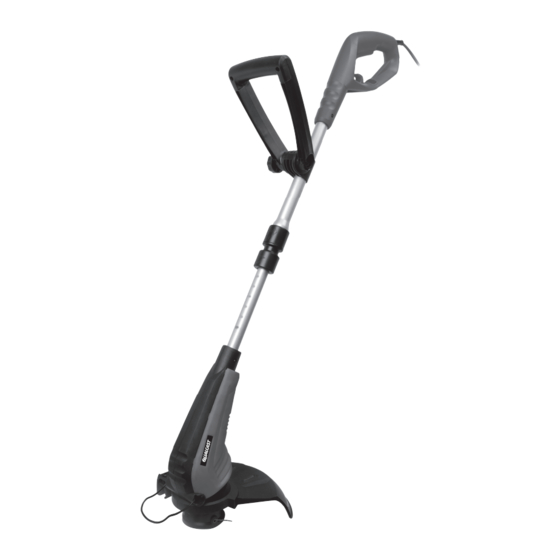
Summary of Contents for Qualcast GGT3001
-
Page 1: Operating Instructions
GGT3001 OPERATING INSTRUCTIONS 300 Watt Electric Grass Trimmer HELPLINE NO 0844 8010979... -
Page 2: General Power Tool Safety Warnings
ORIGINAL INSTRUCTIONS GENERAL POWER TOOL damaged guards or without the guards in place; SAFETY WARNINGS g) Keep hands and feet away from the cutting means at all times and especially WARNING! When using the machine when switching on the motor; the safety rules must be followed. - Page 3 ORIGINAL INSTRUCTIONS SYMBOLS be supplied via a residual current device (RCD) with a tripping current of not more than 30mA. Read the manual Double insulation Warning Wear eye protection Wear ear protection Wear dust mask Do not expose to moisture Keep bystanders away.
- Page 4 ORIGINAL INSTRUCTIONS TRIGGER SWITCH AUXILIARY HANDLE HANDLE ROTATION LOCKING COLLAR HEIGHT ADJUSTMENT LOCKING COLLAR TELESCOPE TUBE MOTOR HOUSING FLOWER GUARD AND EDGE GUIDE CUTTING HEAD ASSEMBLY SAFETY GUARD 10. CABLE STRAIN RELIEF HOOK 11. CUTTING LINE (See Fig L) 12. CUTTING HEAD COVER (See Fig L) 13.
- Page 5 ORIGINAL INSTRUCTIONS OPERATING INSTRUCTIONS Use of the unit without having installed the guard will cause the motor to overheat, and NOTE: Before using the tool, read the void the warranty. instruction book carefully. 2. FITTING THE AUXILIARY HANDLE (See Fig C1,C2) ASSEMBLY/ADJUSTMENT NOTE: This may already be pre-fitted to the trimmer.
- Page 6 ORIGINAL INSTRUCTIONS The auxiliary handle’s bracket can be moved place. up or down on the shaft and the auxiliary handle itself can be moved forward or backward into 5 different locked positions Then tighten the auxiliary handle locking knob. 4. ADJUST THE HEIGHT (See Fig E) To adjust the telescopic shaft, simply pull the height adjustment locking collar down and pull the bottom section of the shaft down to...
-
Page 7: Operation
ORIGINAL INSTRUCTIONS 7. ON/OFF SWITCH EDGING (See Fig J) To start, press and hold the switch. Release To edge, rotate the upper shaft with rear the switch to stop. handle 180 , place the edge guide and WARNING: The cutting head continues trimmer head above the surface you are to rotate after the trimmer has been going to edge, as shown in Fig J. - Page 8 ORIGINAL INSTRUCTIONS head more sharply or try bumping it on a cover and remove cover, pulling it straight off firmer surface. the cutting head assembly. 3. If there is no change in the cutting line 3. Lift the spool out of the spool housing. length, un-plug the trimmer’s mains supply REPLACE THE SPOOL cable.
-
Page 9: Maintenance
There are no user agent or similarly qualified persons in order to serviceable parts in your power tool. Never avoid a hazard. TECHNICAL DATA GGT3001 Voltage 230 -240V~50Hz Power input 300W No load speed 11000/min Max. - Page 10 ORIGINAL INSTRUCTIONS And the tool is being used as intended by its design and these instructions. This tool may cause hand-arm vibration syndrome if its use is not adequately managed. WARNING: To be accurate, an estimation of exposure level in the actual conditions of use should also take account of all parts of the operating cycle such as the times when the tool is switched off and when it is running idle but not actually doing the job.
-
Page 11: Environmental Protection
ORIGINAL INSTRUCTIONS ENVIRONMENTAL PLUG REPLACEMENT PROTECTION (UK & IRELAND ONLY) Waste electrical products should not If you need to replace the fitted plug then be disposed of with household waste. follow the instructions below. Please recycle where facilities exist. IMPORTANT Check with your Local Authority or retailer for recycling advice.


Need help?
Do you have a question about the GGT3001 and is the answer not in the manual?
Questions and answers