Lexmark X340 User Manual
Lexmark international printer/fax/scanner/copier user's guide
Hide thumbs
Also See for X340:
- Specifications (2 pages) ,
- Quick start manual (2 pages) ,
- Service manual (163 pages)
Table of Contents
Advertisement
Advertisement
Table of Contents
Troubleshooting

Related Manuals for Lexmark X340


Summary of Contents for Lexmark X340
- Page 1 X340, X340n, X342n MFP User’s Guide January 2006 www.lexmark.com...
- Page 2 40550, U.S.A. In the United Kingdom and Eire, send to Lexmark International Ltd., Marketing and Services Department, Westhorpe House, Westhorpe, Marlow Bucks SL7 3RQ. Lexmark may use or distribute any of the information you supply in any way it believes appropriate without incurring any obligation to you.
-
Page 3: Table Of Contents
Contents Chapter 1: Finding information about the MFP... 7 Chapter 2: Setting up the MFP... 9 Installing an overlay for another language ... 10 Installing an additional paper tray ... 11 Getting the MFP ready to print and scan ... 12 Installing the software for USB attach ... - Page 4 Loading various paper types ... 33 Setting the paper type and size ... 35 Using the control panel ... 35 Using the computer ... 35 Loading original documents into the ADF ... 36 Loading original documents on the scanner glass ... 37 Selecting an output location ...
- Page 5 Cleaning the outside of the MFP ... 67 Cleaning the inside of the MFP ... 68 Ordering supplies ... 70 Recycling Lexmark products ... 70 Chapter 10: Troubleshooting ... 71 Setup troubleshooting ... 72 Removing and reinstalling the drivers software ... 74 Jams and misfeeds troubleshooting...
- Page 6 Notices ... 94 Index... 102 Contents...
-
Page 7: Chapter 1: Finding Information About The Mfp
Finding information about the MFP The Lexmark™ X340/X340n/X342n Multifunction Printer (MFP) comes with the following resources: Setup sheet Description The Setup sheet gives you instructions for setting up hardware and software. User’s Guide Description The User’s Guide gives you instructions for using the MFP and other information such as: •... -
Page 8: Readme File
1 Click Start Lexmark 2 Select Readme. Where to find Visit our Web site at www.lexmark.com. 1 Go to the Web site. 2 Select a country or region from the drop-down list in the upper-left corner of the page. 3 Select the link for the information you need. -
Page 9: Chapter 2: Setting Up The Mfp
Setting up the MFP Before unpacking your MFP, select a level, stable surface on which to set it. Allow adequate space for air circulation and opening covers and trays. Front Back Right Left Clearance space 400 mm (16 in.) 175 mm (8 in.) 127 mm (3 in.) 50 mm (2 in.) 175 mm (7 in.) -
Page 10: Installing An Overlay For Another Language
Installing an overlay for another language These instructions apply only if you received one or more additional language overlays with the MFP. Lift and remove the overlay. Choose the correct overlay for your language. Align the overlay with the buttons on the MFP, and then press down until the overlay locks into place. -
Page 11: Installing An Additional Paper Tray
Installing an additional paper tray Your MFP supports one optional paper tray that lets you load up to 550 sheets of paper. CAUTION: If you are installing a 550-sheet paper tray after setting up the MFP, turn the MFP off, and unplug the power cord from the wall outlet before continuing. Unpack the 550-sheet paper tray, and remove any packing material. -
Page 12: Getting The Mfp Ready To Print And Scan
• Windows XP x64 • Windows 2000 Note: Drivers for Windows XP x64 bit Edition are available at www.lexmark.com. Insert the Software and Documentation CD. Follow the instructions on the screen. Connect the USB cable, and turn on the printer. -
Page 13: Installing The Software For Network Attach (X342N Only)
• Windows XP x64 • Windows 2000 Note: Drivers for Windows XP x64 bit Edition are available at www.lexmark.com. Connect the ethernet cable, and turn on the printer. Insert the Software and Documentation CD. Follow the instructions on the screen. -
Page 14: Getting The Mfp Ready To Fax
When the software installation screen appears, click Install or Install Now. Follow the instructions on the computer screen to complete the installation. Getting the MFP ready to fax You can connect the printer to equipment such as a telephone, an answering machine, or a computer modem. -
Page 15: Connecting To A Telephone
Connect the other en of the telephone cord into an active telephone wall jack. Note: For more information on connecting the MFP to telecommunications equipment, see the additional setup instructions that came with the MFP. Setup steps may vary depending on your country or region. Connecting to a telephone Connect a telephone to the MFP to use the fax line as a normal telephone line. -
Page 16: Getting The Mfp Ready To Copy
MFP. Setup steps may vary depending on your country or region. Getting the MFP ready to copy The X340/X340n/X342n can be used as a stand-alone copier and does not require additional setup or connection to a computer or a network. of the MFP. -
Page 17: Chapter 3: Learning About The Mfp
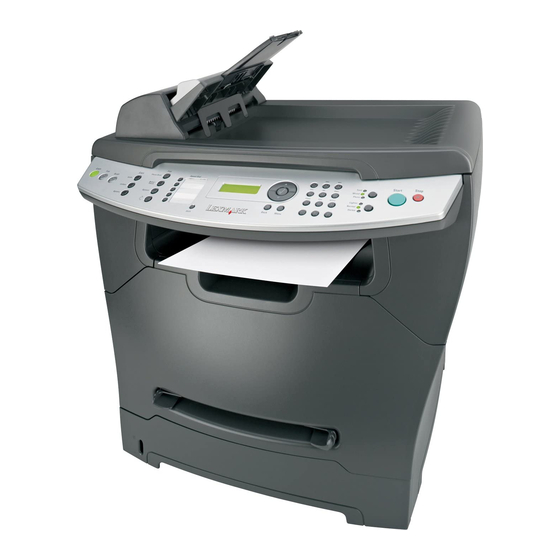
Learning about the MFP Understanding the parts of the MFP Use the ADF paper support Paper guides Automatic Document Feeder (ADF) Top cover Control panel Output paper support Extend to support longer media. Make sure paper feeds correctly. Copy, scan, or fax multiple–page documents. Access the scanner glass. - Page 18 Use the Front output tray Front cover Paper tray Manual feeder Paper level indicator Access button Scanner glass Scanner lock Understanding the parts of the MFP Hold paper as it exits the MFP. Access the toner cartridge. Load paper automatically. Load paper manually.
- Page 19 Use the Rear hinges Power switch Power supply port Dust cover Rear cover Ethernet port USB port LINE port EXT port Handles Understanding the parts of the MFP Lift the top cover to fit thicker documents, such as books. Turn the MFP on or off. Connect the MFP to a power source.
-
Page 20: Using The Control Panel Buttons
Using the control panel buttons The display shows: • MFP status • Messages • Menus Press Copy Access the Copy mode to make copies. Note: The mode is selected when the button light is on. Access the Fax mode to fax. Note: The mode is selected when the button light is on. - Page 21 Press Redial/Pause • In Fax mode, redial the last number entered. • Insert a three–second pause in the number to be dialed to wait for an Phone Book Access any of the programmed shortcuts. For more information on programming a shortcut, see Setting up shortcuts on page 47. Use this Numeric keypad Content...
-
Page 22: Using The Control Panel Menus
Use this Stop Darkness Menu Back Using the control panel menus Navigating the control panel menus Press Menu. Press repeatedly until the menu you want appears, and then press Press repeatedly until the menu option you want appears, and then press Press repeatedly until the setting you want appears. -
Page 23: Copy Defaults Menu
The MFP prints the network setup page. Copy Defaults menu Use this Darkness Improve the readability of a copy by darkening a light document or lightening a dark document. Content Specify the type of document being copied: Text, Mixed, or Photo. Number Specify how many copies to print. -
Page 24: Fax Defaults Menu
Fax Defaults menu Use this Content Choose the quality of the image being sent. Note: Changing the content may also increase the time necessary to send the fax. Original Size Specify the default size of original documents to be faxed. Darkness Improve the readability of a fax by darkening a light document or lightening a dark document. -
Page 25: Setting The Network Options (X342N Only)
To set the length of time the MFP waits before restoring default settings: Press Menu. Press repeatedly until MACHINE SETUP appears, and then press Press repeatedly until Timeout appears, and then press Press repeatedly until the length of time you want appears, and then press Press Back repeatedly to return to the Ready prompt. -
Page 26: Using The Mfp Software
Using the MFP software Use this Print Properties Presto! PageManager QLINK Using Print Properties Print Properties is the software that controls the printing function when the printer is connected to a computer. You can change the settings in Print Properties based on the type of project you want to create. -
Page 27: Using Presto! Pagemanager (Usb Attach Only)
To open QLINK, use one of the following methods: • From the MFP control panel, press Scan. • Double-click the QLINK icon on the desktop. • Click Start Programs or All Programs Programs or All Programs Lexmark Lexmark X34x Series Using the MFP software QLINK. -
Page 28: Chapter 4: Loading Paper And Original Documents
Loading paper and original documents Loading paper in the paper tray Make sure: • You use paper designed for laser printers. • The paper is not used or damaged. • If you are using specialty paper, you follow the instructions that came with the paper. •... - Page 29 Holding the tray on a stable surface, press the guide lock, and slide the rear guide until it locks at the paper length you want. Note: To load longer paper, such as legal size paper: • Press the button at the back of the paper tray, and extend the tray until it locks into place.
- Page 30 Load the paper with the print side facing down. Note: Load letterhead paper with the design side facing down. The top edge of the sheet should be placed at the front of the tray. Make sure the paper is below the maximum fill lines on the left inside wall of the tray. Note: Overloading paper may cause paper jams.
- Page 31 Squeeze and adjust the paper guides until they lightly touch the side of the stack of paper. Note: Do not push the paper guides far enough to cause the materials to warp. Incorrect adjustments may cause paper jams. Close the paper tray. Note: The paper level indicator, on the front of the paper tray, shows the amount of paper currently in the tray.
-
Page 32: Loading Paper In The Manual Feeder
Loading paper in the manual feeder Use the manual feeder to print transparencies, labels, envelopes, or card stock. You may also use the manual feeder to make short runs of paper types or sizes that are not currently loaded in the paper tray. -
Page 33: Loading Various Paper Types
Loading various paper types Size (mm/in.) Plain paper Letter (215.9 x 279/8.5 x 11) A4 (210 x 297/8.27 x 11.69) Folio (215.9 x 330.2/8.5 x 13) Legal (215.9 x 355.6/8.5 x 14) Executive (184.2 x 266.7/7.25 x 10.5) JISB5 (182 x 257/7.2 x 10) Statement (140 x 216/5.5 x 8.5) A5 (148 x 210/5.83 x 8.27) Envelopes... - Page 34 Feed card stock one sheet at a time through the manual feeder. It must exit through the rear output slot. Individual postcard sizes, such as 4 x 6, are not supported. Lexmark recommends full-sized sheets of postcard stock designed for laser printers.
-
Page 35: Setting The Paper Type And Size
Setting the paper type and size Using the control panel Press Menu. Press repeatedly until PAPER SETUP appears on the top line of the display, and then press Press repeatedly until Size/Type appears on the top line of the display, and then press Press repeatedly until the paper source you want to use appears. -
Page 36: Loading Original Documents Into The Adf
Loading original documents into the ADF You can load up to 50 sheets of an original document into the ADF for scanning, copying, and faxing. • Remove staples and paper clips from the original documents before loading into the ADF. •... -
Page 37: Loading Original Documents On The Scanner Glass
Loading original documents on the scanner glass You can scan, copy, and fax photos, text documents, magazine articles, newspapers, and other publications. Note: Place postcards, 4 x 6 cards, small items, or thin media (such as magazine clippings or carbonless paper) on the scanner glass. Open the top cover. -
Page 38: Selecting An Output Location
Close the top cover to avoid dark edges on the scanned image. Selecting an output location The MFP has two output locations: the front output tray and the rear paper exit. Front output tray Front output tray The front output tray should be used to output plain paper only. Use the rear paper exit for envelopes, labels, card stock, and transparencies. -
Page 39: Chapter 5: Printing
Printing Printing a document Load paper. With a document open, click File Click Properties, Options, Setup, or Preferences. Adjust the settings. Click OK. Click OK or Print. Printing an envelope Load an envelope face-up in the manual feeder. Note: Make sure the envelope flap is face-down. With a document open, click File Click Properties, Options, Setup, or Preferences. -
Page 40: Printing Transparencies
Click OK or Print. Printing transparencies Load transparencies. Note: • If you are using the manual feeder, load one transparency at a time. • Make sure you use a transparency designed for laser printers. With a document open, click File Click Properties, Options, Setup, or Preferences. -
Page 41: Printing The Last Page First (Reverse Order)
From the Layout tab, select the number of pages per sheet from the Pages Per Sheet drop– down list. Click OK. Click OK or Print. Printing the last page first (reverse order) Load paper. With a document open, click File Click Properties, Options, Setup, or Preferences. -
Page 42: Chapter 6: Faxing
Faxing You can load an original document into the ADF or on the scanner glass. Use the ADF for multiple–page documents. Note: Do not load postcards, 4 x 6 cards, small items, or thin media (such as magazine clippings or carbonless paper) into the ADF. -
Page 43: Sending A Fax
Sending a fax Note: Make sure the MFP is connected to an active, analog telephone line. Sending a fax automatically Make sure the MFP is on. Load an original document face-up into the ADF or face-down on the scanner glass. Note: Do not load postcards, 4 x 6 cards, small items, or thin media (such as magazine clippings) into the ADF. -
Page 44: Sending A Fax To A Group (Broadcast Fax)
Enter a fax number, press Speed Dial 1, 2, 3, 4, or 5, or press Phone Book to select a number. Note: • If you do not have a Speed Dial list but want to create one, see Setting up shortcuts on page 47. -
Page 45: Adding A Prefix Before Dialing
Enter a fax number, and then press Using the numeric keypad, press 1 (for Yes) if you have another number, or 2 (for No) if you have entered the last number. Enter the time you want to send the fax, and then press Note: At the designated time, the fax numbers are dialed and the fax is sent to all of the designated fax numbers. -
Page 46: Receiving A Fax Manually
Receiving a fax manually We recommend using this feature when the fax and the telephone share a telephone line. Choose which incoming faxes to accept by setting the MFP to manual answering mode. Deselect Auto Answer: From the control panel, press Fax. b Press Menu. -
Page 47: Printing Fax Activity Reports
Press Enter the number to which you want to forward the fax. Press Printing fax activity reports From the control panel, press Fax. Press Menu. Press repeatedly until REPORTS is selected. Press Press repeatedly until Fax Call log or Fax Job log is selected. Press Customizing fax settings Setting up shortcuts... -
Page 48: Using The Speed Dial Buttons
Enter the shortcut name using the keypad, and then press Entering characters on page 50. Note: The MFP does not support double–byte characters for names, such as Chinese, Japanese, or Korean. You cannot enter a name using these languages. Enter a fax number, and then press Using the numeric keypad, press 1 (for Yes) if you have another number, or 2 (for No) if you are finished. -
Page 49: Setting The Distinctive Ring
Setting the distinctive ring From the control panel, press Fax. Press Menu. Press repeatedly until FAX DEFAULTS is selected. Press Press repeatedly until Distinct Ring is selected. Press Press repeatedly until the setting you want is selected. Press to turn the setting on or off. Press to save the setting. -
Page 50: Entering Characters
Entering characters To enter a name for a fax job or the station ID, use the alphanumeric keypad. Press the appropriate key repeatedly until the character you want to use appears on the display. Note: • To add a space, press •... -
Page 51: Chapter 7: Copying
Copying You can load an original document into the ADF or on the scanner glass. Use the ADF for multiple–page documents. Note: Do not load postcards, 4 x 6 cards, small items, or thin media (such as magazine clippings or carbonless paper) into the ADF. -
Page 52: Collating Copies
Load the original document face-up into the ADF or face-down on the scanner glass. From the control panel, press Copy. Enter the number of copies you want to print. Press Start. Collating copies If you make multiple copies of a document, you can choose to print each copy as a set (collated) or to print the copies as groups of pages (not collated). -
Page 53: Enlarging Or Reducing An Image
Press Start. If prompted, press 1 (for yes) if you have more pages, or 2 (for no) if you have finished copying the number of pages you want to print in Paper Saver mode. Enlarging or reducing an image Load paper. Load an original document face-up into the ADF or face-down on the scanner glass. -
Page 54: Chapter 8: Scanning
Scanning Using the X340, X340n, or X342n, you can send scanned images through the USB connection to your computer. In addition, using the X342n you can scan the document back to your computer over the network. You can load an original document into the ADF or on the scanner glass. -
Page 55: Scanning Documents Using The Control Panel (Usb Attach Only)
Scanning documents using the control panel (USB attach only) Make sure: • The computer is on. • The computer is attached to the MFP. • The software has been loaded onto the computer. Load an original document face-up into the ADF or face-down on the scanner glass. Note: Do not load postcards, index cards, small items, or thin media (such as magazine clippings) into the ADF. -
Page 56: Configuring Additional Applications For Scanning
You can scan documents directly from applications that are TWAIN and WIA compliant. See the application Help for more information. Scanning documents directly from an application (USB attach only) Lexmark Lexmark X34x Series Lexmark Lexmark X34x Series QLINK. QLINK... -
Page 57: Scanning Text For Editing (Ocr)
From the toolbar, click Read. Click Save. Select a destination you want to send to, and click OK. Edit and save the document. ABBYY FineReader 6.0 Sprint, and make sure that ABBYY Lexmark Applications Scanning text for editing (OCR) Programs or All... -
Page 58: Customizing Scan Settings
Go to the MFP, and place your original document in the ADF face up, long edge first. b Press # followed by the shortcut number on the keypad, or touch Profiles on the home screen. Lexmark Lexmark X34x Series Scanning over a network QLINK. -
Page 59: Understanding Scan Options
After you enter the shortcut number, the scanner will scan and send the document to the directory or application you specified. If you touch Profiles on the home screen, locate your shortcut on the list. Return to your computer to view your file. Your output file is saved in the location you specified or launched in the application you specified. - Page 60 Orientation—Tells the MFP whether the original document is portrait or landscape and then changes the Sides and Binding settings to match the original document orientation. Darkness—Adjusts how light or dark your scanned documents will turn out. Resolution—Adjusts the output quality of your file. Increasing the image resolution increases the file size and the time needed to scan your original document.
-
Page 61: Chapter 9: Maintaining The Mfp
To remove the toner cartridge: Press the button on the print cartridge assembly. b Remove the toner cartridge using the handle. To return the empty toner cartridge, see Recycling Lexmark products on page 70 for more information. Maintaining the MFP... -
Page 62: Installing A Toner Cartridge
Installing a toner cartridge If you are installing a new toner cartridge, remove the toner cartridge from the packaging, and gently shake four or five times to distribute the toner. Gently slide the toner cartridge in until it locks into place. Installing a toner cartridge... -
Page 63: Redistributing Toner
Close the front cover. Note: The front cover must be closed to start a new print, copy, scan, or fax job. Redistributing toner Redistribute the toner if you are dissatisfied with print quality or if the error message on the display is 88 Toner Low. - Page 64 To remove the toner cartridge: Press the button on the print cartridge assembly. b Remove the toner cartridge using the handle. Firmly shake the cartridge in all directions to distribute the toner. Reinstall the cartridge, and close the front cover. Note: If print quality does not improve, replace the toner cartridge.
-
Page 65: Replacing The Photoconductor
Replacing the photoconductor Press the access button on the left side of the MFP, and open the front cover. Pull on the handle to remove the print cartridge assembly. Place the print cartridge assembly on a flat, clean surface. Replacing the photoconductor... - Page 66 To remove the toner cartridge: Press the button on the print cartridge assembly. b Remove the toner cartridge using the handle. Unpack the photoconductor kit. Install the toner cartridge into the new photoconductor. Note: The toner cartridge snaps into place when correctly installed. Reinstall the print cartridge assembly.
-
Page 67: Cleaning The Mfp
Cleaning the MFP To maintain print quality, follow these cleaning procedures each time the toner cartridge is replaced or if print quality problems occur. Warning: Do not put water directly on the MFP or use ammonia–based cleaners or volatile solvents, such as paint thinner, on the MFP. Cleaning the scanner glass Slightly dampen a soft, lint–free cloth or paper towel with water. -
Page 68: Cleaning The Inside Of The Mfp
Cleaning the inside of the MFP CAUTION: The fuser area is hot. Avoid contact with the fuser area to prevent burns. Warning: While cleaning the inside of the MFP, be careful not to touch the transfer roller located under the toner cartridge. Oil from your fingers can affect print quality. Turn the MFP off, unplug the power cord, and then wait for the MFP to cool down. - Page 69 With a dry, lint–free cloth, wipe away any dust and spilled toner from the print cartridge area. Warning: • To prevent damage to the print cartridge assembly, do not expose it to light for more than a few minutes. Cover it with a piece of paper, if necessary. •...
-
Page 70: Ordering Supplies
Ordering supplies To order supplies or to locate a dealer near you, visit our Web site: www.lexmark.com. Part number Item X340A11G Return program toner cartridge (X340/X340n/X342n) X340H11G High yield return program toner cartridge (X342n) 6000 standard pages X340H22G Photoconductor kit... -
Page 71: Chapter 10: Troubleshooting
Troubleshooting • Setup troubleshooting on page 72 • Jams and misfeeds troubleshooting on page 75 • Print and copy troubleshooting on page 84 • Print quality troubleshooting on page 85 • Scan troubleshooting on page 88 • Fax troubleshooting on page 89 •... -
Page 72: Setup Troubleshooting
Setup troubleshooting Symptom Incorrect language appears on the display. Display is not lit. Software will not install. Solution 1 Press Menu. 2 Press repeatedly until MACHINE SETUP appears on the display. 3 Press 4 Press repeatedly until Language appears on the display. 5 Press 6 Press repeatedly until the language you want appears on the... - Page 73 Symptom Solution Unable to connect over a Make sure you are using the correct cable, that it is securely connected, and network the network options are properly configured. For more information, see Setting the network options (X342n only). Note: Connecting over a network is only available on the X342n. Setup troubleshooting...
-
Page 74: Removing And Reinstalling The Drivers Software
For Windows XP, click Start to access the My Computer icon. Double-click the CD–ROM drive icon. If necessary, double-click setup.exe. When the MFP software installation screen appears, click Install or Install Now. Follow the instructions on the computer screen to complete the installation. Programs Lexmark Lexmark Software Uninstall. Setup troubleshooting... -
Page 75: Jams And Misfeeds Troubleshooting
Jams and misfeeds troubleshooting Follow these tips to help prevent document and paper jams. • Use only recommended print materials. • Do not mix paper types in the paper tray. • Do not use creased, damp, or curled paper. • Flex, fan, and straighten the paper before loading. -
Page 76: Clearing A Paper Jam
Clearing a paper jam Use the following table to locate and clear the paper jam. Note: To avoid tearing the paper, pull the paper out gently and slowly. Message 200.xx Paper Jam 201.xx Paper Jam 202.xx Paper Jam 241.xx Paper Jam 242.xx Paper Jam 251.xx Paper Jam 290 Scanner Jam... - Page 77 200/201 Paper Jam CAUTION: The fuser area is hot. Avoid contact with the fuser area to prevent burns. Press the access button on the left side of the MFP, and open the front cover. Pull on the handle to remove the print cartridge assembly. Warning: Do not leave the print cartridge assembly exposed to direct light for an extended period of time.
- Page 78 Remove the jammed paper by gently pulling it straight out. Reinsert the print cartridge assembly. Jams and misfeeds troubleshooting...
- Page 79 Close the front cover. Press Start to resume printing. Note: If you receive a 200.20 paper jam at the start of a print job, verify that the media settings match the acutal media size. Jams and misfeeds troubleshooting...
-
Page 80: Paper Jam
202 Paper Jam CAUTION: The fuser area is hot. Avoid contact with the fuser area to prevent burns. Open the rear cover. Remove the jammed paper by gently pulling it straight out. Close the rear cover. Press Start to resume printing. Jams and misfeeds troubleshooting... - Page 81 241/242 Paper Jam Open the appropriate paper tray. Note: • Open Tray 1 for 241 Paper Jam. Open Tray 2 for 242 Paper Jam. • 242 Paper Jam will only occur when Tray 2 is installed. • Tray 2 is optional and may be purchased separately. Remove the jammed paper by gently pulling it straight out.
- Page 82 Insert the paper tray. Press Start to resume printing. Note: If you receive a 241.18 paper jam at the start of a print job, verify that the media settings match the acutal media size. 251 Paper Jam Remove the jammed paper by gently pulling it straight out of the MFP. Press Start to resume printing.
- Page 83 290/291/292 Scanner Jam Open the ADF top cover. Remove the jammed paper by gently pulling it straight out. Close the ADF top cover, and then load the documents back into the ADF. Note: To prevent document jams, use the scanner glass rather than the ADF for thick, thin, or a mixed set of documents.
-
Page 84: Print And Copy Troubleshooting
Make sure the MFP is set as the default printer. 1 Click Start 2 Double–click the Lexmark X340/X340n/X342n icon. 3 Click Printer, and make sure no check mark appears next to Pause 4 Make sure a check mark appears next to Set As Default. -
Page 85: Print Quality Troubleshooting
Print quality troubleshooting Problem Light or faded print AaBbCc AaBbCc AaBbCc AaBbCc AaBbCc Toner specs AaBbCc AaBbCc AaBbCc AaBbCc AaBbCc Print irregularities AaBbCc AaBbCc AaBbCc AaBbCc AaBbCc Vertical lines AaBbCc AaBbCc AaBbCc AaBbCc AaBbCc Solution You may be able to temporarily extend the toner cartridge life by redistributing the toner. - Page 86 Problem Horizontal stripes AaBbCc AaBbCc AaBbCc AaBbCc AaBbCc Gray background AaBbCc AaBbCc AaBbCc AaBbCc AaBbCc Toner smear Page skew Solution Replace the toner cartridge. For more information, see Installing a toner cartridge on page 62. For copies, adjust the darkness settings by pressing Darkness from the control panel.
- Page 87 Problem Solution Wrinkles or creases Make sure paper is loaded correctly. For more information, see Loading paper and original documents on page 28. Make sure the paper is not too wet. Keep paper in its original wrapper and out of high humidity areas until needed. Try paper from a freshly opened pack.
-
Page 88: Scan Troubleshooting
Printers and Faxes or Printers. Click Start Control Panel Printers and Faxes. 2 Double–click the Lexmark X340/X340n/X342n icon. 3 Click Printer, and make sure no check mark appears next to Pause Printing. 4 Make sure a check mark appears next to Set As Default. -
Page 89: Fax Troubleshooting
Fax troubleshooting Problem Cannot send or receive a fax Can send but not receive faxes Load paper to print any faxes that have been stored in the printer. Solution Check the display. If there is an error message, see Error messages troubleshooting on page 91. - Page 90 Problem Solution Can receive but not send faxes Make sure the document is loaded correctly into the ADF or on the scanner glass. For more information, see Faxing on page 42. Check the Prefix setting. 1 From the control panel, press Fax. 2 Press Menu.
-
Page 91: Error Messages Troubleshooting
1 Open the top cover. 2 Move the switch to the left of the scanner glass to the unlock position. Remove the defective toner cartridge, and install a new Lexmark toner cartridge. For supplies information, see on page 69. Error messages troubleshooting... - Page 92 Problem 34 Short paper 37 Insufficient Collation Area 38 Memory Full 84 Photoconductor Near Life 84 Replace Photoconductor 88 Toner Low 200.xx Paper Jam 201.xx Paper Jam 202.xx Paper Jam Solution Make sure the correct media type and size have been selected for the existing print job.
- Page 93 See 290/291/292 Scanner Jam on page 83. 1 Turn the power off for one minute. 2 Turn the power on. If the error message reappears, call a Lexmark service representative. For authorized service representatives in your area, visit www.lexmark.com. Error messages troubleshooting...
-
Page 94: Electronic Emission Notices
Note: To assure compliance with FCC regulations on electromagnetic interference for a Class B computing device, use a properly shielded and grounded cable such as Lexmark part number 12A2405 for USB attach. Use of a substitute cable not properly shielded and grounded may result in a violation of FCC regulations. - Page 95 If you experience trouble with this equipment, for repair or warranty information, contact Lexmark International, Inc. at www.Lexmark.com or your Lexmark representative. If the equipment is causing harm to the telephone network, the telephone company may request that you disconnect the equipment until the problem is resolved.This equipment contains no user serviceable parts.
- Page 96 Declaration of Conformity with Regard to the EU Directive 1999/5/EC (R&TTE Directive) in languages of the European Community. English Hereby, Lexmark International Inc., declares that this product is in compliance with the essential requirements and other relevant provisions of Directive 1999/5/EC. Suomi Valmistaja Lexmark International Inc.
- Page 97 Slovak požiadavkám a ïalším ustanoveniam smernice 1999/5/ES, ktoré sa na tento výrobok vzt’ahujú. Družba Lexmark International Inc. s tem izjavlja, da je ta naprava skladna z bistvenimi Slovenšèina zahtevami in drugimi ustreznimi doloèili direktive 1999/5/EC. This product is in conformity with the protection requirements of EC Council directives 89/336/EEC, 73/23/...
-
Page 98: Other Telecommunications Notices
Korean MIC statement If this symbol appears on your product, the accompanying statement is applicable. Mercury statement This product contains mercury in the lamp (<5mg Hg). Disposal of mercury may be regulated due to environmental considerations. For disposal or recycling information, contact your local authorities or the Electronic Industries Alliance: www.eiae.org. - Page 99 Using this product in Germany This product requires a German billing tone filter (Lexmark part number 14B5123) to be installed on any line which receives metering pulses in Germany. Metering pulses may or may not be present on analog lines in Germany.
-
Page 100: Printer Energy Consumption
Power Saver Timeout. The factory default Power Saver Timeout is 30 minutes for the Lexmark X340. By using the printer configuration menus, the Power Saver Timeout can be modified between 1 minute and 240 minutes. - Page 101 The WEEE logo signifies specific recycling programs and procedures for electronic products in countries of the European Union. We encourage the recycling of our products. If you have further questions about recycling options, visit the Lexmark Web site at www.lexmark.com for your local sales office phone number. Laser advisory label A laser notice label may be affixed to this MFP.
- Page 102 Index loading original documents 36 paper capacity 36 broadcast fax 44 buttons, control panel 20 canceling fax job 50 using Stop button 22 card stock 34 cartridge error 91 cartridge, toner installing 62 ordering 70 recycling 70 redistributing toner 63 removing 61 characters, entering 50 Cleaning...
- Page 103 Load Media 91 Memory Full 92 No Answer 91 No Dial Tone 91 Photoconductor Near Life 92 Qlink Not Found 91 Replace Photoconductor 92 Short Paper 92 Toner Low 92 Unsupported Toner Cartridge 91 USB Not Connected 91 error messages troubleshooting 91 fax activity reports 47 Fax Advanced menu 23 Fax Call log 47...
- Page 104 QLINK, using 27 rear cover 19 rear output slot 38 rear paper exit 38 receiving a fax automatically 45 manually 46 recycling Lexmark products 70 redistributing toner 63 reducing an image 53 removing software 74 toner cartridge 61 reports fax activity 47...
- Page 105 error messages 91 fax 89 jams and misfeeds 75 print 84 scan 88 setup 72 USB port 19 Web site 8 Index...
Need help?
Do you have a question about the X340 and is the answer not in the manual?
Questions and answers