Table of Contents
Advertisement
Advertisement
Table of Contents

Related Manuals for DR 30.00 COMMERCIAL DR RAPID-FEED CHIPPER


Summary of Contents for DR 30.00 COMMERCIAL DR RAPID-FEED CHIPPER
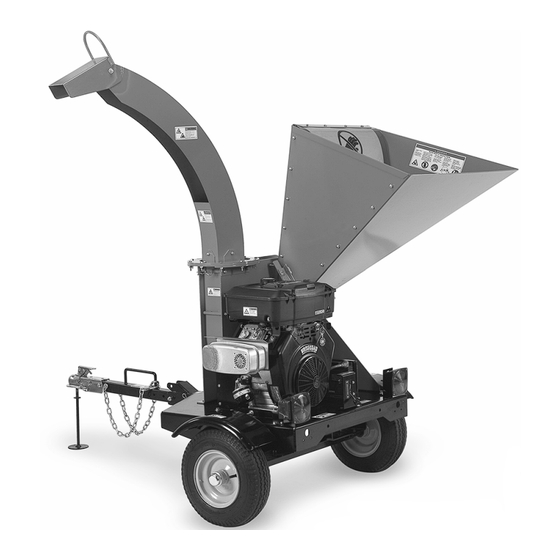
- Page 1 30.00 COMMERCIAL ® RAPID-FEED™ CHIPPER SAFETY & OPERATING INSTRUCTIONS Chipper shown with Optional Accessories Serial No. Order No. READ AND UNDERSTAND THIS MANUAL AND ALL INSTRUCTIONS BEFORE OPERATING OR SERVICING THIS 30.00 COMMERCIAL DR RAPID-FEED CHIPPER.
- Page 2 In addition, please tell your friends about your new 30.00 COMMERCIAL DR RAPID-FEED CHIPPER! Having DR Owners spread the word about our products and our way of doing business is the best advertising we can have, and the best way to help us provide even better service in the years to come.
-
Page 3: Table Of Contents
Table of Contents CHAPTER 1 ............................1 INTRODUCING THE DR 30.00 COMMERCIAL DR RAPID-FEED CHIPPER ......1 Conventions used in this manual....................1 Specifications ..........................2 Serial Number ..........................2 Order Number..........................2 CHAPTER 2 ............................3 GENERAL SAFETY RULES ......................3 Labels ............................3 Protecting Yourself and Those Around You.................6 Safety for Children and Pets......................7... - Page 4 Schematic - Chipper Basic ......................67 Parts List – Hopper Assembly ....................68 Schematic – Hopper Assembly....................69 Parts List – Accessories.......................70 Schematic – Accessories......................71 Notes: ............................71 Daily Checklist for the 30.00 COMMERCIAL DR RAPID-FEED CHIPPER ........72 ® 30.00 COMMERCIAL DR RAPID-FEED™ CHIPPER...
-
Page 5: Chapter 1
THIS INFORMATION IS IMPORTANT IN THE PROPER USE OF YOUR MACHINE. FAILURE TO FOLLOW THIS INSTRUCTION COULD RESULT IN DAMAGE TO YOUR MACHINE OR PROPERTY. Tip: This is a helpful hint to guide you in getting the most out of your 30.00 COMMERCIAL DR RAPID- FEED CHIPPER. -
Page 6: Specifications
An Order Number is used to check and maintain your order history. The number is located on the upper left portion of your packing slip. For your convenience and ready reference, enter the Order Number in the space provided on the front cover of this manual. ® 30.00 COMMERCIAL DR RAPID-FEED™ CHIPPER... -
Page 7: Chapter 2
DISCHARGE AREA OF YOUR CHIPPER. Labels Your 30.00 COMMERCIAL DR RAPID-FEED CHIPPER carries prominent labels as reminders for its proper and safe use. Shown below are copies of all the safety and operation labels that appear on the equipment. Take a moment to study them and make a note of their location on your 30.00 COMMERCIAL DR RAPID-FEED CHIPPER as you assemble and before you operate the unit. - Page 8 242041 241991 241811 241831 242001 #127811 242331 #243011 #244911 #242611 (Road-Towing Package only) ® 30.00 COMMERCIAL DR RAPID-FEED™ CHIPPER...
- Page 9 241821 241841 CONTACT US AT www.DRpower.com or CALL TOLL FREE 1-800-DR-OWNER...
-
Page 10: Protecting Yourself And Those Around You
SHOES, WE RECOMMEND WEARING THEM. DO NOT USE THE MACHINE WHILE BAREFOOT OR WEARING OPEN SANDALS. • WEAR LONG PANTS WHILE OPERATING THE 30.00 COMMERCIAL DR RAPID-FEED CHIPPER. • USE EAR PROTECTORS OR EAR PLUGS RATED FOR AT LEAST 20 DBA TO PROTECT YOUR HEARING. -
Page 11: Safety For Children And Pets
• NEVER, UNDER ANY CONDITIONS, REMOVE, BEND, CUT, FIT, WELD, OR OTHERWISE ALTER STANDARD PARTS ON THE 30.00 COMMERCIAL DR RAPID-FEED CHIPPER. THIS INCLUDES ALL SHIELDS AND GUARDS. MODIFICATIONS TO YOUR MACHINE COULD CAUSE PERSONAL INJURIES AND PROPERTY DAMAGE AND WILL VOID YOUR WARRANTY. -
Page 12: Towing Safety (Applies Only If Road-Towing Package Is Installed)
Towing Safety (applies only if Road-Towing Package is installed) • BEFORE TOWING, BE CERTAIN THE 30.00 COMMERCIAL DR RAPID-FEED CHIPPER IS CORRECTLY AND SECURELY ATTACHED TO THE TOWING VEHICLE AND THE SAFETY CHAINS ARE IN PLACE. LEAVE SLACK IN THE CHAINS TO ALLOW FOR TURNING. -
Page 13: General Safety
OCCURRING TO OTHER PEOPLE, THEIR PROPERTY, AND THEMSELVES. • YOUR 30.00 COMMERCIAL DR RAPID-FEED CHIPPER IS A POWERFUL TOOL, NOT A PLAYTHING. EXERCISE EXTREME CAUTION AT ALL TIMES. THE DESIGN OF THIS MACHINE IS TO CHIP WOOD. DO NOT USE IT FOR ANY OTHER PURPOSE. - Page 14 ACCIDENTAL STARTING, DISCONNECT THE NEGATIVE BATTERY CABLE, THEN WAIT 5 MINUTES BEFORE REMOVING PROCESSED MATERIAL, LEAVES, OR DEBRIS FROM THE MACHINE. • ALWAYS STOP THE ENGINE WHEN MOVING THE 30.00 COMMERCIAL DR RAPID-FEED CHIPPER. • KEEP COMBUSTIBLE SUBSTANCES AWAY FROM THE ENGINE WHEN IT IS HOT.
-
Page 15: A Note To All Users
Additional Information and Potential Changes DR Power Equipment reserves the right to discontinue, change, and improve its products at any time without notice or obligation to the purchaser. The descriptions and specifications contained in this manual were in effect at printing. - Page 16 ® 30.00 COMMERCIAL DR RAPID-FEED™ CHIPPER...
-
Page 17: Chapter 3
It may be helpful to familiarize yourself with the controls and features of your 30.00 COMMERCIAL DR RAPID-FEED CHIPPER as shown in Figure 1 before beginning these procedures. If you have any questions at all, please feel free to contact our Customer Service Representatives at our toll free number: 1-800-DR-OWNER (376-9637). -
Page 18: Unpacking The 30.00 Commercial Dr Rapid-Feed Chipper
(optional Accessory) CHIPPER (optional Accessory) NOTE: Unpacking the 30.00 COMMERCIAL DR RAPID-FEED CHIPPER is a two-person job. We recommend you have an extra s of hands available before you begin, as the 30.00 COMMERCIAL DR RAPID-FEED CHIPPER weighs 491 lbs. - Page 19 9637). Do not discard the shipping materials until you are fully satisfied with your new 30.00 COMMERCIAL are fully satisfied with your new 30.00 COMMERCIAL DR RAPID-FEED CHIPPER. DR RAPID-FEED CHIPPER. CONTACT US AT www.DRpower.com or CALL TOLL FREE 1-800-DR-OWNER...
-
Page 20: Attaching The Hopper Assembly
Hitch • Two 1/2" Wrenches Plate Hardware Position the Hitch Plate onto the Tongue assembly as shown and secure with two 5/16-18 x 1" Bolts and Nylon Locknuts (Figure 9). Tongue Assembly Figure 9 ® 30.00 COMMERCIAL DR RAPID-FEED™ CHIPPER... -
Page 21: Connecting The Battery Cable
NOTE: Use SAE 30 high detergent oil classified “For Service SF, SG, SH, SJ” or higher. Do not use special additives. Other types of oil could cause problems operating your machine. Please refer to your Engine Owner’s Manual for detailed oil information. CONTACT US AT www.DRpower.com or CALL TOLL FREE 1-800-DR-OWNER... - Page 22 (Figure 11). Be careful not to overfill and reinstall the Gas Fill Cap before starting the engine. See your Engine Owner’s Manual for more detailed information. NOTE: To refill the gas tank, turn the engine OFF and let the engine cool at least five minutes before removing the gas fill cap. ® 30.00 COMMERCIAL DR RAPID-FEED™ CHIPPER...
-
Page 23: Check The Tire Pressure
If the pressure is too low, add air with an air hose through the Valve Stem. Replace the Valve Stem Protective Cap. Valve Stem Protective Cap Figure 13 CONTACT US AT www.DRpower.com or CALL TOLL FREE 1-800-DR-OWNER... - Page 24 ® 30.00 COMMERCIAL DR RAPID-FEED™ CHIPPER...
-
Page 25: Chapter 4
CHAPTER 4 OPERATING YOUR 30.00 COMMERCIAL DR RAPID-FEED CHIPPER This chapter covers the procedures for starting and stopping your new 30.00 COMMERCIAL DR RAPID- FEED CHIPPER and discusses basic operation features. • THE DESIGN OF THIS MACHINE IS FOR CHIPPING WOOD. NEVER USE THIS MACHINE FOR ANY OTHER PURPOSE AS IT COULD CAUSE SERIOUS INJURY. -
Page 26: Operation Notes
OF THE CHIPPER KNIFE (before each use)” in Chapter 5 for info on accessing the Chipper Knife. Hopper • At engine start-up, the engine of your DR CHIPPER operates under no load until approximately 1800 RPM, at which speed the Centrifugal Clutch engages and Operator begins driving the Rotor Assembly. - Page 27 PREVENT DAMAGE TO THE DRIVE SYSTEM. • Your DR RAPID-FEED CHIPPER can process dry or green wood up to 5.5" in diameter. • The Chipper will self-feed the wood once it contacts the knife edge so forcing the branches into the Hopper is not necessary if the knife is sharp.
-
Page 28: Starting The Engine
“Run” position. Wait until the engine runs Switch smoothly before each Choke adjustment. For chipping, operate the engine with the Throttle in the “RUN” position with the Choke pushed in to the “RUN” position. Figure 18 ® 30.00 COMMERCIAL DR RAPID-FEED™ CHIPPER... -
Page 29: Stopping The Engine
NEVER STOP THE ENGINE BY MOVING THE CHOKE LEVER TO THE CHOKE POSITION. THIS COULD CAUSE AN ENGINE BACKFIRE RESULTING IN ENGINE DAMAGE. NOTE: Close the fuel Shut-Off Valve when transporting or storing the DR RAPID-FEED CHIPPER. CONTACT US AT www.DRpower.com or CALL TOLL FREE 1-800-DR-OWNER... -
Page 30: Adjusting The Angle Of The Tongue Weldment
AVOID DEATH OR SERIOUS INJURY. DO NOT TOW THIS MACHINE FASTER THAN 10 MPH. THIS MACHINE IS NOT LEGAL FOR STREET OR HIGHWAY USE UNLESS YOU INSTALL THE ROAD- TOWING PACKAGE (SEE “CHIPPER ACCESSORIES” IN CHAPTER 7). ® 30.00 COMMERCIAL DR RAPID-FEED™ CHIPPER... -
Page 31: To Free A Jammed Flywheel
If the Chipping Chamber doesn’t clear and the flywheel is still jammed, repeat above process. NOTE: Be certain the Chipping Chamber is clear before trying to process more material into the Chipper Hopper. CONTACT US AT www.DRpower.com or CALL TOLL FREE 1-800-DR-OWNER... - Page 32 ® 30.00 COMMERCIAL DR RAPID-FEED™ CHIPPER...
-
Page 33: Chapter 5
This chapter covers regular maintenance procedures that will ensure the best performance and long life of your DR RAPID-FEED CHIPPER. For engine maintenance, please refer to the Engine Owner’s Manual that came with your machine. Service intervals listed in the checklist below supercede those listed in the Engine Owner’s Manual. -
Page 34: Grease Fittings
Grease Fitting Your DR RAPID-FEED CHIPPER was greased at the Factory. The operator needs to periodically lubr icate the two Bear ings of the Chipper Assembly. SHUT DOWN THE ENGINE, WAIT FOR ALL MOVING PARTS TO COME TO A COMPLETE STOP, REMOVE... -
Page 35: Removing And Replacing The Engine Oil And Filter
Figure 24 the oil filter 1/8 of a turn at a time. NOTE: Be sure to use environmentally safe disposal procedures in the disposing of the used oil and used oil filter. CONTACT US AT www.DRpower.com or CALL TOLL FREE 1-800-DR-OWNER... -
Page 36: Removing, Replacing And Adjusting The Drive Belt
SPARK PLUG WIRES, DISCONNECT THE NEGATIVE BATTERY CABLE, THEN WAIT 5 MINUTES BEFORE PERFORMING ANY MAINTENANCE PROCEDURE OR INSPECTION ON THE CHIPPER. USE ONLY DR ELTS ON YOUR M ACHINE. THE BELTS HAVE BEEN THOROUGHLY TESTED AND PROVEN FO R MANY HOURS OF USE. - Page 37 Bolt farthest from the Bushing Saw Slot. h) Recheck the alignment after tightening the Bolts, and then retighten the Sheave Bushing Bolt. NOTE: Make sure that the Belt or Sheave is not hitting the Hopper. CONTACT US AT www.DRpower.com or CALL TOLL FREE 1-800-DR-OWNER...
-
Page 38: Removing, Replacing And Adjusting The Chipper Knife And Wear Plate
Chipper Knife and Wear Plate Routi ne inspection of the Chipper Knife and Wear Plate will ensure that your DR 30.00 FTP COMMERCIAL Rapid Feed Chipper is operating at full efficiency (see “Regular Maintenance Checklist” at the b eginning of this Chapter). -
Page 39: Visual Inspection Of The Chipper Knife (Before Each Use)
5. If necessary, repair or replace the Chipper Knife and/or Wear Plate per the following procedures. If the Knife Figure 33 and Wear plate do not need maintenance or adjustment, replace the Hopper. CONTACT US AT www.DRpower.com or CALL TOLL FREE 1-800-DR-OWNER... - Page 40 Flywheel. IF THE FLYWHEEL SURFACE IS NOT CLEANED PROPERLY AN D THE CHIPPER KNIFE IS NOT MOUNTED FLUSH ON THE FLYWHEEL , THE KNIFE COULD CRACK WHEN THE HARDWARE IS TIGHTENED. ® 30.00 COMMERCIAL DR RAPID-FEED™ CHIPPER...
-
Page 41: Removing And Replacing The Wear Plate
VE SPARK PLUG WIRES, DISCONNECT THE NEGATIVE BA TTERY CABLE, THEN WAIT 5 MINUTES BEFORE PER FORMING ANY MAINTENANCE PROCEDURE OR INSPECTION ON THE CHIPPER. Tools Needed: • 7/16" wrench or socket • Gap Gauge (provided with Chipper) CONTACT US AT www.DRpower.com or CALL TOLL FREE 1-800-DR-OWNER... - Page 42 4. Position the Chipper Hopper into the Hopper Bracke and secure with the six Bolts, Washers and Locknuts. 5. Re-connect the negative battery terminal wire and the Wear spark plug wire. Plate 1/16" Gap (thickness of Gap Gauge) Figure 39 ® 30.00 COMMERCIAL DR RAPID-FEED™ CHIPPER...
-
Page 43: Chipper Knife Sharpening
Top Edge Short Side New Knife Beveled Edge Top Edge Short Side Beveled Edge Sharpened Knife Figure 41 CONTACT US AT www.DRpower.com or CALL TOLL FREE 1-800-DR-OWNER... -
Page 44: Wear Plate Sharpening
NOTE: If the Wear Plate is filed enough tim es that the proper gap between t he Knife and Wear Plate can not be set with the Gap Gauge, y ou will need to r eplace the Wear Plate. Figure 42 ® 30.00 COMMERCIAL DR RAPID-FEED™ CHIPPER... -
Page 45: Removing And Replacing The Wheels
Removing and Replacing the Wheels The Wheels on the DR 30.00 FTP COMMERCIAL Rapid Feed Chipper are pneumatic and have pressed in Bearings for easy transport. With use, tires or Bearings may need replacing. The following procedure will explain the replacement procedures. -
Page 46: Installing A New Clutch Assembly
Engine RPM. The lower the engagement speed, and the higher the maintained Engine speed, the more torque the Clutch can transfer to the driven unit. NEVER operate the DR RAPID-FEED CHIPPER Engine at l ess than full RPM when chipping. NOTE: At engine start-up, the engine of... -
Page 47: Battery Care
Operate the engine for at least 45 minutes to maintain proper battery charge. If the battery loses its charge, you will need to use a trickle charger (like the DR Battery Charger) to recharge it. The charge should have an output of 12 volts DC at no more than 2 amps. -
Page 48: Recycling A Used Battery
To connect a battery charger to your DR RAPID-FEED CHIPPER, follow the steps listed below. Attach the black (-) battery charger wire to the battery negative (-) terminal, and attach the red (+) battery charger wire to the battery positive (+) terminal. -
Page 49: End Of Season And Storage
• Change the oil (and oil filter, if applicable). • If your DR RAPID-FEED CHIPPER will be idle for more than 30 days, we recommend using a gas stabilizer. This will prevent sediment from gumming u the carbu retor. If there is dirt or moisture in the gas or tank, remove it by draining the tank. - Page 50 ® 30.00 COMMERCIAL DR RAPID-FEED™ CHIPPER...
-
Page 51: Chapter 6
See the Battery Care section in Chapter 5. ⇒ If your battery is charged and your DR RAPID-FEED CHIPPER still won’t start, contact us at www.DRpower.com or call 1(800) DR- OWNER (376 -9637) for assistance. - Page 52 ⇒ Does your engine have the right amount of clean oil? If it’s dirty, change it following the procedure in Chapter 4. ⇒ If your engine still lacks power, contact us at www.DRpower.com or call 1(800) DR-OWNER (376-9637) for assistance. Engine smokes. ⇒ Check the oil level and adjust as needed.
- Page 53 Clutch parts. See Chapter 5. rotate. ⇒ Loose Drive Belt; adjust the Drive Belt tension. See Chapter 5. ⇒ Remove any built-up debris from the Chipper Hopper Inlet and Discharge Chute. CONTACT US AT www.DRpower.com or CALL TOLL FREE 1-800-DR-OWNER...
- Page 54 60 psi in ea should be 60 psi in ea ch tire if you have the road towing option. ch tire if you have the road towing option. while being towed. while being towed. ® 30.00 COMMERCIAL DR RAPID-FEED™ CHIPPER...
-
Page 55: Chapter 7
Bolt o Bolt s and Locknuts and tighten with s and Locknuts and tighten with two 1/2" wre two 1/2" wre nches. nches. Bolt and Locknut Locking (2 places) Figure 46 CONTACT US AT www.DRpower.com or CALL TOLL FREE 1-800-DR-OWNER... -
Page 56: Operation
Rotate the Extended Top-Discharge Chute for the full 180˚ of rotation for a few times to spread the grease inside the Discharge Ring. 4. Reposition the Extended Top-Discharge Chute to the desired angle and insert the Locking Pin and Hitch Clip. ® 30.00 COMMERCIAL DR RAPID-FEED™ CHIPPER... -
Page 57: Road-Towing Package
If there are any questions contact us at www.DRpower.com or call 1-800-DR-OWNER (376- 9637). Do not discard the shipping materials until you are fully satisfied with your new Road-Towing Package. Figure 51 CONTACT US AT www.DRpower.com or CALL TOLL FREE 1-800-DR-OWNER... -
Page 58: Installation
Chipper wheels off the ground (Figure 54). The Spacer (behind lowermost part of frame must be at least 10" from the Jack wheel) Stands ground for the Wheel Assembly to fit under. Figure 54 ® 30.00 COMMERCIAL DR RAPID-FEED™ CHIPPER... - Page 59 Axle Bracket side Locknuts and Washers (on the side with slots) two Bolts and Locknuts (on side with holes) using two 9/16" wrenches (Figure 57). Axle Axle Assembly Assembly Hardware Figure 57 CONTACT US AT www.DRpower.com or CALL TOLL FREE 1-800-DR-OWNER...
- Page 60 17. Jack the back of the Chipper up and remove the jack Wheel Stands. Assembly 18. Lower the Chipper to the ground. 19. Check the Tire for proper air pressure o f 60 psi maximum in each Tire. Figure 60 ® 30.00 COMMERCIAL DR RAPID-FEED™ CHIPPER...
- Page 61 Push the Green Wire into the top right hole in the back of the light socket and p ush the Brown Wire into the top left hole. Side Light Figure 63 CONTACT US AT www.DRpower.com or CALL TOLL FREE 1-800-DR-OWNER...
- Page 62 NOTE: We recommend that you wrap the Harness wires together with e lectrical tape about every twelve inches starting at the W Figure 66 Harness Connector end and going ba ck to where the wires go to either side of the Frame ® 30.00 COMMERCIAL DR RAPID-FEED™ CHIPPER...
-
Page 63: Towing
Vehicle and ensure that your lights on the Chipper are working properly. Lock or Lock Pin If there are any questions, contact us at www.DRpower.com or call 1-800-DR-OWNER (376-9637). Latch Assembly Figure 69 CONTACT US AT www.DRpower.com or CALL TOLL FREE 1-800-DR-OWNER... -
Page 64: Hitch Coupler Adjustment Check
Then back off the lock nut 1/2 turn or Lock Nut just enough that the latch is able to clamp and unclamp from the ball. Ball Clamp Figure 71 ® 30.00 COMMERCIAL DR RAPID-FEED™ CHIPPER... - Page 65 CONTACT US AT www.DRpower.com or CALL TOLL FREE 1-800-DR-OWNER...
-
Page 66: Chapter 8
CHAPTER 8 PARTS LIST AND SCHEMATIC DIAGRAMS Parts List - 30.00 Commercial DR Rapid-Feed Chip NOTE: Part numbers listed are available through DR P ower Equipment. Ref# Part# Description Ref# Part# Description 2711 Chipper Basic Assembly 155110 Washer, Lock, S plit, 5/16"... -
Page 67: Schematic - 30.00 Commercial Dr Rapid-Feed Chipper
Schematic - 30.00 Commercial DR Rapid-Feed Chipper CONTACT US AT www.DRpower.com or CALL TOLL FREE 1-800-DR-OWNER... -
Page 68: Parts List - 30.00 Commercial Dr Rapid-Feed Chipper
Parts List - 30 .00 Commercial DR Rapid-Feed Chipper NOTE: Part numbers listed are available through DR Power Equipment. Ref# Part# Description Ref# Part# Description 242181 Base Weldment 146051 Bolt, 5/16-18 X 1", GR5 242191 Bracket, Axle 159790 Bolt, 5/16-18 X 1-3/4", GR5 154490 Bolt, 3/8-16 X 1-1/4", GR 5... -
Page 69: Schematic - 30.00 Commercial Dr Rapid-Feed Chipper
Schematic - 30.00 Commercial DR Rapid-Feed Chipper CONTACT US AT www.DRpower.com or CALL TOLL FREE 1-800-DR-OWNER... -
Page 70: Parts List - Chipper Basic
Parts List – Chipper Basic NOTE: Part numbers listed are available through DR Power Equipment. Ref# Part# Description Ref# Part# Description 242851 Flywheel 242491 Bolt, 5/16-18 X 5-1/4", GR 5 242861 Knife, Commercial 146051 Bolt, 5/16-18 X 1", GR 5 155301 Screw, 3/8-16 X 1-3/4", FHS... -
Page 71: Schematic - Chipper Basic
Schematic - Chipper Basic CONTACT US AT www.DRpower.COM or CALL TOLL FREE 1-800-DR-OWNER... -
Page 72: Parts List - Hopper Assembly
Parts List – Hopper Assem NOTE: Part numbers listed are available through DR Power Equipment. Ref# Part# Description Ref# Part# Description 249261 Hopper Weldment, Bottom 241621 Bolt, Philips Head, 5/16-18 X 5/8", GR 5 249271 Hopper Weldment, Lef 241631 Nut, Nylon Lock, Thin, 5/1... -
Page 73: Schematic - Hopper Assembly
Schematic – Hopper Assembly CONTACT US AT www.DRpower.com or CALL TOLL FREE 1-800-DR-OWNER... -
Page 74: Parts List - Accessories
Parts List – Accessories NOTE: Part numbers listed are available through DR Power Equipment. ROAD-TOW PACKAGE EXTENDED T DISCHARGE CHUTE Ref# Part# Description Ref# Part# Description 242571 Tongue Weldment, Highway 242621 Flange, Side 161011 Hitch, Trailer 242631 Plate, Bottom 148911... -
Page 75: Schematic - Accessories
Schematic – Accessories CONTACT US AT www.DRpower.com or CALL TOLL FREE 1-800-DR-OWNER... - Page 76 ® 30.00 COMMERCIAL DR RAPID-FEED™ CHIPPER...
-
Page 77: Notes
Notes: CONTACT US AT www.DRpower.com or CALL TOLL FREE 1-800-DR-OWNER... - Page 78 Notes: ® 30.00 COMMERCIAL DR RAPID-FEED™ CHIPPER...
- Page 79 Technical Service Department for our Owners. You can access a Representative by dialing our TOLL-FREE Hotline at 1- 800-DR-OWNER (376-9637). The sole job of our well-trained and friendly folks is to ensure that you get any help you need in a timely fashion. They are there to answer all your questions including: (1) inquiries on any of the above warranties, (2) inquiries about replacement parts, or (3) your questions regarding service, maintenance and operation.
-
Page 80: Daily Checklist For The 30.00 Commercial Dr Rapid-Feed Chipper
Daily Checklist for the 30.00 COMMERCIAL DR RAPID-FEED CHIPPER To help maintain your 30.00 COMMERCIAL DR RAPID-FEED CHIPPER for optimum performance, we recommend you follow this checklist each time you use your Chipper. SHUT DOWN THE ENGINE, WAIT FOR ALL MOVING PARTS TO COME TO A COMPLETE STOP, REMOVE SPARK PLUG WIRES, DISCONNECT THE NEGATIVE BATTERY CABLE, THEN WAIT 5 MINUTES BEFORE PERFORMING ANY MAINTENANCE PROCEDURE OR INSPECTION ON THE CHIPPER.
Need help?
Do you have a question about the 30.00 COMMERCIAL DR RAPID-FEED CHIPPER and is the answer not in the manual?
Questions and answers