Power Wheels Jeep Wrangler Owner's Manual
Limited edition
Hide thumbs
Also See for Jeep Wrangler:
- Owner's manual (36 pages) ,
- Owner's manual with assembly instructions (60 pages)
Table of Contents
Advertisement
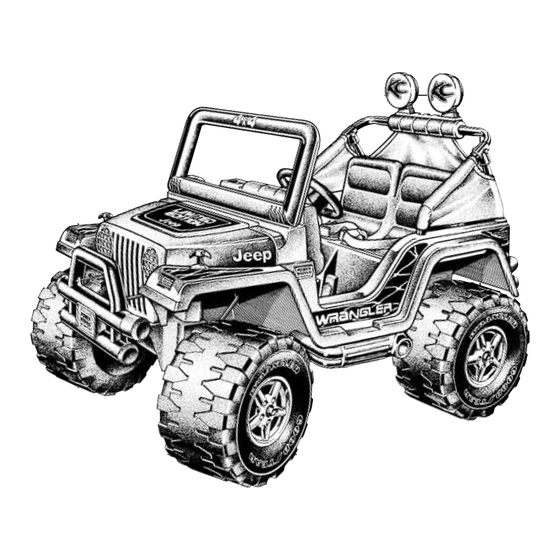
Product features and decoration may vary from the picture above.
JEEP and the Jeep grille design are registered trademarks of DaimlerChrysler Corporation and are used under license. ©DaimlerChrysler Corporation
Goodyear (and winged foot design) and Wrangler (for tires) are trademarks of The Goodyear Tire & Rubber Company, used with permission.
Fisher-Price, Power Wheels and Power Wheels by Fisher-Price are U.S. trademarks of Mattel, Inc.
Owner's Manual
with Assembly Instructions
Please read this manual and save it with your original sales receipt.
For Model 75598
Tools needed for assembly: Cap Nut Assembly Tool (included), Phillips Screwdriver, Hammer, and
Safety Scissors (not included). Use only with Power Wheels
®
12 Volt Lead-acid Rechargeable Battery
and Power Wheels
®
12 Volt Charger with Type "12V" Connector (included).
Requires three size "AA" (LR6) alkaline batteries (not included) for sound box.
Advertisement
Table of Contents

Related Manuals for Power Wheels Jeep Wrangler


Summary of Contents for Power Wheels Jeep Wrangler
- Page 1 JEEP and the Jeep grille design are registered trademarks of DaimlerChrysler Corporation and are used under license. ©DaimlerChrysler Corporation Goodyear (and winged foot design) and Wrangler (for tires) are trademarks of The Goodyear Tire & Rubber Company, used with permission. Fisher-Price, Power Wheels and Power Wheels by Fisher-Price are U.S. trademarks of Mattel, Inc. Owner’s Manual with Assembly Instructions Please read this manual and save it with your original sales receipt.
-
Page 2: Table Of Contents
Keep these instructions for future reference as they contain important information. • If you have any questions about your Power Wheels ® vehicle, please call our toll-free service lines at • This vehicle is designed for use on: grass, asphalt or 1-800-348-0751 from 8 AM to 6 PM (EST) Monday other hard surfaces;... -
Page 3: Warnings And Cautions
- Use of the wrong type battery or charger could cause a fire or explosion resulting in serious injury. - Use of Power Wheels ® components in products other than Power Wheels ® vehicles could cause overheating, fire or explosion. -
Page 4: Parts
Parts • If you experience a problem with this product, or are missing a part, please call us at 1-800-348-0751, rather than return this product to the store. • Please identify all parts before assembly and save all packaging material until assembly is complete to ensure that no parts are discarded. - Page 5 Parts Rear Bumper Knob Plate Seat Dash Cap Nut Assembly Tool Steering Wheel Steering Column Dash Knob – 2 Key Assembly Hood Sound Box Brush Guard Spacer Tube – 2 Hood Latch – 2 Steering Wheel Cover...
- Page 6 Parts Windshield Frame - Front Windshield Frame - Back Windshield Hinge Pin – 2 Sport Bar Sport Bar Support - 2 Sport Bar Bracket Set Windshield Bracket – 2 Brush Guard Right Sidepipe Canopy Left Sidepipe Not Shown: Label Sheet - 2...
- Page 7 Parts " x " Machine Screw - 2 #8 x 4" Screw – 2 #8 x 1" Screw – 11 #10 x " Screw – 2 #8 x " Screw – 6 #10 x 1" Screw – 7 #6 x 1 "...
-
Page 8: Parts Diagram
Parts Diagram Note: Some parts shown are assembled on both sides of the vehicle. - Page 9 Parts Diagram Part Quantity Part Quantity Windshield Frame, Front Vehicle Body Windshield Bracket Steering Column Sport Bar .354 Cap Nut Sport Bar Support Hood Latch Sport Bar Bracket 12 Volt Battery #6 x 1 " Screw Battery Clamp Unit #8 x 4" Screw "...
-
Page 10: Battery Charging
® 12 volt charger with type CAUTION “12V” connector (120 VAC 60 Hz 28W with an output of 12 VDC 1200mA) to charge your Power Wheels ® Use the charger in dry locations only. rechargeable 12 volt battery. • If your battery is old and will not accept a charge, do not leave it in the vehicle. -
Page 11: Assembly
Battery Charging Assembly WARNING Battery Children can be harmed by small parts, sharp edges and sharp points in the vehicle’s unassembled state, or by electrical items. Care should be taken in unpacking and assembly of the vehicle. Children should not handle parts, including the battery, or help in assembly of the vehicle. - Page 12 Assembly Rear of Vehicle Battery Left Sidepipe Clamp Unit Vehicle Body Screw Pegs • Insert two #10 x 1" screws through the holes in the • Turn the vehicle body upside down. battery clamp unit and into the pegs in the dash. •...
- Page 13 Assembly Battery Dash Knob Plate Compartment Door Pocket Battery Compartment Key Assembly Microphone Cord Sound Box T-End Dash View 1.5V x 3 • Bend the end of the microphone cord so that it forms a “T”. “AA” (LR6) • Insert the end of the microphone cord through the square opening in the dash pocket.
- Page 14 Assembly Holes Cap Nut Steering Wheel Steering Column Cap Nut Assembly Tool Steering “UP” Column Bottom View • Turn the vehicle body upright. • Position the steering wheel upright (see inset). • Wipe the steering column with a paper towel to remove •...
- Page 15 Assembly Wide Tab Headlight Lens Wide Notch Lens Guard • Fit the wide notch in the side of a headlight lens under Brush Guard Front Bumper the wide tab on a lens guard. • Press firmly on the inside of the headlight lens to snap it into the lens guard.
- Page 16 Assembly Windshield Frame - Front Hood Latch Hole Slots Tabs Tabs Hood Latch Hole • Insert a hood latch into one of the holes in the vehicle • Align the slots in the front half of the windshield frame body, near the hood area. with the tabs on the windshield brackets.
- Page 17 Assembly Short Seat T-Loop (pull through slot) Windshield Frame – Back Belt Strap Fastener End T-Loops Slots Slots Windshield Frame – Front Seat Slot • Turn the seat upside down. • Insert the fastener end of a short seat belt strap through the slot near the outer edge of the seat.
- Page 18 Assembly Seat Canopy Sleeves Canopy Seat Back Tab Sleeves PUSH HERE Canopy Tabs Slot Tabs Sport Bar • With the seat at an angle, insert the tabs on the front edge of the seat into the slots in the foot-well wall •...
- Page 19 Assembly Light Sport Bar Bracket Rack - Back Half Ring Tabs Side Leg Tunnel Sport Bar Sport Bar Support Light Rack - Front Half • Position the sport bar with the ends on a flat surface, • Using safety scissors, remove the sport bar brackets from as shown.
- Page 20 Assembly Sport Bar Side Legs Rear Bumper PUSH HERE Side Fender Tabs Rear Bumper Support Lower Rail PULL UP HERE • Face the rear of the vehicle. • Fit the lower rail on the rear bumper over the rear bumper supports. •...
- Page 21 Assembly Bumper Tabs Bumper Gas Cap Tether • Position the gas cap so that its tether points down. • Lift the rear of the vehicle. • Insert and “snap” the gas cap into the opening on the • Align the holes in the bumper tabs with the screw pegs on rear bumper.
-
Page 22: Label Decoration
Back View Right Side View Right Side View • Your Limited Edition Jeep Wrangler includes additional gold labels. These labels (29 and 30) should be applied over labels 1, 2 and 3 (on both sides of the vehicle). One-time assembly is now complete. -
Page 23: Battery Installation
Battery Installation IMPORTANT! Use only a Power Wheels ® 12 volt battery. Use of any other battery will damage your vehicle. Make Battery sure that you charge the battery for at least 18 hours using Battery the enclosed Power Wheels ®... -
Page 24: Battery Care And Disposal
• Do not store the battery in temperatures above 75° F or and Disposal below -10° F. • Use only a Power Wheels ® 12 volt battery. Remember to charge the new battery for atleast 18 hours before Disposal first use. -
Page 25: Rules For Safe Driving
Rules for Safe Driving RIDING HAZARD WARNING Prevent Injuries and Deaths • Direct Adult Supervision Required • Keep Children Within Safe Riding Areas These areas must be: - away from swimming pools and other Use vehicle on generally level ground ONLY! bodies of water to prevent drownings - generally level to prevent tipovers 7. -
Page 26: How To Operate Your Vehicle
How to Operate Your Vehicle IMPORTANT! Use this vehicle ONLY outdoors. Most interior flooring can be damaged by riding this vehicle indoors. Fisher-Price ® will not be responsible for damage to the floor if the vehicle is used indoors. To Back Up Beginner Use - Low Speed Drive As assembled, your vehicle is ready to roll in low speed mph, maximum). -
Page 27: Caring For Your Vehicle
(5 mph, maximum). we recommend that you periodically have your vehicle • Make sure the shifter is in the reverse position. checked by a Power Wheels authorized service center. ® • Loosen the screw in the shifter box using a Phillips See page 32 for the list of authorized service centers or screwdriver. -
Page 28: Problems And Solutions Guide
Problems and Solutions Guide IMPORTANT! If you experience a problem with your vehicle, first check the Problems and Solutions Guide below. If you still experience a problem, please contact Power Wheels ® Consumer Relations, toll-free at 1-800-348-0751 between 8 AM and 6 PM (EST) Monday through Friday. Or, contact your local Power Wheels authorized service center. -
Page 29: Problems And Solutions Guide
Do not drive up hills or run into fixed objects, which can cause the wheels to stop spinning while power is still being supplied to the motors. If a thermal fuse continually trips, contact your local Power Wheels ® authorized service center. - Page 30 Loose wire or connector Check all wires around the motors and all connectors to run, but other times it does make sure they are tight. Motor or electrical switch damage Contact your local Power Wheels ® authorized service center for diagnosis and repair.
- Page 31 If, after reviewing the Problems and Solutions Guide, the vehicle still fails to operate, please contact your nearest authorized service center (see page 32) or contact Power Wheels ® Consumer Relations toll-free at 1-800-348-0751.
-
Page 32: Limited Warranty
Bumper-to-Bumper* Limited Warranty *One year limited warranty from the date of purchase on the Power Wheels ® vehicle. Six month limited warranty on the 12 volt battery. For the original purchaser, this one year limited warranty covers the Power Wheels ®... - Page 33 Authorized Service Centers PANAMA CITY - Callaway Vacuum & Sewing, GRANITE - Midwest Golf Car & Equipment Co., OWENSBORO - Kuester’s Hardware, 1210 Carter 221 N. Tyndall Prkwy., 32404, (904) 763-6333 904 Thorngate Road, 62040, (618) 797-2278 Road, 42301, (270) 685-4916 PENSACOLA - Foster’s Appliance Repair, HAMILTON - Discount Battery Sales, #80 S 2nd Rte.
- Page 34 Authorized Service Centers GAYLORD - Alpine Electronics, 604 West Main, NEW HAMPSHIRE GREENSBORO - Little Creek Electronics, 49735, (989) 732-5004, (800) 244-6633 3310 N. Church Street, 27406, (336) 375-9890, MARLBOROUGH- Electronics Aid Inc., 32 Roxbury (877) 446-7144 Road P.O. Box 325, 03455, (603) 876-4161 GRAND RAPIDS - Superior Appliance Service Co., 1050 Scribner Avenue, NW, 49504, (616) 459-3271 HICKORY- Power Tool &...
- Page 35 Authorized Service Centers HARRISBURG - C.A. Juillard, Inc., 2301 North SOUTH DAKOTA UTAH Seventh Street, 17110, (717) 233-3488, WINNER - Nelson’s Electronics Inc., 422 West 2nd OREM - The Mending Shed, 1735 South State Street, (800) 633-3488 Street P.O. Box 369, 57580, (605) 842-1611, 84058, (801) 225-8012, (800) 339-9297 (888) 842-1699 JOHNSTOWN - Cambria Hardware, West Hills...
- Page 36 For high speed operation, please refer to the How to Operate Your Vehicle Section in this manual for more information. DO NOT Return your Vehicle to the Store! If you are missing parts or need assistance, please call us toll-free: Power Wheels ® Consumer Relations Over 400 Authorized Service Centers 1-800-348-0751 8 AM - 6 PM EST, Monday through Friday.
Need help?
Do you have a question about the Jeep Wrangler and is the answer not in the manual?
Questions and answers
battery is charged but no power
If your Power Wheels Jeep Wrangler is not working even though the battery is charged, consider these possible causes and solutions:
1. Loose or Unplugged Connectors – Check all battery and charger connectors to ensure they are properly plugged in.
2. Charger Malfunction – If you suspect the charger is faulty, have it tested at an authorized Power Wheels service center.
3. Tripped Thermal Fuse – The thermal fuse may have tripped. Let it cool down and try again.
4. Faulty Foot Pedal Switch – The foot pedal switch may be defective. Remove the pedal panel and check the plunger switch. If necessary, replace it.
5. Power Flow Issue – Ensure the wall outlet is functioning and the charger is plugged in correctly.
If these steps do not resolve the issue, contact Power Wheels Consumer Relations or an authorized service center.
This answer is automatically generated