
Related Manuals for DMTech Starry7

Summary of Contents for DMTech Starry7
-
Page 1: Internet Radio
User’s manual Internet Radio English Before using this product, please read the security instructions first and bear them in mind when using the product. -
Page 2: Safety Instructions
Safety Instructions Please read the safety instructions below before using your Internet Radio. • Only use the AC adaptor that provided with your Internet Radio. Using an unauthorized power supply will invalidate your guarantee and may damage the radio. Warning •... -
Page 3: Fcc Information
FCC Information The Federal Communications Commission Radio Frequency Interference Statement includes the following warning: NOTE: This equipment has been tested and found to comply with the limits for a Class B digital device, pursuant to Part 15 of the FCC Rules. These limits are designed to provide reasonable protection against harmful interference in a residential installation. -
Page 4: Table Of Contents
Table of contents Safety instructions ..........1 Auxiliary Function ..........18 FCC Information ...........2 Features..............4 Alarm clock Part Descriptions Setting the Alarms ..........19 Internet Radio............5 Setting the sleep timer .........19 Display window icons ...........7 Configure menu ...........20 Getting started What you need before you can use Configure ‘My Stuff’... -
Page 5: Features
Features This internet radio is a device with which you can play music files that are stored on your computer, or listen to web radio or podcasts, via a wireless LAN. You can also listen to music files stored on USB thumb drive via USB HOST. -
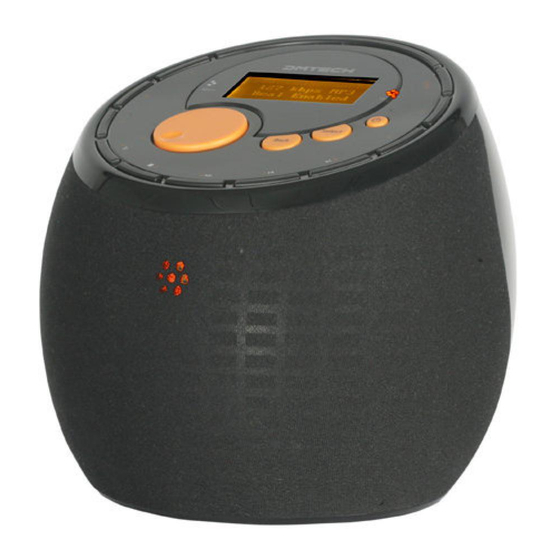
Page 6: Part Descriptions
Part Description • Internet Radio 1- 3 7 (Previous Track) POWER( In radio mode, press and hold down In radio mode, press and hold down Turns the power on/off. to store preset #, pressing again will to store preset 7, pressing again will play preset# (# : 1-3) play preset 7. - Page 7 Part Description Built-in stereo speaker DC Power Jack Connect the AC Adaptor (DC 7.5V, 1.6A) to the DC Jack. AUX IN jack Use to connect a external audio device to AUX IN jack using ‘Audio Cable’. Headphone Socket Use to connect a headphone. USB HOST jack Use to connect the external USB compatible devices with UMS support(USB memory, MP3 player, etc.)
-
Page 8: Display Window Icons
Part Description • Display Window Icons Icons are displayed on the bottom row of the display. The meaning of these icons is explained below. Internet Radio Mode Media Player Mode Sleep timer. Alarm set indicator. The radio is in ‘Internet Radio’ mode and is playing a live stream. The radio is in ‘Media Player’... -
Page 9: Getting Started
Getting started • What you need before you can use Step 2 Scan for a wireless network connection your Internet radio When the display says <Scan for networks>, press the Before you can use your Internet radio, you need the SELECT button. -
Page 10: Using The Wired Lan Function (Optional)
Getting started Step 3 Connect to the wireless network • Using the Wired LAN function (optional) When the ESSID for the access point you want to connect This product supports the Wired LAN function using the to is displayed on the screen, press the SELECT button. external “USB to Ethernet dongle”... -
Page 11: Using The Internet Radio
Using the Internet Radio Putting the radio into standby mode Note that some radio stations do not broadcast 24 If you are not using the radio for an long period, you can hours per day, and some stations are not always conserve the radio power by putting it into standby mode. -
Page 12: Stations Which Enable You To Choose What You Listen To
Using the Internet Radio • Stations which enable you to choose what you listen to Some radio stations can provide a number of options associated with their station; for example, some stations enable you to listen to programs that have already been broadcast. When you select a radio station that has this facility, the station does not start playing immediately, but instead the display shows: Live 1. -
Page 13: Using Podcasts
Using Podcasts • Choosing Podcasts to listen to 1. Press the SELECT button to return to the top-level menu. (Note: if you make a mistake at any point, press the BACK button to go back to the previous screen.) Podcasts 2. -
Page 14: Using The Media Player
Using the Media Player The Media Player allows you to play audio files (AAC, AIFF, 9. Once the radio has finished scanning, it will display 'By AU, MP3, RM, WAV and WMA) and playlists (M3U) stored Album'. You can now browse through the scanned on a networked PC. -
Page 15: Upnp Servers
Using the Media Player Controlling playback Playing tracks in the queue repeatedly(repeat) 1. Use the 5/STOP button to stop playback. 1. Select the individual tracks as described previously. 2. Use the 6/PLAY/PAUSE button to either pause a 2. Navigate to top-level menu item 'Media Player' using currently playing track or to restart a currently paused the SELECT and BACK buttons and press the SELECT track or to restart a stopped track. - Page 16 Using the Media Player c. Press SELECT and the radio will scan for all available UPnP servers. Note, this may take a few seconds for the radio to complete its scan and before the scan has completed, the radio will display ‘[Empty]’. The radio will continue to display ‘[Empty]’...
- Page 17 Using the Media Player Locating and playing media files using the radio and Queuing up UPnP tracks for playback later UPnP 1. Highlight the required track. 1. Once the UPnP server is configured to share media files 2. Press the SELECT button. ‘Track Added To Queue’ will with the Internet radio, you can play the files by doing be displayed.
-
Page 18: Local Media (External Usb Host)
Using the Media Player Playing tracks in random order(shuffle) • Local Media (External USB Host) 1. Select the individual tracks as described previously. Playing media files from the USB thumb drive 2. Navigate to top-level menu item 'Media Player' using the SELECT and BACK buttons and press the SELECT button. -
Page 19: Auxiliary Function
Auxiliary Function You can listen to music from the audio device via the speakers of this device. 1. Connect an audio device, such as a MP3 player or CD player, to the AUX IN jack on the back side of this radio by using “Audio Cable”. -
Page 20: Alarm Clock
Alarm clock Use this option to set the alarms , to view the current alarm 9. Turn the knob until the minute setting is correct, then setting or to set the sleep timer. press the SELECT button. Alarm Set : •... -
Page 21: Configure Menu
Configure menu Choosing the option you want from the Configure If your radio supports wired networking using “USB to menu Ethernet dongle” then you will be able to configure your 1. Press the SELECT button. radio to connect to your network via an available Ethernet (Note: if you make a mistake at any point, press the connection (RJ45) or via a Wi-Fi router: BACK button to go back to the previous screen.) - Page 22 Configure menu Version 4. Turn the knob until the display says <Clock Setup>. Displays the versions numbers of the various parts of software and hardware on your Internet radio. Clock Setup Upgrade Firmware Use this option to download new firmware for the radio 5.
- Page 23 Configure menu Backlight Selecting this option will alter the Internet radio’s backlight values. 1. After selecting the ‘Backlight’ menu item, the radio will display its list of three menu modes: ‘Active’, ‘Inactive’ and ‘Standby’. These three states are explained below: The radio gets into its ‘inactive’...
-
Page 24: Configure 'My Stuff
Configuring ‘My Stuff’ • Registering an account on Reciva’s • Configuring ‘My Streams’ website 1. Once logged into your Reciva website account, you can add your own Internet radio streams to your ‘My 1. Open the website, http://www.reciva.com from your Streams’. -
Page 25: Product Specifications
Product Specfications Product specifications can be changed without prior notice for improving the product performance. Display Graphic 132 x64 ESTN LCD Monochrome (Negative) WiFi IEEE 802.11b,g Network Wired (option) 10/100Mbps IEEE 802.3x WEP Key HEX and ASCII, 64/128 bit, Auto sense Network WPA1(TKIP) with PSK only Functionality... -
Page 26: Troubleshooting
Troubleshooting If you experience any trouble with your wireless Internet radio, first refer to the troubleshooting below. And then you may find it useful to visit the help section of the following: http://www.reciva.com if your questions remain unanswered. If you have trouble connecting the radio to your wireless network, these steps may help to resolve the problem: 1. -
Page 27: Software Licence Information
Software licence information • This product contains software licensed under version2 of the GNU Public License and version 2.1 of the GNU Lesser Public License, The source code for this software is available from: http://www.reciva.com/gpl/ • This product includes technology owned by Microsoft Corporation and under a licence from Microsoft Licensing GP.
Need help?
Do you have a question about the Starry7 and is the answer not in the manual?
Questions and answers