
Summary of Contents for ROLLEIFLEX SL 66
- Page 1 Rolleiflex SL 66 User Manual Revised and updated by RolleiClub ©2002 RolleiClub.com...
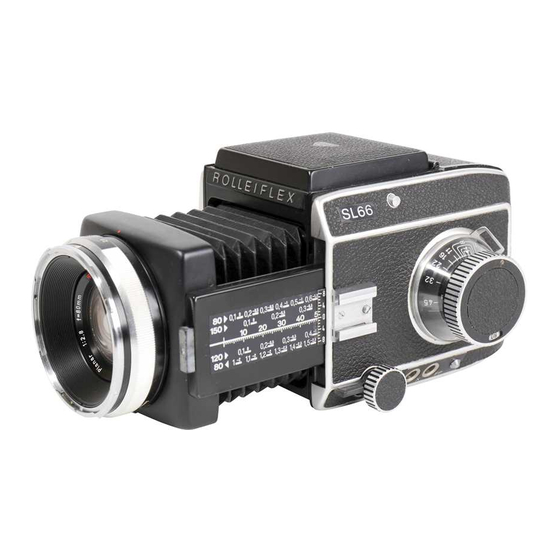
- Page 2 Rolleiflex SL 66 Parts Lens mount locating mark Lens carrier panel and tilt Magazine back door release catch Waist level finder Focusing hood release button (each side) Carrying strap connector (each side) Depth of field scale Distance scale (meter or feet)
- Page 3 Rolleiflex SL 66 Parts Storage compartment of magazine slide Magazine slide handle with window to insert film box top for film type indication Change-over control for 12 or 24 exposures Counter for 12 or 24 exposures Magazine winding knob for film advance...
-
Page 4: Table Of Contents
23 Infra-red Focusing Correction e are sure that you will be successful with 13 Multiple Exposures 24 Focusing Ranges Summed up your Rolleiflex SL66, as this system has 13 Flash Connectors 26 Scheimpflug Tilt Indicator Instructions proven its superior quality and durability for 14 Filters &... -
Page 5: The Most Important Rule
Taking Pictures The Most Important Rule For taking pictures, you will find all neces- Before you load or unload a film sary basic information on the next four Before you remove or fit a magazine pages: Before you press the release button - From loading a new film to unloading the Always check that the crank is unfolded and exposed roll. -
Page 6: Loading The Magazine
Loading the Magazine The procedure for loading a magazine is the Setting the magazine for 12/24 exposures: same whether the magazine is attached or off Switch over the film length selector lever (7). the camera. The film counter window (5) shows 12 or 24 to indicate the selected setting for 120 or 220 type When there is only a single magazine in roll film. - Page 7 Loading the Magazine Checking Readiness Take the loaded film insert by its center bar If in doubt, it is possible to check readiness to and slide it into the magazine with the upper shoot by pressing the crank release button (18) take-up spool first (13), so that the gearing and pushing the crank clock wise at the same wheels on the insert and inside the magazine...
- Page 8 Taking Pictures Remove the lens cap (turning it counter clock 3. Focusing wise with old style caps, or pressing the but- Turn the focusing knob (6) until the picture ap- tons on new style caps). pears sharp on the focusing screen (7). With lenses of longer focal lengths and when Open the focusing hood (1).
-
Page 9: Film Transport & Shutter Tension
Film Transport & Unloading the Magazine Shutter Tension After the last exposure on a roll of film, the magazine knob pops out when you turn the After every exposure, unfold the crank and crank - an audible and visible sign that the film turn it clock wise 270 degrees and back to its is finished. -
Page 10: Extended Functions
Extended Functions/ Scale of Reproduction Distance Scale In close-up work, the scale of reproduction is more important than the subject distance. With The distance scale on the focusing knob is the aid of the scales (for three focal lengths) on used only for estimated depth of field, for the bellows rail you can set the camera directly zone focus settings and when using flash... -
Page 11: Depth Of Field
Extended Functions Depth of Field Depth of field can be checked directly on the fo- cusing screen or indirectly on the focusing knob. 1. For all lenses except 500 and 1000mm, press the stopping-down key (4). This knob can be locked by inclining it and is released in the same way. -
Page 12: Multiple Exposures
Extended Depth of Field Pre-release the Mirror By tilting the camera and in addition tilting The movement of the instant return mirror is the lens axis, it becomes possible to extend mechanically and pneumatically damped during the zone of sharp reproduction over a large releasing. -
Page 13: Multiple Exposures
Multiple Exposures Flash Shots After the first exposure press the lever (5) The flash cable connects into the outlets X or FP. inside the unfolded crank chamber towards To release the special Rollei type cable plug, push the front of the camera and at the same time the button (6) to the right and pull out the plug. -
Page 14: Filters & Lens Hoods
Filters & Lens Hoods Tripod Quick Coupling Filters: The camera can be mounted on a tripod either The 50, 60, 80, 120, 150, 250 lenses and the via the tripod bush or - more convenient - with 1000mm Tele Tessar all share the same size the tripod quick mount (which is also part of the VI Rollei bayonet and use the same filters. -
Page 15: Neck Strap
Neck Strap / Interchangeable Film Type Indicator Components To attach the carrying neck strap, hook the snap hooks of the strap (4) into the two strap eyelets (5) at either side of the camera. The eyelets rotate 360 degrees (with click stops on newer cameras) so you can use the camera in every position. - Page 16 Lens Changing Distance Scale The instructions for lens changing apply To change the distance scale: Fully pull equally to lenses mounted normally and out the focusing knob (3) and turn its position "retro", and also for the Luminar adapter to show the desired focal length in the knobs and the extension tubes.
-
Page 17: Focusing Screen Change
(with impaired, you can exchange the magnifier in the little cloth seal) facing the Rolleiflex name all finders to suit individual needs within a plate, press down the frame on both sides and range of +3 and -3 dioptres. - Page 18 Changing the Magazine The magazine is firmly locked onto the camera once the dark slide is pulled out. To avoid double exposures and blank frames the magazine only can be removed or fitted when the shutter is cocked (after working the crank) and the slide is pushed in (2).
- Page 19 Changing the Magazine Spare Magazine Handling Attaching the magazine: Separate magazines are supplied with a protec- First check that the crank is locked (if not, tive cover. To fit the magazine on the protective swing it fully forwards clock wise and back). cover or to detach it, proceed as with fitting a Hook the magazine from above (40 and magazine on the camera (6).
-
Page 20: Interchangeable Lenses
Lens max. focal aperture diaphragm picture angle lenses elements leaf length weight aperture length range system Mirror lens Interchangeable Lenses Scales of Reproduction, The factors indicated facilitate the calcu- lation of the exposure increase over the Lens Extensions, exposure at full aperture. Diaphragm Systems: Exposure Correction A - Fully automatic spring-loaded dia-... - Page 21 > magnification factor More combinations and depth of field The blue lines indicate the range of recom- Example 1: 120mm S-Planar f 5.6, normal mended use. Black lines indicate possible mount (left diagram). The recommended charts on page 25 scales, but there might be better combina- setting at 1:1 magnification is 2 stops ex- tions available.
- Page 22 Lens DSM* Extension Tubes: Subject Distances, None 40mm 80mm 40+80mm Subject Field & Scales of Reproduction Planar f2.8 The tables show for every lens, used by itself and 80mm with various extension tubes, three sets of data: The Distance of the Subject (D), the Subject Field (S) and the Scale of Magnification or Reproduction (M).
- Page 23 Lens DSM* Extension Tubes: Focusing Correction for Infrared None 40mm 80mm 40+80mm The change in focal length when taking pictures Planar f2.8 through an infra-red filter calls for a focusing cor- 80mm Retro rection if the lens was focused without the filter. The necessary extension increase depends on the maximum spectral sensitivity of the infra-red film emulsion used.
-
Page 24: Focusing Ranges Summed Up
Close Focusing Ranges Summed Up The chart on page 25 contains all the nec- factors (i.e. 2x). Reading the values: All values shown verti- essary data for close-ups as well as for macro Depth of Field: To read the depth of field cally below each other belong together. - Page 25 Close Focusing Ranges Summed Up Normal Range Close-Up Macro Micro 1:50 - 1:10 1:10 - 1:1 1:1 - 10:1 10:1 - 20:1 Magnification Scale of Reproduction Planar / Distagon 80mm Recommended Range for Best Distagon 40mm Results Distagon 50mm Sonnar 150mm Range with Sonnar 250mm Camera Bellows...
- Page 26 The Scheimplug Rule What does it mean How it works To reproduce a flat surface perfectly sharp Rollei supplies a Scheimpflug Indicator for at full lens aperture, the subject plane at the 50, 80, 120, 150 and 250mm lenses, plus a focused distance must be parallel to the film transparent guide plate (page 27).
- Page 27 The Scheimplug Indicator Using the Indicator Example 1: The 80mm lens is used for a subject extending from 1.3 to 5 meters (top picture 3). Distance setting for the center of the subject field: Use the blue line to join the 5 meter mark on the line X with the 1.3 meter mark on line Z.
- Page 28 The Scheimplug Indicator Depth of Field With the lens simultaneously set to a number of subject distances we get an equal number of dif- ferent depth of field zones. When using the depth tilt these zones therefore cannot be tabulated. However, the indicator shows visually the depth of field at one selected aperture.
- Page 29 The Scheimplug Indicator The Scheimplug Indicator Depth of Field Gain atop the Subject Plane Depth of Field Gain atop the Subject Plane More significant in real life is the height of the More significant in real life is the height of the subject (i.e.
- Page 30 Care & Maintenance of the Camera The Rolleiflex SL66 calls for the same ity in tropical and sub-tropical areas used regularly to keep all lubrication care as any camera of which you expect represents a high risk of corrosion to fluids soft.
-
Page 31: Trouble Shooting
Trouble Shooting SL66.com Problem Cause Remedy Magazine slide will not push in fully Gear wheel on the front of the magazine was Pull the slide half way out, turn the gear wheel in moved with the slide pulled out the direction of the arrow until it locks Magazine back will not close Film insert loaded into the magazine in a Make sure the gear wheels on the magazine and... - Page 32 Rolleiflex SL 66 System Standard Camera Set: Lens Adapters: Close-Up: Rolleiflex SL66 with Planar 1:2,8/80mm, Adapter for large format lenses Extension Ring 40mm Magazine 6x6 for 120/220, Focusing Hood, Adapter for Luminar lenses Extension Ring 80mm Micro Prism Focusing Screen, Strap and Adapter for Componon lenses Universal Automatic Extension Ring (4 Pcs.)
Need help?
Do you have a question about the SL 66 and is the answer not in the manual?
Questions and answers